4.1 View Options (Left Panel)
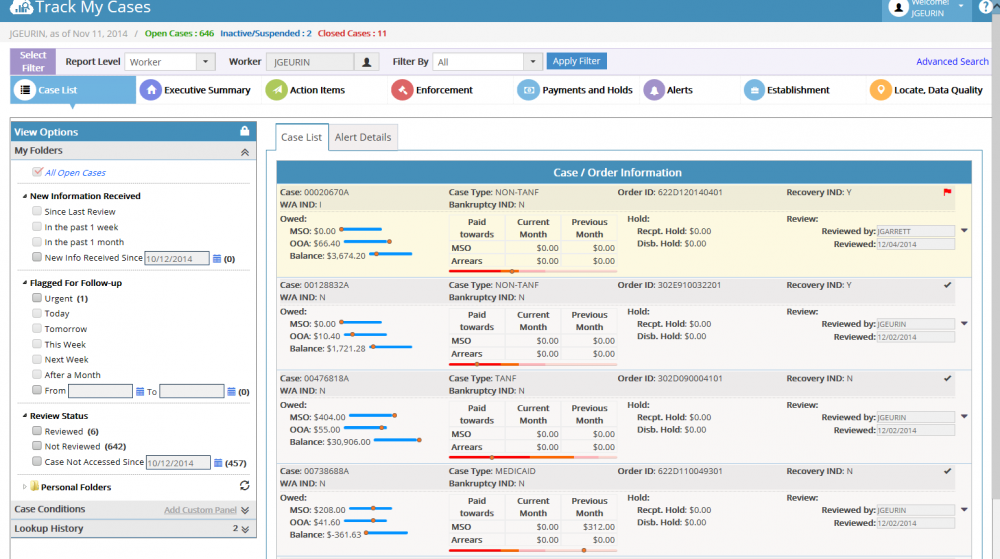
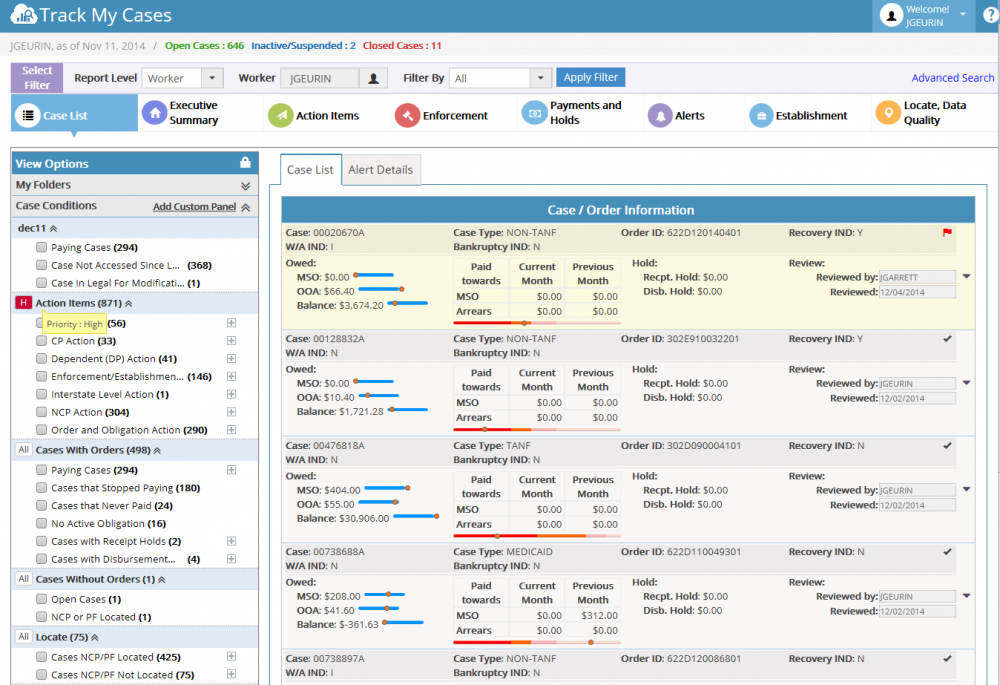
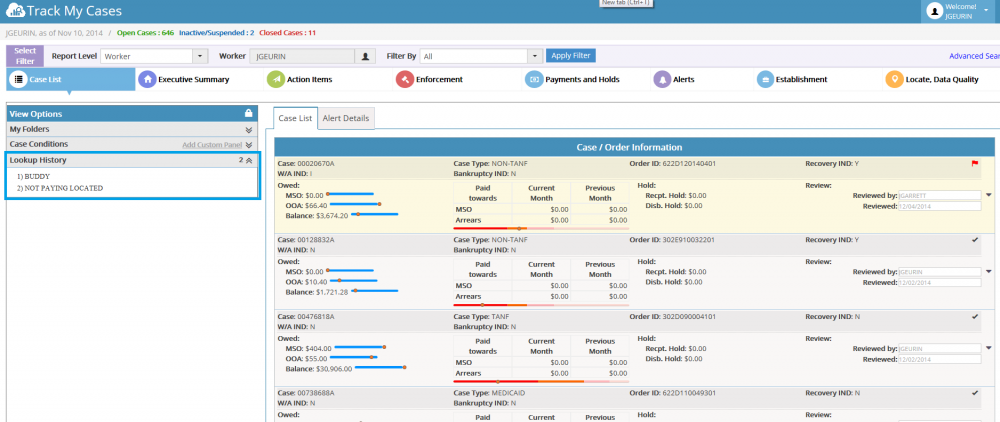
View options present in the case list left panel used to filter the cases based on corresponding selection and display in the case list grid View options categories into major 3 options,
- My Folders
- Case Conditions
- Lookup History
My folders:
My folder section contains the following 5 filter sections, 1. All open cases 2. New Information Received 3. Flagged for follow-up 4. Review Status 5. Personal folders
| All open cases | All open cases checkbox always selected by default. We cannot uncheck this selection. It is used to filter only the open cases in the case list grid |
| New Information Received | This option is used to filter the cases which new information received for last 3 months. We can filter new information received cases for the following categories.
Since last review In the past 1 week In the past 1 month New info received since <DATE> |
| Flagged for follow-up | This option is used to filter the follow-up cases for last 3 months. We can filter the follow-up cases using the following categories.
Urgent Today Tomorrow This Week Next Week After a Month From <DATE> To <DATE> |
| Review Status | This option is used to filter the cases using review status .We can filter the follow-up cases using the following categories.
Reviewed Not Reviewed Case Not accessed since <DATE> |
| Personal Folders | This section will display the folders added by the worker. Each folder contains the cases which added by the worker. On selecting the folder it will show the cases which present inside the folder on case list grid
Note: Worker can add Cases into personal folder. This option enable worker to add a case in existing folder and also it allows worker to create new folder to save cases. |
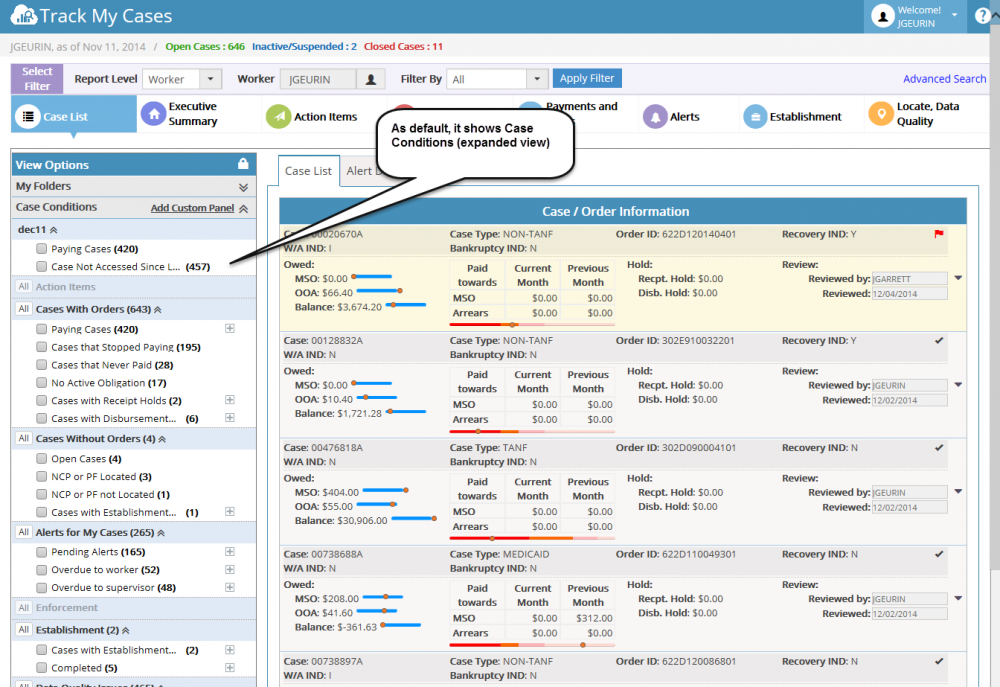
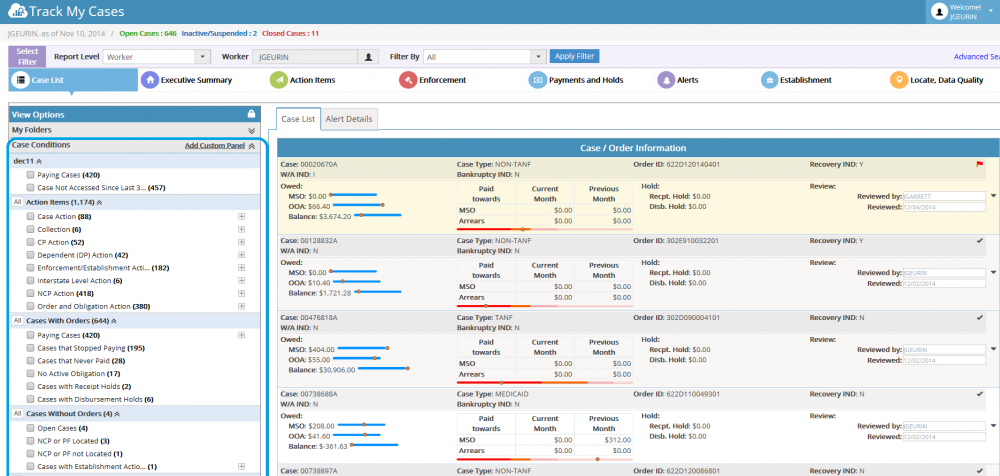
Case Conditions:
- Using this, the worker can able to view the cases in priority wise. As default, it shows overall results, irrespective of Priority Level. Default Priority Selection is ‘No Priority’.
- The Case Conditions List out the TMC Attributes widget and also Favorite widget which added by the worker. Each attribute having the checkbox option. Selecting the checkbox automatically adds the item in filter section and it performs the inquiry automatically and show the corresponding cases in case list grid.
- On clicking the expand icon (+), we can view the child attributes for the appropriate attributes
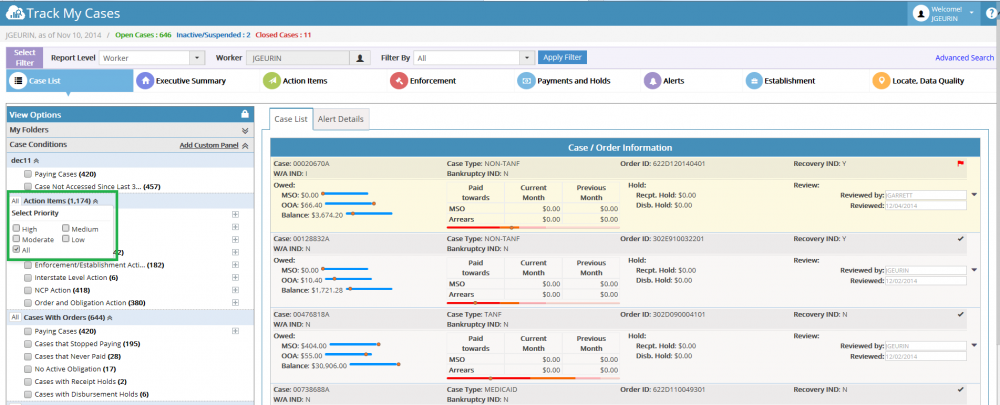
Priority Levels:
Each Attribute has the following Priority Options.
- High
- Medium
- Moderate
- Low
- No Priority (default)
- Using this, the worker can able to view the cases in priority wise. As default, it shows overall results, irrespective of Priority Level. Default Priority Selection is ‘No Priority’.
- Selecting the Priority Options automatically refreshes the respective Case Condition’s attributes counts and also it refreshes the other Case Condition’s attributes count as per the Priority selection of specific Case Condition. In addition, the Case List grid also refreshed as per the selection.
- Example: If Action Items – High Priority is selected, then those High Priority Cases will be refreshed in all other Case Conditions and those results will be displayed in the Case List grid also.
Lookup-History:
Lookup history section will display saved search links which saved as public by any of the workers. On clicking this links, it will display the corresponding cases in case list grid according to the selection of links

