Difference between revisions of "How to Apply for Social Services"
(→Applications Screen Flow) |
(→Applications Screen Flow) |
||
| (9 intermediate revisions by 2 users not shown) | |||
| Line 14: | Line 14: | ||
---- | ---- | ||
| − | *Click '''Start''' Button . | + | * <big> If you want to know '''How to get into Government Portal''' then '''[[How to get into Government Portal|click here...]]'''</big> |
| + | |||
| + | * <big> Click '''Start''' Button .</big> | ||
| + | |||
[[File:S4.png]] | [[File:S4.png]] | ||
| Line 21: | Line 24: | ||
| − | * Select '''Social services''' alone or social / TGG services & click '''Next''' button . | + | * <big> Select '''Social services''' alone or social / TGG services & click '''Next''' button .</big> |
| Line 28: | Line 31: | ||
| − | *Provide Data in mandatory fields of '''Basic Applicant Information''' section under the '''People''' menu.and click Next button . | + | * <big> Provide Data in mandatory fields of '''Basic Applicant Information''' section under the '''People''' menu.and click Next button . </big> |
| Line 40: | Line 43: | ||
| − | * Add members in the grid | + | * <big> Click '''+ Add new member ''' button & enter user data in the field and click '''Save''' button to add members in the grid . Click next button </big> |
| + | |||
[[File:S8.png]] | [[File:S8.png]] | ||
| Line 46: | Line 50: | ||
| − | * Enter mandatory information in all user tabs & click next button | + | * <big> Enter mandatory information in all user tabs & click next button </big> |
| + | |||
| + | |||
[[File:S9.png]] | [[File:S9.png]] | ||
---- | ---- | ||
| − | * Enter school enrollment detail for each member & click next button | + | * <big> Enter '''school enrollment detail''' for each member in the tab & click next button </big> |
| − | [[File: | + | |
| + | |||
| + | [[File:S101.png]] | ||
---- | ---- | ||
| − | * Choose asset information & click next button | + | * <big> Choose '''asset information''' & click next button </big> |
| − | [[File: | + | |
| + | |||
| + | [[File:S11.png]] | ||
---- | ---- | ||
| − | * Enter income details , add information in the grid | + | * <big> Enter income details by selecting any checkbox of user name & clik '''+ Add new''' button above grid ,then add field information click ''' Save ''' button to add details in the grid . click next button </big> |
| − | [[File: | + | |
| + | |||
| + | [[File:S12.png]] | ||
---- | ---- | ||
| − | * | + | * <big> Select any additional income checkbox then add details in the grid & click Next Button </big> |
| − | [[File: | + | |
| + | |||
| + | [[File:S13.png]] | ||
---- | ---- | ||
| − | * | + | * <big> Complete bills screen by adding '''rental expenses , other expenses''' information in the grid & click Next Button </big> |
| − | [[File: | + | |
| + | |||
| + | [[File:S14.png]] | ||
---- | ---- | ||
| − | * Check eligibility information , Fill details in programs screen & click | + | * <big> Check eligibility information , Fill details in programs screen & add few information then click Next </big> |
| − | [[File: | + | |
| + | |||
| + | [[File:S15.png]] | ||
---- | ---- | ||
| − | * Review the user informations entered & click electronically sign and submit button . | + | * <big> Review the user informations entered & click '''electronically sign and submit''' button to submit the application .</big> |
| − | [[File: | + | |
| + | |||
| + | [[File:S16.png]] | ||
---- | ---- | ||
| − | * Application Id is generated click finish button | + | * <big> Once the application is submitted the '''Application Id''' is generated click finish button </big> |
| − | [[File: | + | |
| + | |||
| + | [[File:S7.png]] | ||
---- | ---- | ||
| − | == '''How to Apply for Social services video '''== | + | == <big>'''How to Apply for Social services video '''== </big> |
| Line 90: | Line 112: | ||
[[File:Rec3.gif]] | [[File:Rec3.gif]] | ||
| + | * <big> If you want to know '''How Service Provider gets the Service Requests''' then '''[[How Service Provider gets the Service Requests|click here...]]'''</big> | ||
Latest revision as of 04:04, 12 May 2015
Back To Main Menu
Actions Work Flow
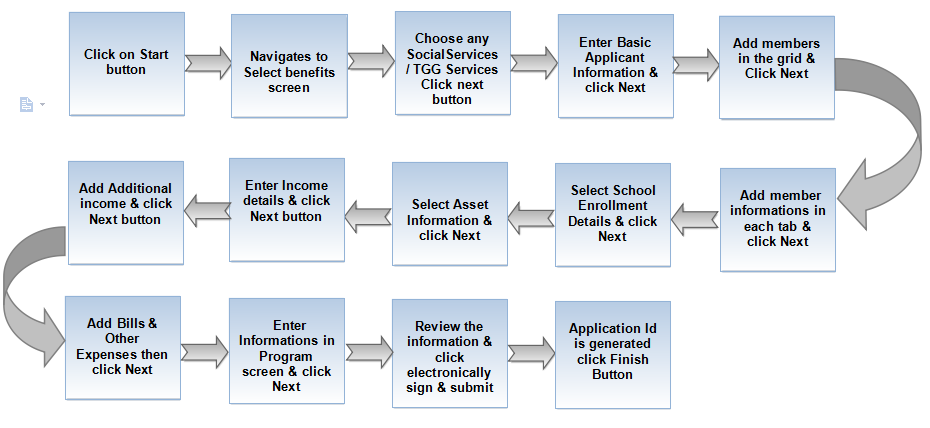
Applications Screen Flow
- If you want to know How to get into Government Portal then click here...
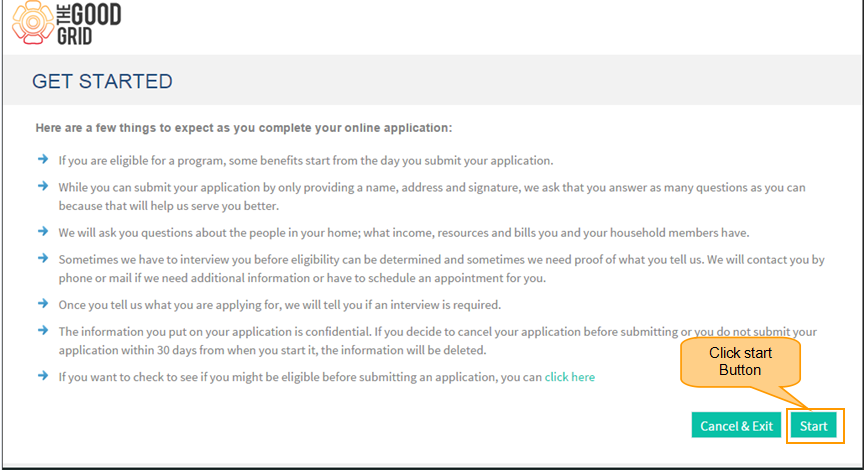
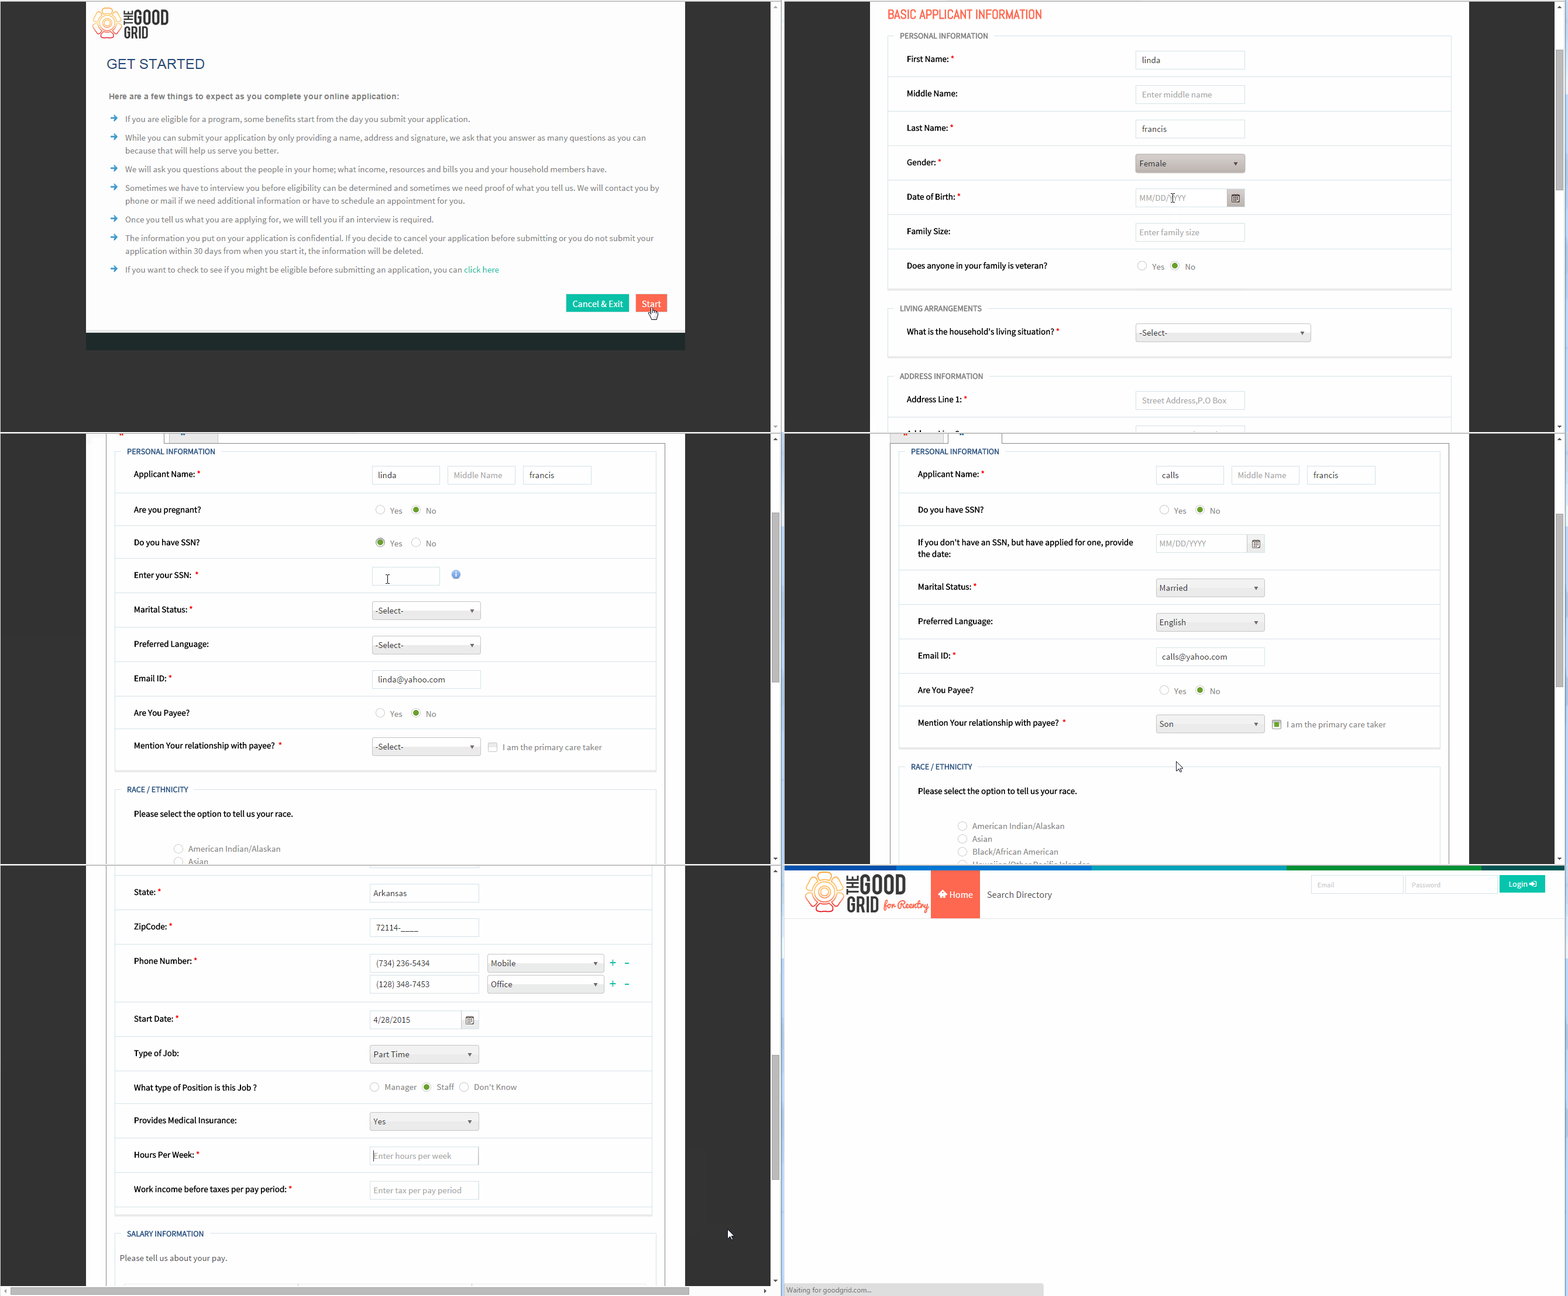
- Click Start Button .
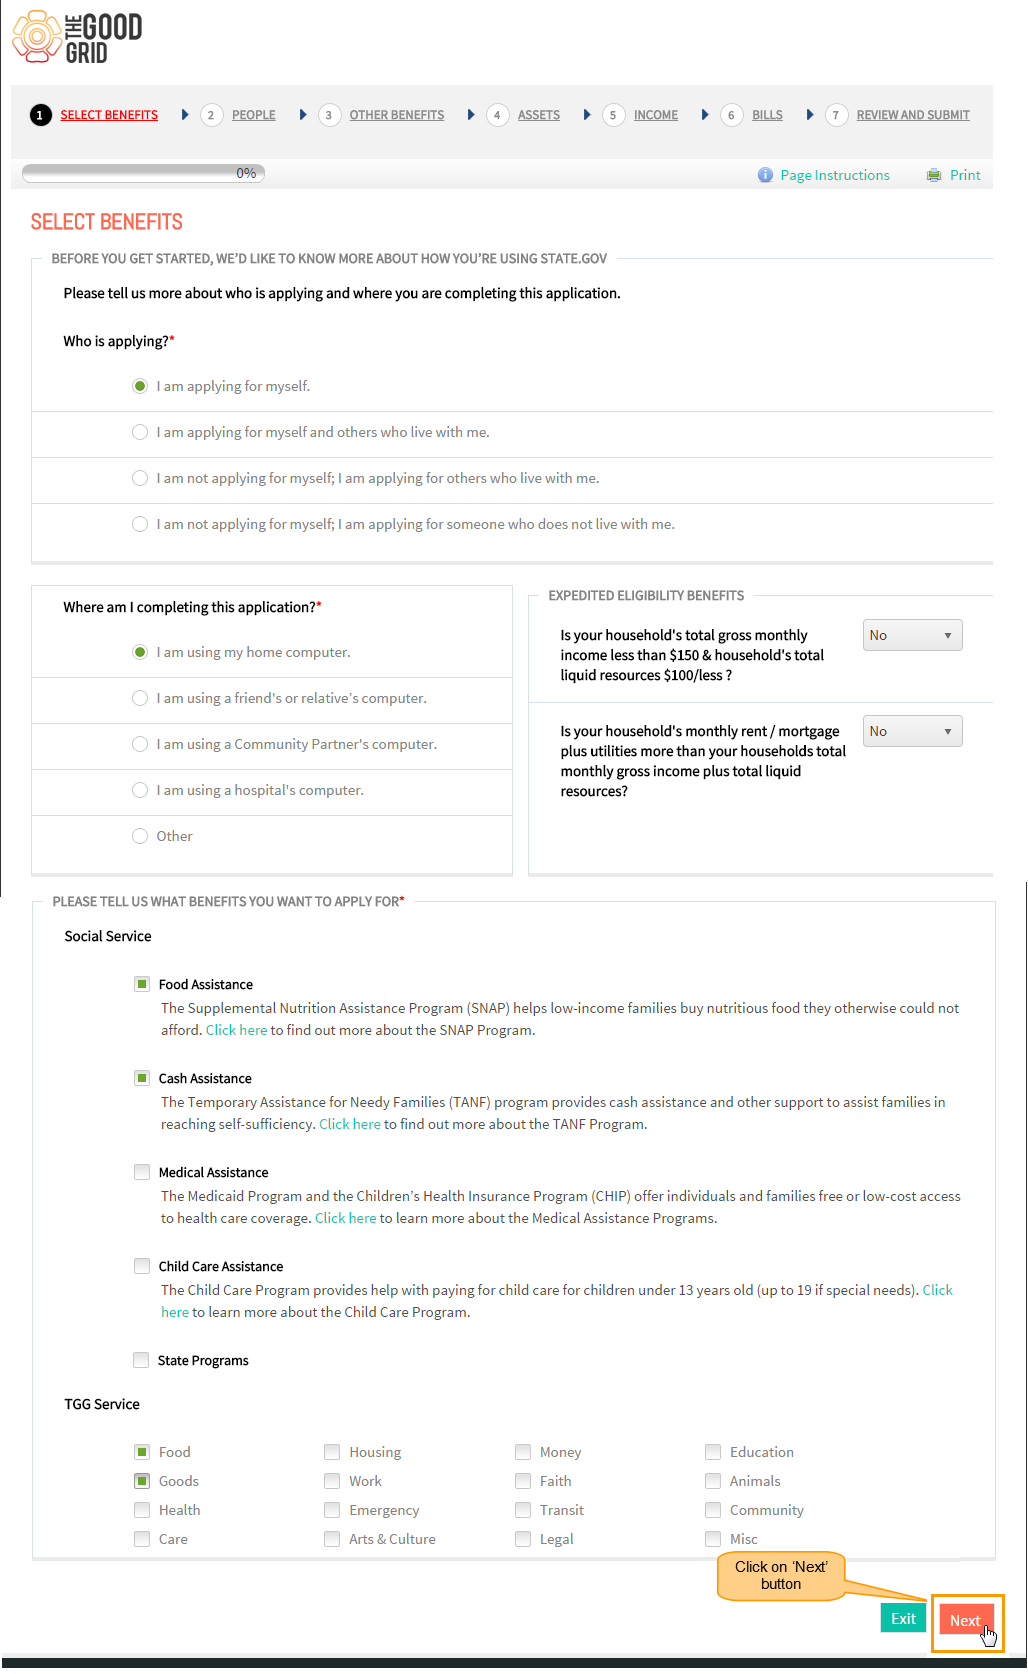
- Select Social services alone or social / TGG services & click Next button .
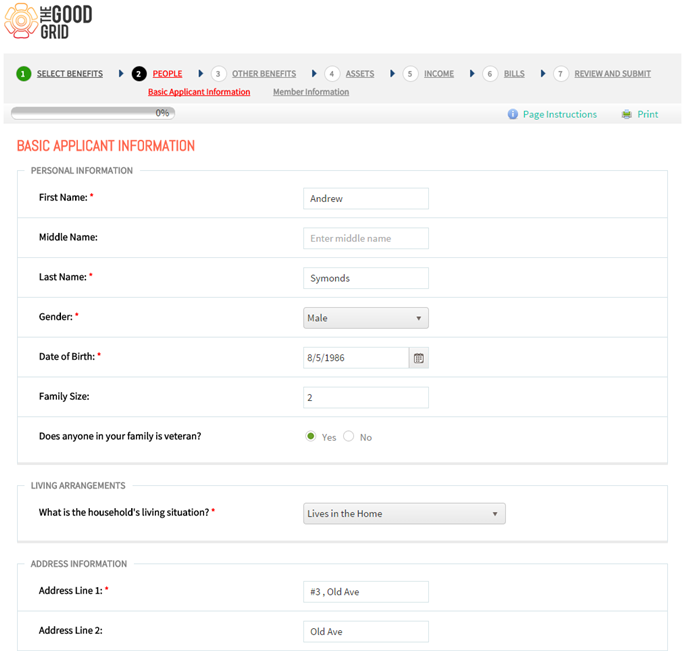
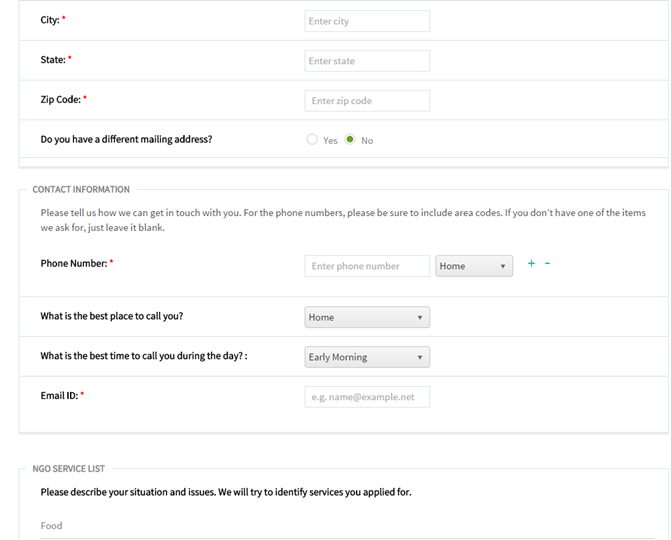
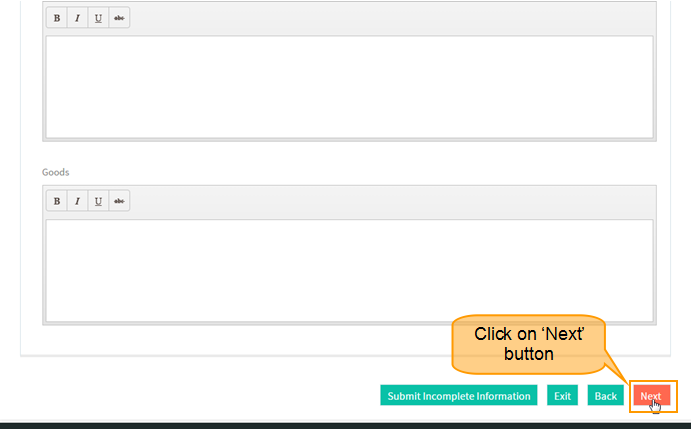
- Provide Data in mandatory fields of Basic Applicant Information section under the People menu.and click Next button .
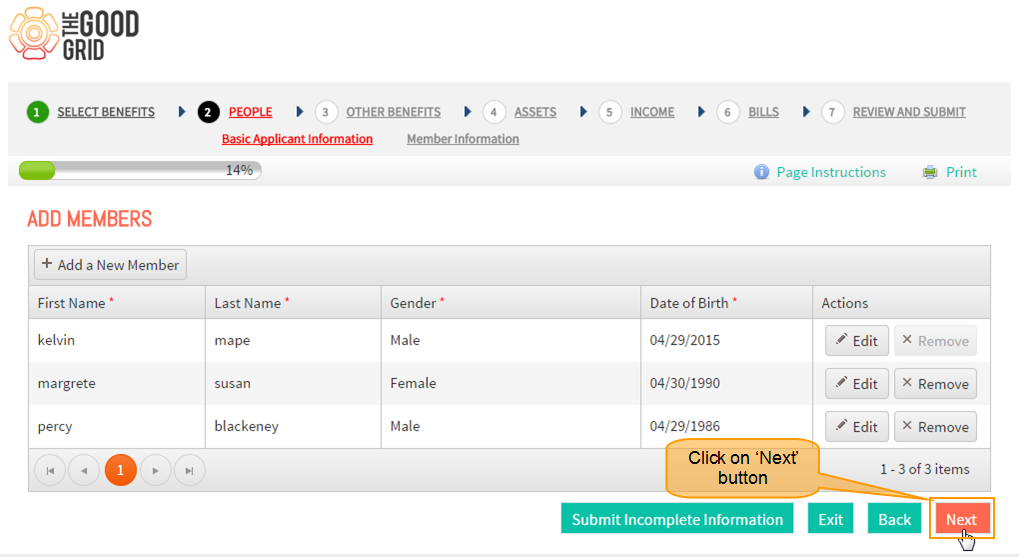
- Click + Add new member button & enter user data in the field and click Save button to add members in the grid . Click next button
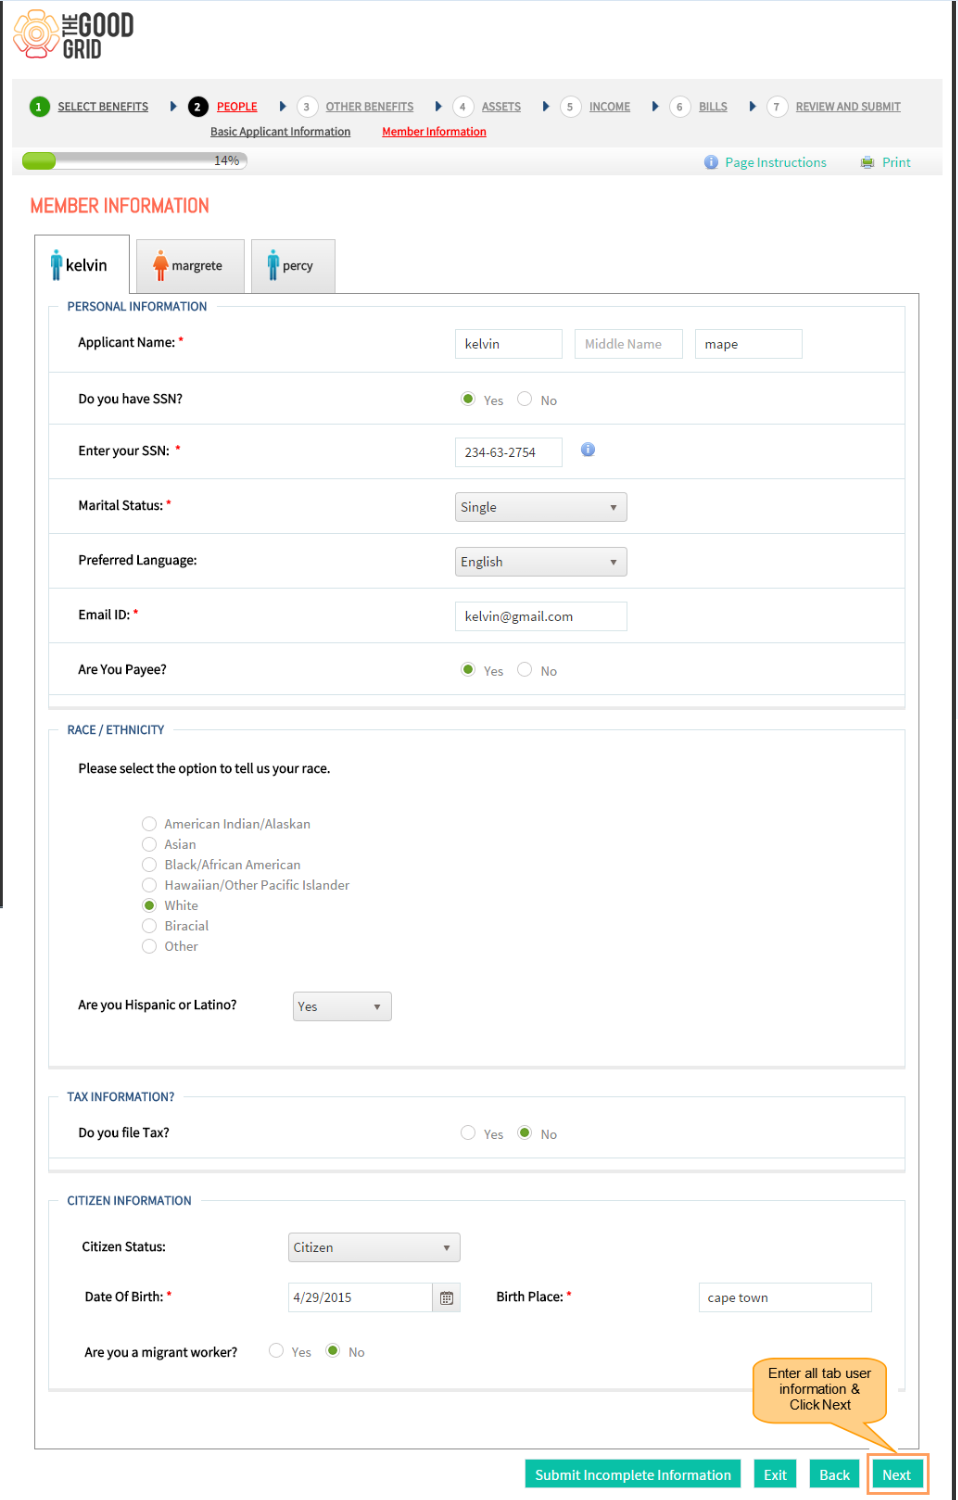
- Enter mandatory information in all user tabs & click next button
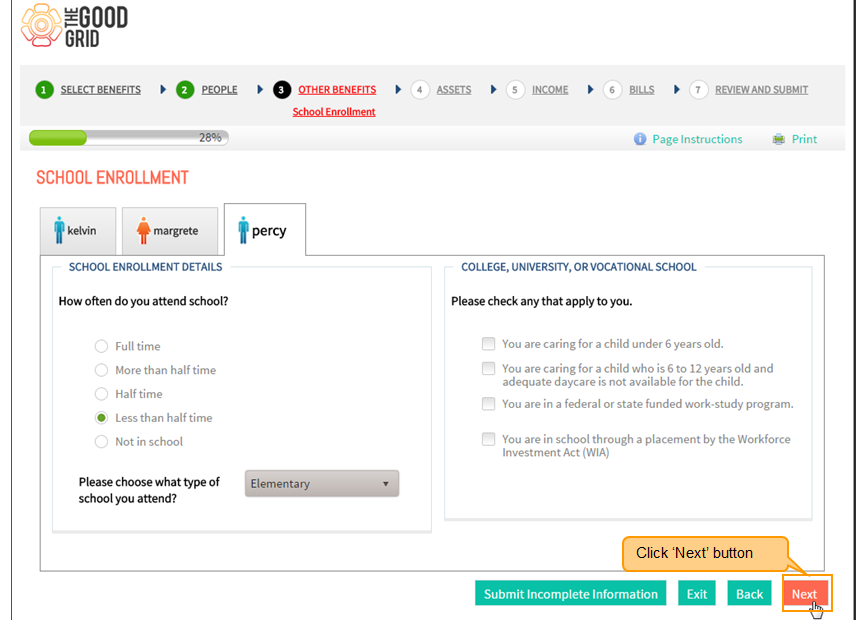
- Enter school enrollment detail for each member in the tab & click next button
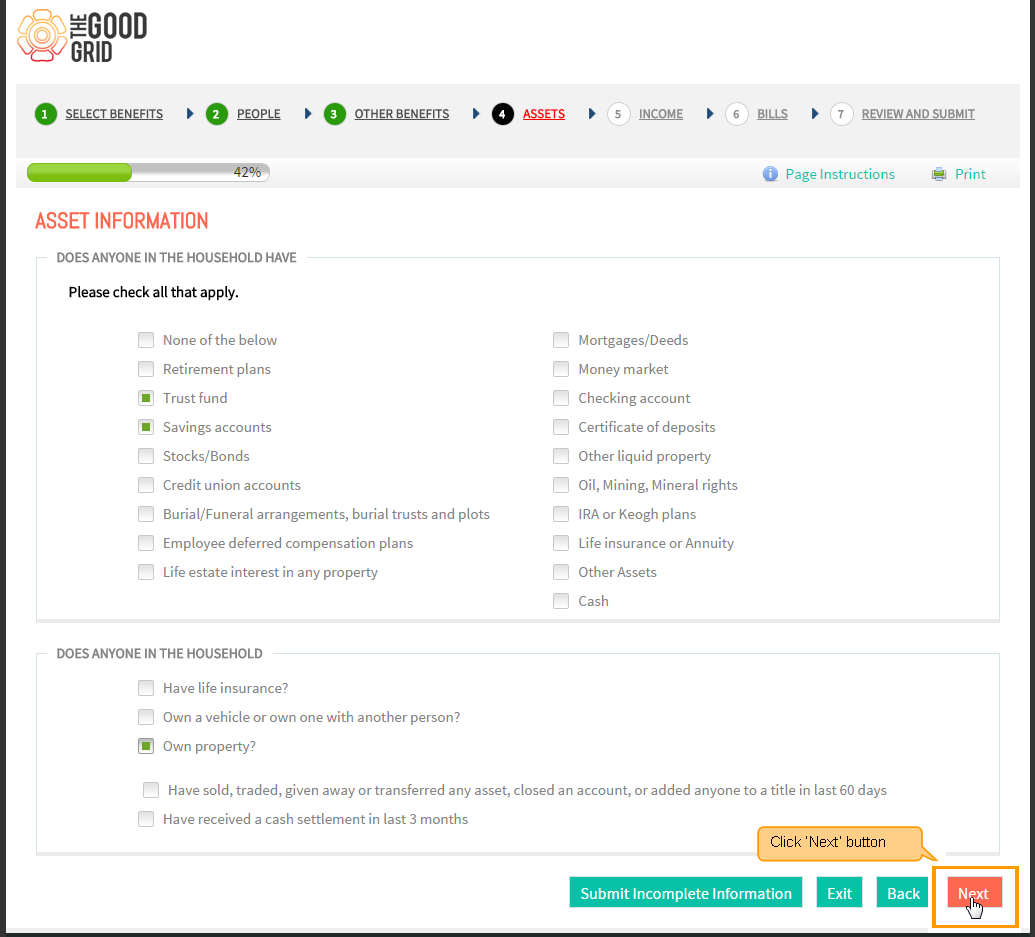
- Choose asset information & click next button
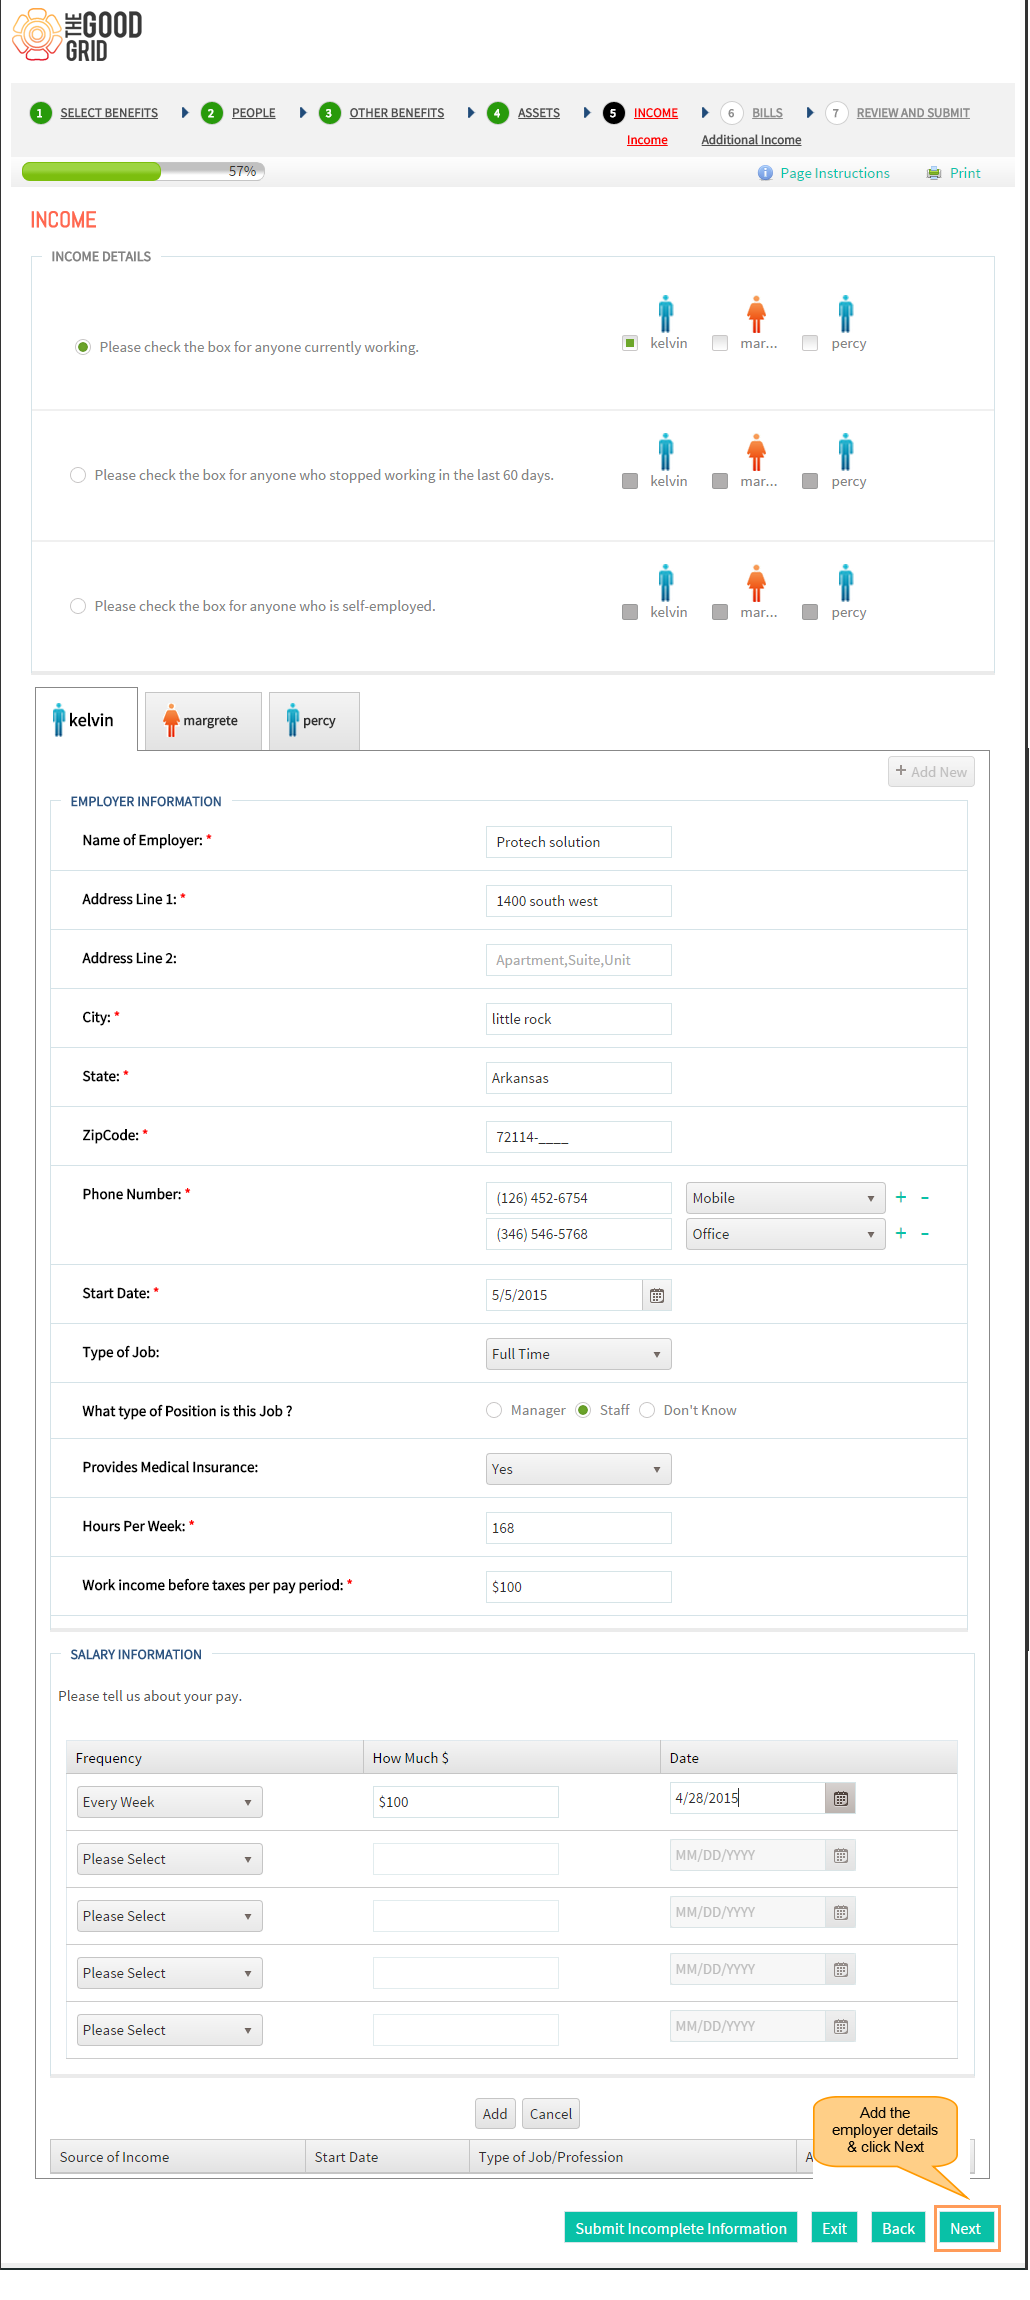
- Enter income details by selecting any checkbox of user name & clik + Add new button above grid ,then add field information click Save button to add details in the grid . click next button
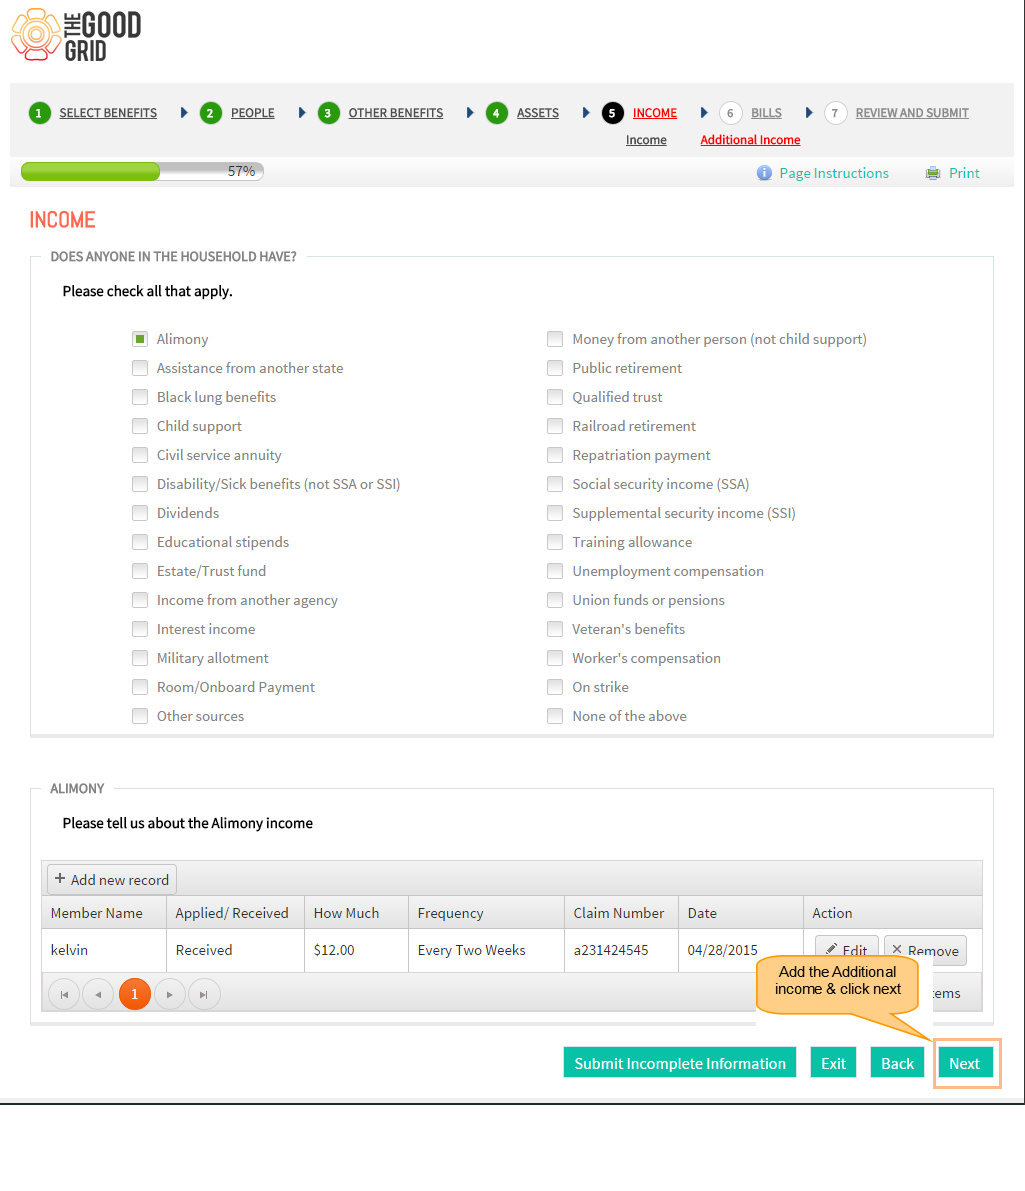
- Select any additional income checkbox then add details in the grid & click Next Button
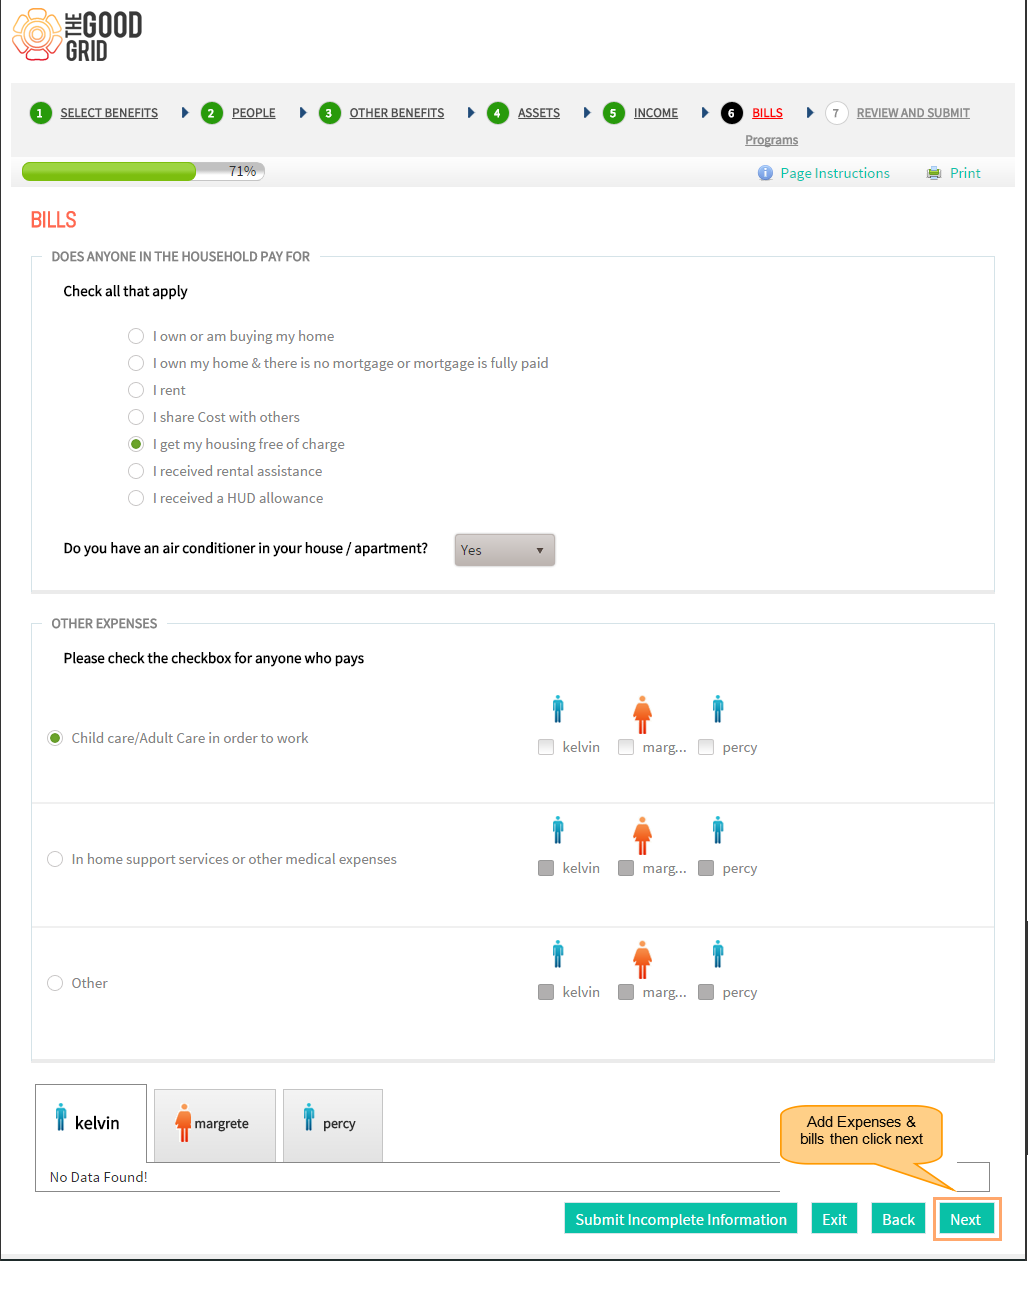
- Complete bills screen by adding rental expenses , other expenses information in the grid & click Next Button
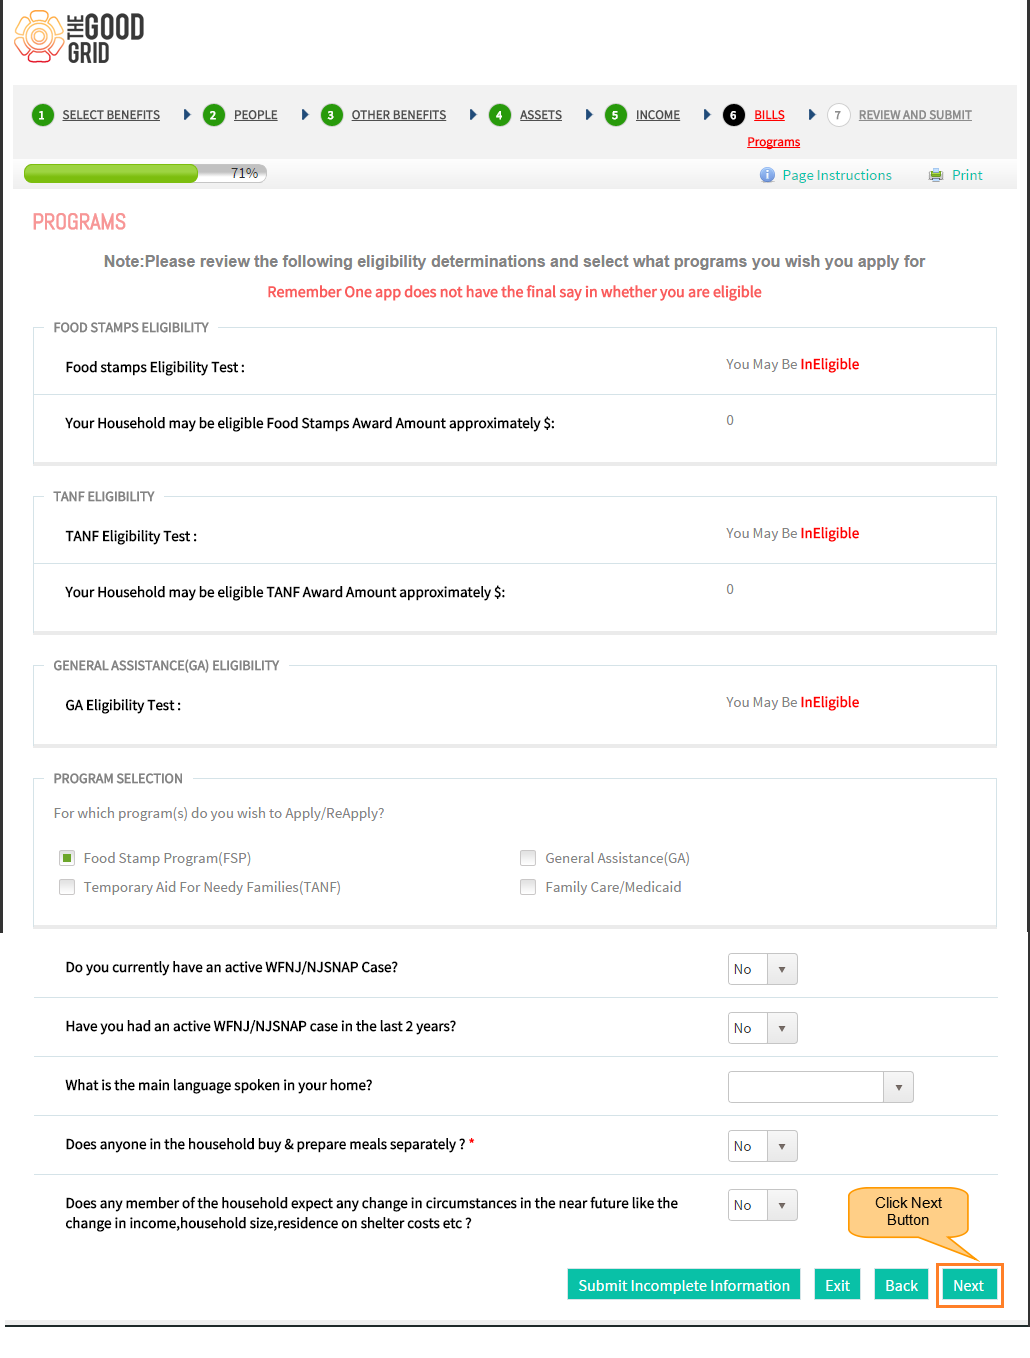
- Check eligibility information , Fill details in programs screen & add few information then click Next
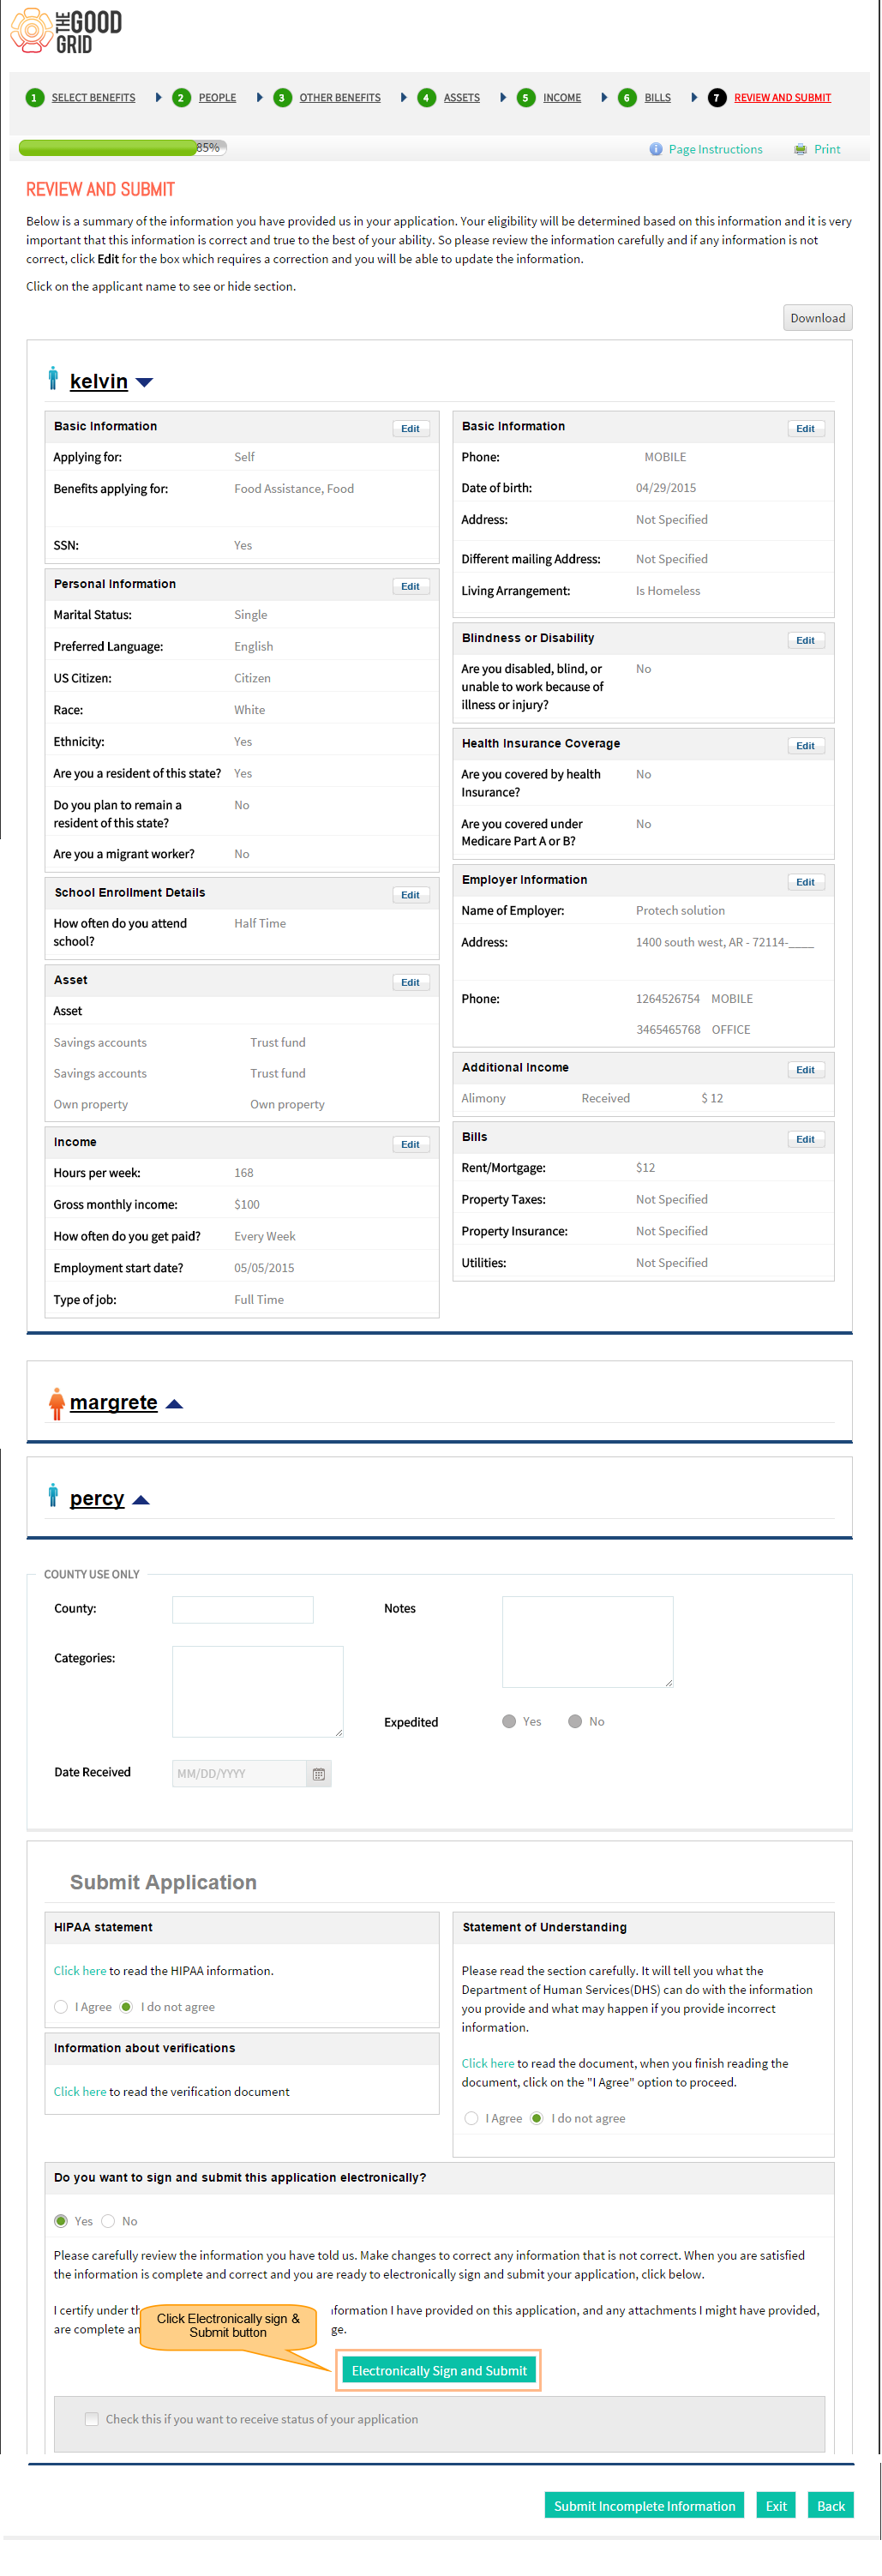
- Review the user informations entered & click electronically sign and submit button to submit the application .
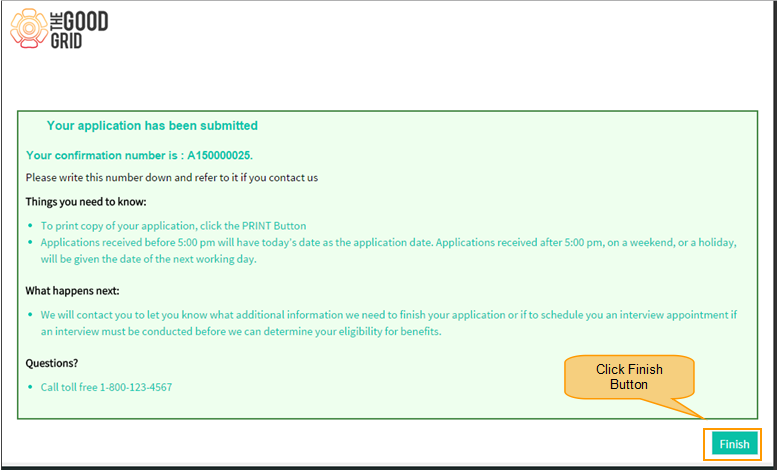
- Once the application is submitted the Application Id is generated click finish button
== How to Apply for Social services video ==
- If you want to know How Service Provider gets the Service Requests then click here...

