Difference between revisions of "Service Provider"
| (11 intermediate revisions by 2 users not shown) | |||
| Line 1: | Line 1: | ||
| + | '''<code> [[Training Manual|Back to main menu]]</code>''' | ||
| + | |||
=='''Applications Screen Flow'''== | =='''Applications Screen Flow'''== | ||
| Line 7: | Line 9: | ||
[[File:SS-1.png]] | [[File:SS-1.png]] | ||
| + | |||
| + | |||
---- | ---- | ||
| − | * To update | + | * To update profile Keisha has to click on the Profile in the header. |
[[File:S-2.png]] | [[File:S-2.png]] | ||
| + | |||
| + | |||
---- | ---- | ||
| − | * On clicking the Profile | + | * On clicking the Profile, screen displays the overlay. |
[[File:S-3.png]] | [[File:S-3.png]] | ||
| + | |||
| + | |||
| + | ---- | ||
| + | |||
| + | |||
| + | * Keisha clicks on the “Edit Profile” from the overlay and the application navigates to the Edit profile screen | ||
| + | |||
| + | |||
| + | [[File:SS.png]] | ||
| + | |||
| + | |||
---- | ---- | ||
| Line 28: | Line 45: | ||
[[File:S-4.png]] | [[File:S-4.png]] | ||
| + | |||
| + | |||
---- | ---- | ||
| Line 35: | Line 54: | ||
[[File:S-5.png]] | [[File:S-5.png]] | ||
| + | |||
| + | |||
---- | ---- | ||
| Line 44: | Line 65: | ||
[[File:S-6.png]] | [[File:S-6.png]] | ||
| + | |||
| + | |||
---- | ---- | ||
| Line 53: | Line 76: | ||
[[File:S-7.png]] | [[File:S-7.png]] | ||
| + | |||
| + | |||
---- | ---- | ||
| Line 62: | Line 87: | ||
[[File:S-8.png]] | [[File:S-8.png]] | ||
| + | |||
| + | |||
---- | ---- | ||
| Line 71: | Line 98: | ||
[[File:S-9.png]] | [[File:S-9.png]] | ||
| + | |||
| + | |||
---- | ---- | ||
* Application takes her to “About” screen. | * Application takes her to “About” screen. | ||
| + | * After completing the About process she needs to click on “Save and Continue” button. | ||
[[File:S-10.png]] | [[File:S-10.png]] | ||
| + | |||
| + | |||
---- | ---- | ||
| Line 86: | Line 118: | ||
[[File:S-11.png]] | [[File:S-11.png]] | ||
| + | |||
| + | |||
---- | ---- | ||
| Line 93: | Line 127: | ||
[[File:S-12.png]] | [[File:S-12.png]] | ||
| + | |||
| + | |||
---- | ---- | ||
| Line 100: | Line 136: | ||
[[File:S-13.png]] | [[File:S-13.png]] | ||
| + | |||
| + | |||
---- | ---- | ||
| Line 107: | Line 145: | ||
[[File:S-14.png]] | [[File:S-14.png]] | ||
| + | |||
| + | |||
---- | ---- | ||
| Line 114: | Line 154: | ||
[[File:S-15.png]] | [[File:S-15.png]] | ||
| + | |||
| + | |||
---- | ---- | ||
| Line 121: | Line 163: | ||
[[File:S-16.png]] | [[File:S-16.png]] | ||
| − | |||
| − | |||
| − | |||
| − | |||
---- | ---- | ||
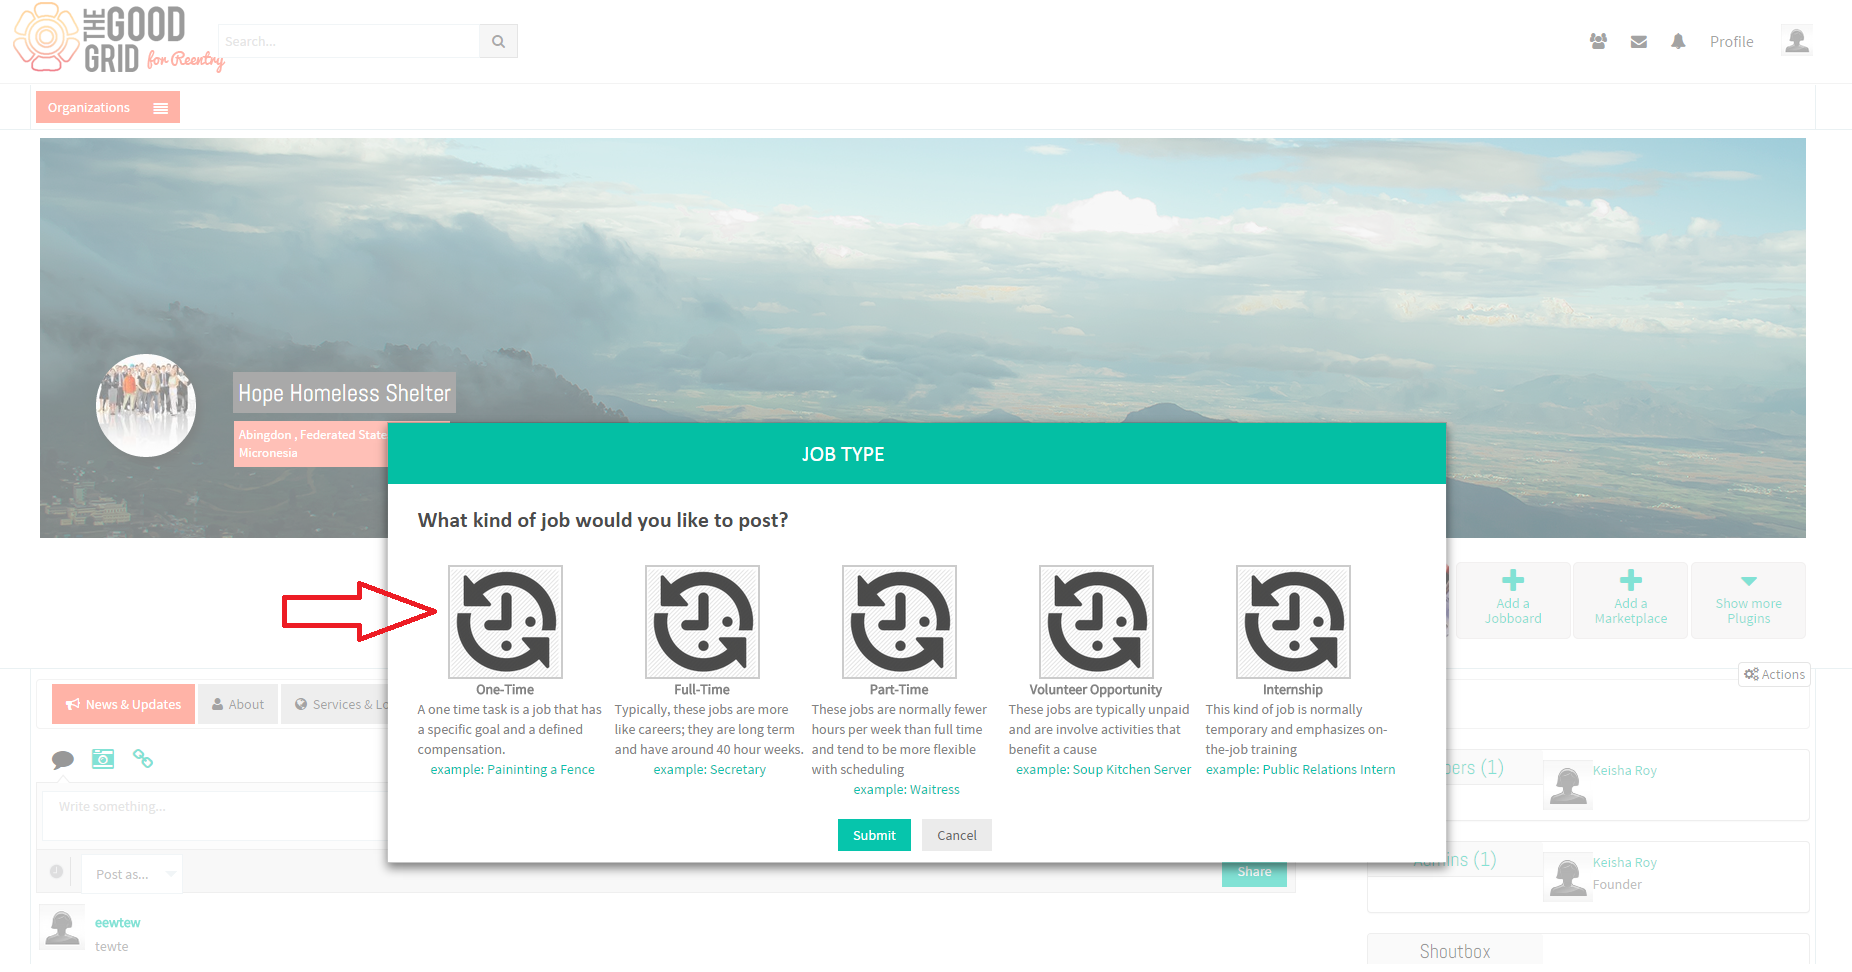
| − | * | + | * On clicking “Add a Job Board” screen displays a pop-up "Job Type". |
| − | + | [[File:Sh.png]] | |
| − | [[File: | + | |
| − | + | ||
| − | |||
| − | |||
| − | |||
| − | |||
---- | ---- | ||
| Line 147: | Line 179: | ||
| − | [[File: | + | [[File:Ab.png]] |
| + | |||
| + | |||
---- | ---- | ||
| Line 153: | Line 187: | ||
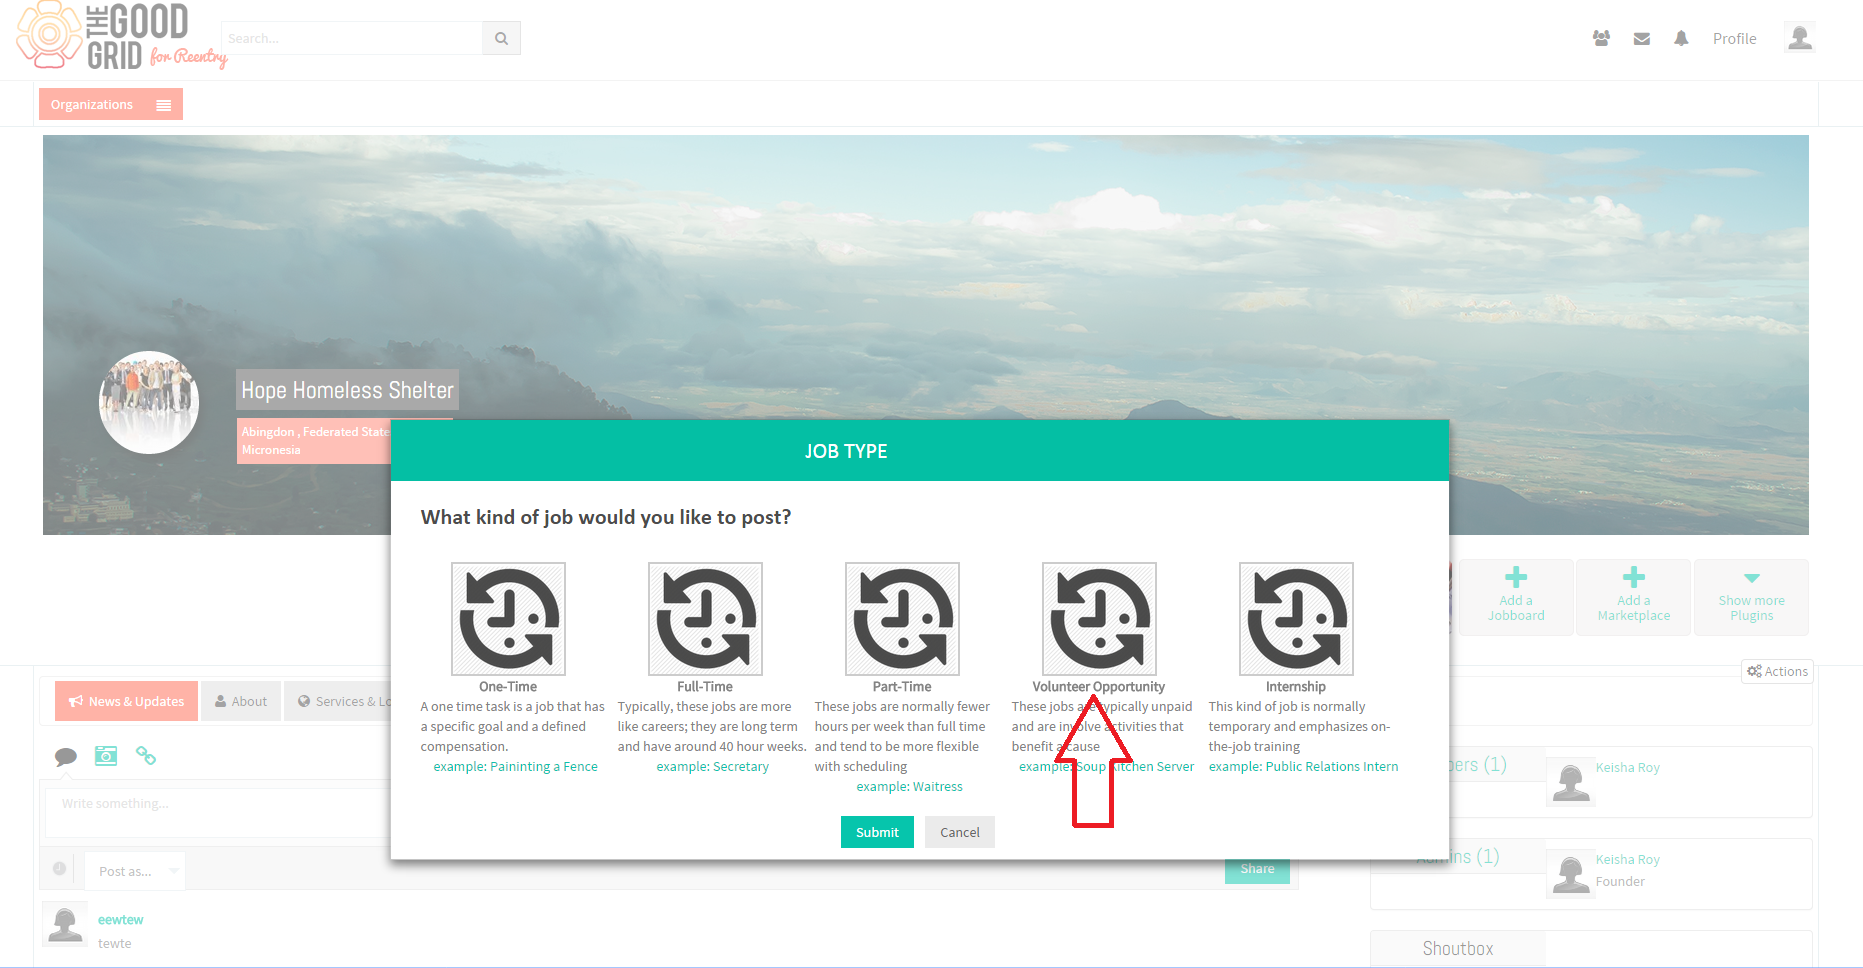
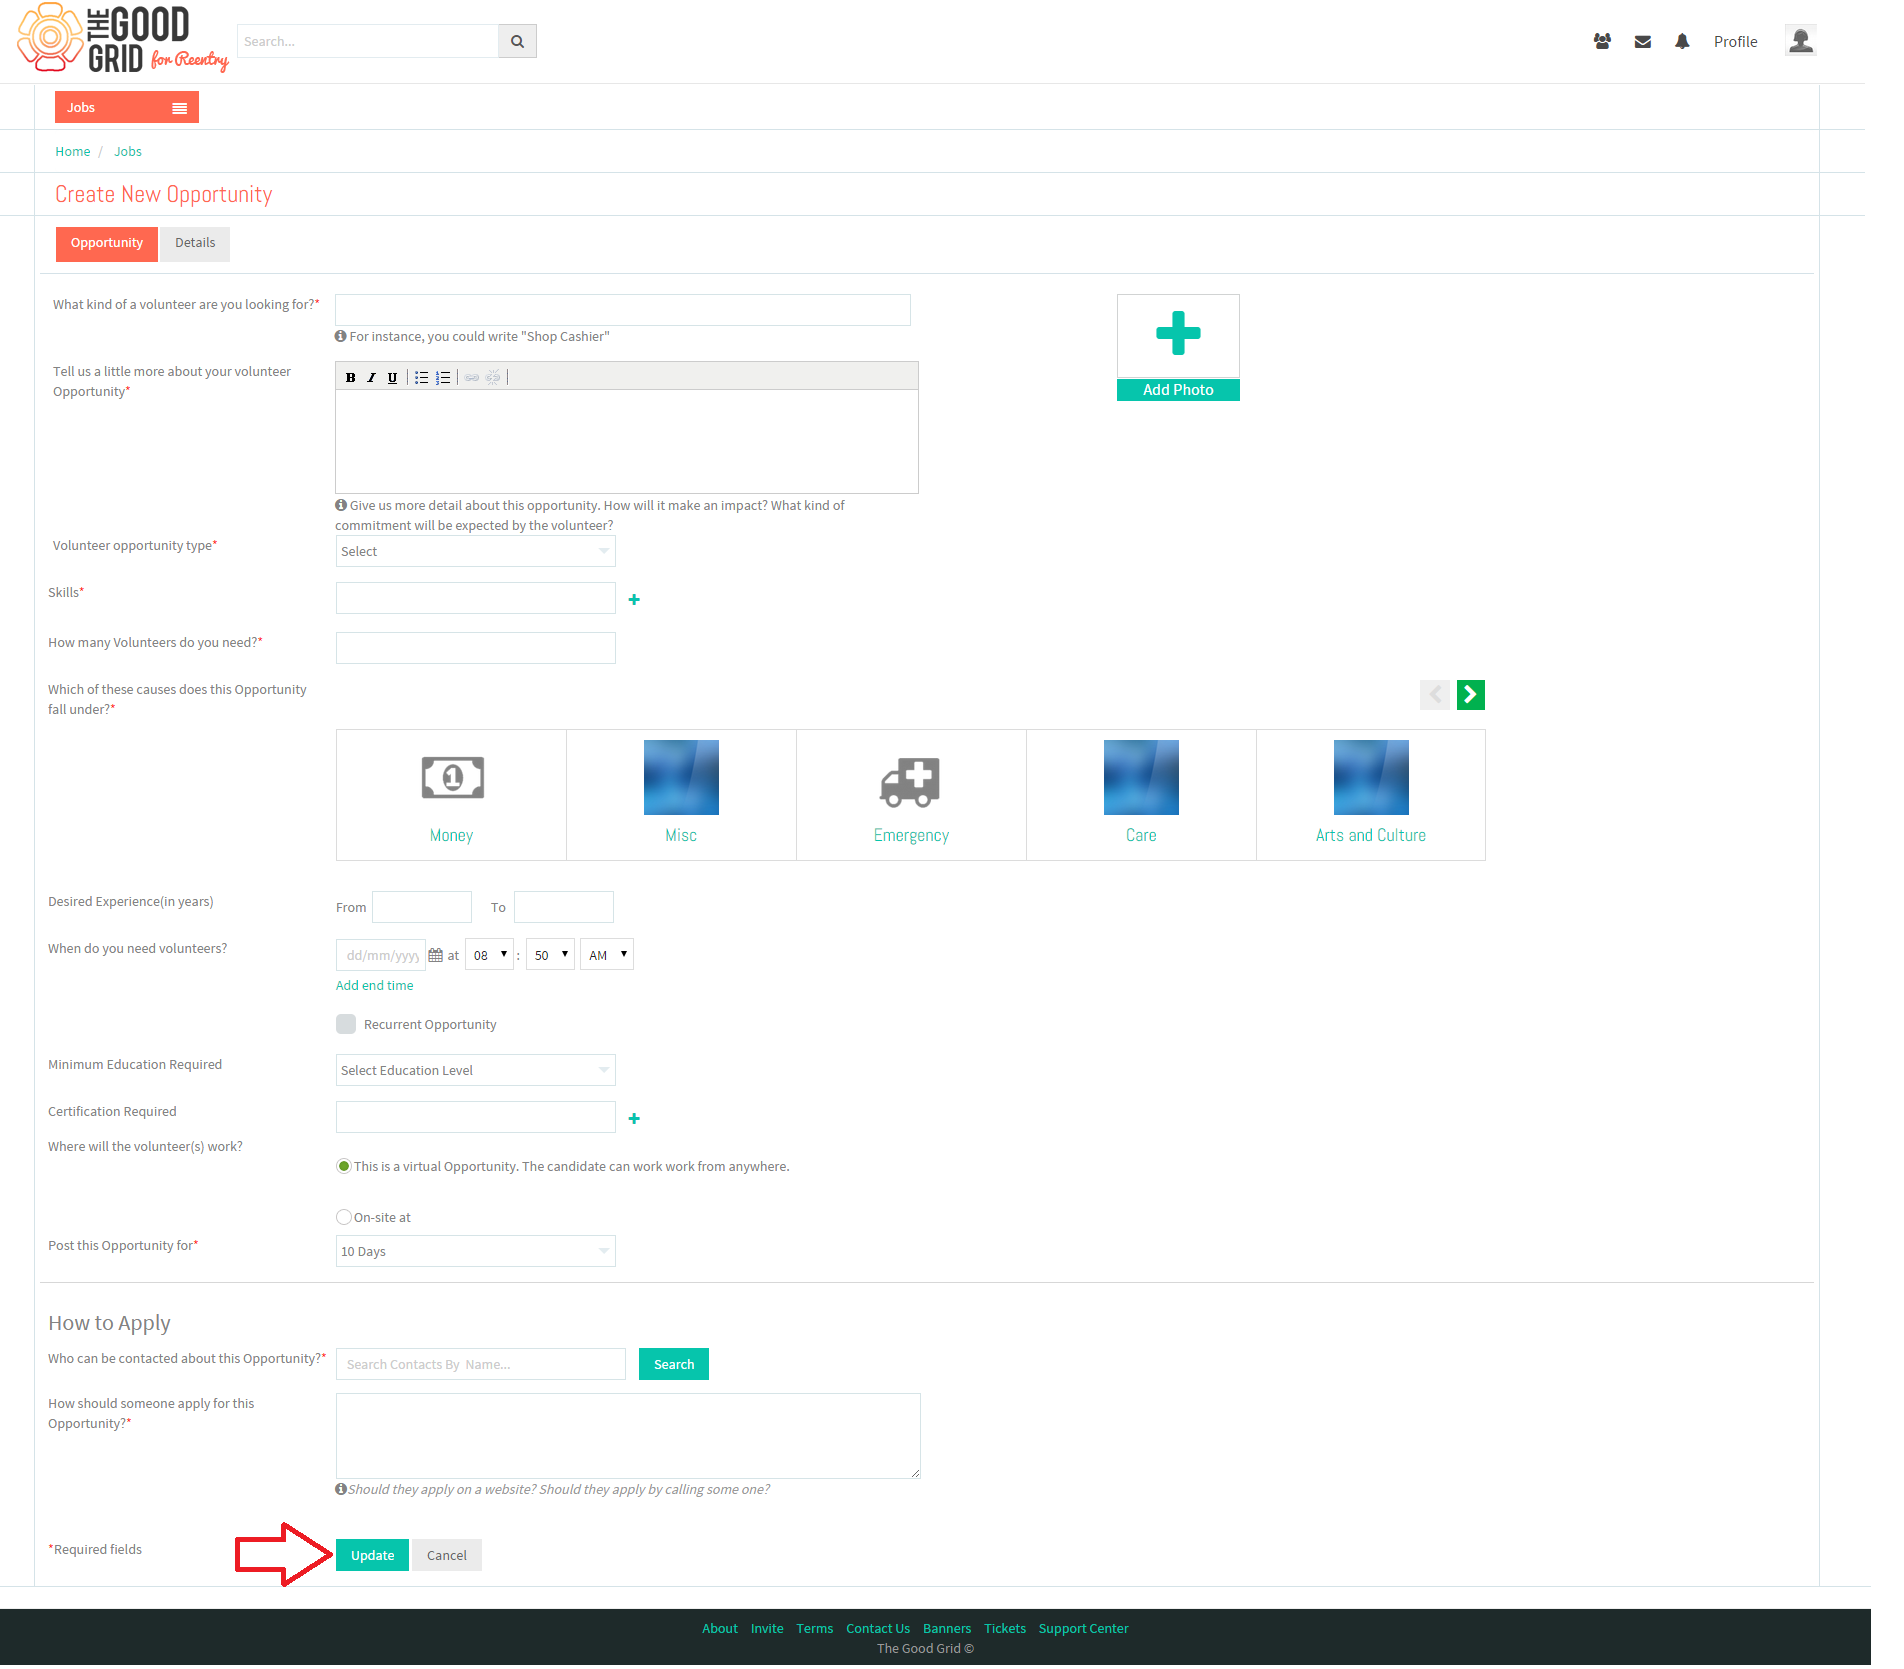
* On clicking the volunteering opportunity widget application takes her to the create screen. | * On clicking the volunteering opportunity widget application takes her to the create screen. | ||
| − | * After entering the necessary information | + | * After entering the necessary information, Keisha needs to click on “Update” button. |
| + | |||
| + | |||
| + | [[File:Zz.png]] | ||
| − | |||
---- | ---- | ||
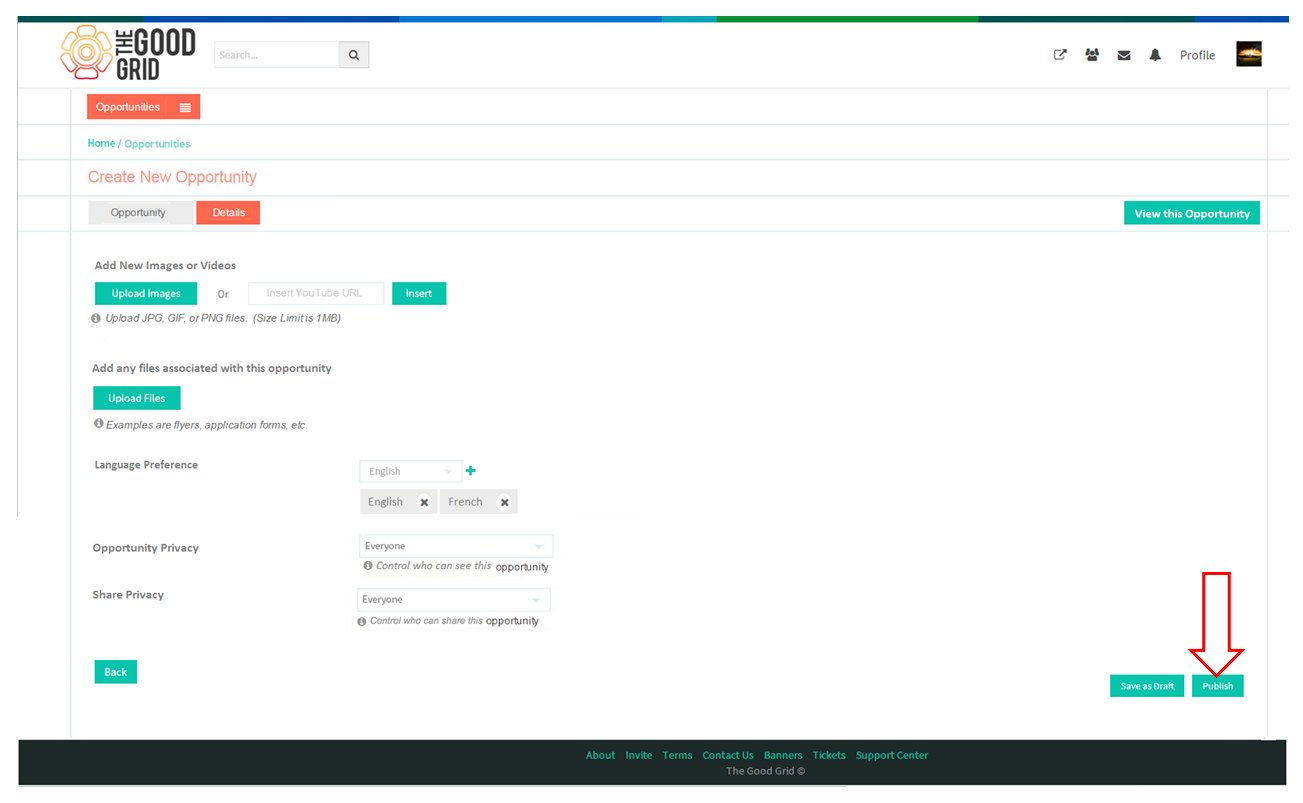
| − | * | + | * After clicking on Update button, application takes her to Details screen. |
| + | * Here she needs to provide other information and click on “Publish” button. | ||
[[File:S-22.png]] | [[File:S-22.png]] | ||
| + | |||
| + | |||
---- | ---- | ||
| − | * After | + | * After clicking on “Publish” button the opportunity will get published. |
[[File:S-23.png]] | [[File:S-23.png]] | ||
| + | |||
| + | |||
---- | ---- | ||
| Line 178: | Line 219: | ||
[[File:S-24.png]] | [[File:S-24.png]] | ||
| + | |||
| + | |||
---- | ---- | ||
* After Creating the Opportunity in TMS, automatically a Folder will be created in the name of “Volunteering Opportunities”. | * After Creating the Opportunity in TMS, automatically a Folder will be created in the name of “Volunteering Opportunities”. | ||
| + | |||
[[File:S-25.png]] | [[File:S-25.png]] | ||
| + | |||
| + | |||
---- | ---- | ||
| Line 190: | Line 236: | ||
[[File:S-26.png]] | [[File:S-26.png]] | ||
| + | |||
| + | |||
---- | ---- | ||
| Line 197: | Line 245: | ||
[[File:S-27.png]] | [[File:S-27.png]] | ||
| + | |||
| + | |||
---- | ---- | ||
| − | * From the main menu she needs to select the option " | + | * From the main menu she needs to select the option "Page". |
[[File:S-28.png]] | [[File:S-28.png]] | ||
| + | |||
| + | |||
---- | ---- | ||
| Line 211: | Line 263: | ||
[[File:S-29.png]] | [[File:S-29.png]] | ||
| + | |||
| + | |||
---- | ---- | ||
* Applications takes her to the organization profile page. From there she needs to click on the plug-in “Add Event”. | * Applications takes her to the organization profile page. From there she needs to click on the plug-in “Add Event”. | ||
| + | |||
[[File:S-30.png]] | [[File:S-30.png]] | ||
| + | |||
| + | |||
---- | ---- | ||
| Line 226: | Line 283: | ||
[[File:S-31.png]] | [[File:S-31.png]] | ||
| + | |||
| + | |||
---- | ---- | ||
| Line 233: | Line 292: | ||
[[File:S-32.png]] | [[File:S-32.png]] | ||
| + | |||
| + | |||
---- | ---- | ||
| Line 240: | Line 301: | ||
[[File:S-33.png]] | [[File:S-33.png]] | ||
| + | |||
| + | |||
---- | ---- | ||
| Line 247: | Line 310: | ||
[[File:S-34.png]] | [[File:S-34.png]] | ||
| + | |||
| + | |||
---- | ---- | ||
| Line 254: | Line 319: | ||
[[File:S-35.png]] | [[File:S-35.png]] | ||
| + | |||
| + | |||
---- | ---- | ||
| Line 261: | Line 328: | ||
[[File:S-36.png]] | [[File:S-36.png]] | ||
| + | |||
| + | |||
---- | ---- | ||
Latest revision as of 03:58, 3 January 2015
Back to main menu
Applications Screen Flow
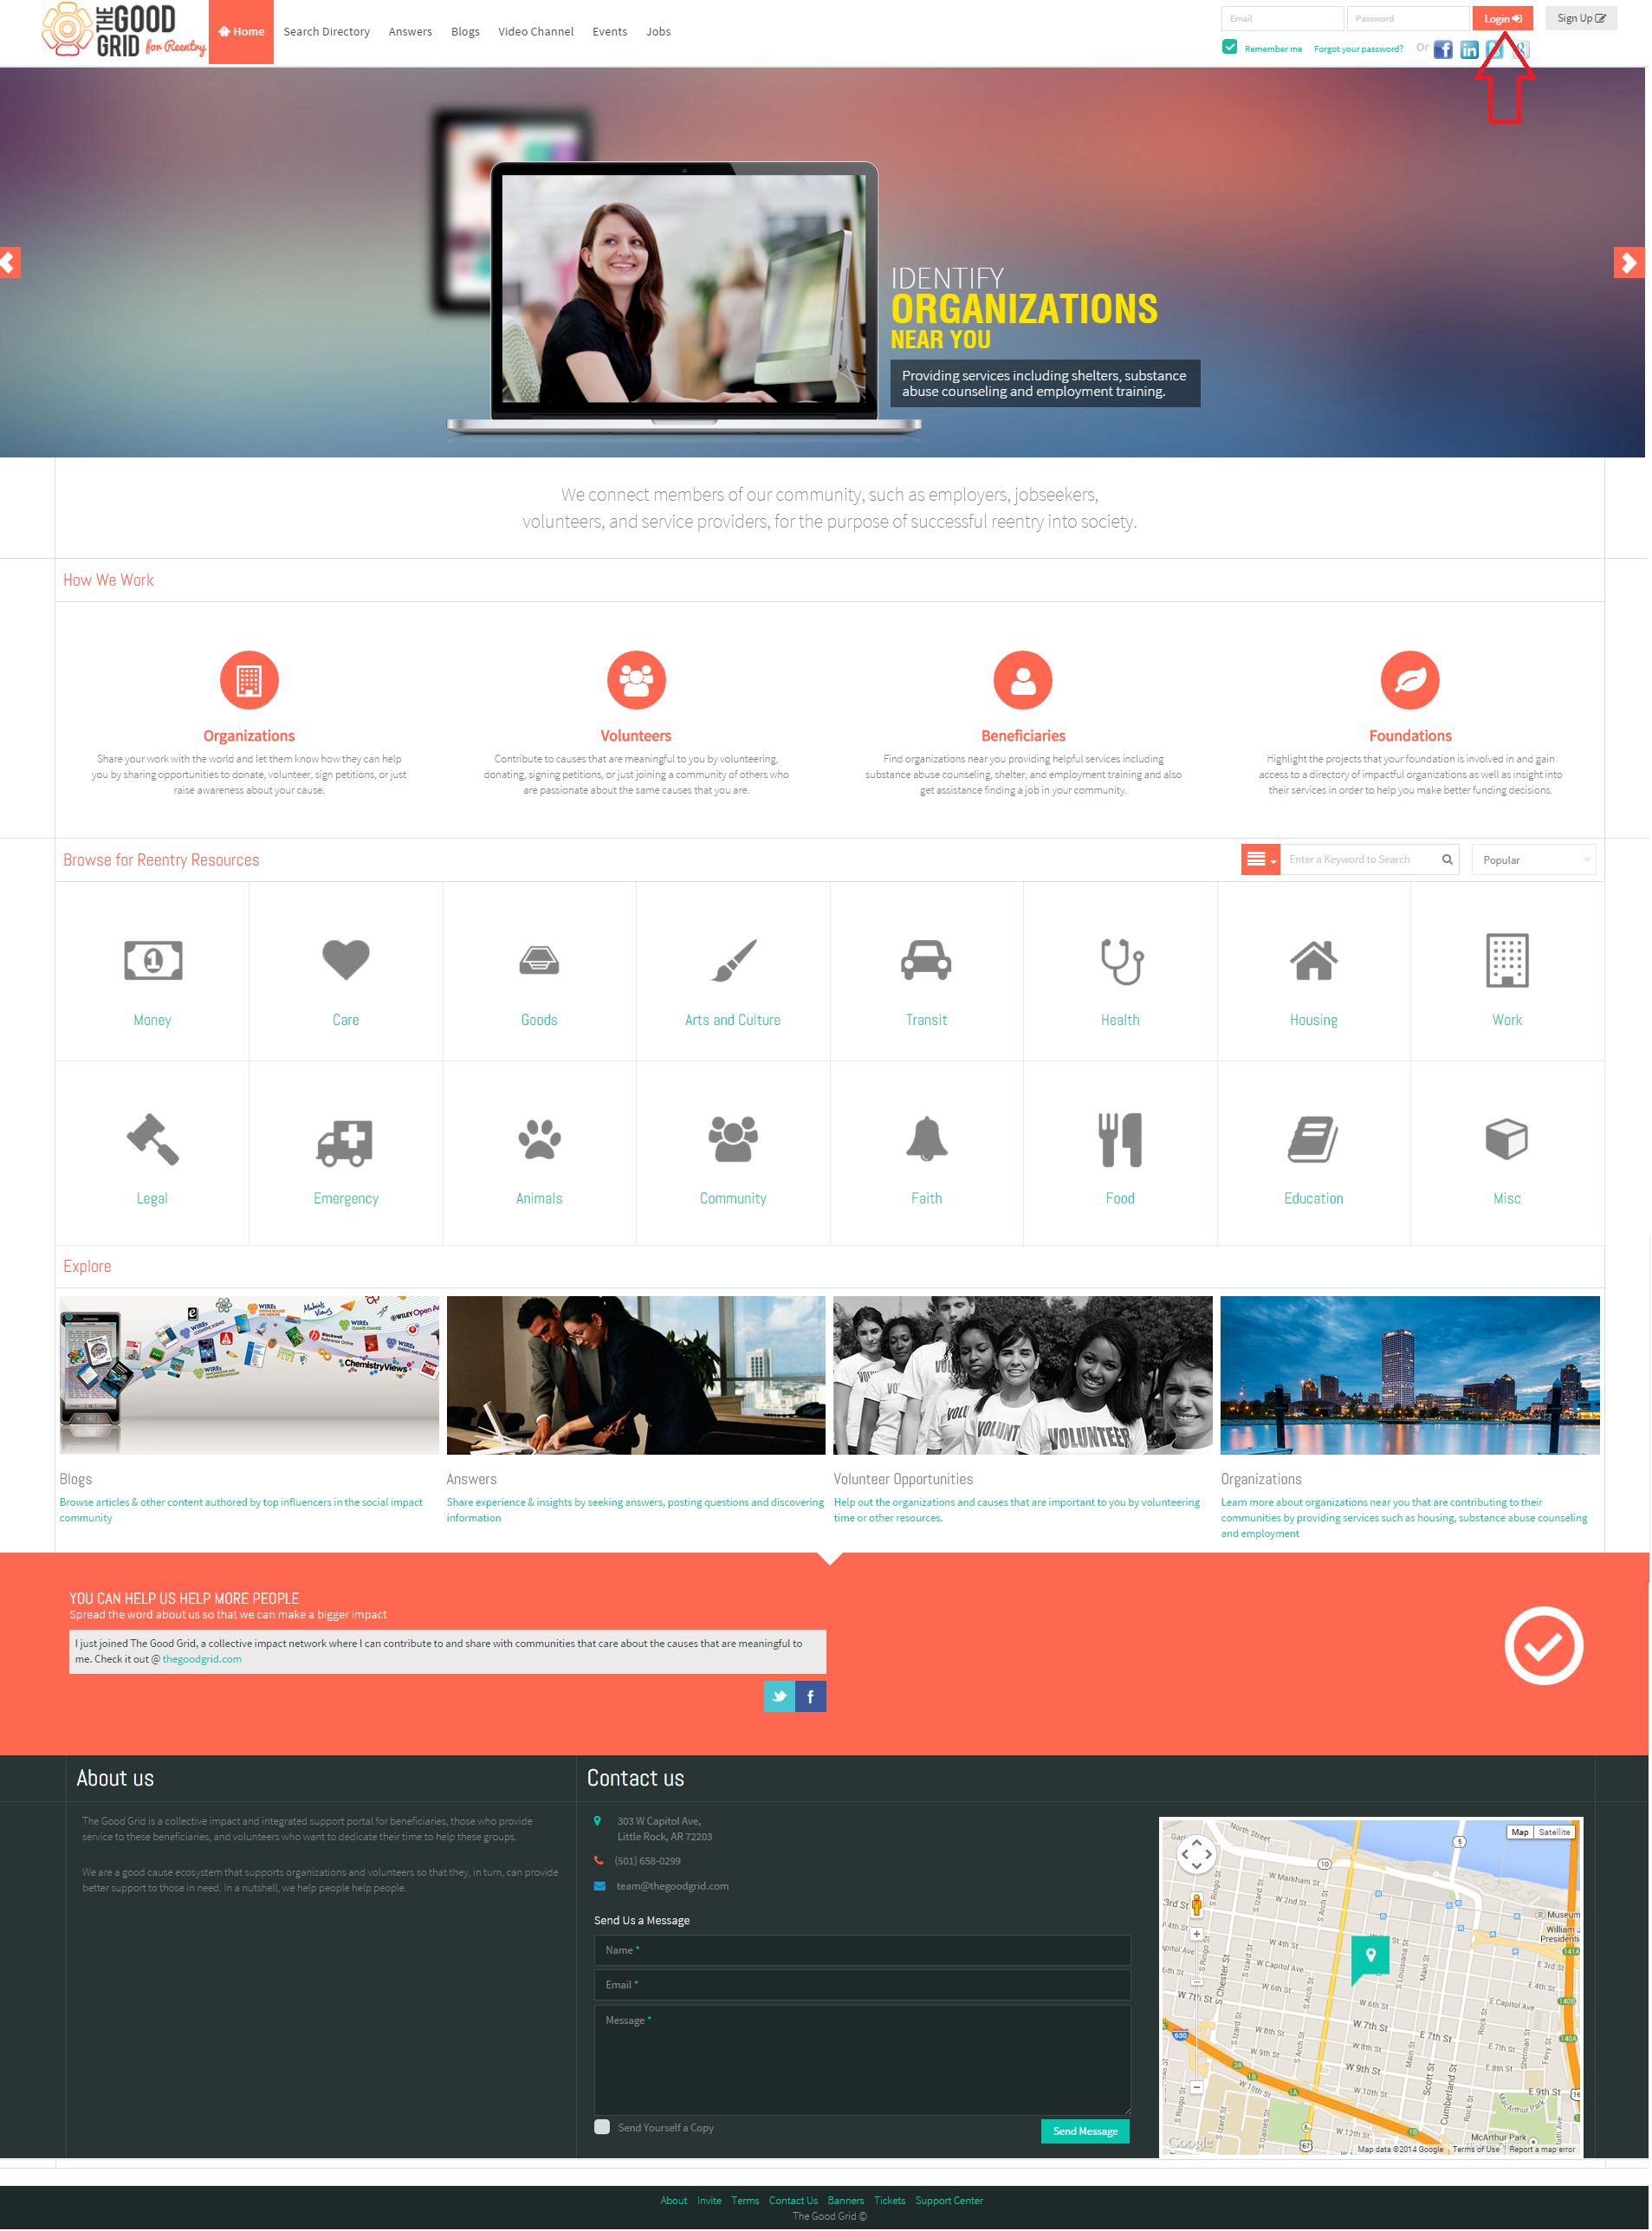
- Keisha enters email address and password and clicks on Login button.
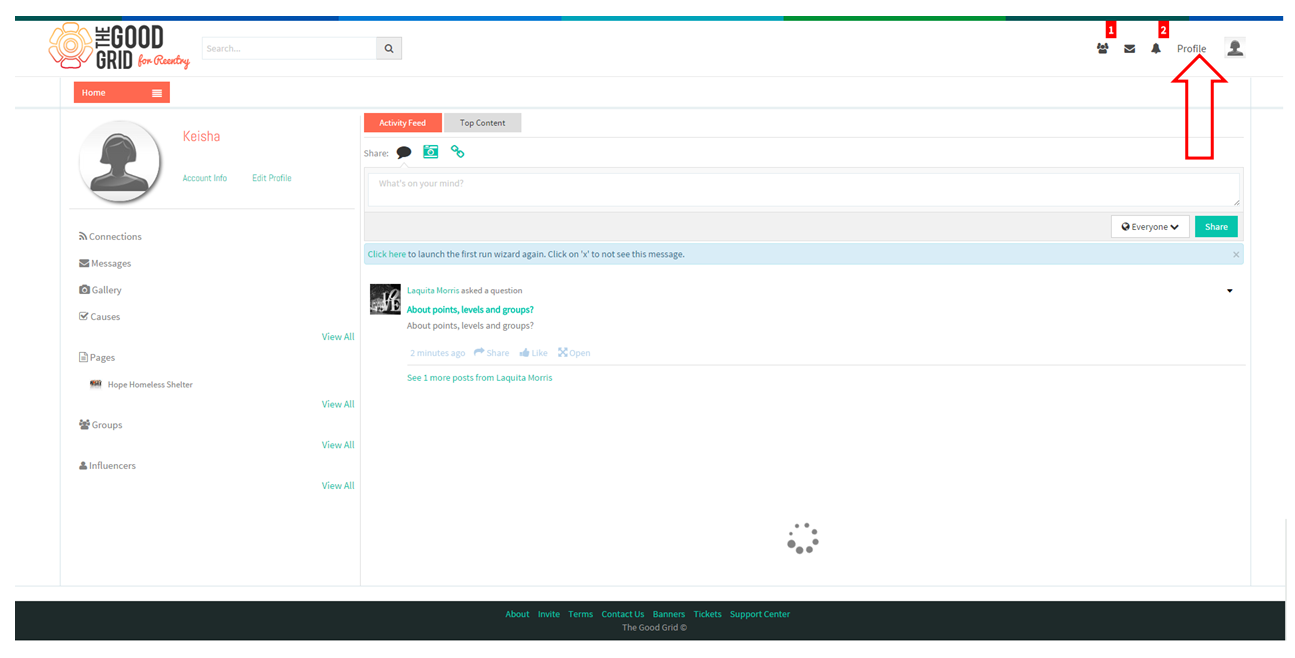
- To update profile Keisha has to click on the Profile in the header.
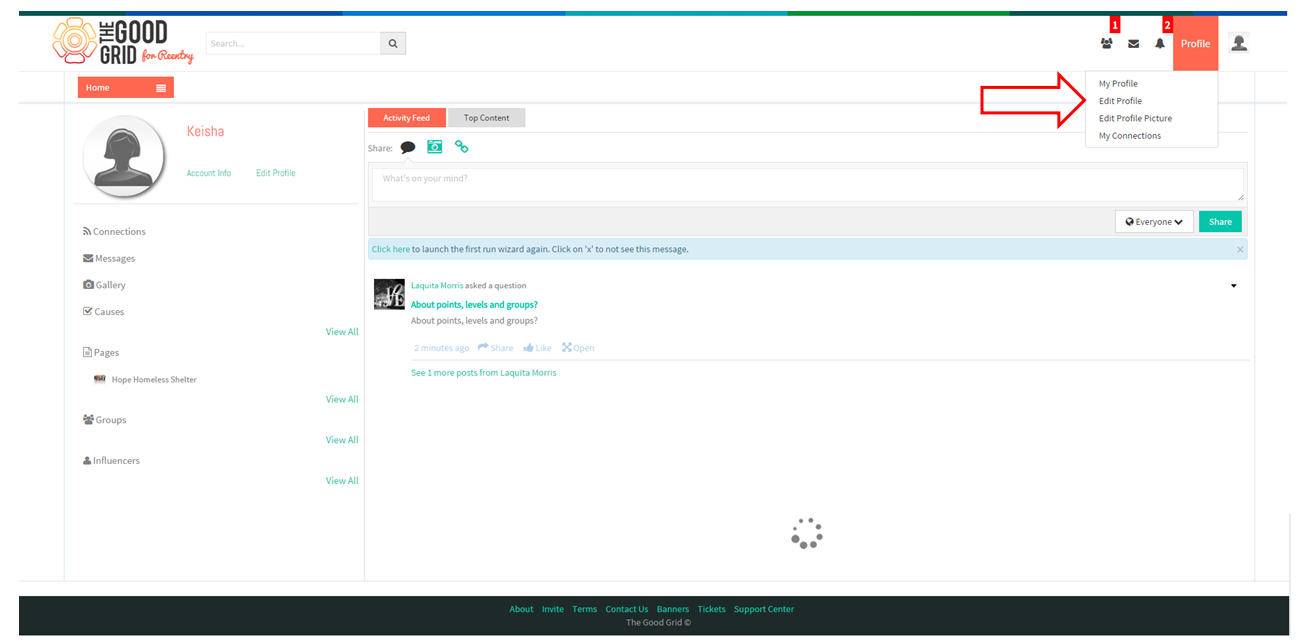
- On clicking the Profile, screen displays the overlay.
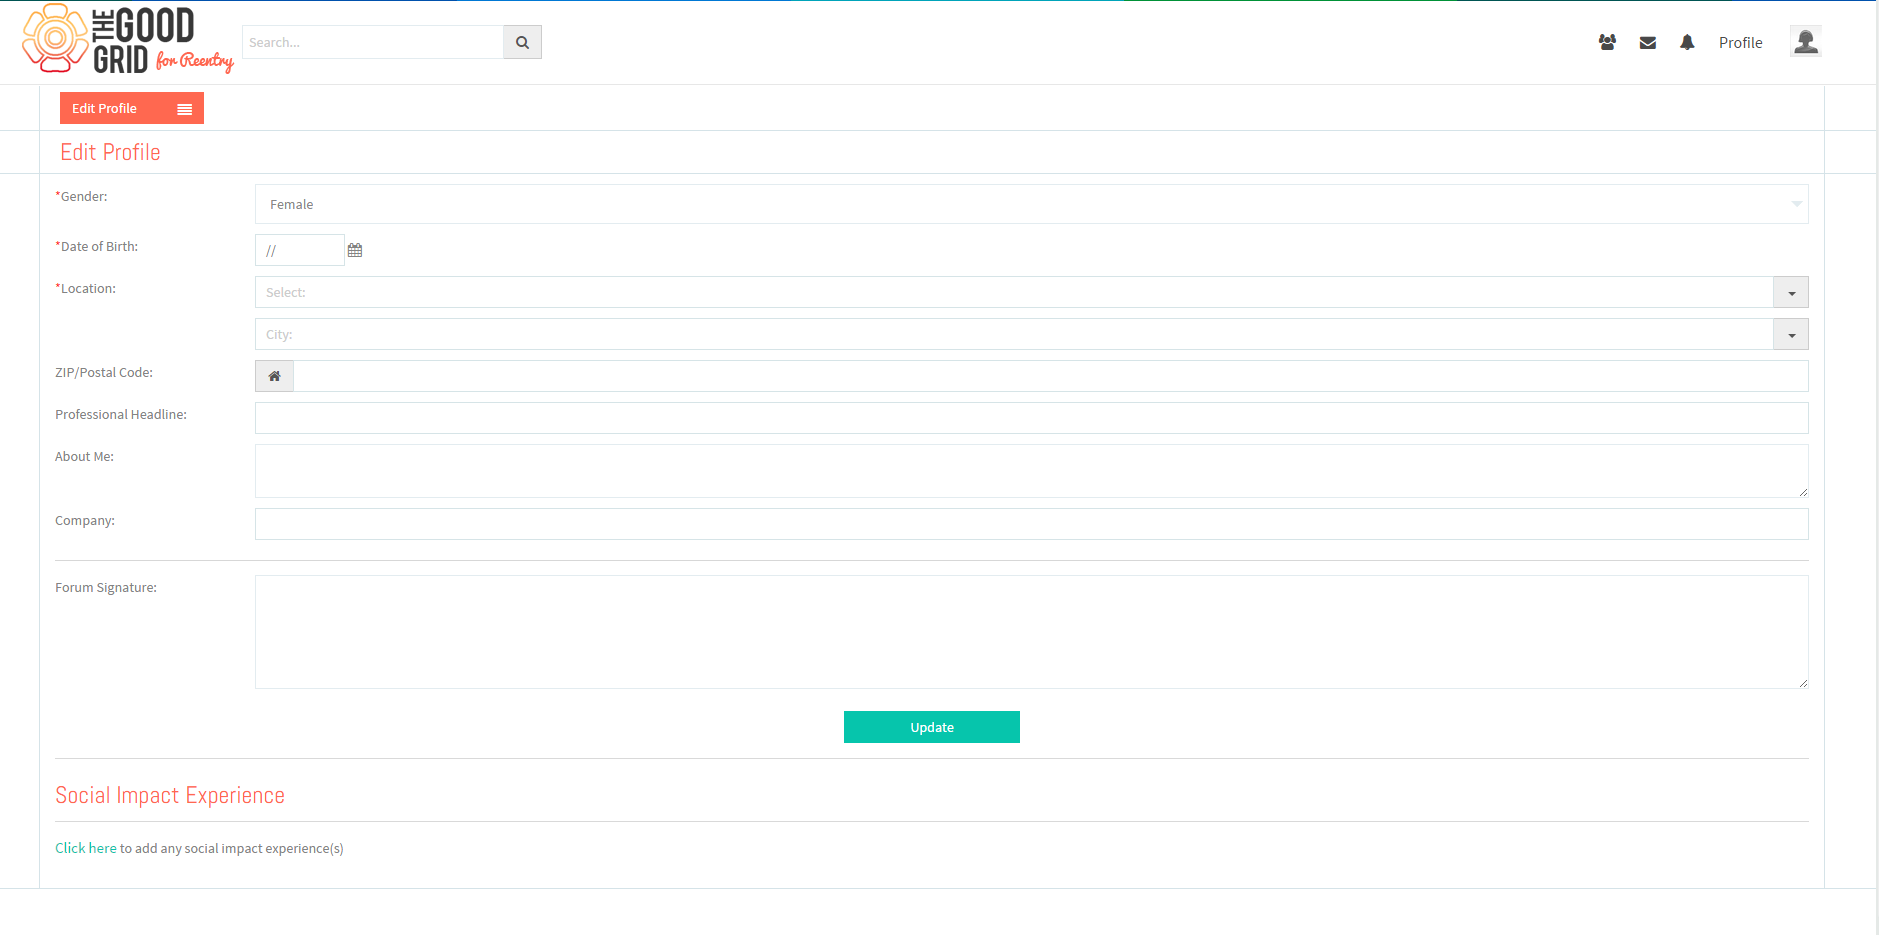
- Keisha clicks on the “Edit Profile” from the overlay and the application navigates to the Edit profile screen
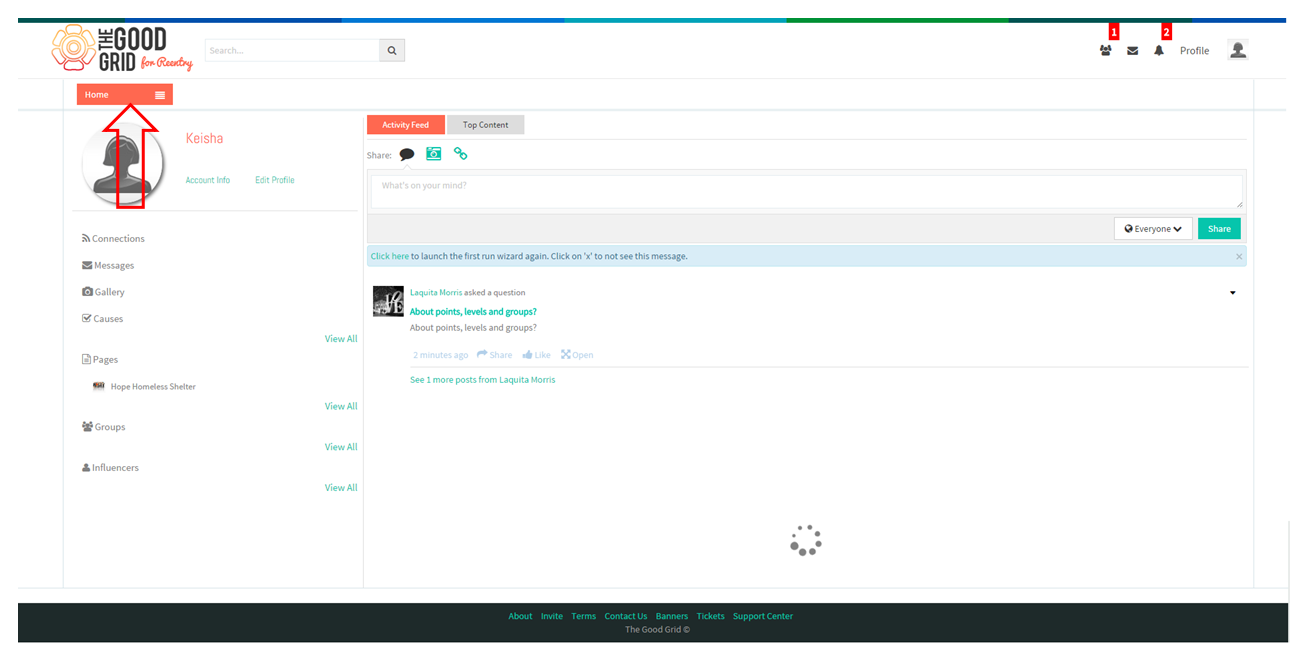
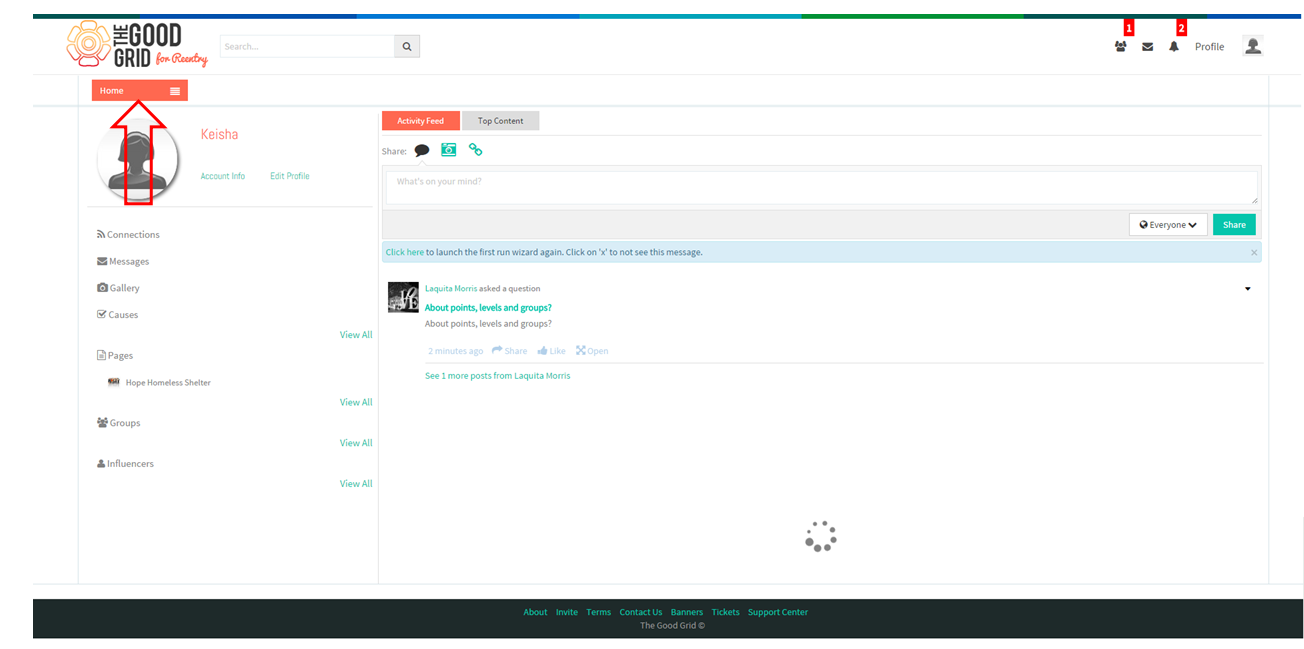
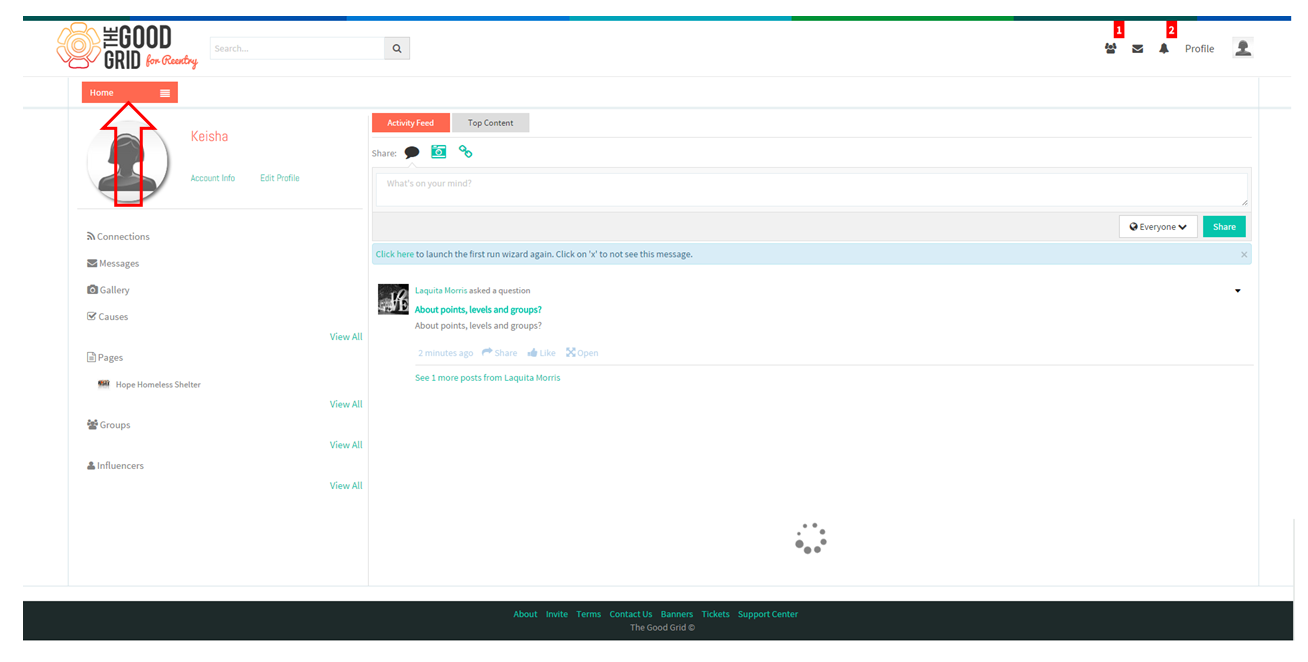
- To create a page Keisha has to click on Main menu.
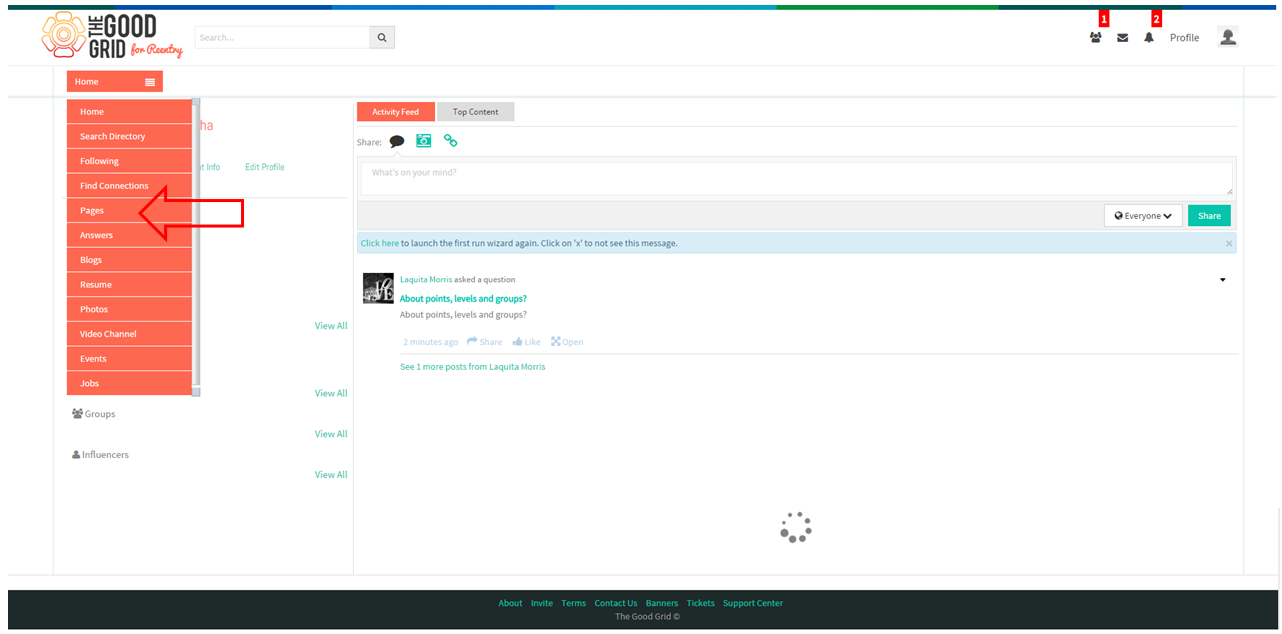
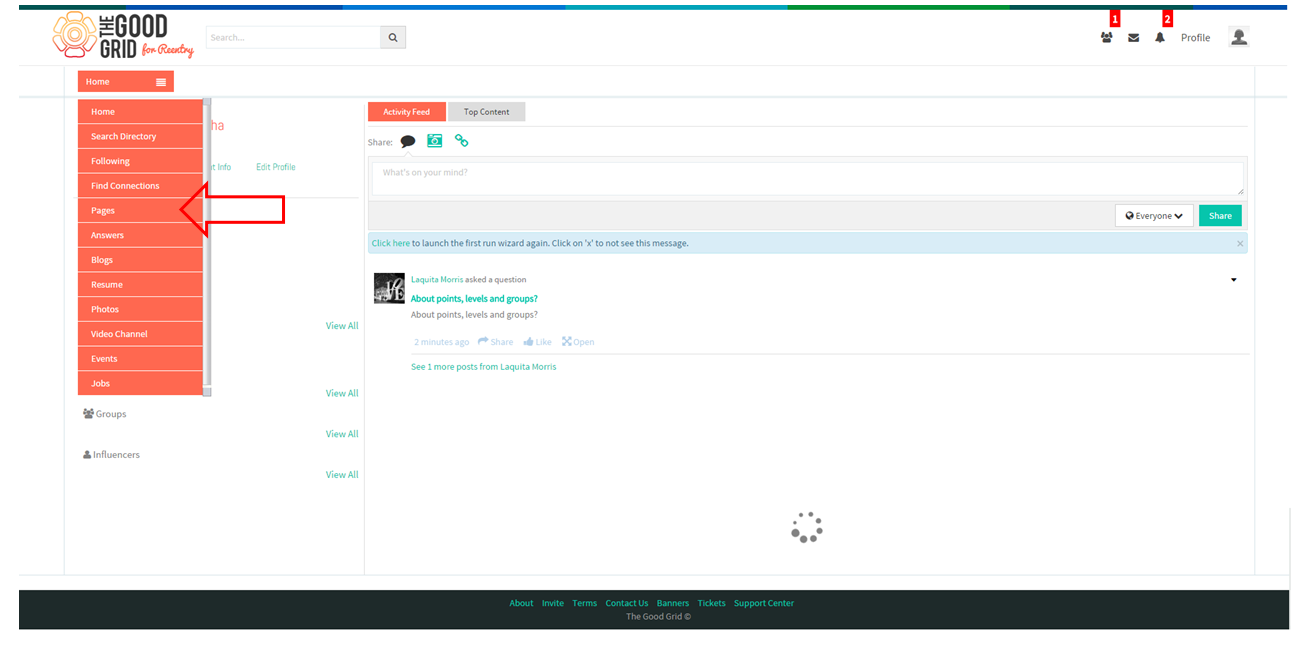
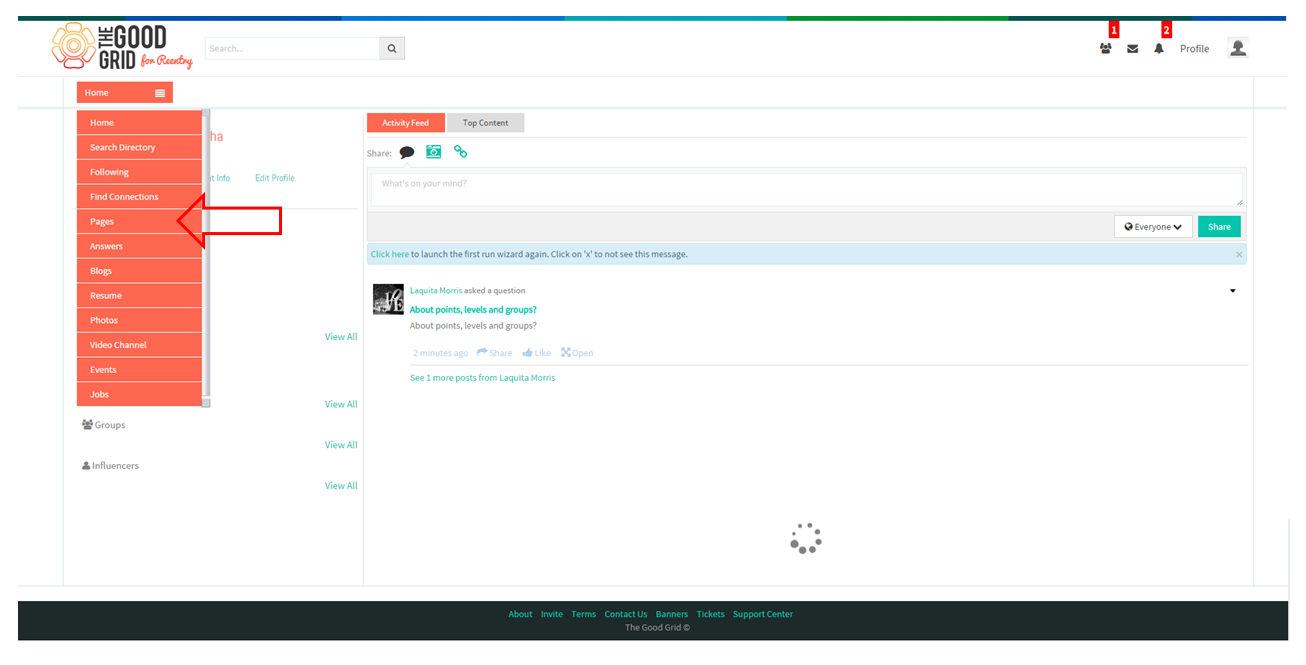
- From that she has to click on Pages option.
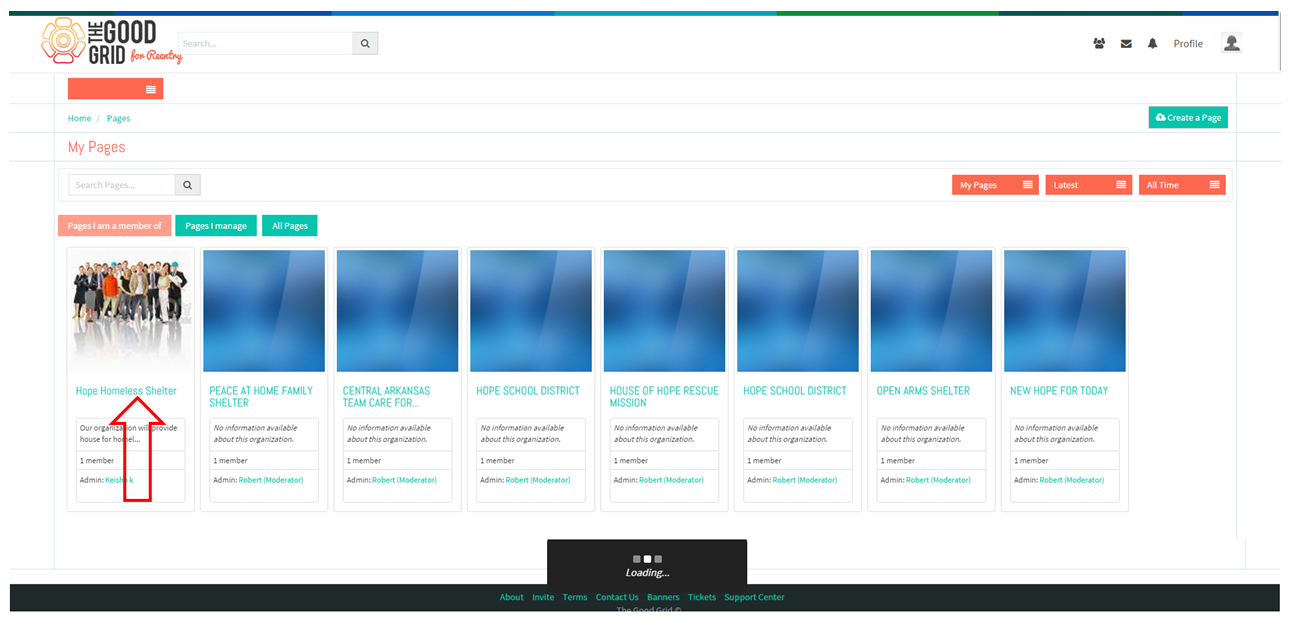
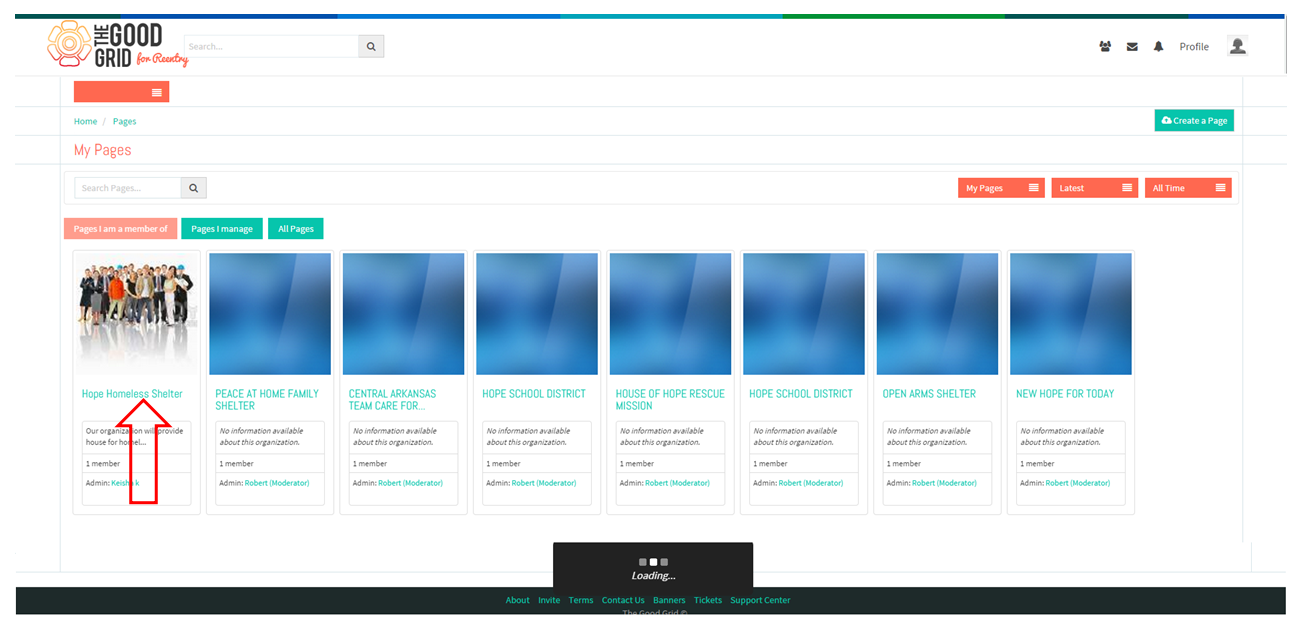
- On clicking Pages option, application navigates to the Pages screen.
- To create a Page for Organization Keisha has to click on “Create a Page button.
- On clicking create a page button, application takes her to the create wizard.
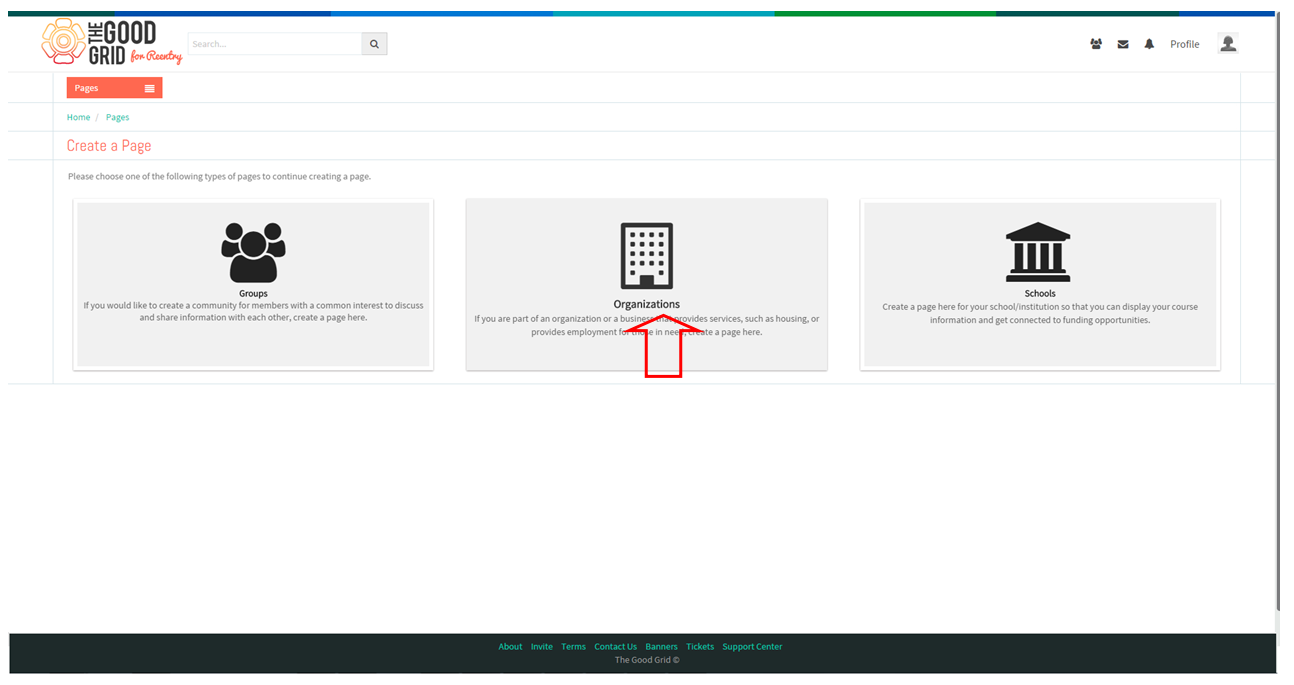
- To create a page for organization Keisha has to click on the Organization badge.
- On clicking the organization badge, it takes her to the organization create screen.
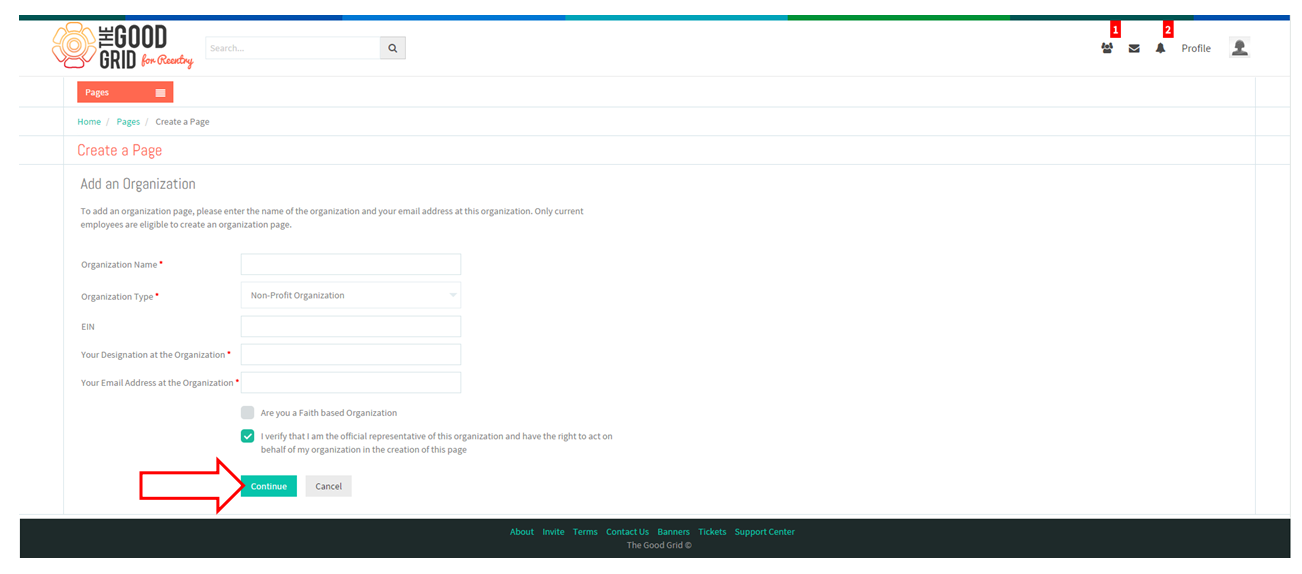
- After entering all mandatory information click on “Continue” button.
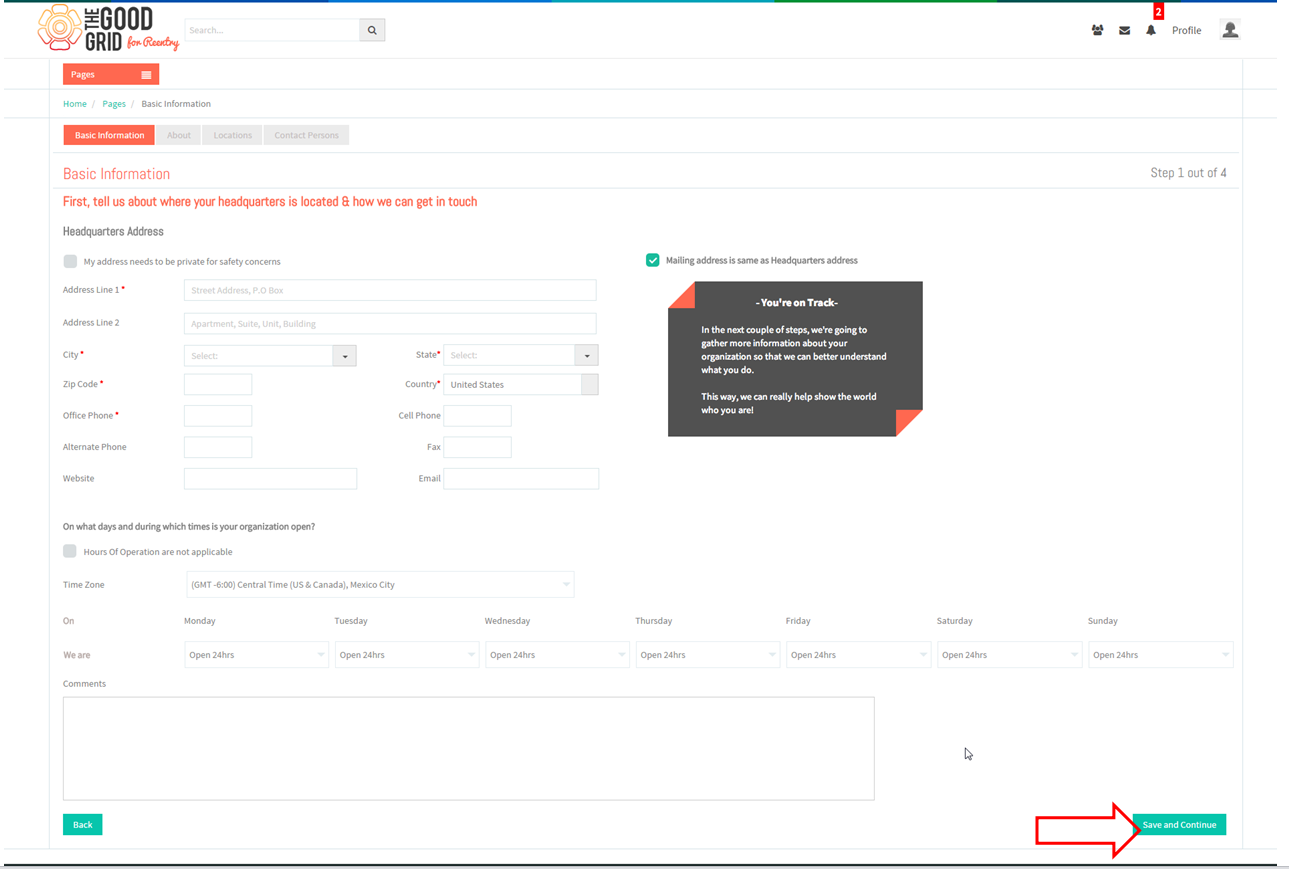
- On Clicking continue button, application takes her to Basic Information screen.
- After entering the above information click on “Save and Continue” button.
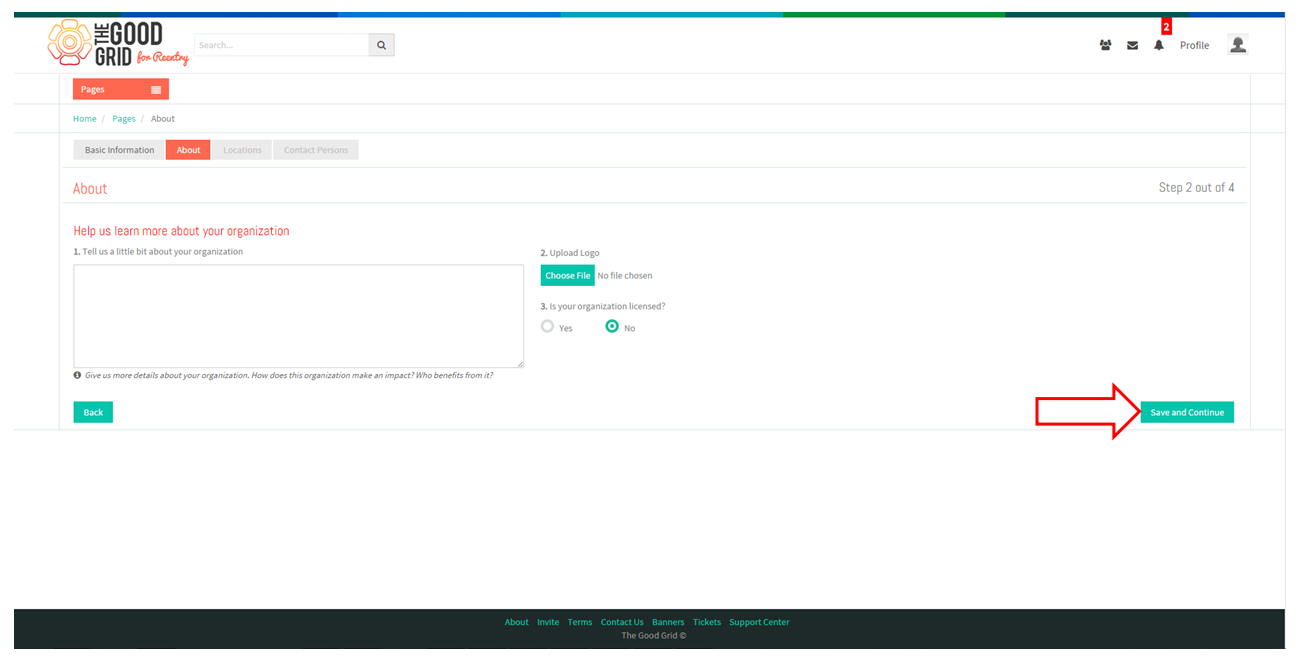
- Application takes her to “About” screen.
- After completing the About process she needs to click on “Save and Continue” button.
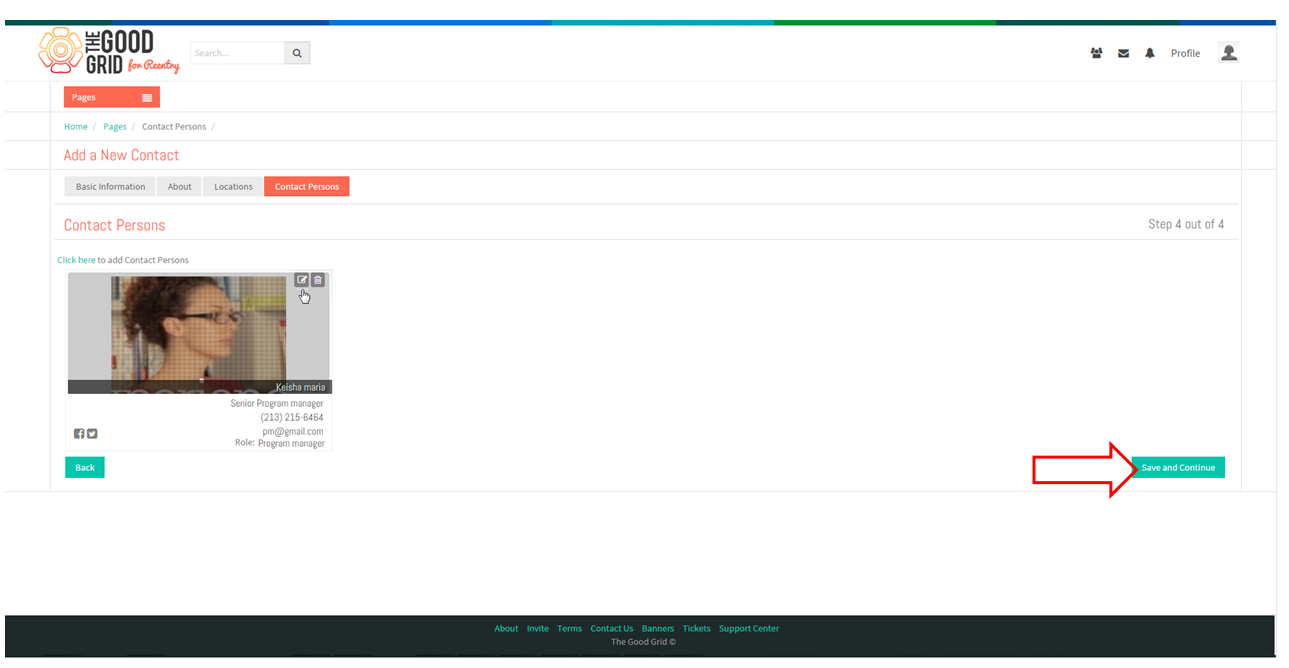
- Similarly for the other two steps.
- In Contact person screen after adding the contacts, click “Save and Continue” button.
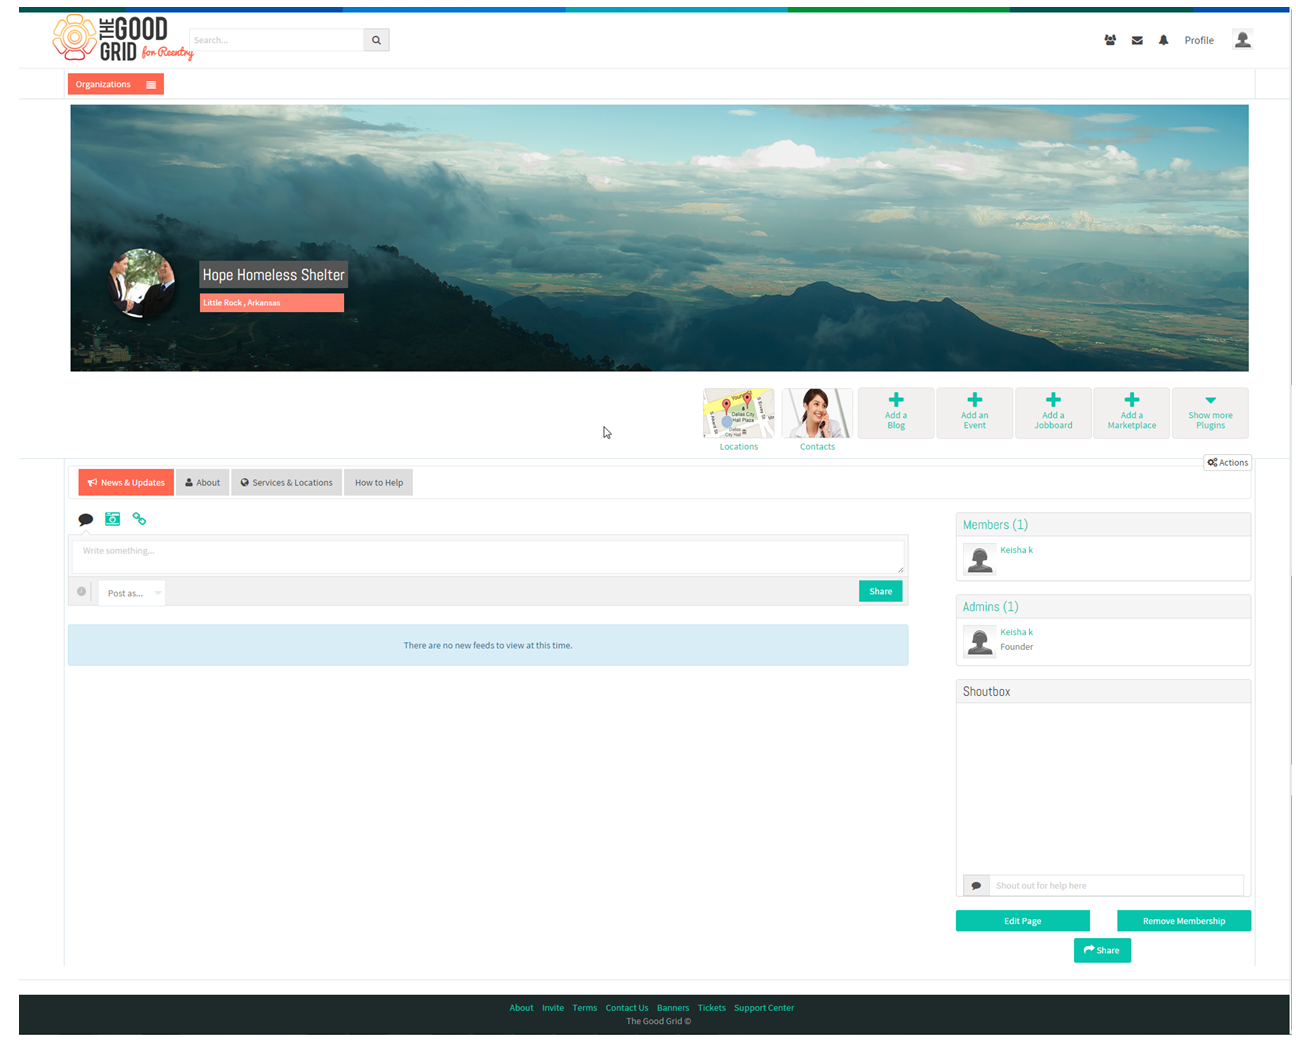
- Application takes her to the Organization Profile.
- To create Volunteer Opportunities Keisha has to click on Main Menu.
- From the main menu select the option called “Pages”.
- In Pages screen she needs to click on the organization which she has created.
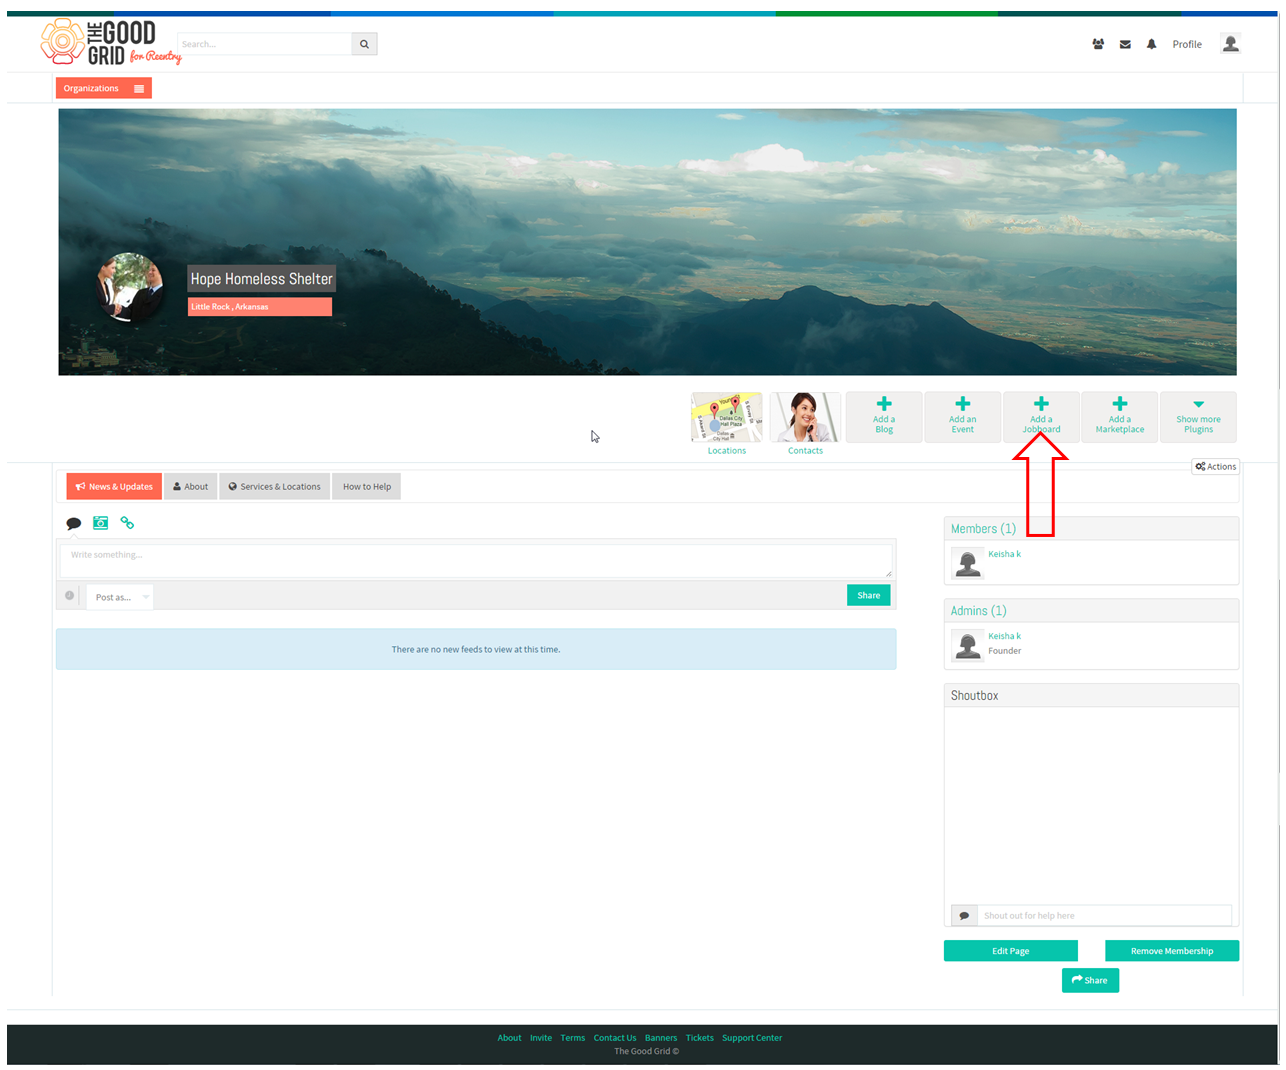
- Applications takes her to the organization profile page. From there she needs to click on the plug-in “Add a Job Board”.
- On clicking “Add a Job Board” screen displays a pop-up "Job Type".
- To create Volunteering Opportunity Keisha has to click on the Volunteering Opportunity widget.
- On clicking the volunteering opportunity widget application takes her to the create screen.
- After entering the necessary information, Keisha needs to click on “Update” button.
- After clicking on Update button, application takes her to Details screen.
- Here she needs to provide other information and click on “Publish” button.
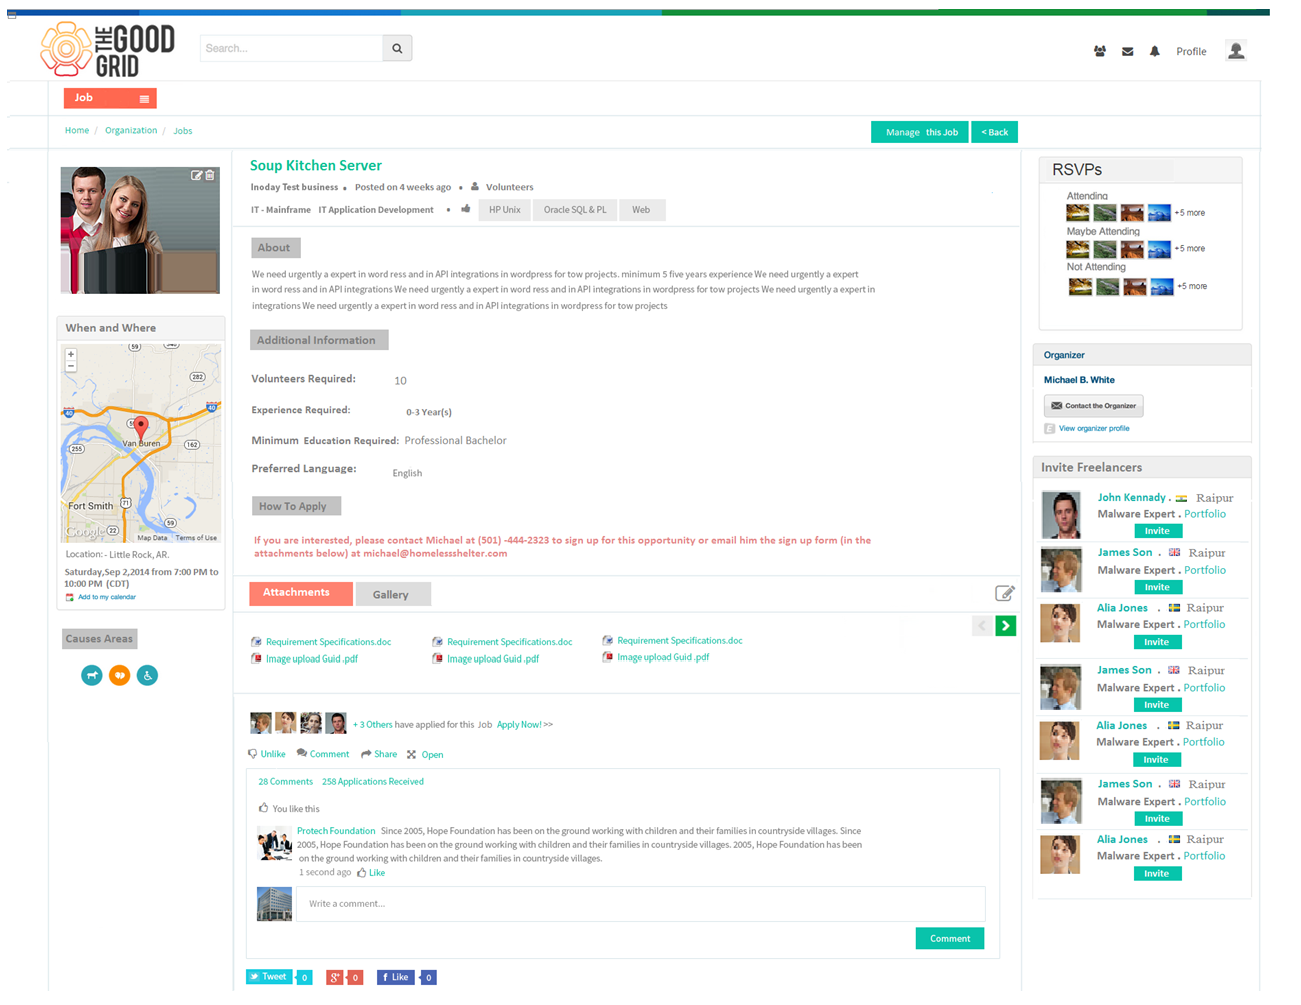
- After clicking on “Publish” button the opportunity will get published.
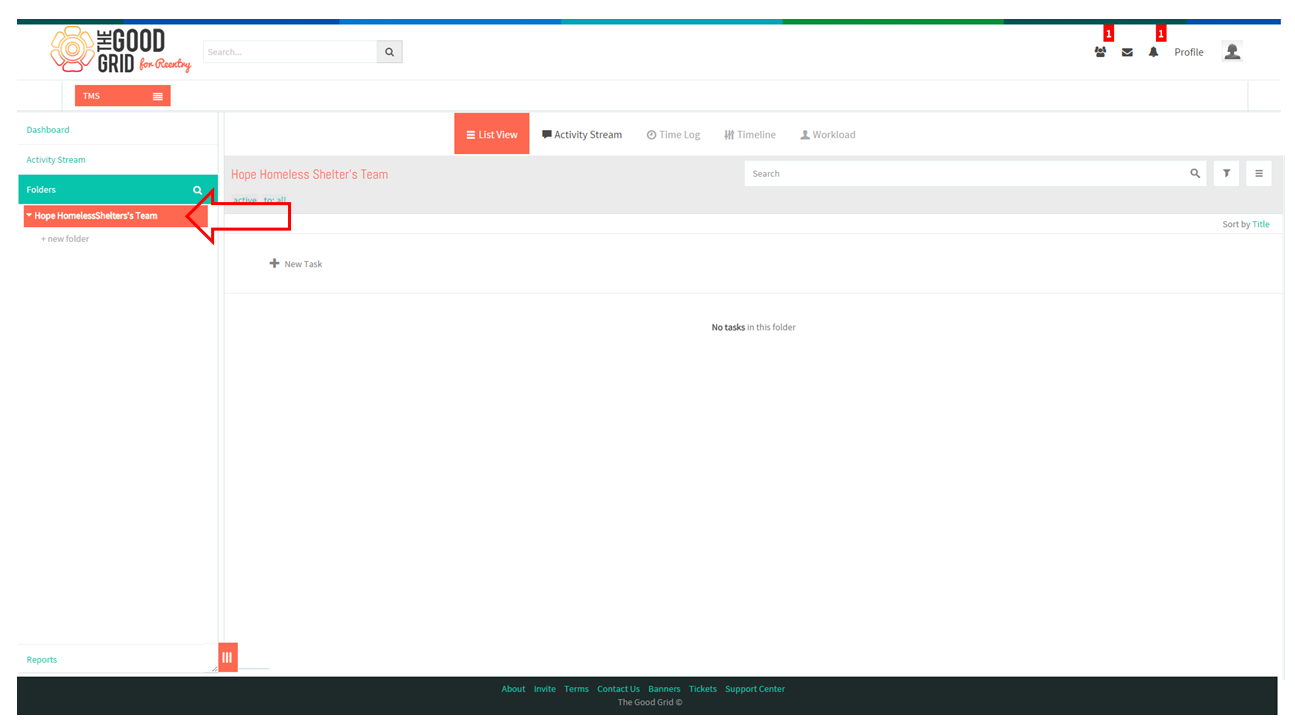
- Once Keisha created the Organization in her TMS profile Workspace will get created in the organization name.
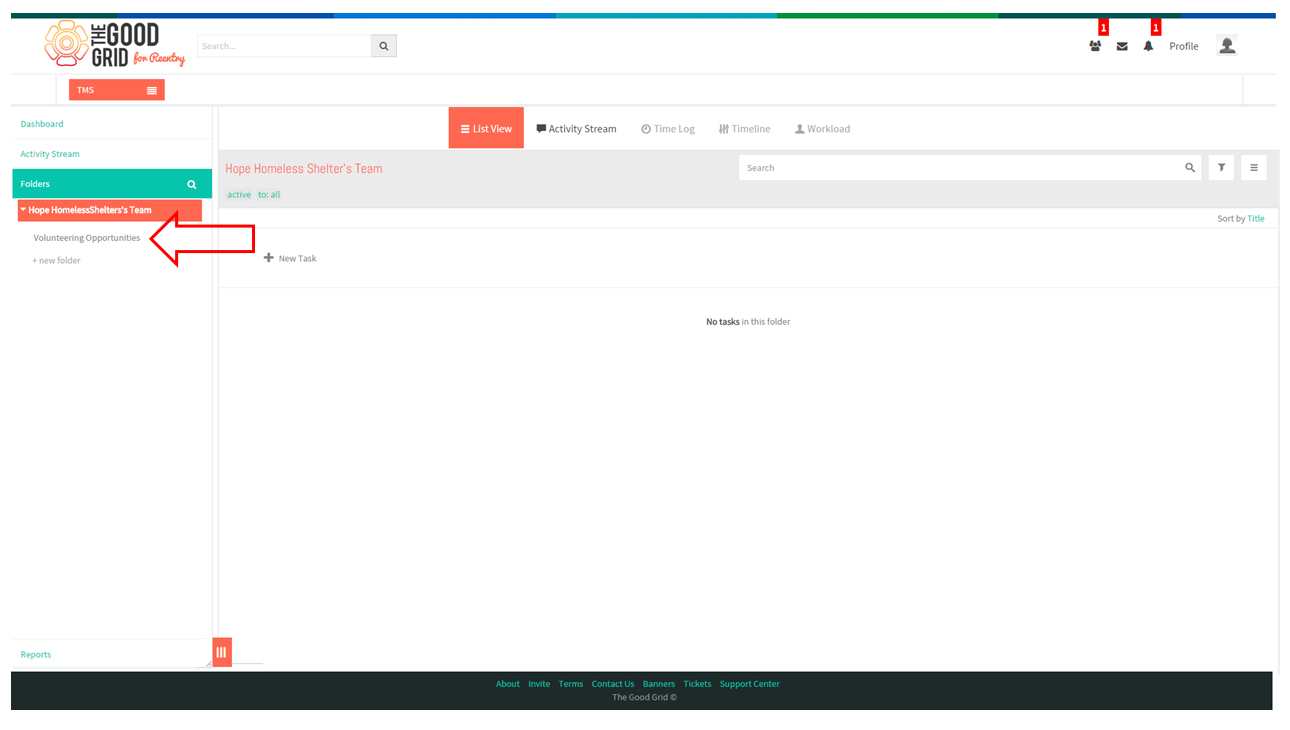
- After Creating the Opportunity in TMS, automatically a Folder will be created in the name of “Volunteering Opportunities”.
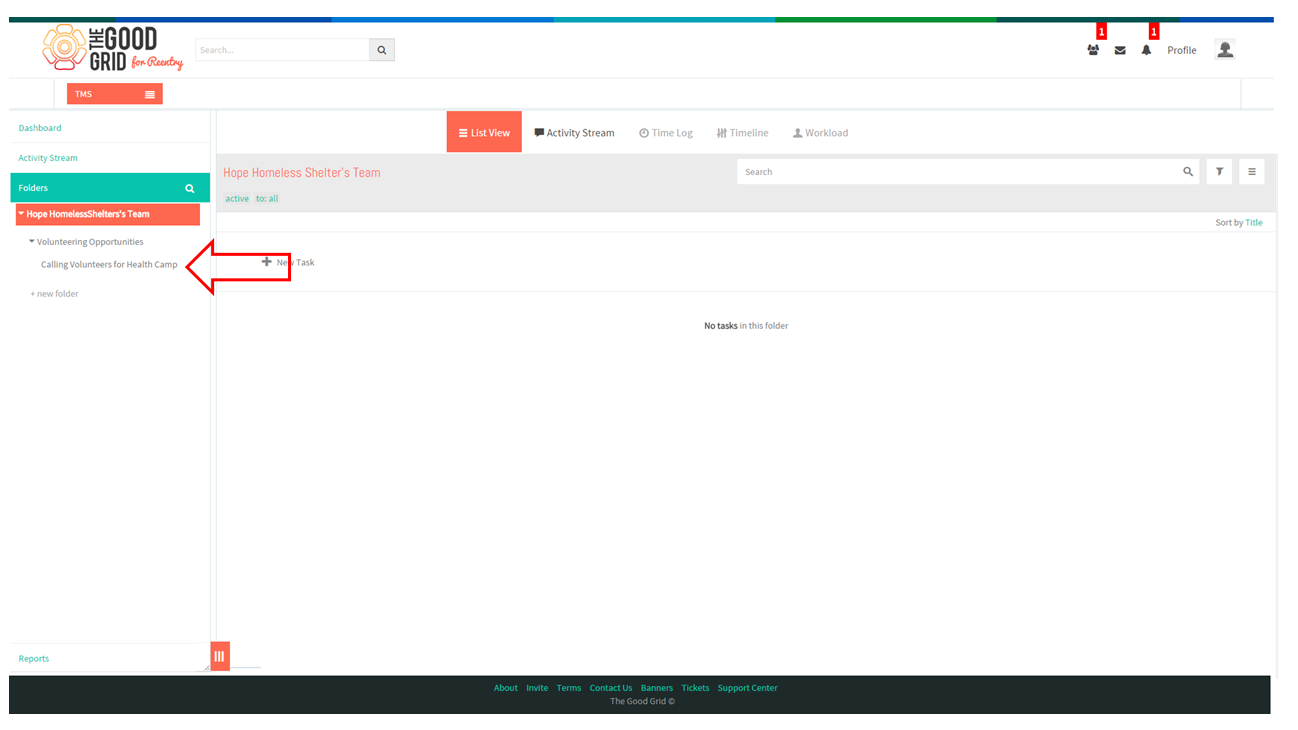
- After creating an Opportunity in TMS, application automatically will create a sub-folder under volunteering opportunities folder.
- To add events Keisha has to click on the Main Menu.
- From the main menu she needs to select the option "Page".
- In Pages screen she needs to click on the organization which she has created.
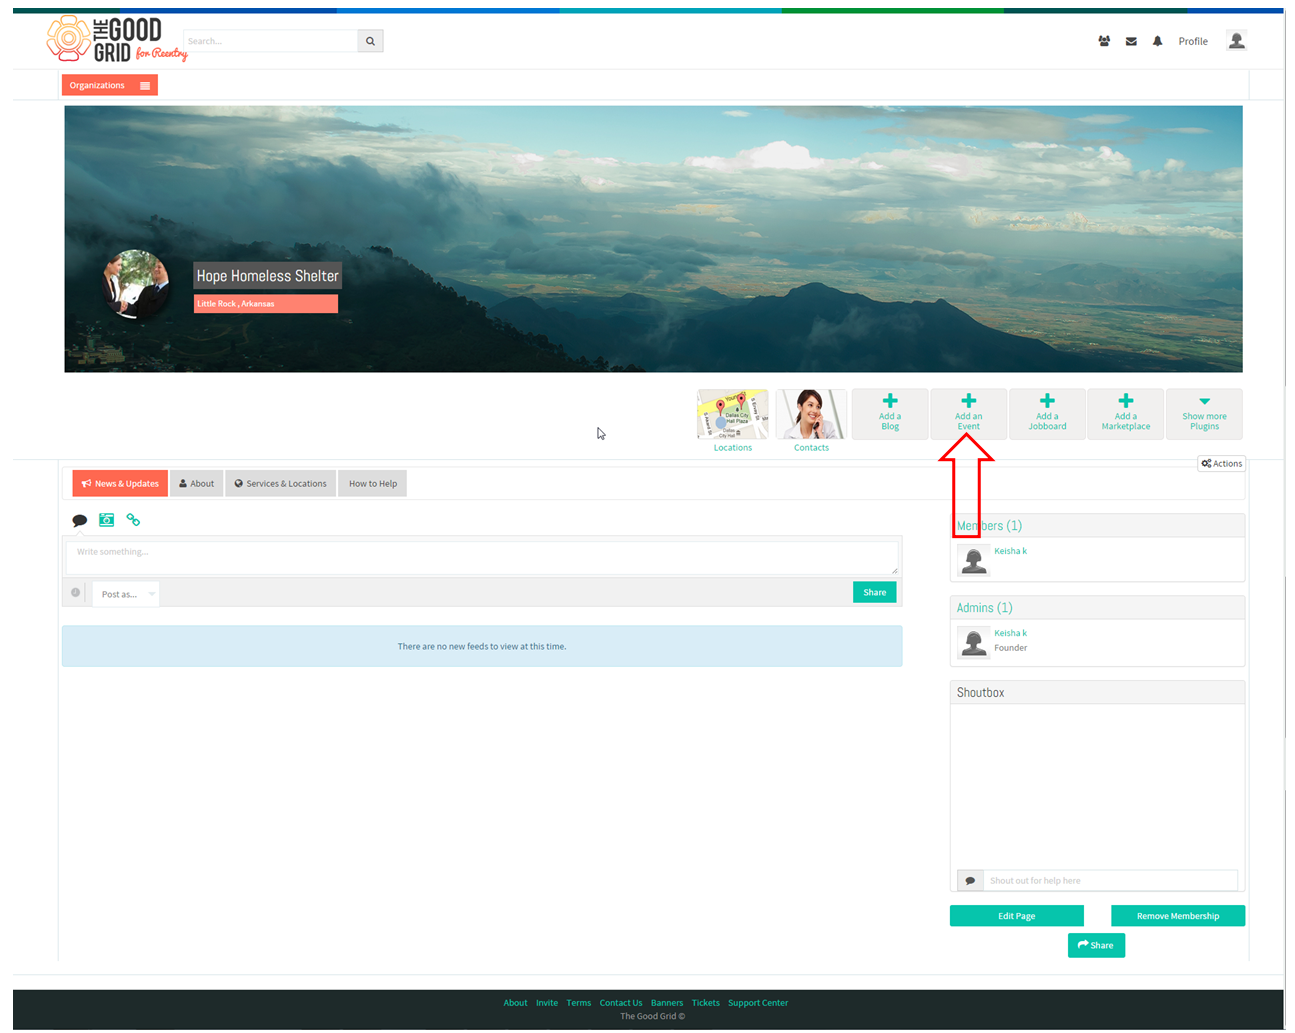
- Applications takes her to the organization profile page. From there she needs to click on the plug-in “Add Event”.
- On clicking “Add Event” it takes her to Events Create Wizard.
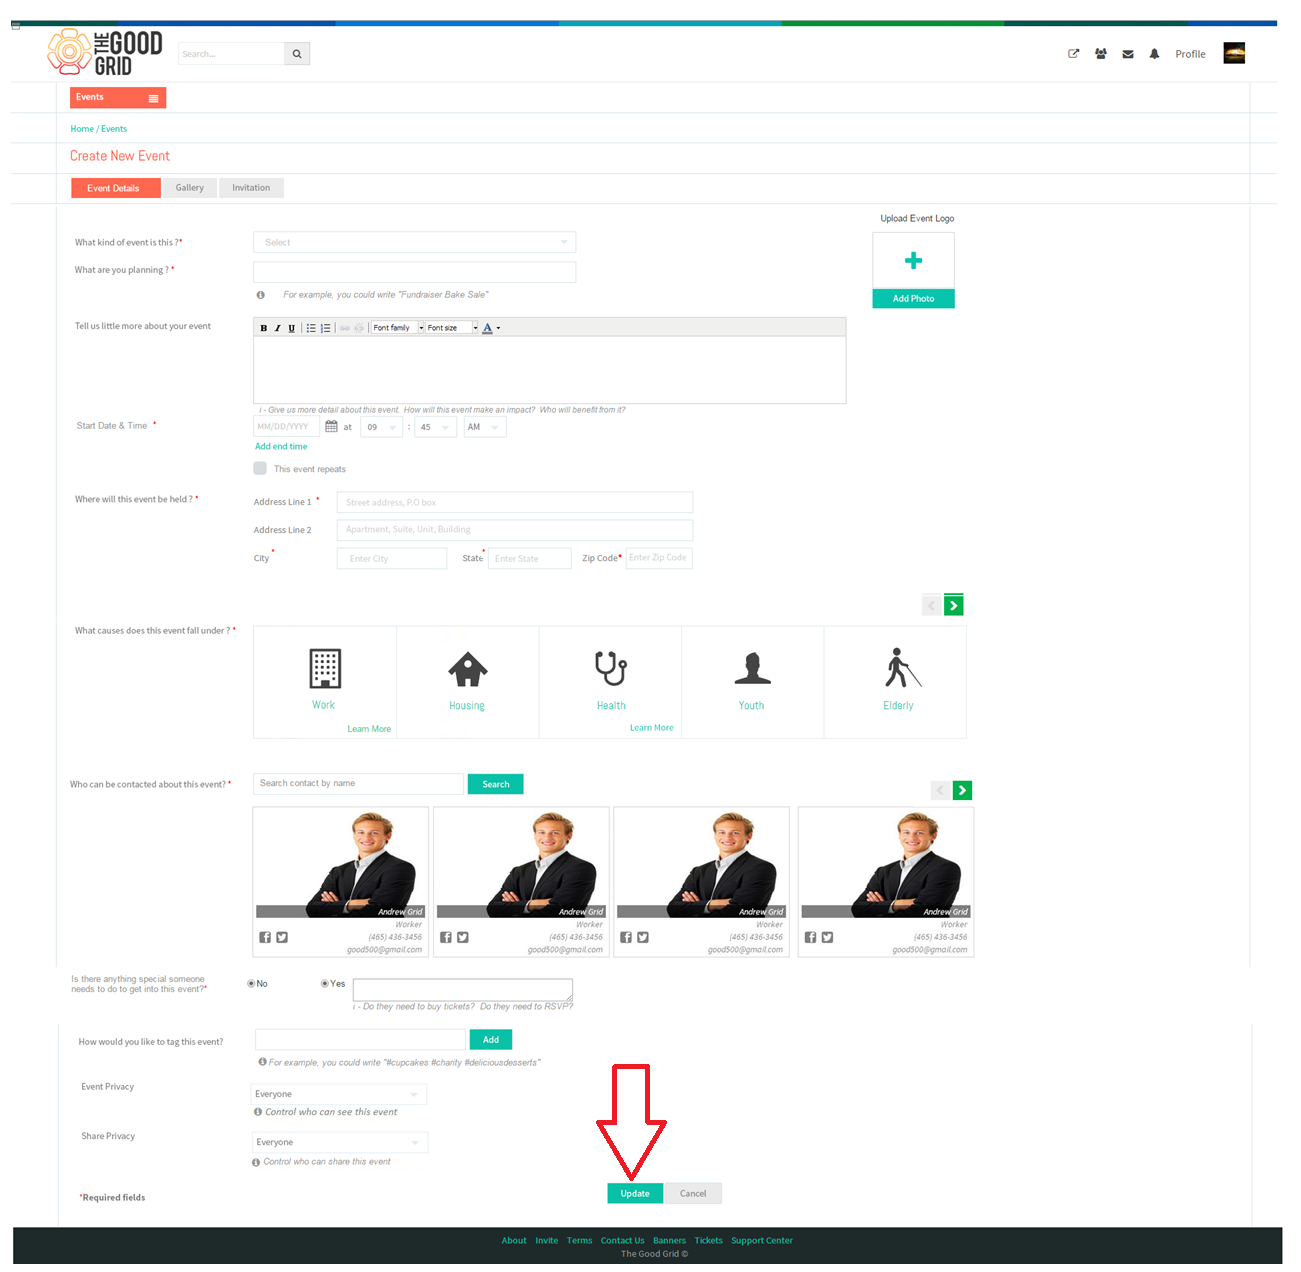
- To create events Keisha needs to enter all the required fields and needs to click on the “Update” button.
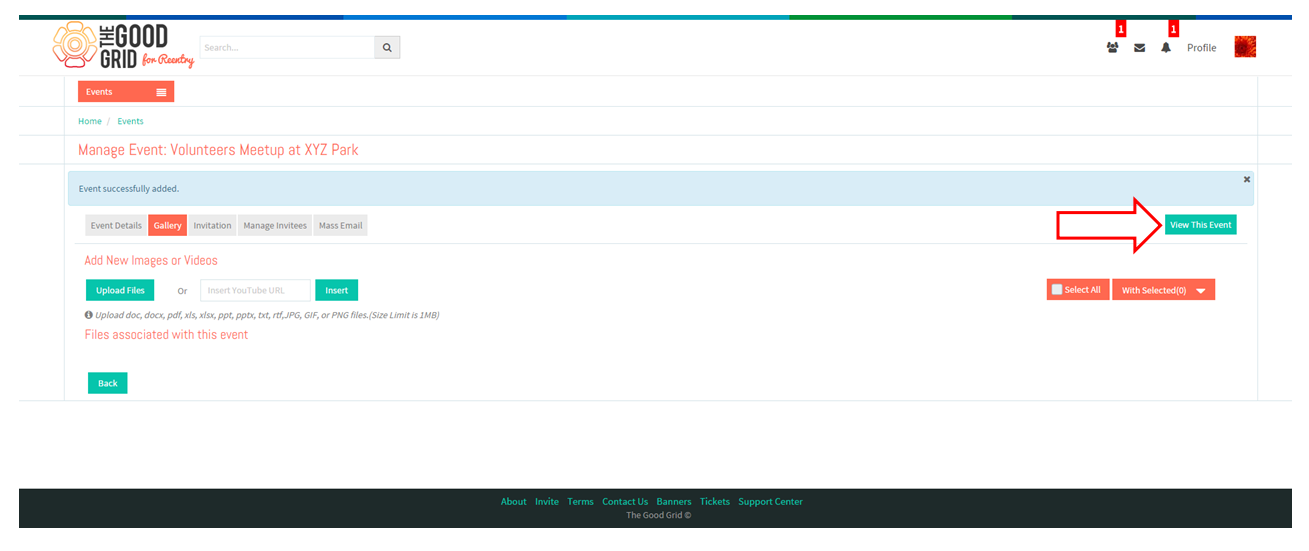
- On clicking “Update” button application takes her to the Gallery screen here she can click "View This Event" button.
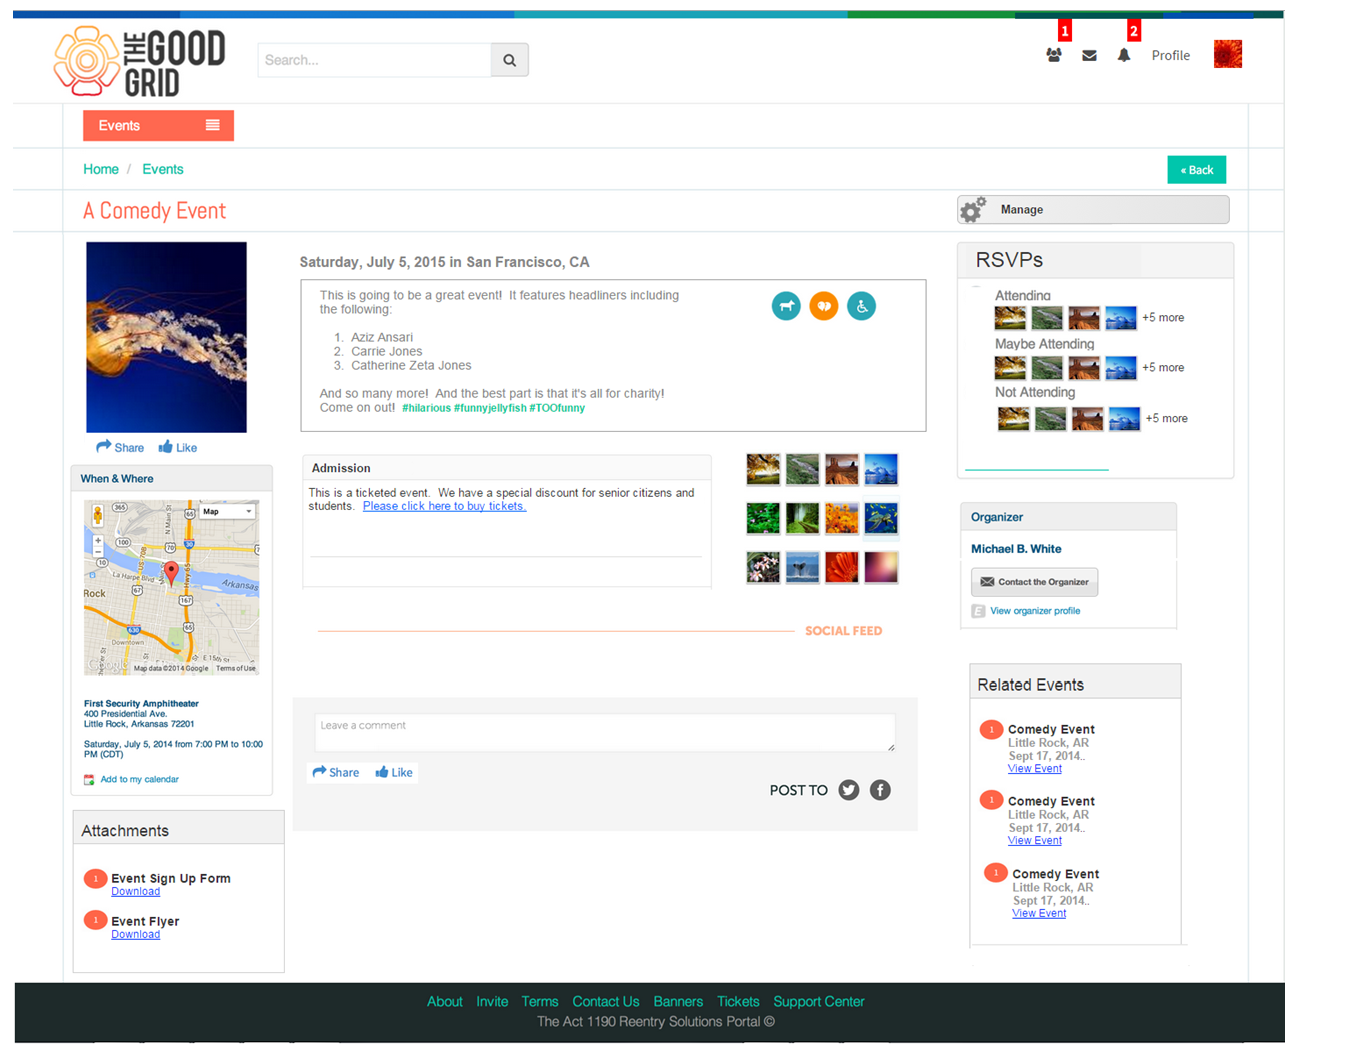
- Keisha can view the event created.
- Once Keisha created the Organization in her TMS profile Workspace will get created in the organization name.
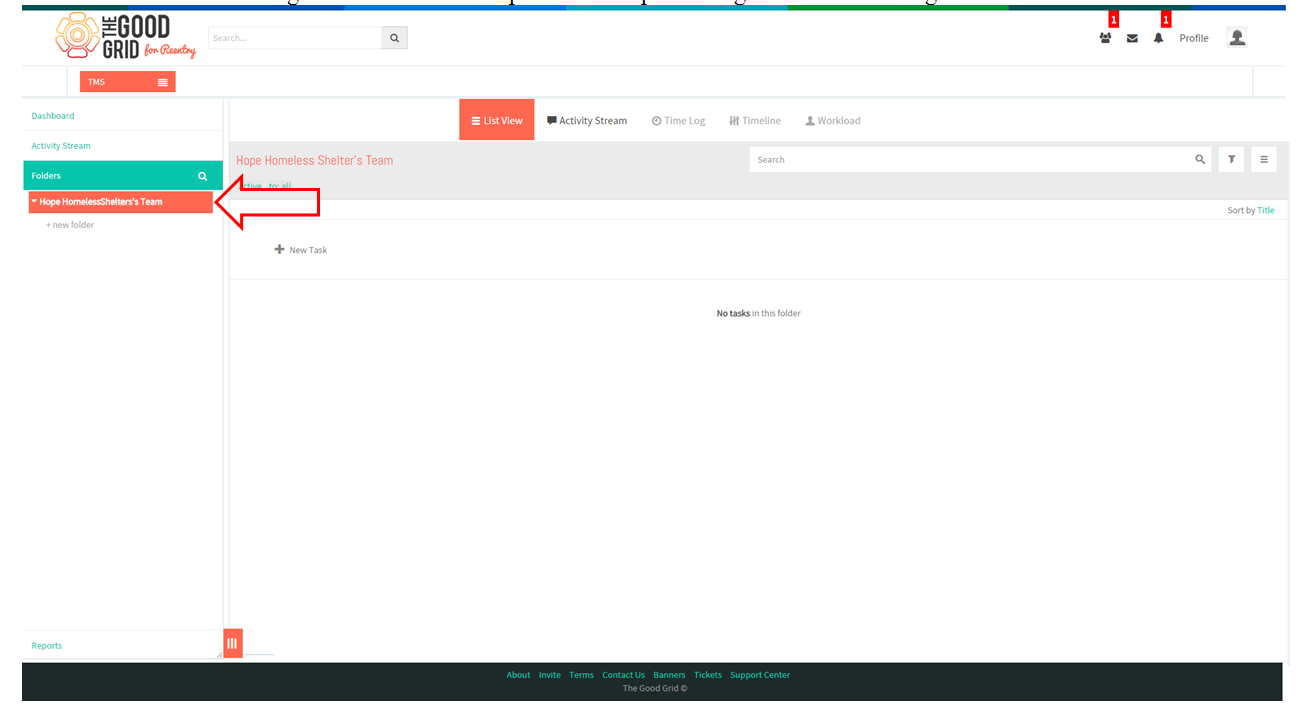
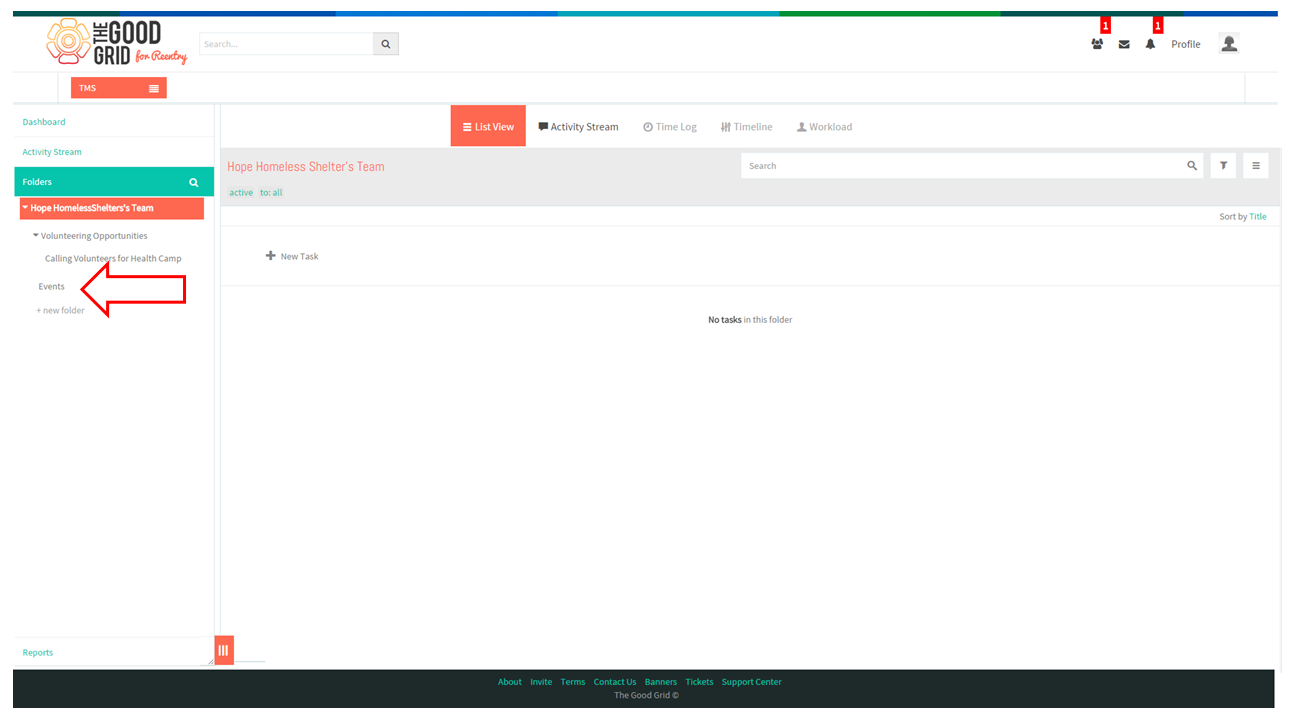
- After Creating the Events in TMS, automatically a Folder will be created in the name of “Events”.
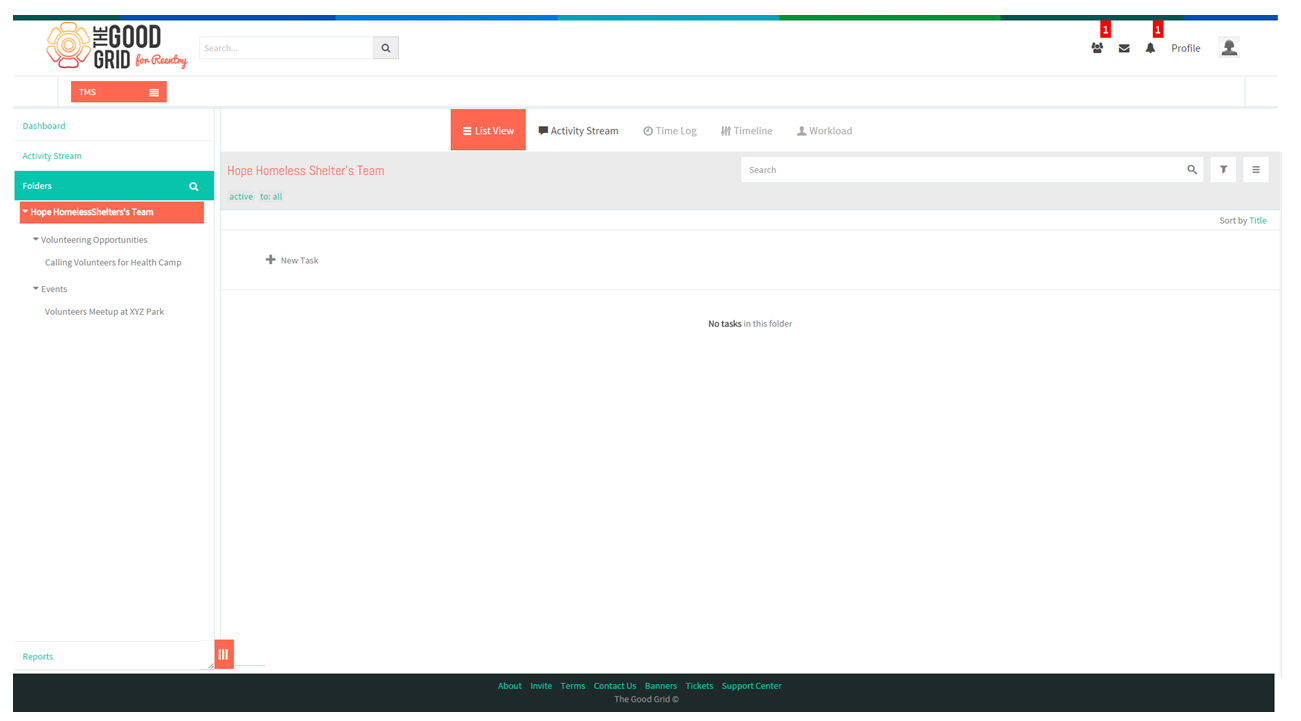
- After creating an Event in TMS application, automatically a sub-folder will be created under volunteering opportunities folder.

