Difference between revisions of "How to create an Organization Page"
(→Applications Screen Flow) |
|||
| (6 intermediate revisions by the same user not shown) | |||
| Line 21: | Line 21: | ||
---- | ---- | ||
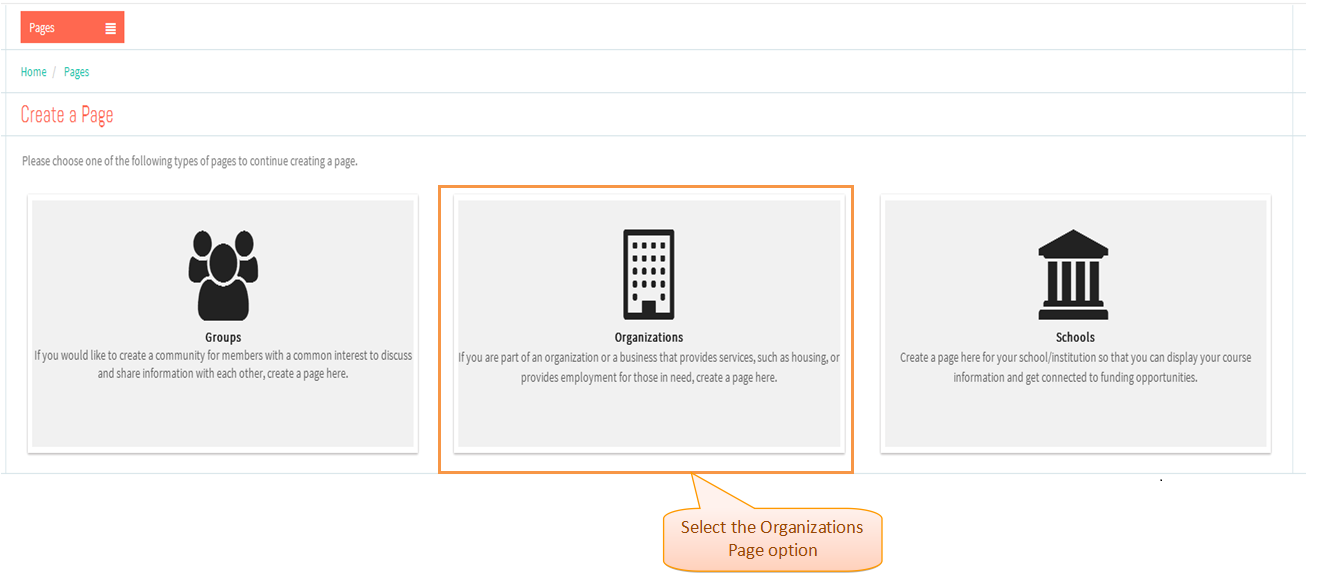
| − | * <big> Select '''Organization'''Page to be created.</big> | + | * <big> Select '''Organization''' Page to be created.</big> |
| − | [[File: | + | [[File:SelectingOrgOption.png]] |
---- | ---- | ||
| Line 56: | Line 56: | ||
| − | [[File: | + | [[File:LocationsWizard.png]] |
---- | ---- | ||
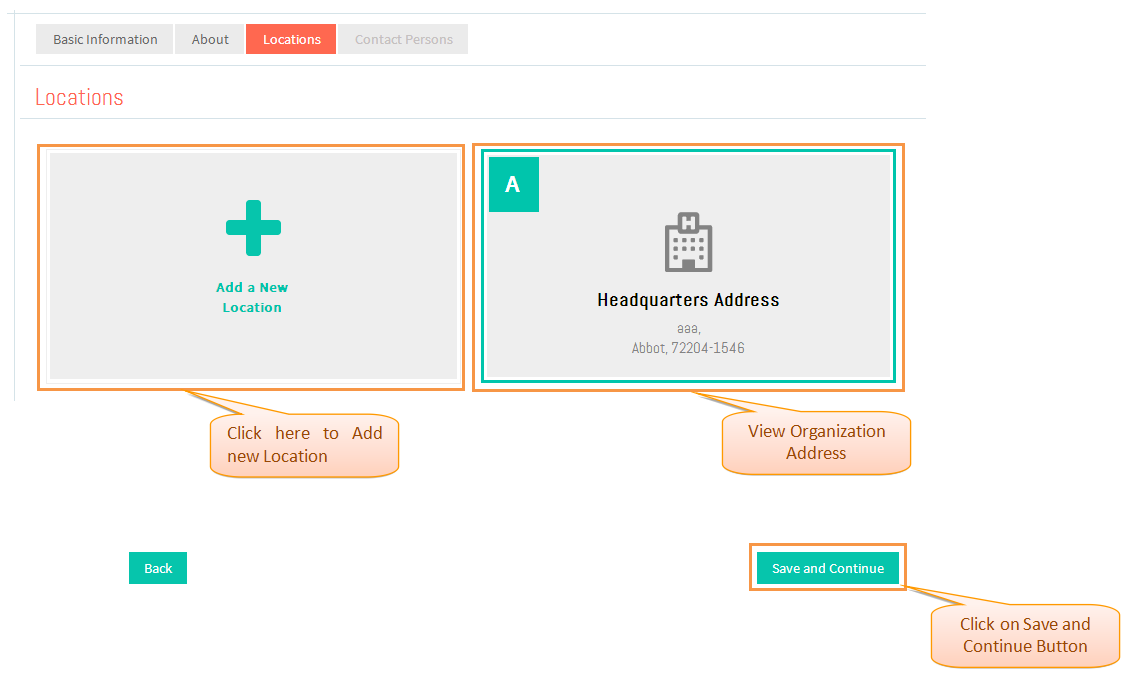
| + | * <big> View and Add Locations in ''''Locations'''' tab of Pages Wizard and click on '''Save and Continue''' button.</big> | ||
| + | [[File:LocationsWizard.png]] | ||
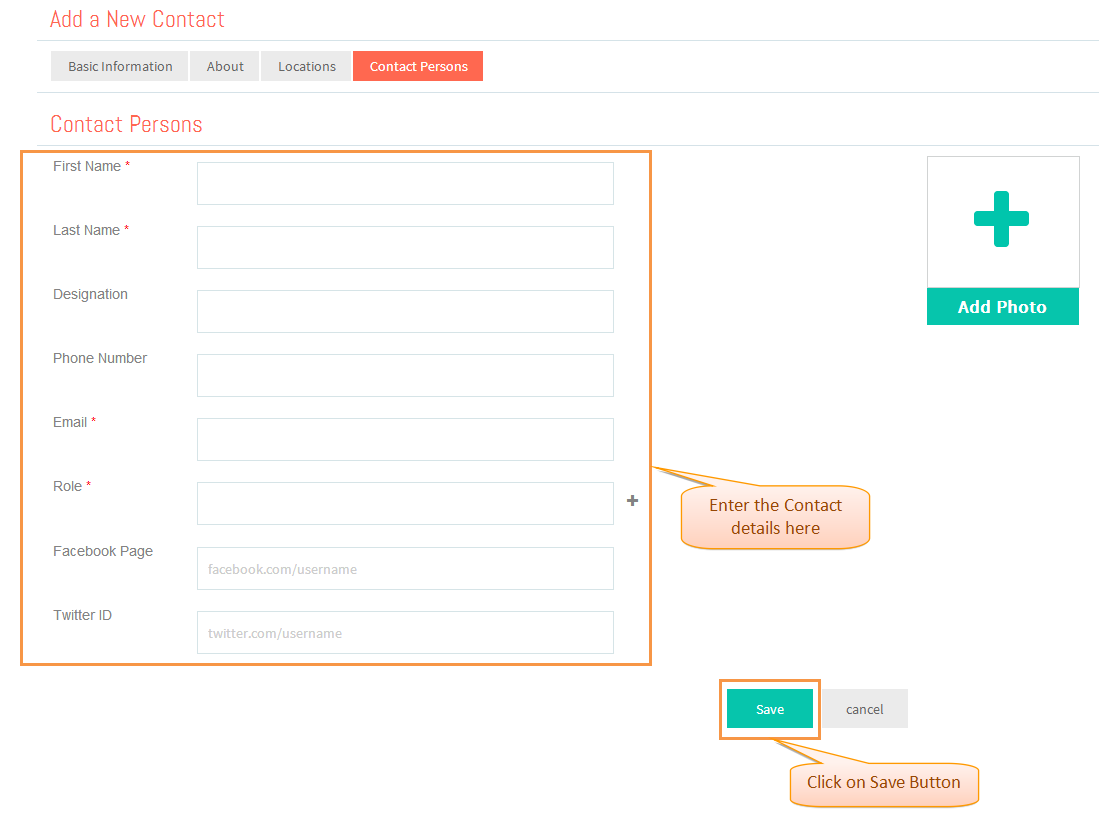
| + | * <big> Add Contacts in ''''Contacts'''' tab of Pages Wizard and click on '''Save and Continue''' button.</big> | ||
| + | [[File:ContactWizard.png]] | ||
| + | |||
| + | |||
| + | ---- | ||
| + | |||
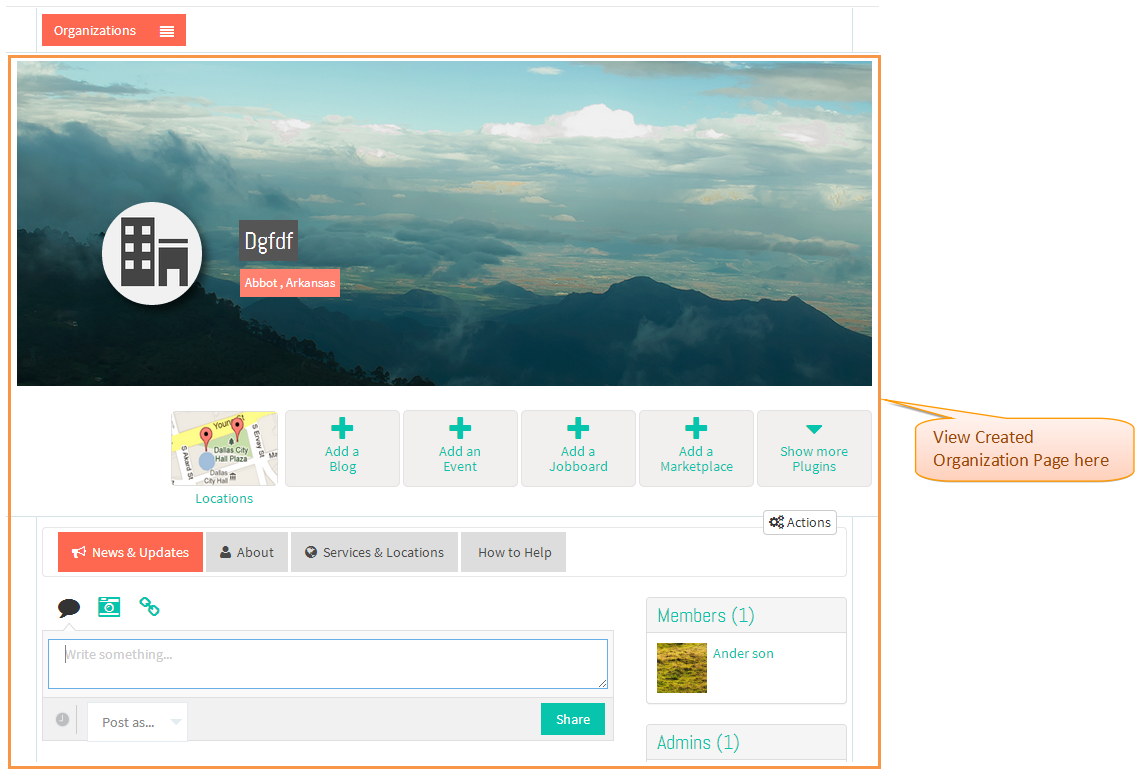
| + | * <big> View created Organization Page.</big> | ||
| + | |||
| + | |||
| + | [[File:ViewOrgPage.png]] | ||
| + | |||
| + | |||
| + | ---- | ||
== '''User Actions Presentation''' == | == '''User Actions Presentation''' == | ||
| Line 76: | Line 91: | ||
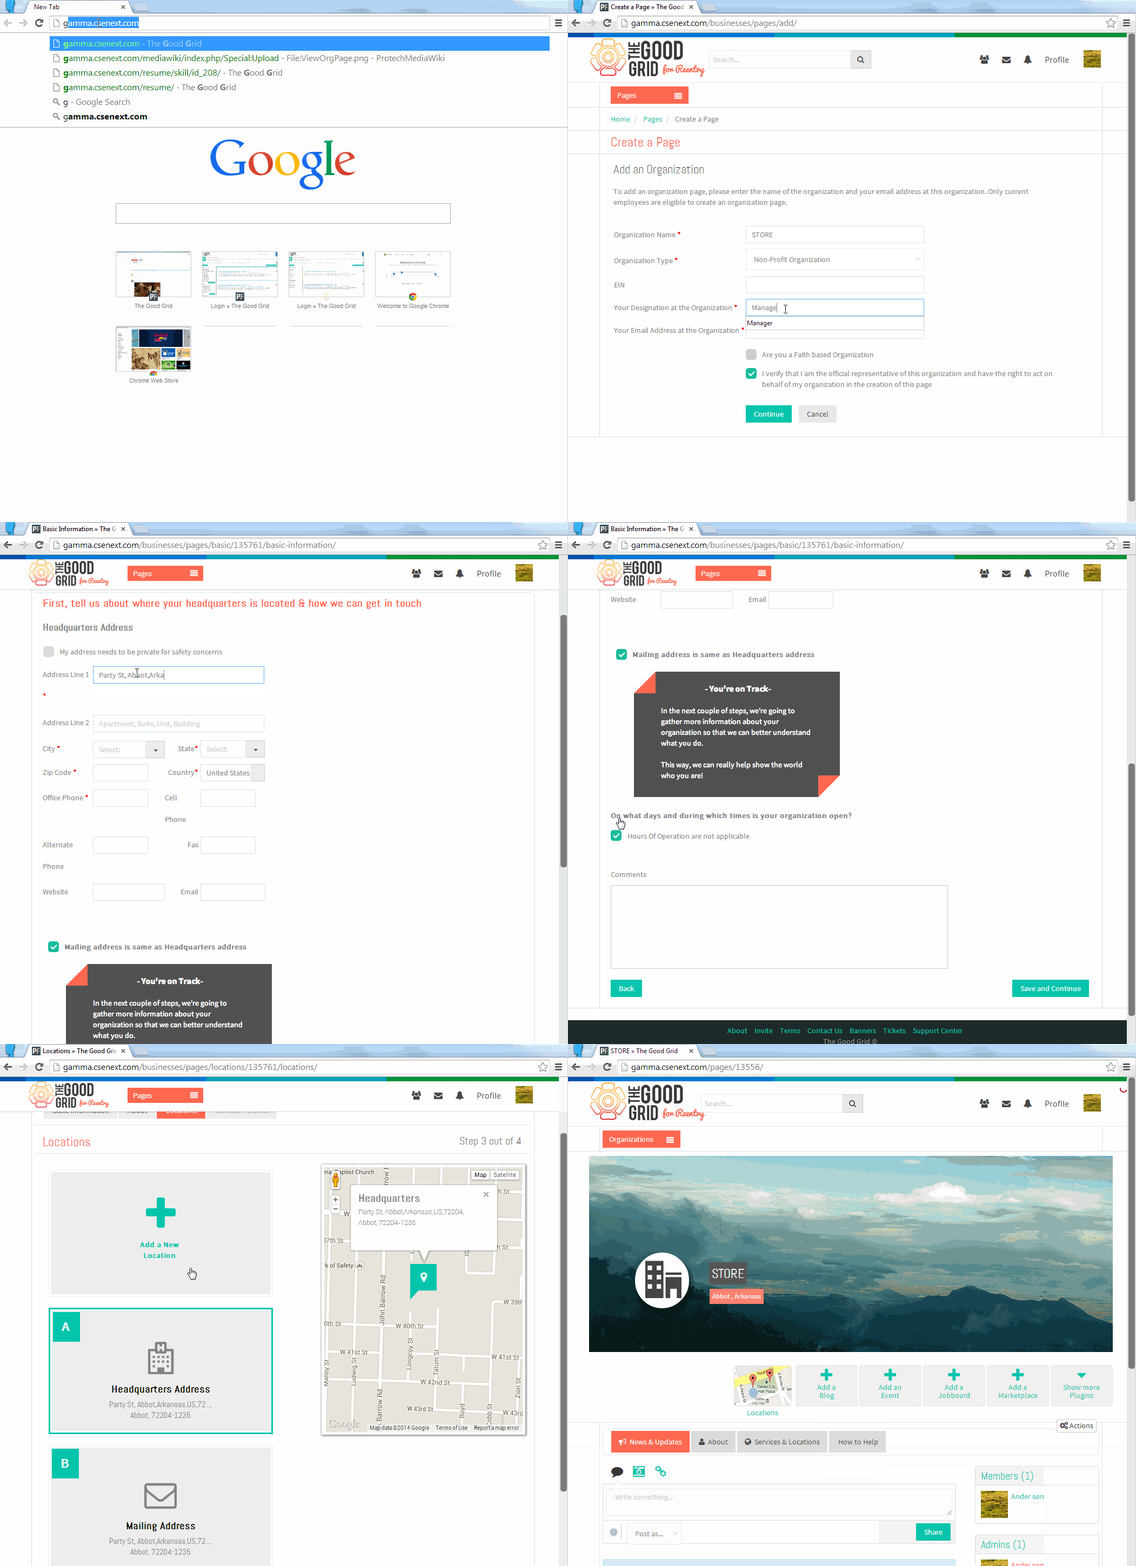
| − | [[File: | + | [[File:CreateOrgPagePPT.gif]] |
Latest revision as of 06:23, 24 December 2014
Actions Work Flow
Applications Screen Flow
- Click on the Create a Page button.
- Select Organization Page to be created.
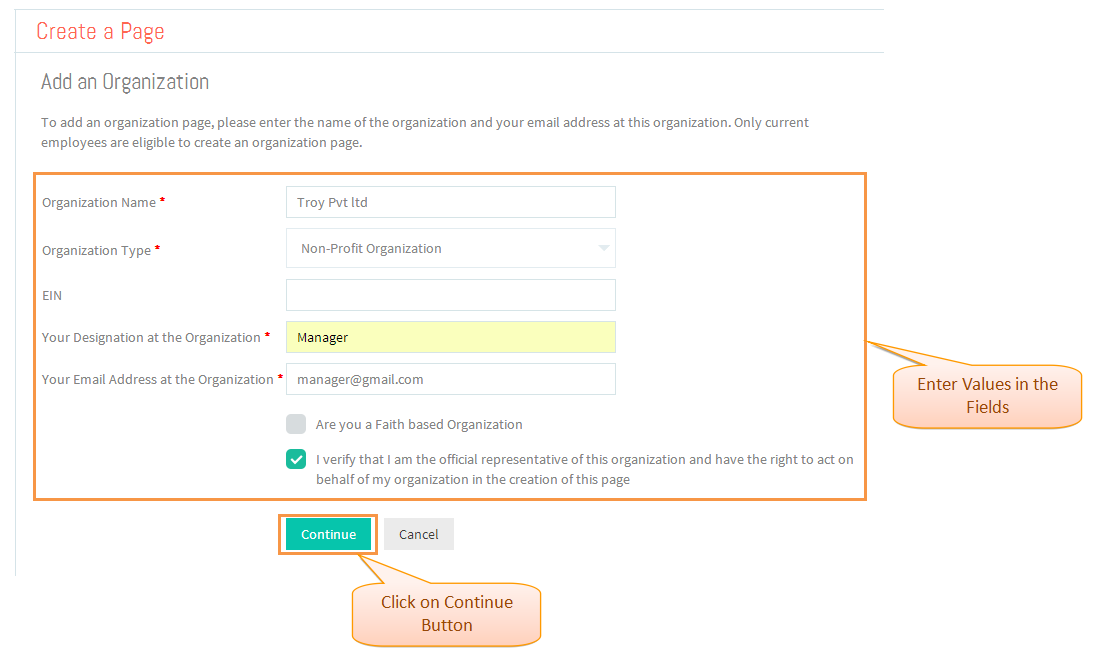
- Enter Values in 'Add an Organization' screen and click on Continue button.
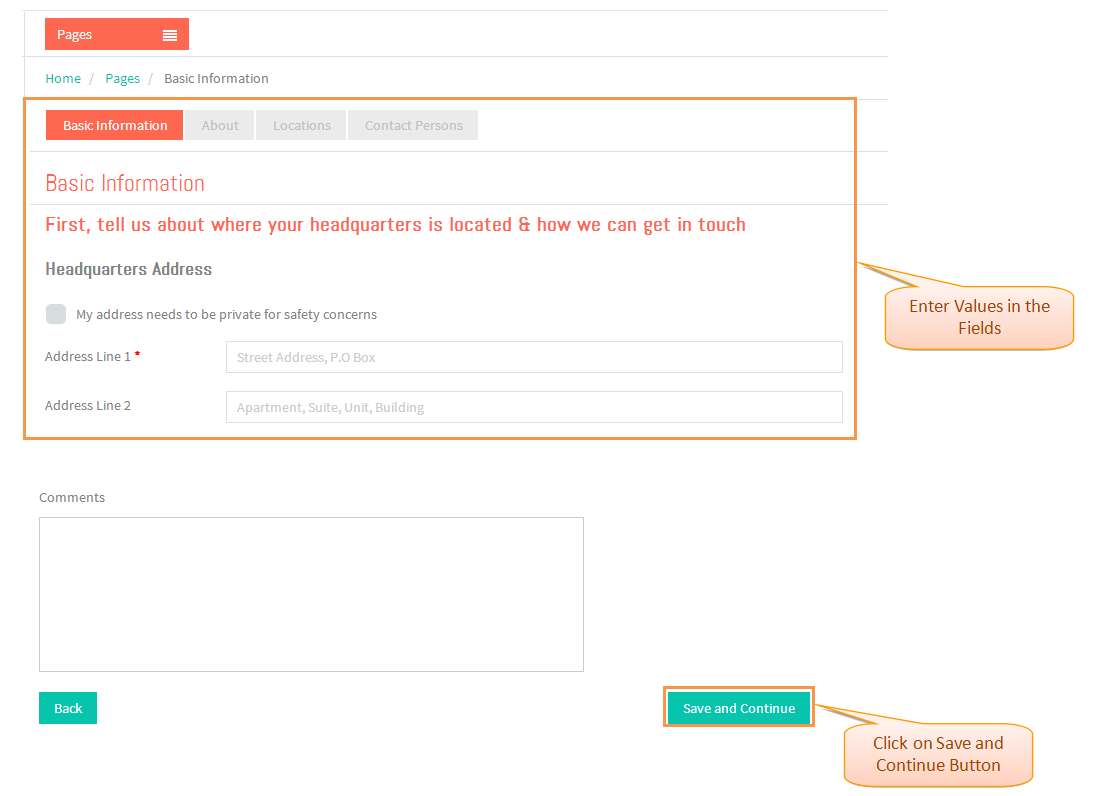
- Enter Values in 'Basic Information' tab of Pages Wizard and click on Save and Continue button.
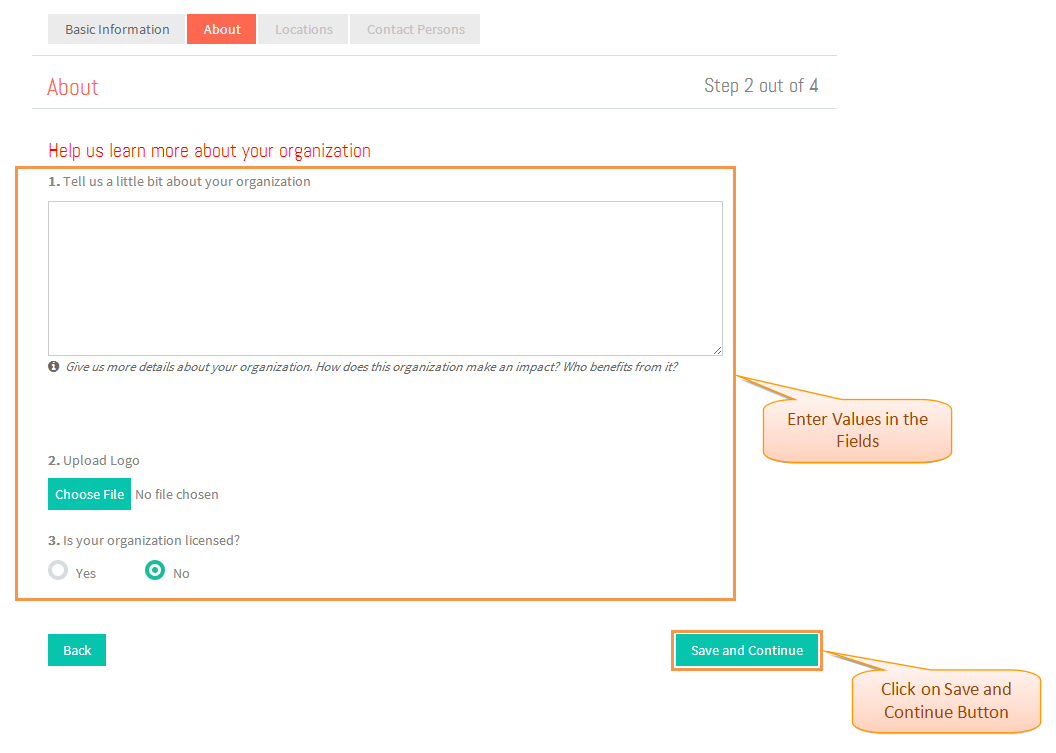
- Enter Values in 'About' tab of Pages Wizard and click on Save and Continue button.
- View and Add Locations in 'Locations' tab of Pages Wizard and click on Save and Continue button.
- View and Add Locations in 'Locations' tab of Pages Wizard and click on Save and Continue button.
- Add Contacts in 'Contacts' tab of Pages Wizard and click on Save and Continue button.
- View created Organization Page.
User Actions Presentation


