Difference between revisions of "Volunteer Process"
(Created page with " '''<code>...") |
|||
| (10 intermediate revisions by the same user not shown) | |||
| Line 4: | Line 4: | ||
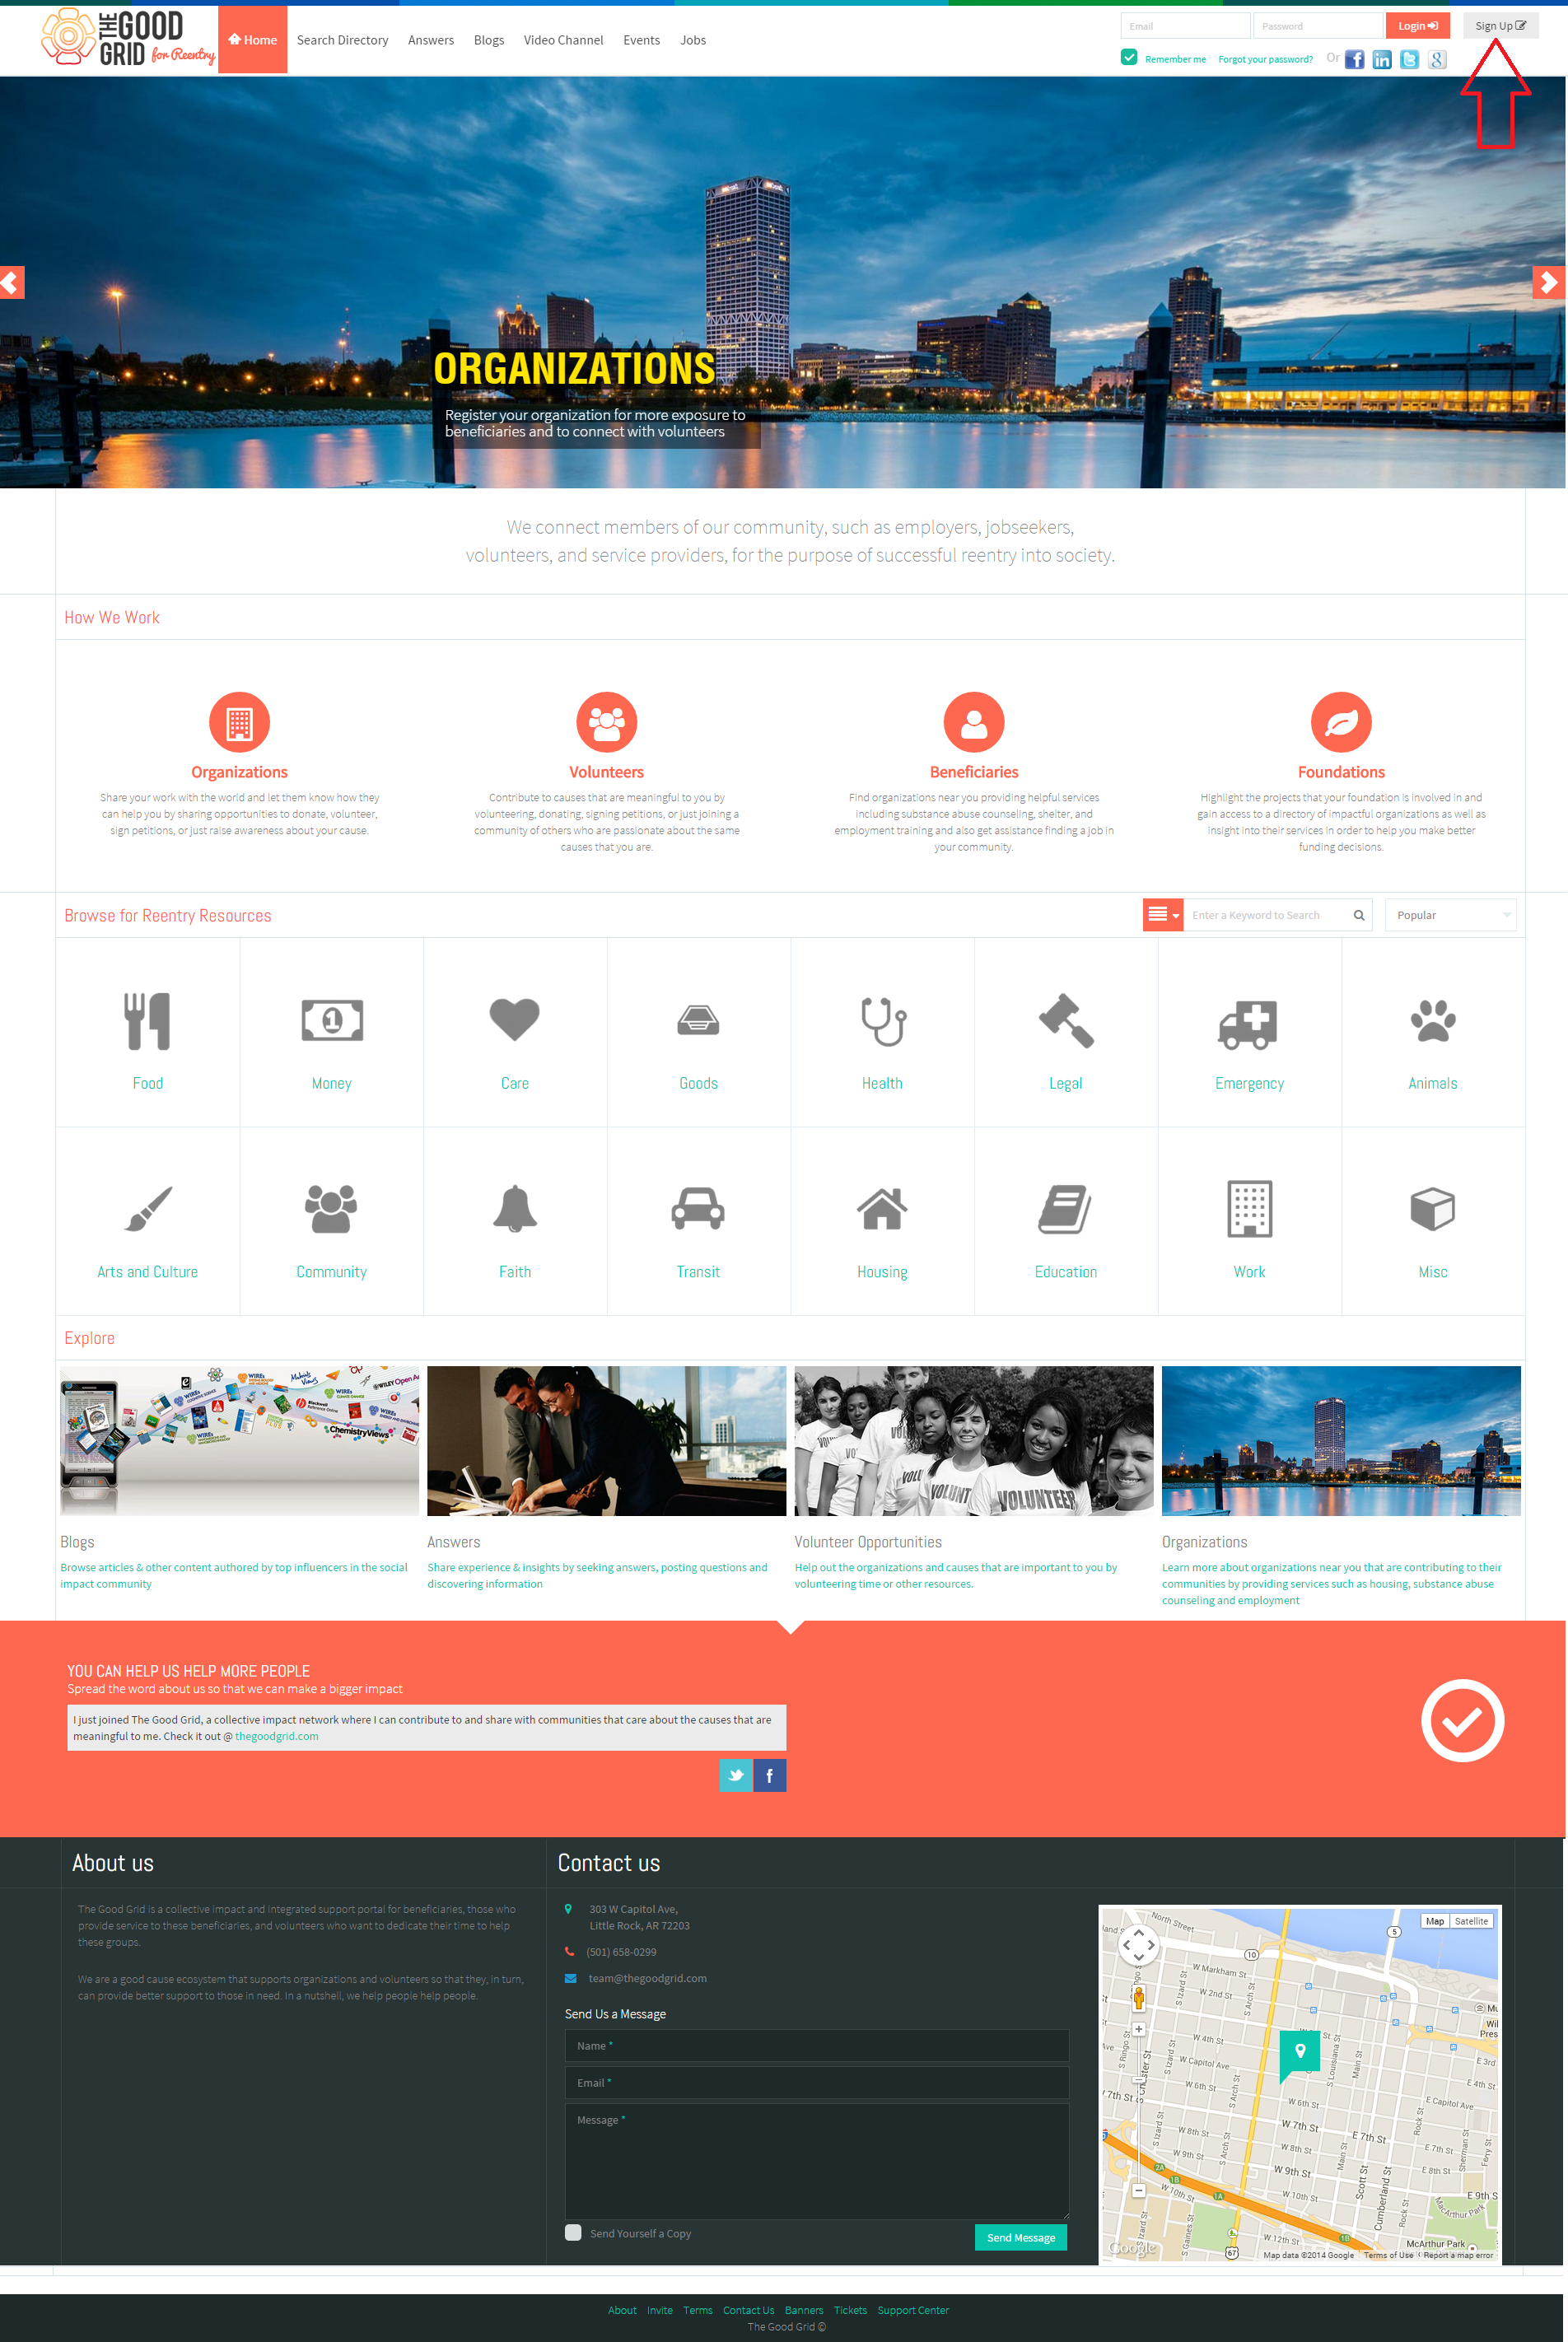
| − | * | + | * Jim needs to enter the URL in the chrome browser and it takes him to the Landing Screen. For creating an account he needs to click Sign-up button. |
| − | + | [[File:V-1.png]] | |
| − | [[File: | + | |
---- | ---- | ||
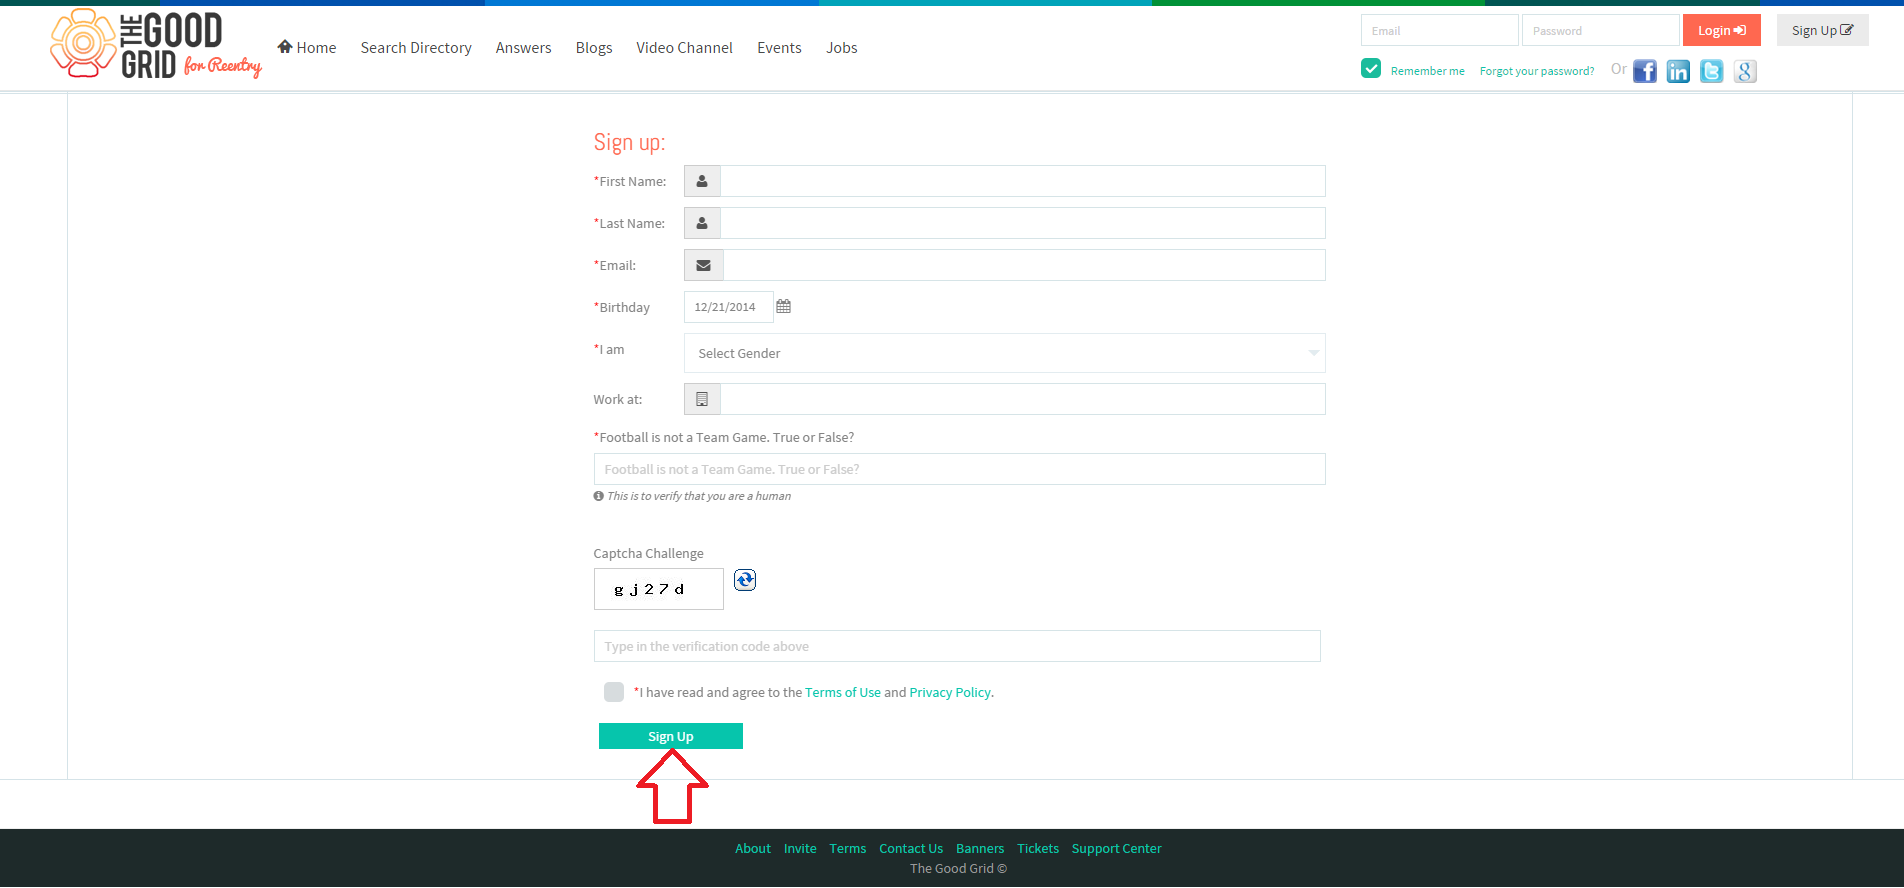
| − | * | + | * On clicking sign-up button, Jim is redirected to the sign-up screen. |
| + | * In sign-up screen he enters all mandatory information and clicks on sign-up button. | ||
| − | [[File: | + | [[File:V-2.png]] |
---- | ---- | ||
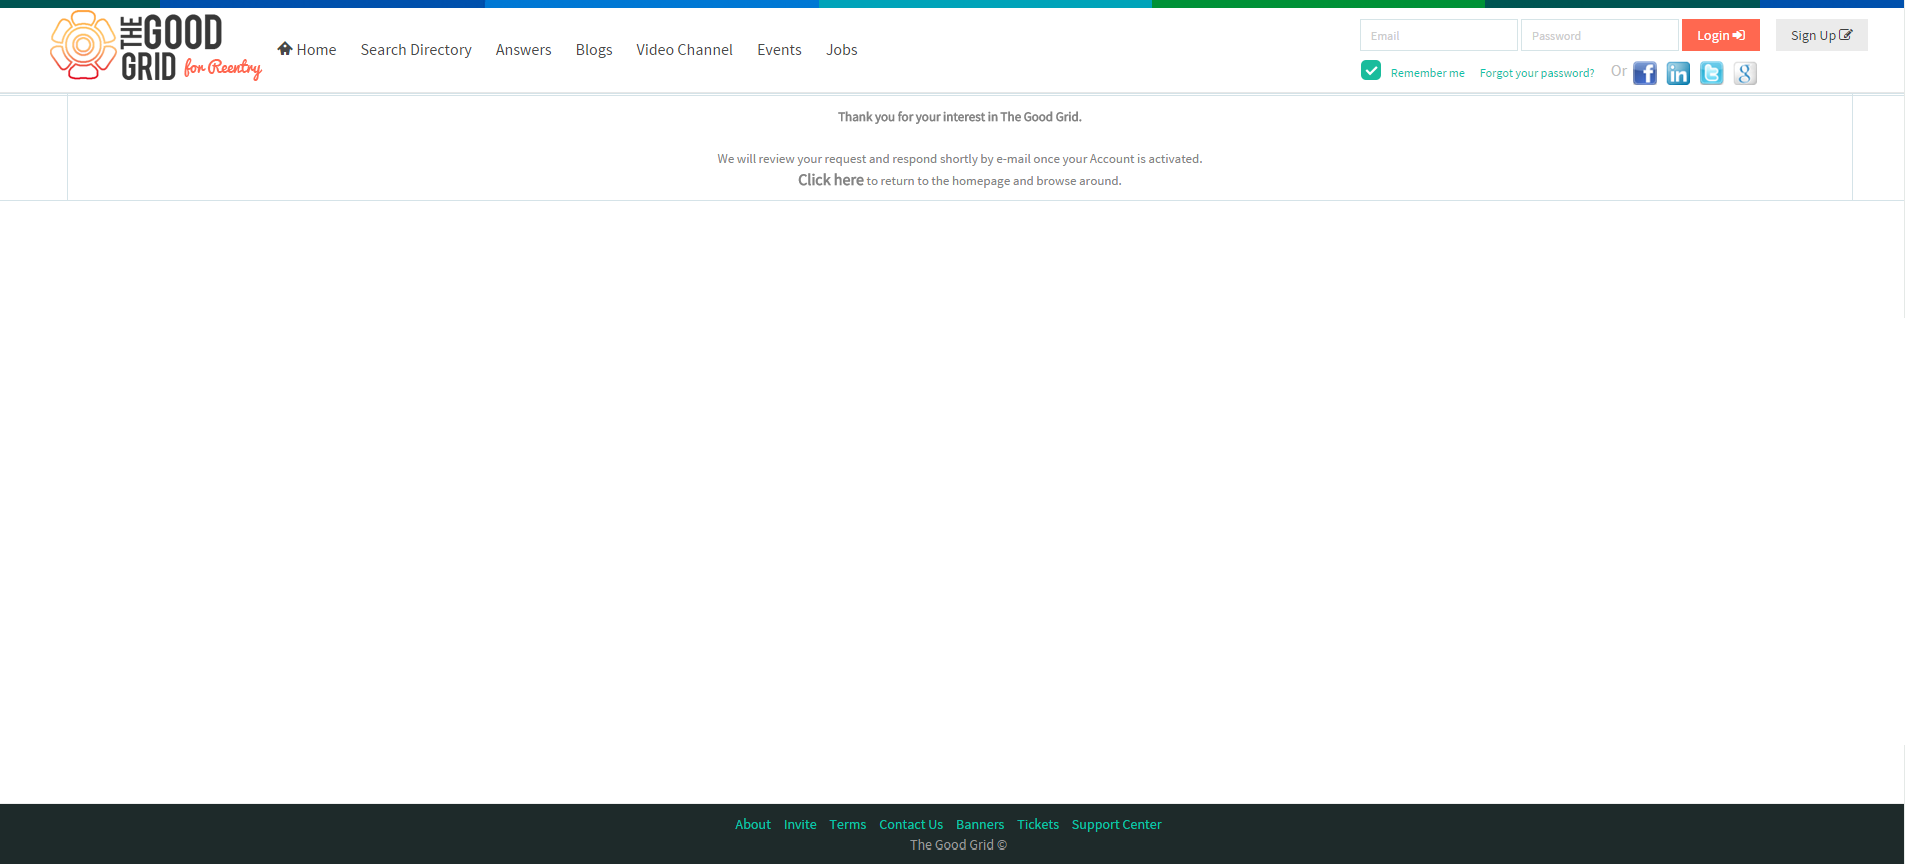
| − | * | + | * After clicking on sign-up button, screen displays the message for successful sign-up process & the registration process will be kept as pending for Administrator approval. |
| − | [[File: | + | [[File:V-3.png]] |
---- | ---- | ||
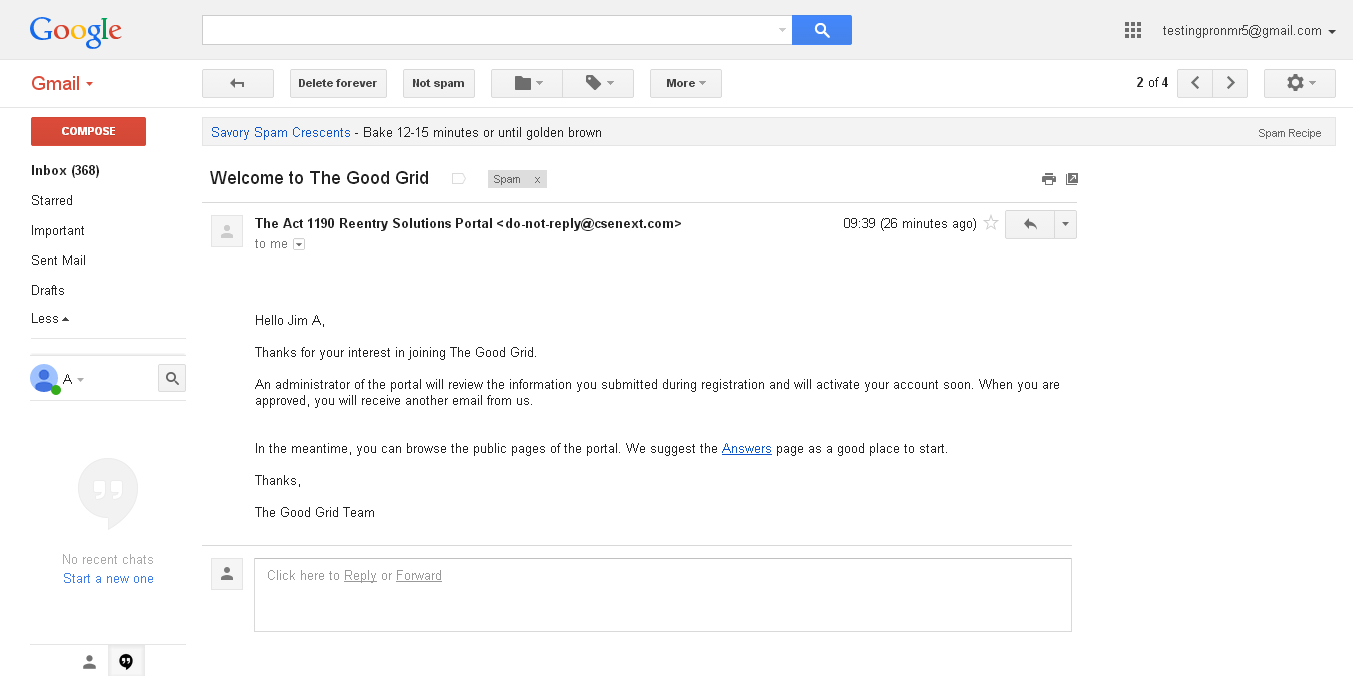
| − | * | + | * After that the Jim will receive a confirmation mail for sign-up in Good Grid in the registered email. |
| − | [[File: | + | [[File:V-4_a.PNG]] |
---- | ---- | ||
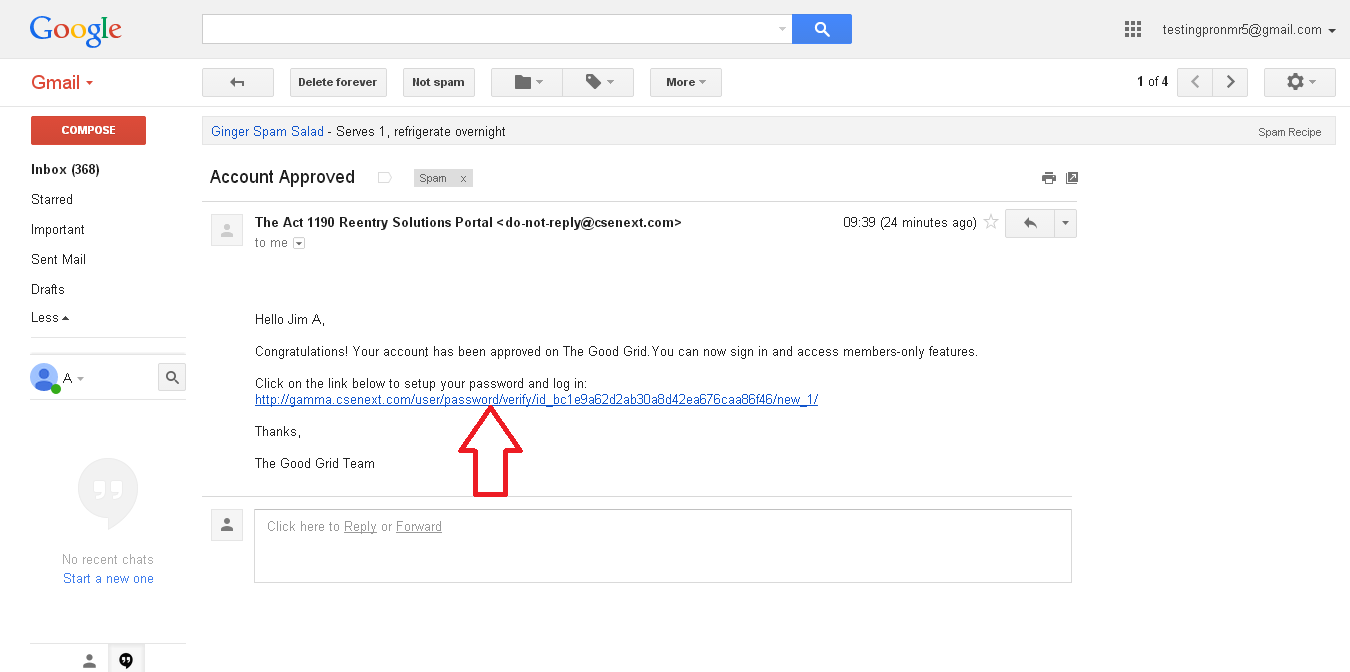
| − | * | + | * Once the Administrator approves the user, Jim will receive the Account Activation mail in the registered mail address. |
| − | [[File: | + | [[File:V-5_a.PNG]] |
---- | ---- | ||
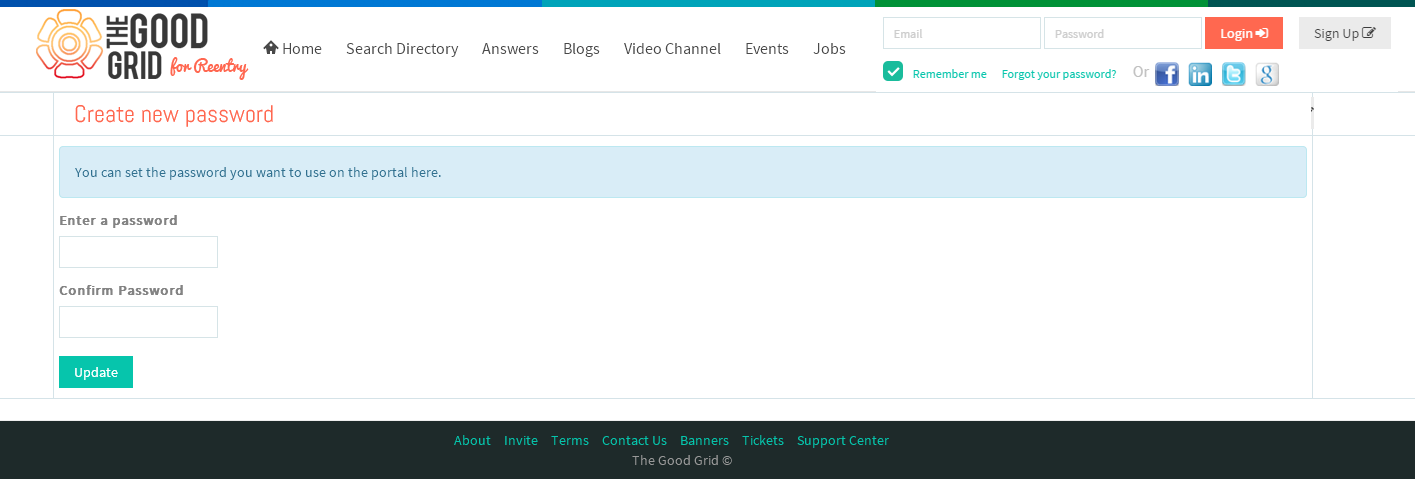
| − | * | + | * Jim needs to click on the received link in activation mail & application will take him to the “Create New Password” screen where he can set the password for his account. |
| + | * Here Jim enters the Password and Confirm Password & clicks on “Update” button. | ||
| − | + | [[File:V-6_a.PNG]] | |
| + | ---- | ||
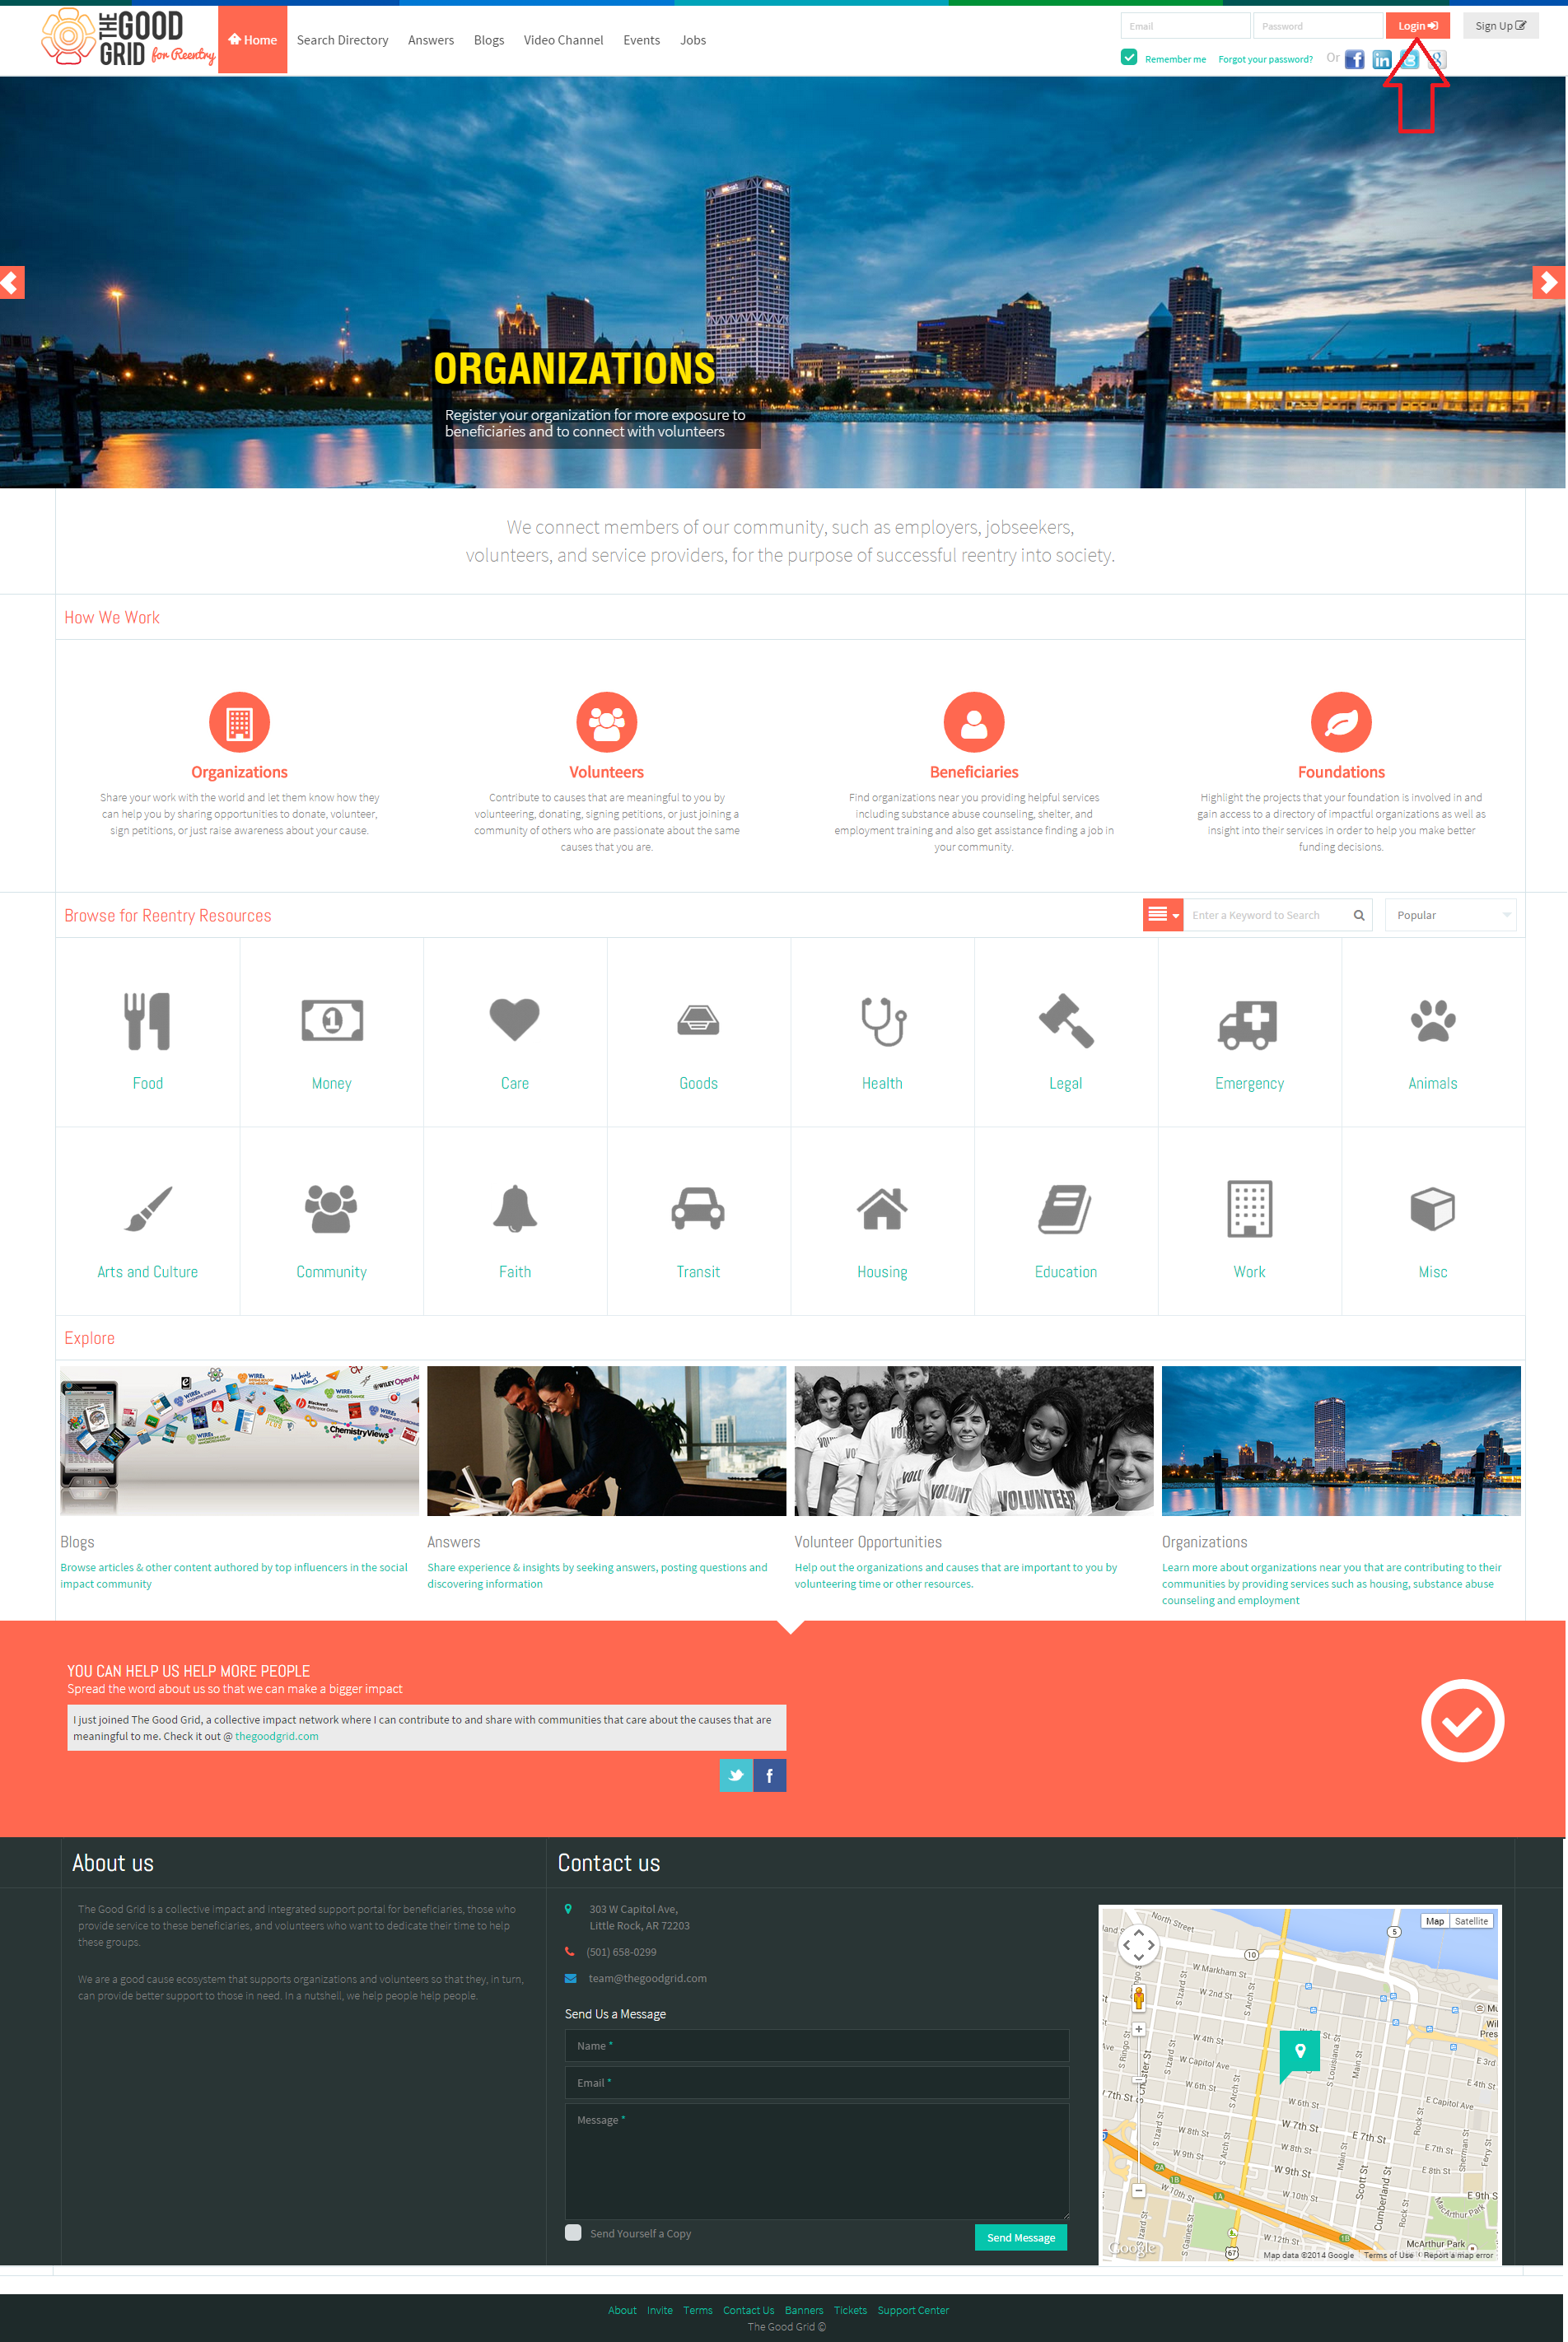
| − | + | * After clicking on “Update” button, landing screen will be displayed. | |
| − | + | * Here Jim needs to provide valid Email and Password & click on Login button. | |
| − | + | [[File:V-7.png]] | |
| + | ---- | ||
| − | |||
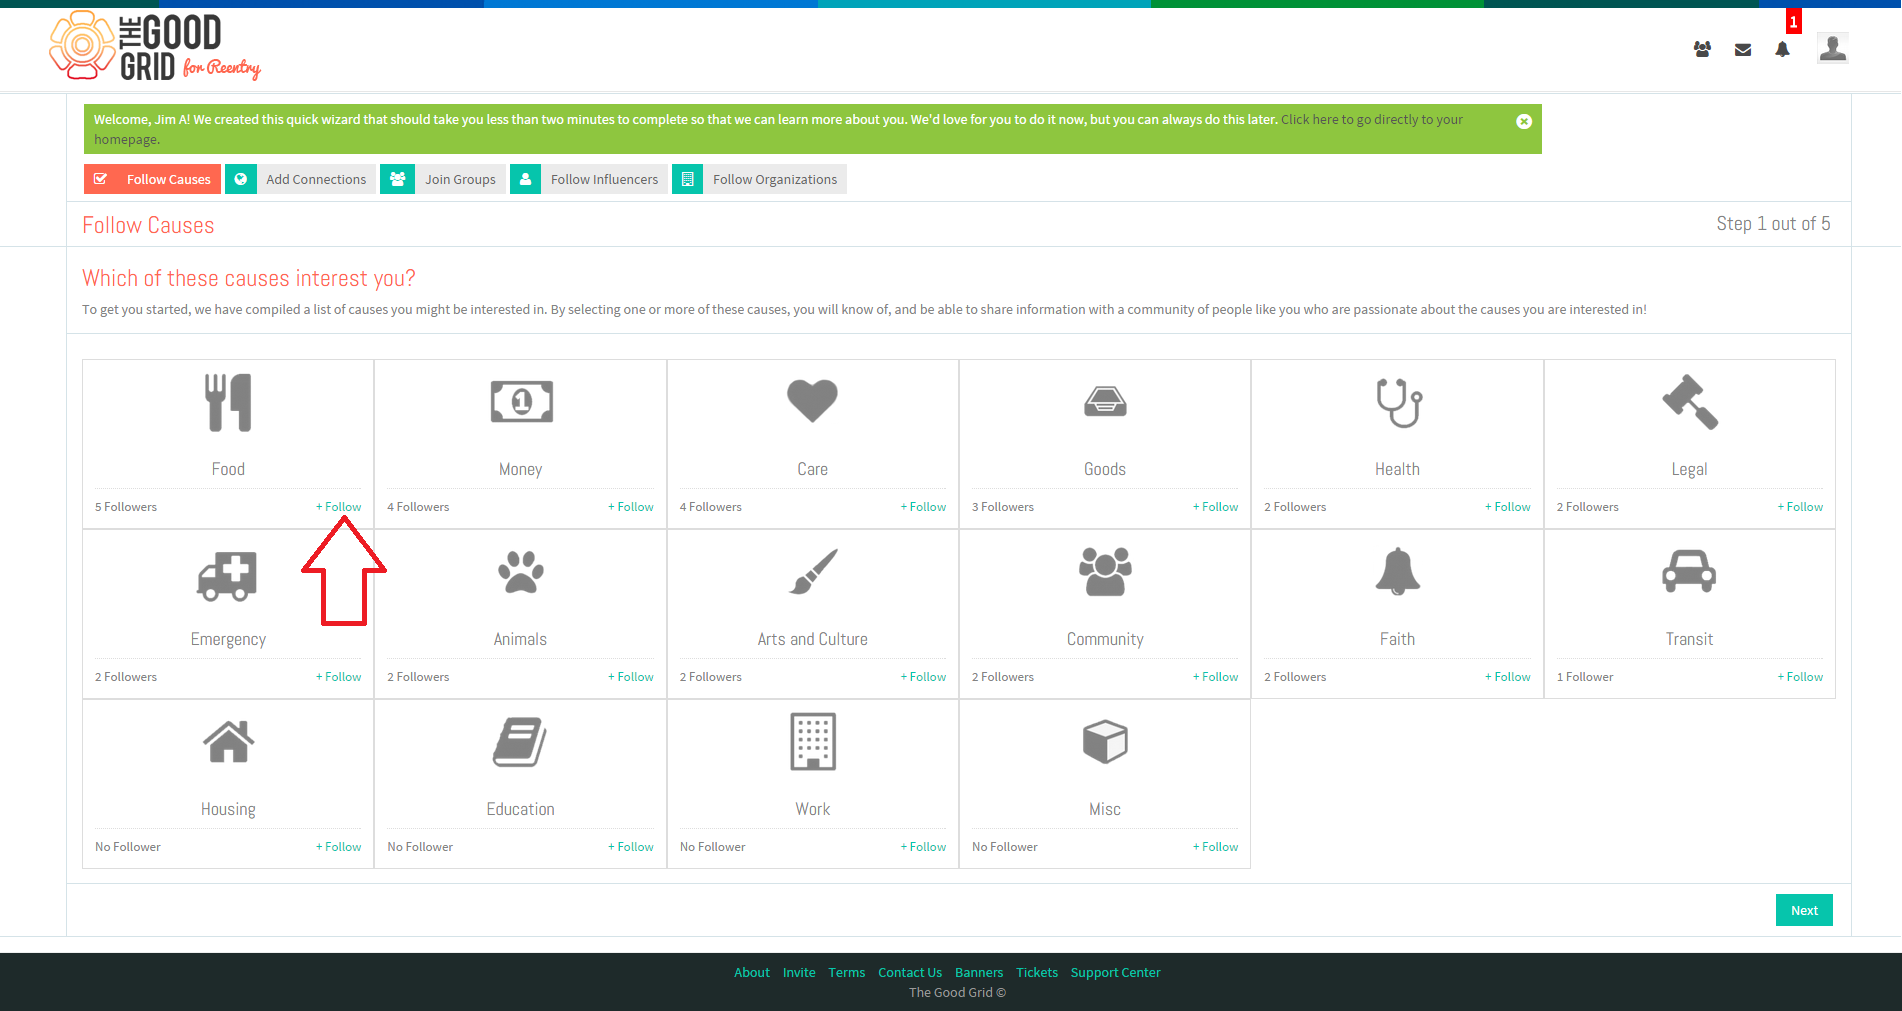
| + | * After that application will take him to the First Run wizard. | ||
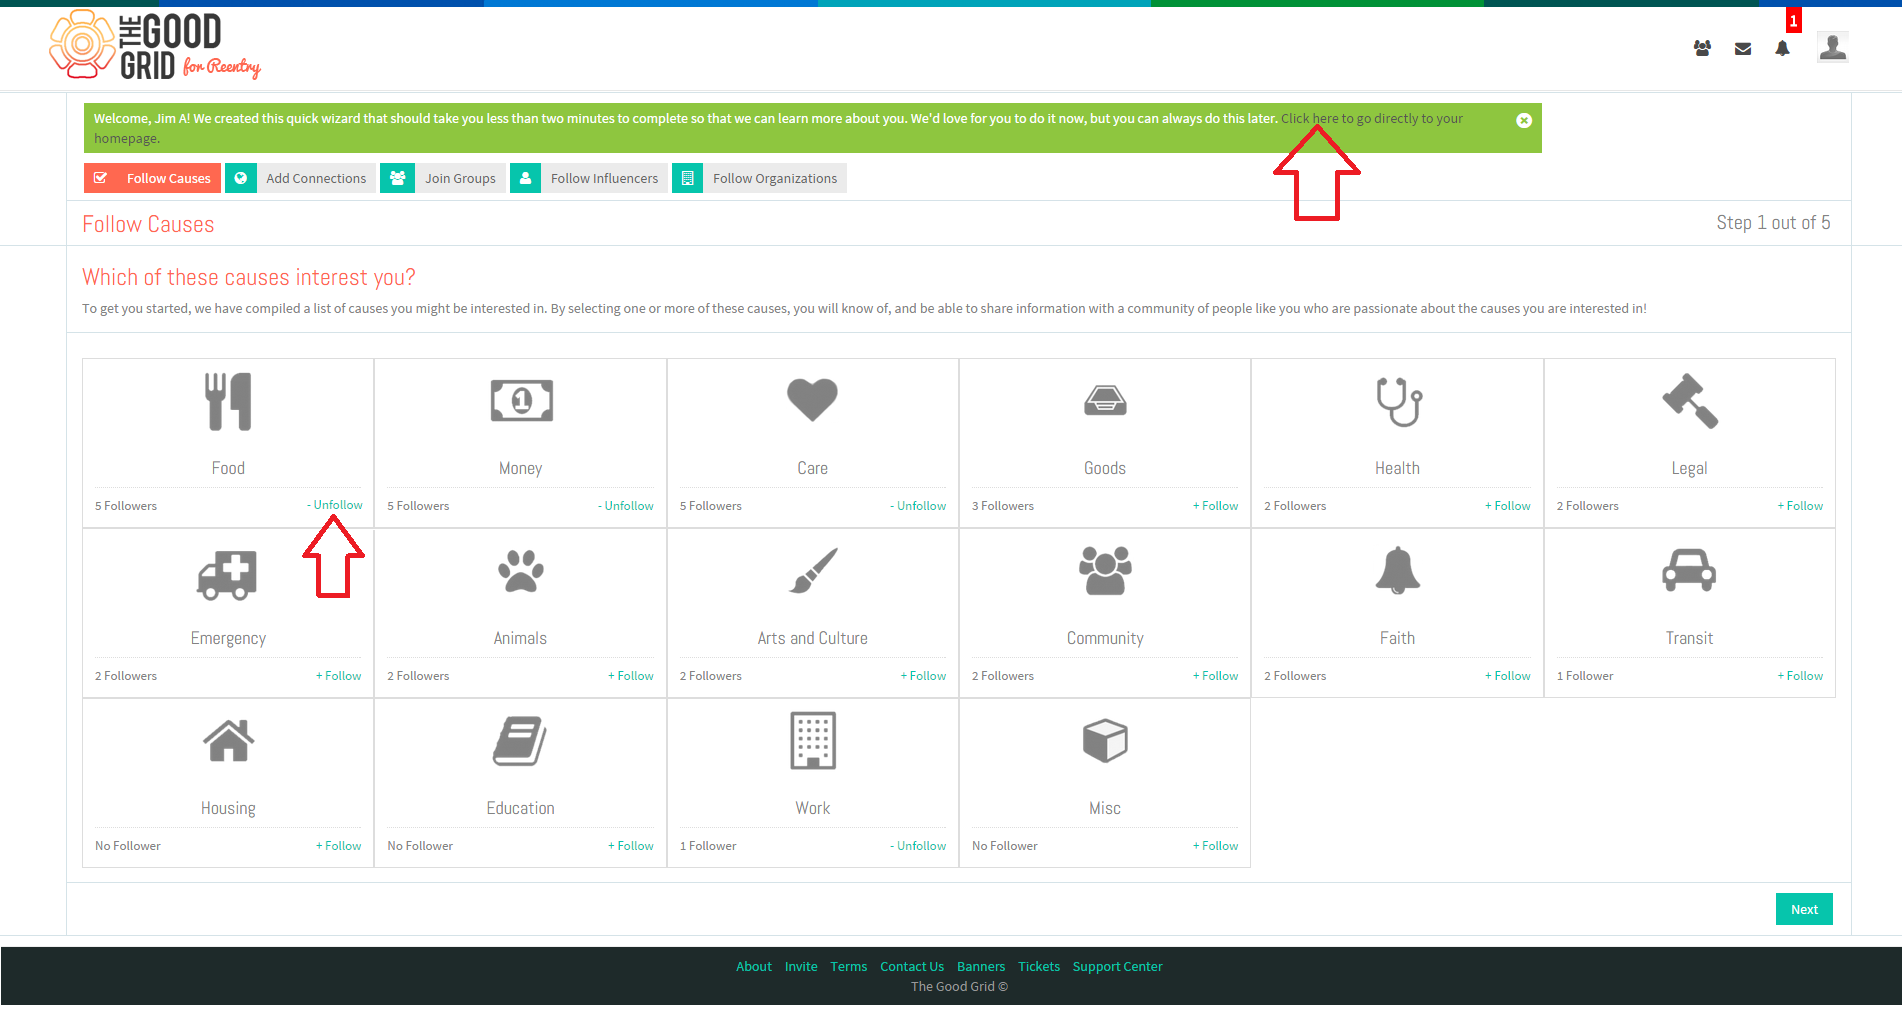
| + | * To follow any cause, Jim needs to click on “Follow” link. | ||
| − | [[File: | + | [[File:V-8.png]] |
---- | ---- | ||
| − | * | + | * Once he will click the Follow link, the “Follow” will change to “Un-follow”. |
| − | + | * Jim can also skip the first run wizard and he can directly go to his home page by clicking the link in the top banner. | |
| − | * | + | |
| − | [[File: | + | [[File:V-9-a.png]] |
---- | ---- | ||
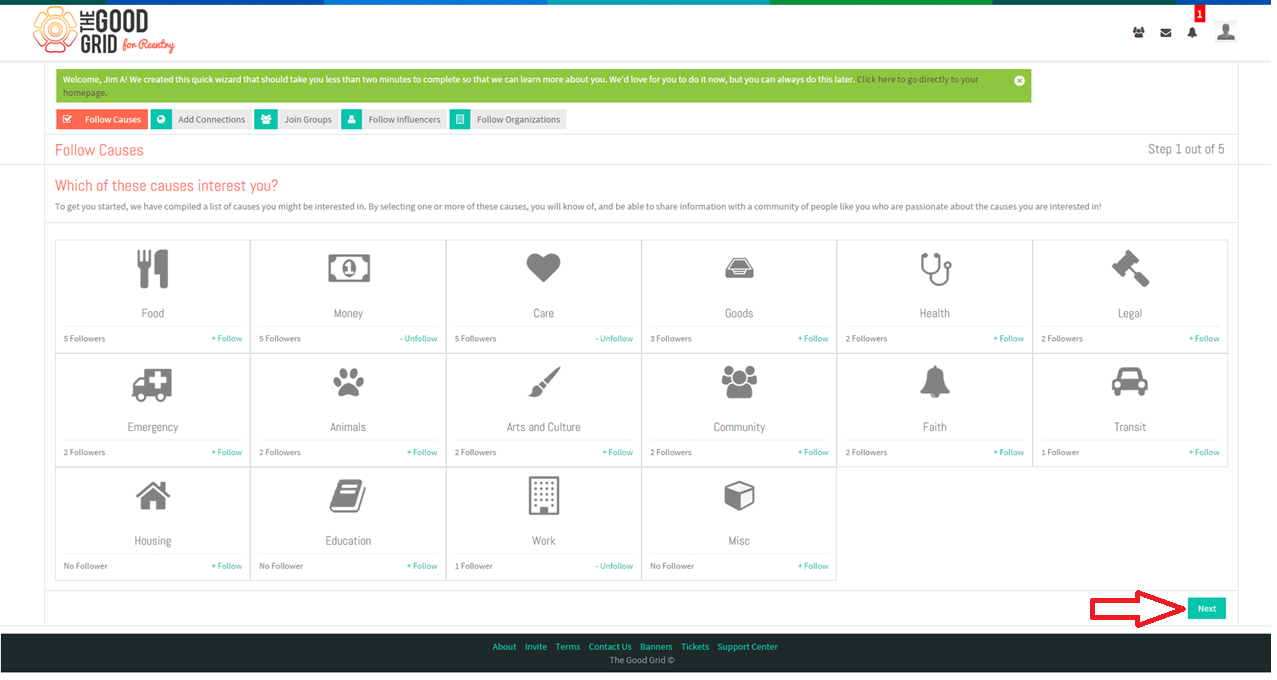
| − | * | + | * After following the Causes, to move to next section Jim needs to click on Next button as shown in the screen. |
| − | + | [[File:V-10.png]] | |
| + | ---- | ||
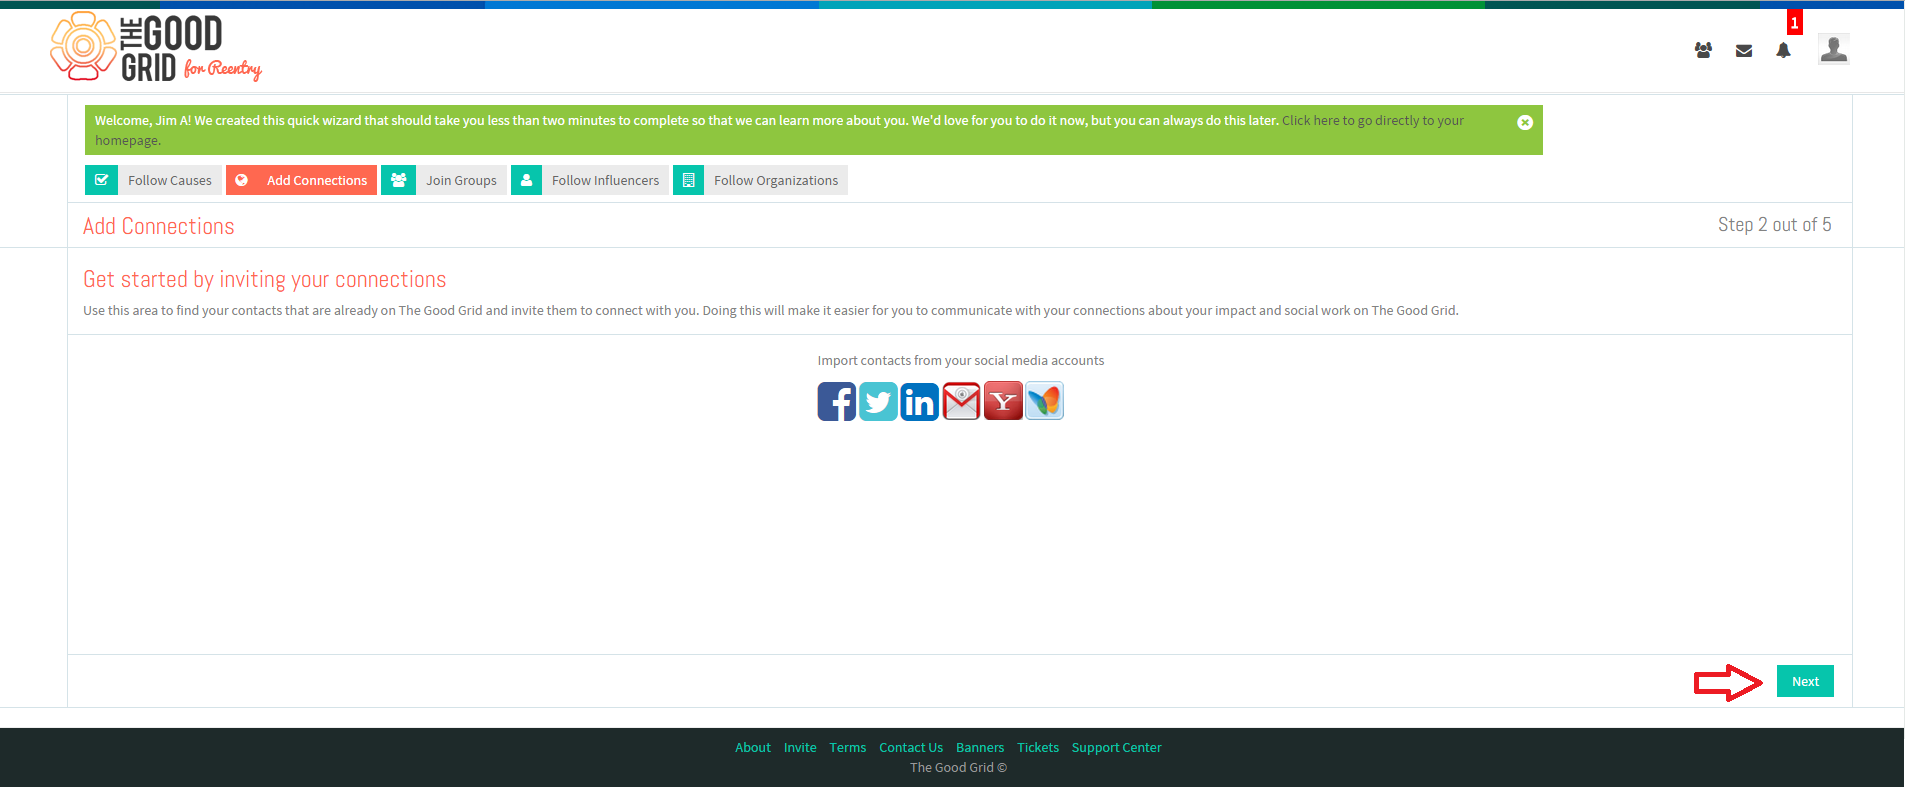
| − | [[File: | + | * On clicking Next button he is redirected to the “Add connections” section. |
| + | * After adding the connections again he needs to click on Next button to move to the next section. | ||
| + | |||
| + | |||
| + | [[File:V-11.png]] | ||
---- | ---- | ||
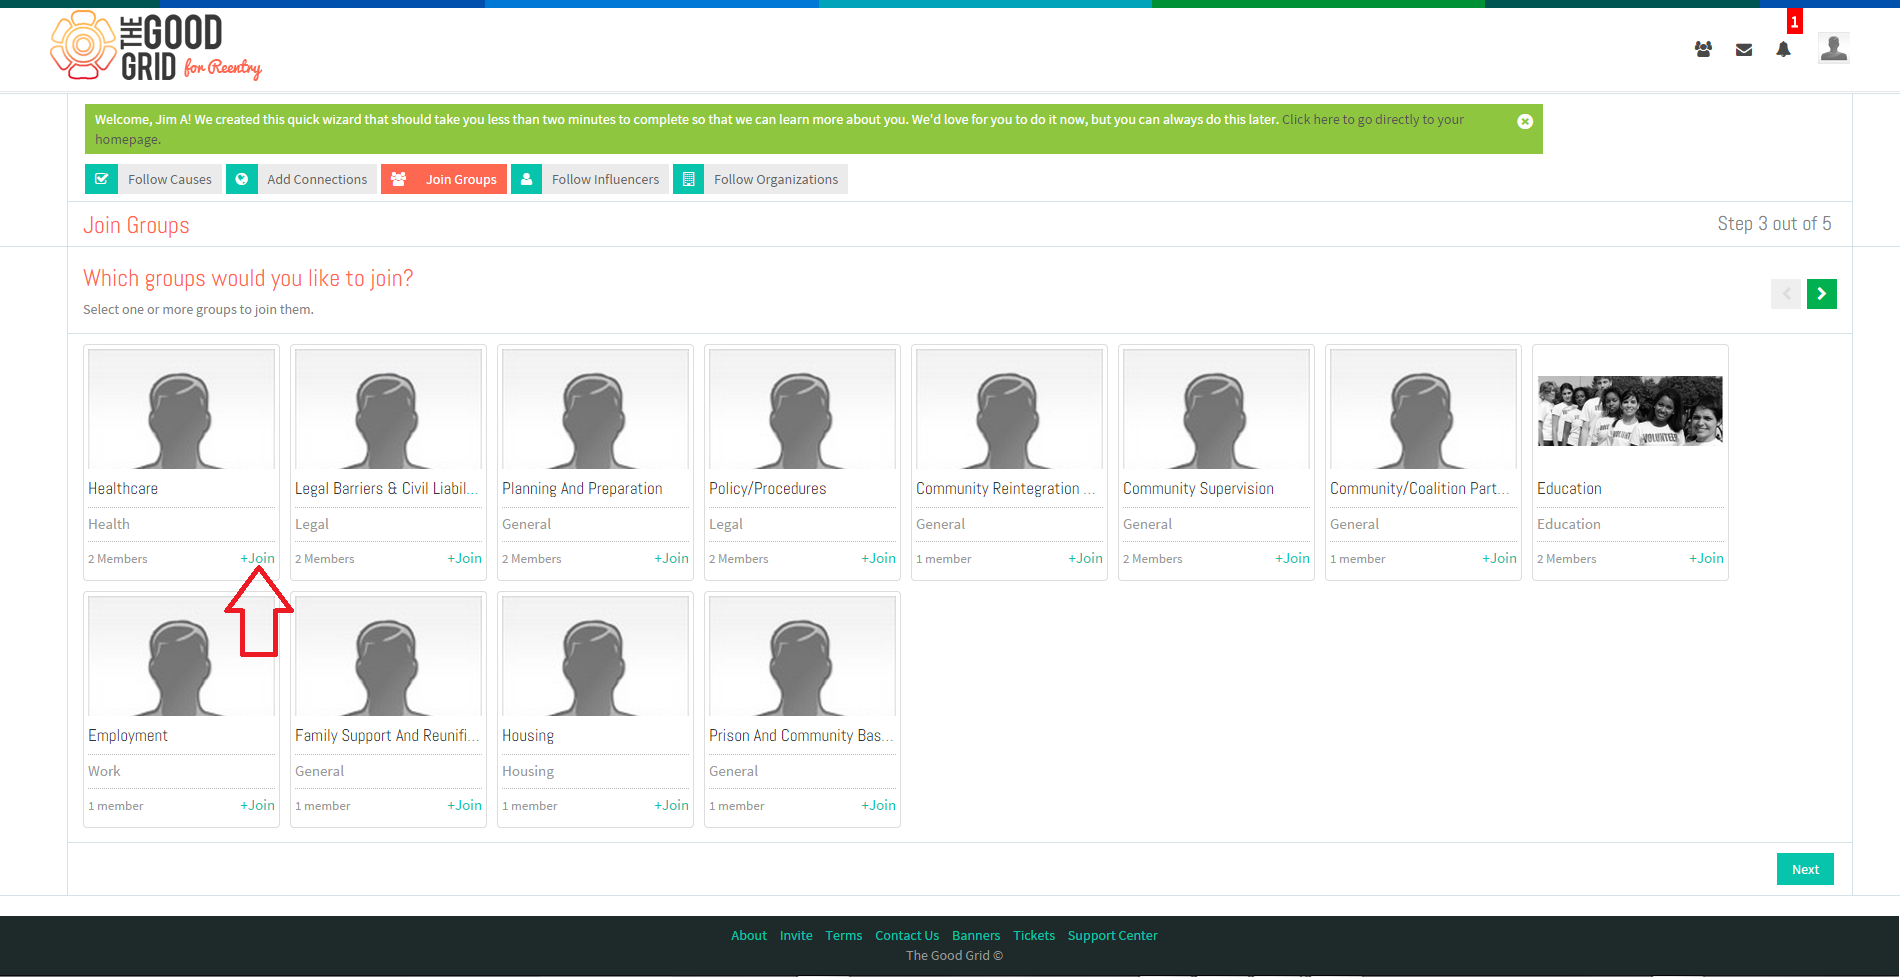
| − | * | + | * On clicking Next button he is redirected to the “Join Groups” section. |
| + | * To join any Group, Jim needs to click on “Join” link. | ||
| − | [[File: | + | |
| + | [[File:V-12.png]] | ||
---- | ---- | ||
| − | * | + | * Once he will click the Join link, the “Join” will get change to “Pending Approval”or sometimes he can directly join the Group as per the settings of an Organization. |
| + | * After that he needs to click on Next button to move to the next section. | ||
| + | |||
| + | [[File:V-13.png]] | ||
| + | ---- | ||
| + | |||
| − | * | + | * On clicking Next button he should be redirected to the “Follow Influencers” section. |
| + | * To follow any Influencer, Jim needs to click on “Follow” link. | ||
| − | [[File: | + | [[File:V-14.png]] |
---- | ---- | ||
| − | * | + | * Once he will click the Follow link, the “Follow” will get change to “Un-follow” & simultaneously the screen will display a notice as “You are now following this Influencer”. |
| − | [[File: | + | [[File:V-15.png]] |
---- | ---- | ||
| − | * | + | * After that he needs to click on Next button to move to the next section. |
| − | [[File: | + | [[File:VV-16.png]] |
---- | ---- | ||
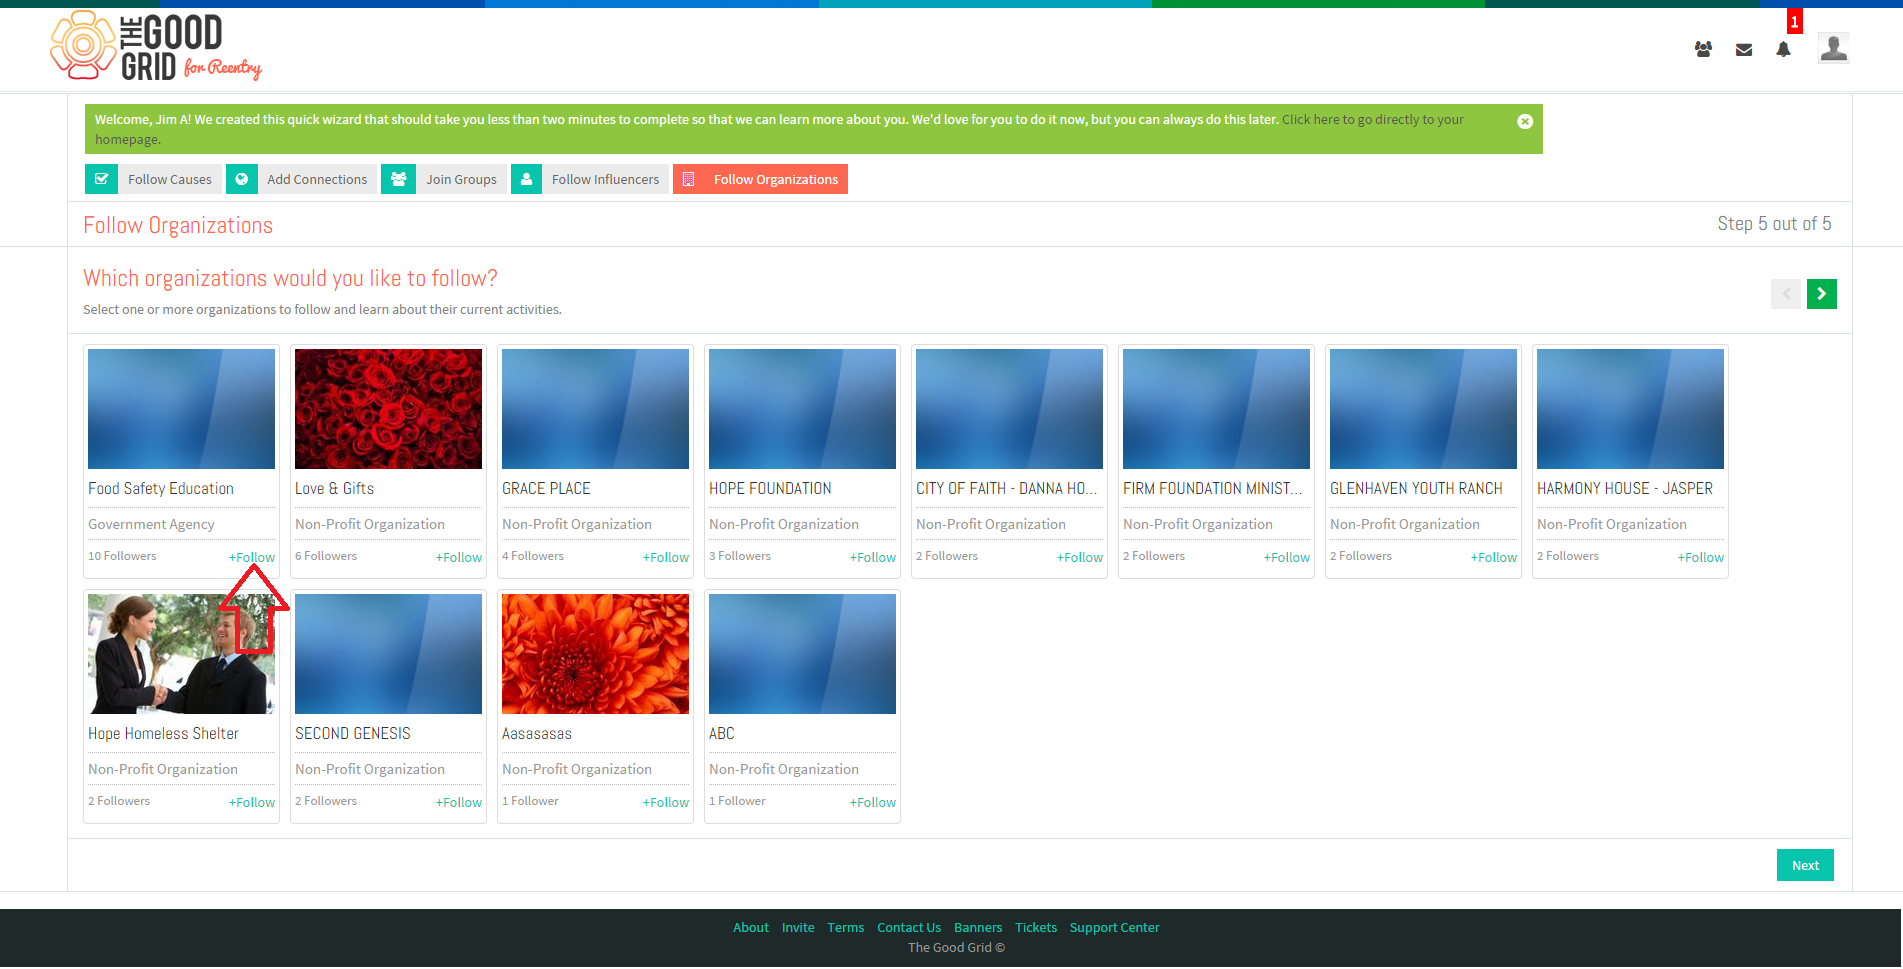
| − | * | + | * On clicking Next button he is redirected to the “Follow Organizations” section. |
| + | * To follow any Organization, Jim needs to click on “Follow” link. | ||
| + | |||
| + | [[File:V-17.png]] | ||
| + | ---- | ||
| + | |||
| + | |||
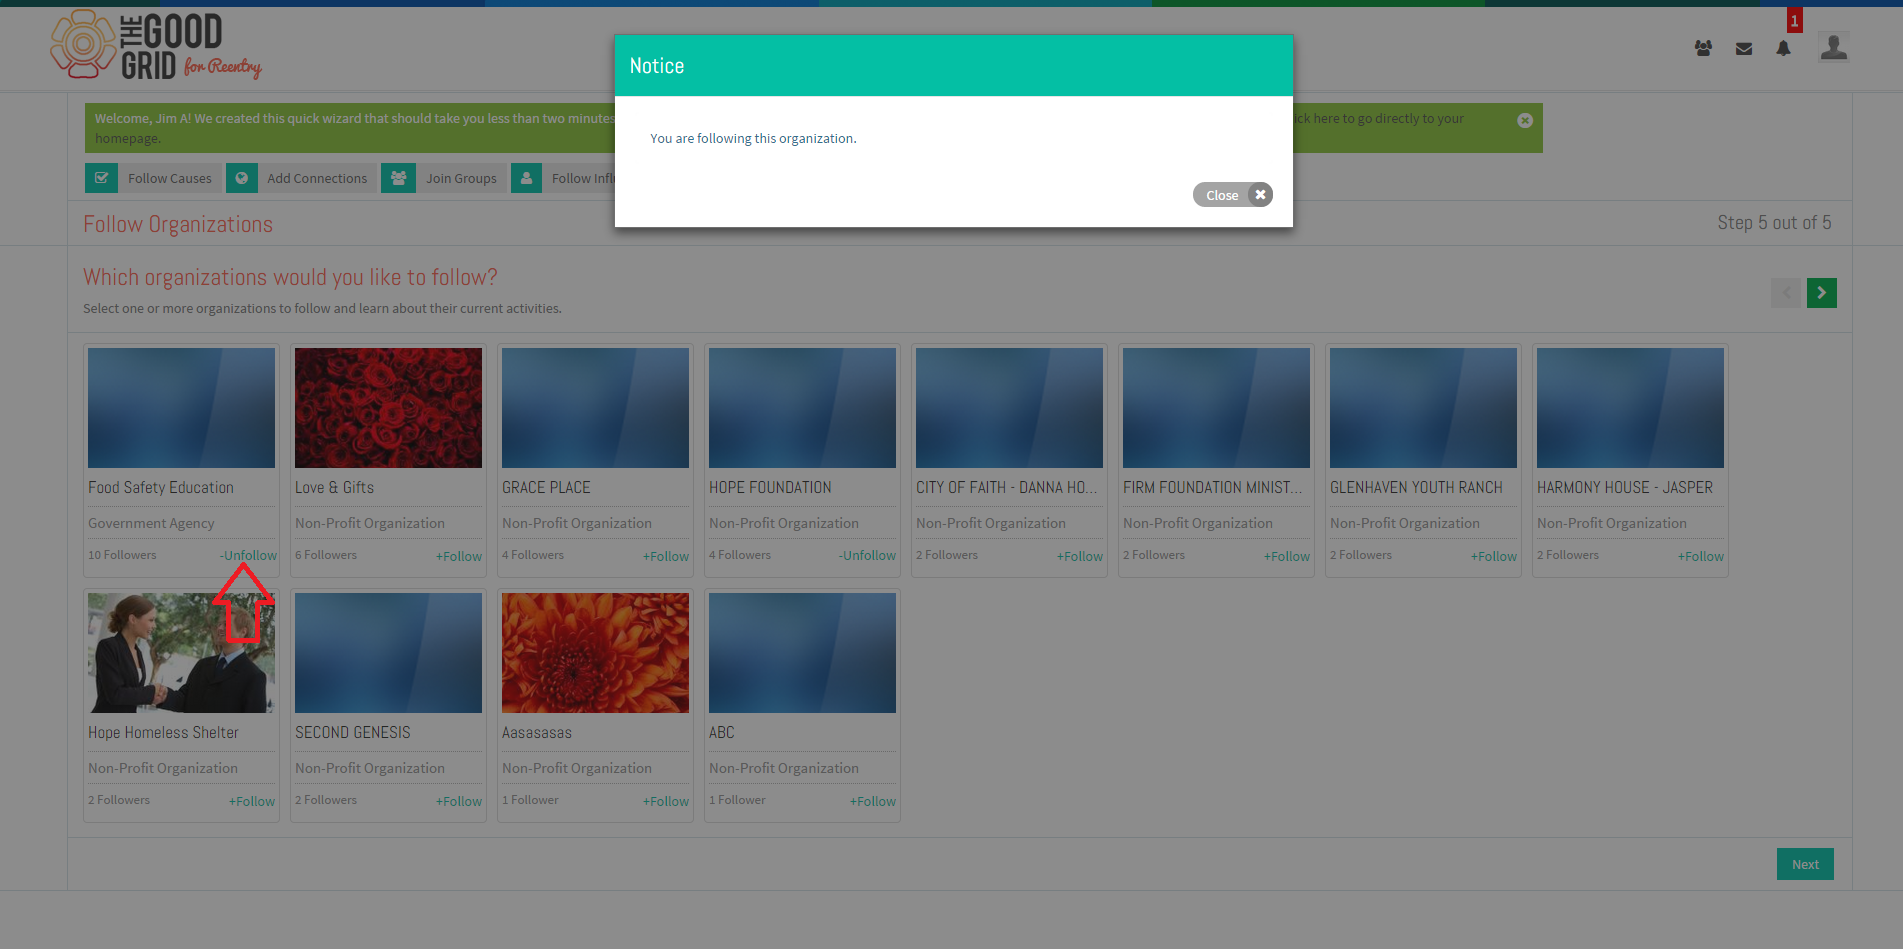
| + | * Once he will click the Follow link, the “Follow” will get change to “Un-follow” & simultaneously the screen will display a notice as “You are following this Organization”. | ||
| − | [[File: | + | [[File:V-18-a.png]] |
---- | ---- | ||
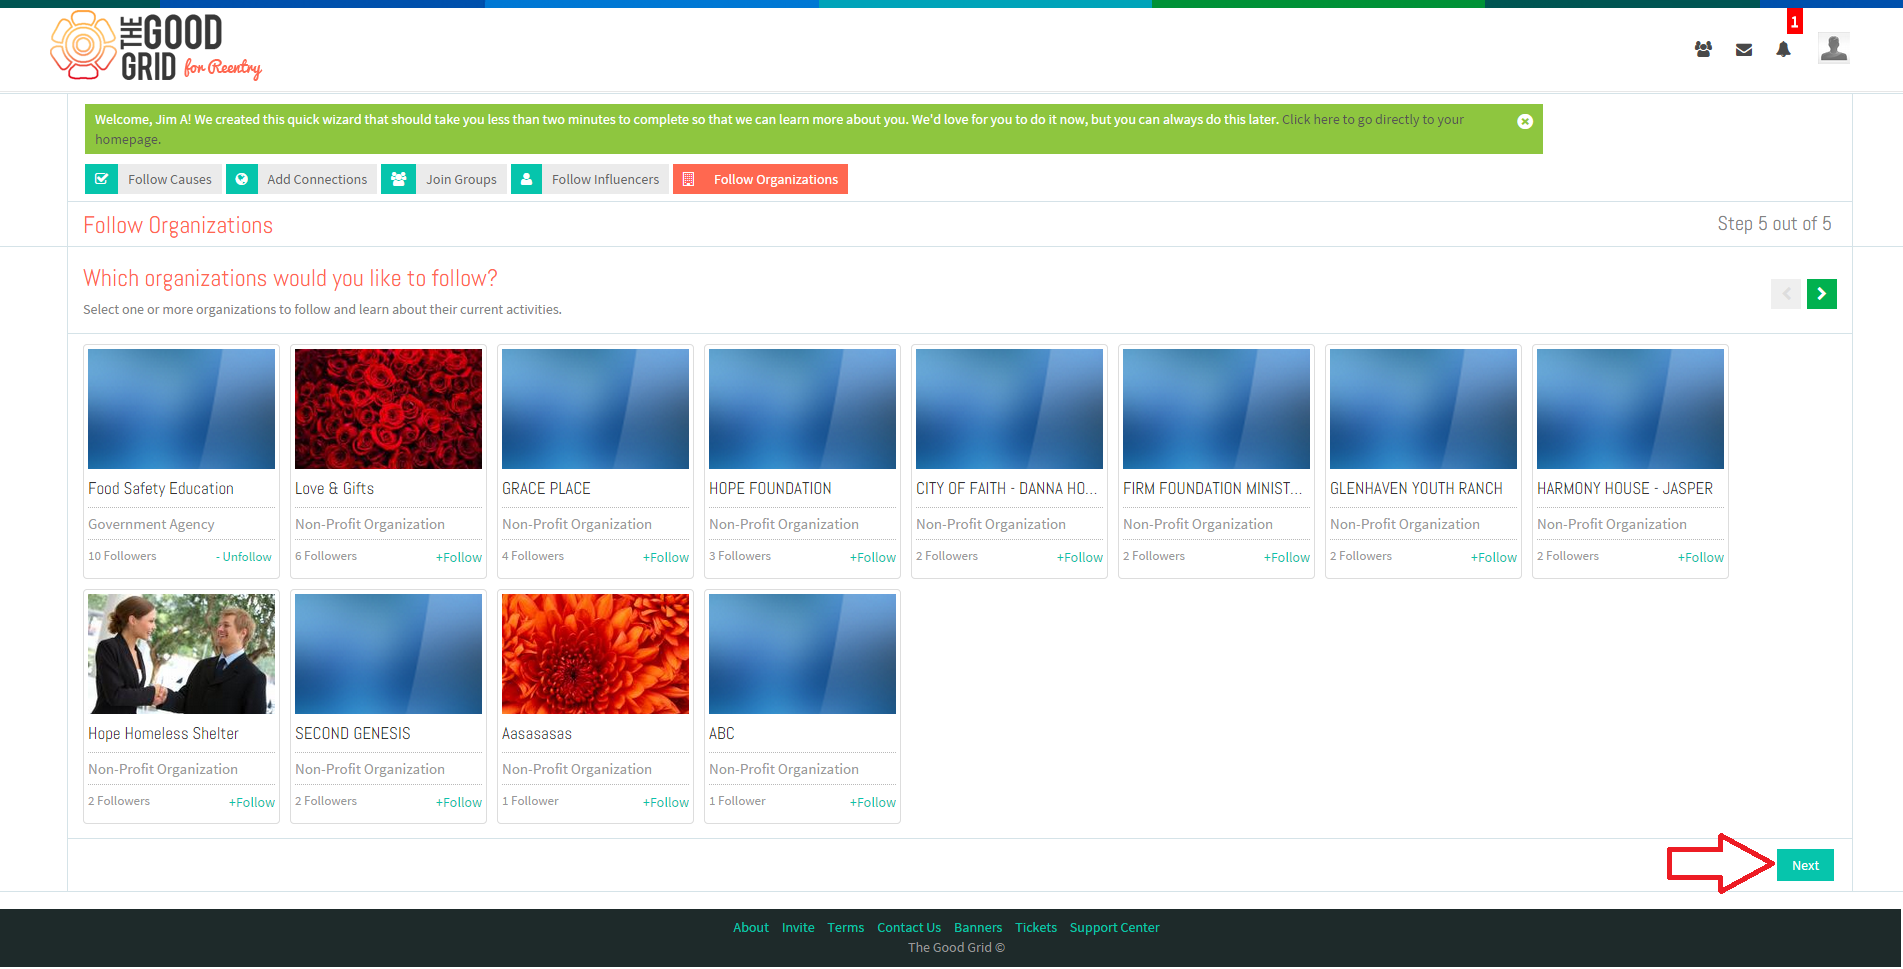
| − | * | + | * After that he needs to click on Next button to move to the Home Page. |
| − | [[File: | + | [[File:V-19-a.png]] |
---- | ---- | ||
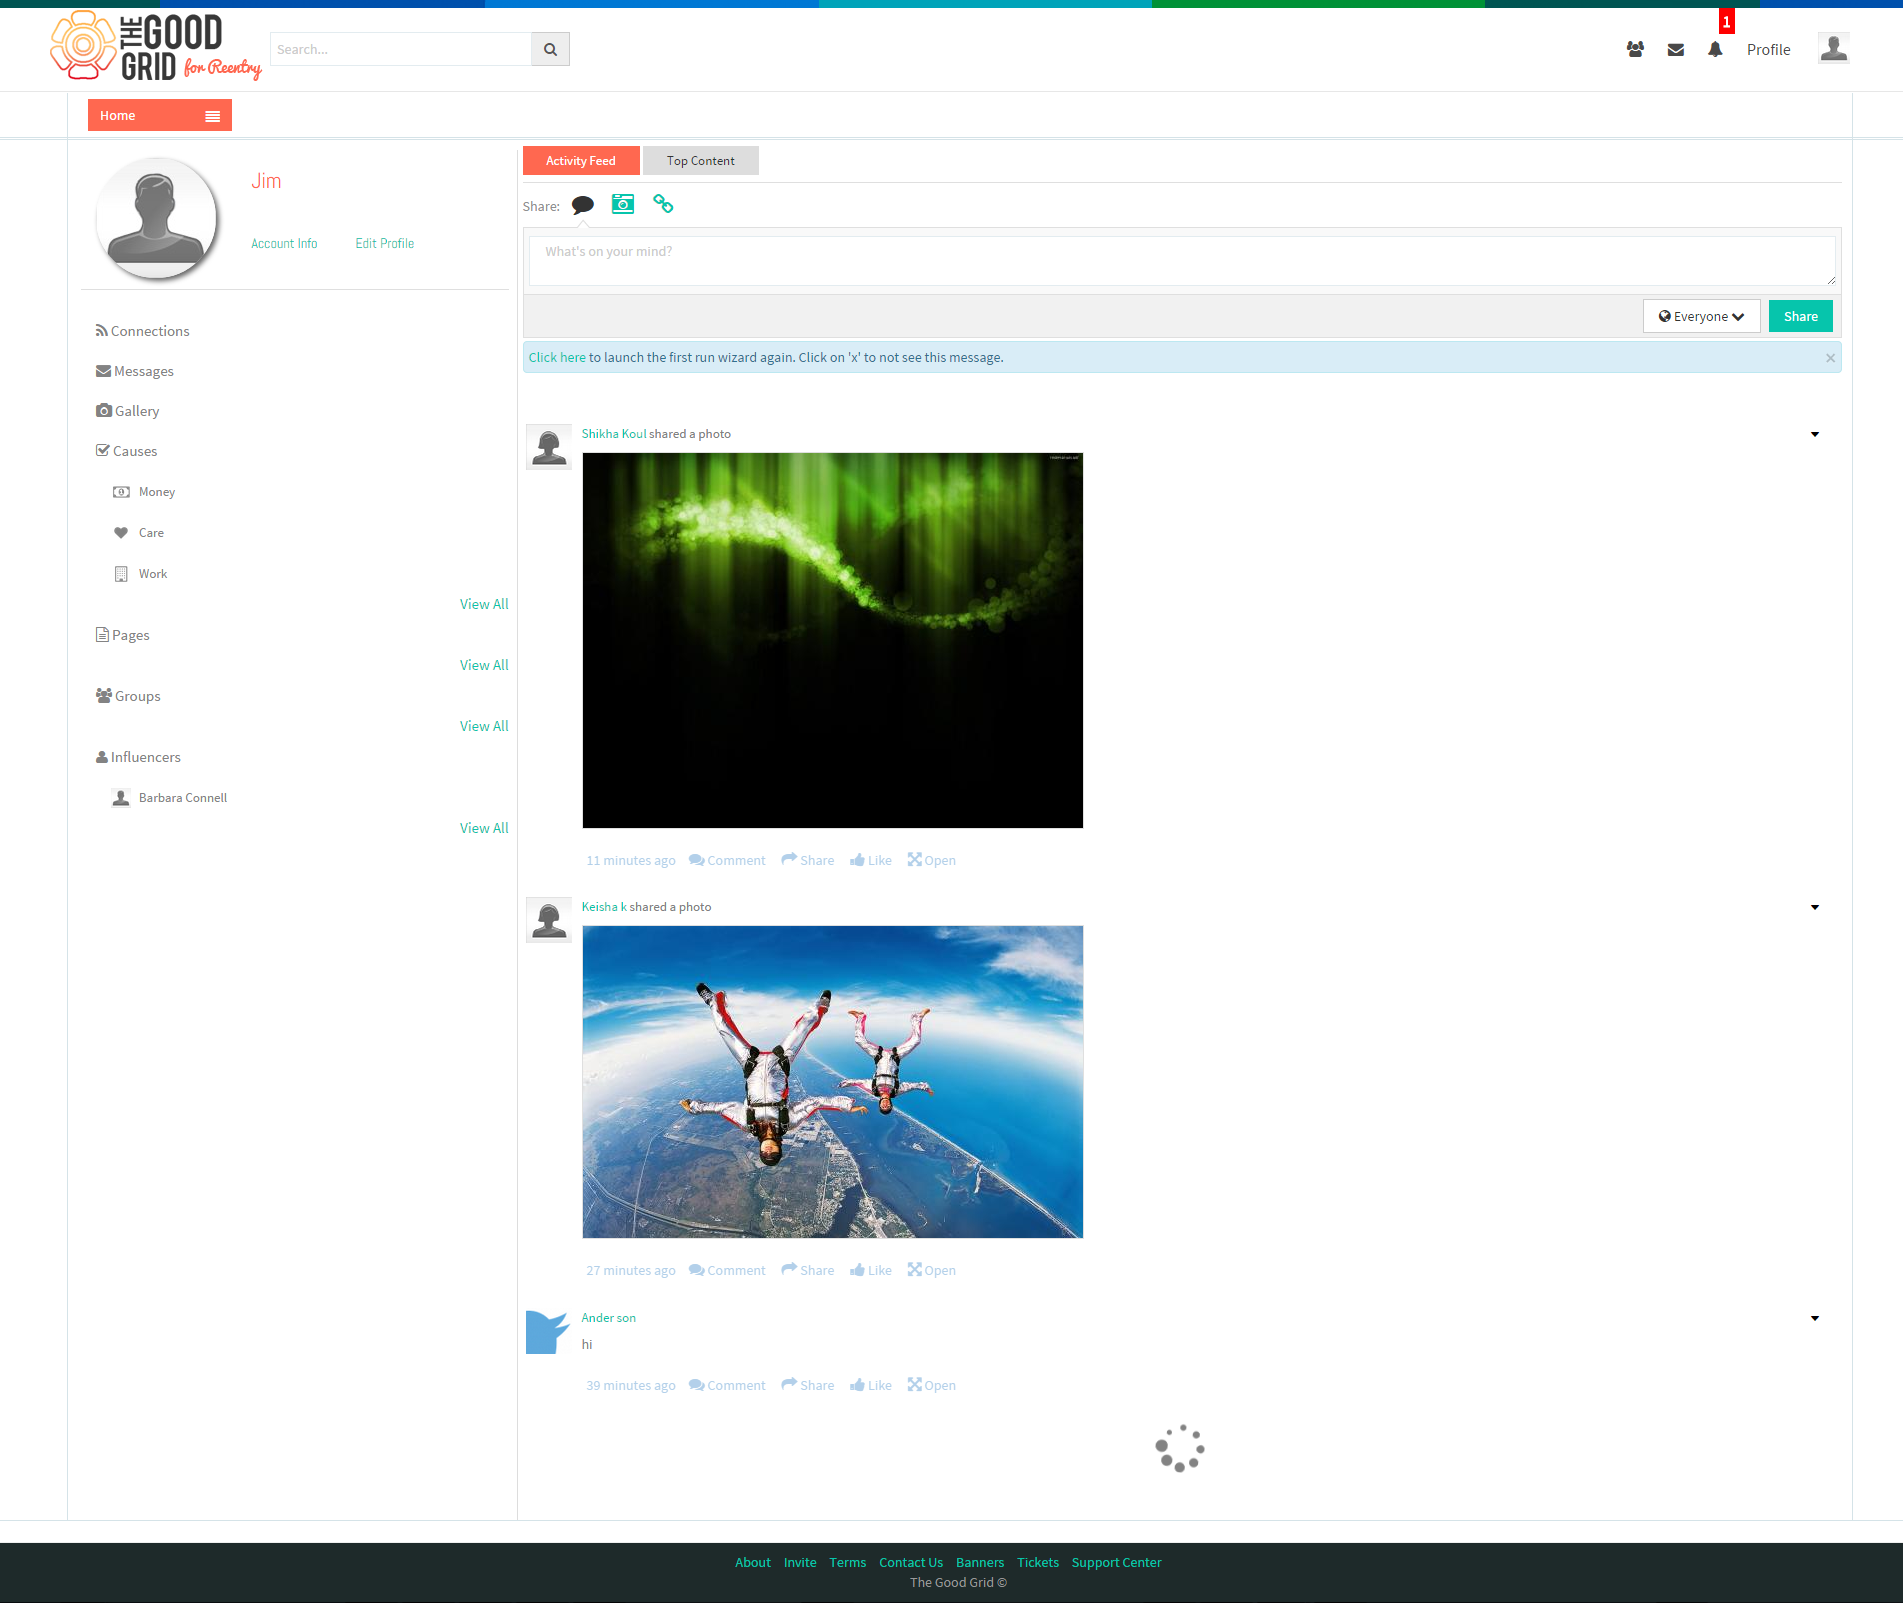
| − | * | + | * Now the Jim will be redirected to his Home Page, highlighting the Activity Feed tab. |
| − | [[File: | + | [[File:VV-20.png]] |
---- | ---- | ||
| − | * | + | * To search an Organization Jim needs to click on Main Menu. |
| − | [[File: | + | |
| + | [[File:VV-21.png]] | ||
---- | ---- | ||
| − | * | + | * On clicking Main Menu, list of options will be displayed from where Jim needs to select “Pages” option. |
| − | [[File: | + | [[File:V-22.png]] |
---- | ---- | ||
| − | * On | + | * On selecting Pages from the main menu, he is redirected to the Pages screen. |
| − | [[File: | + | [[File:V-23.png]] |
---- | ---- | ||
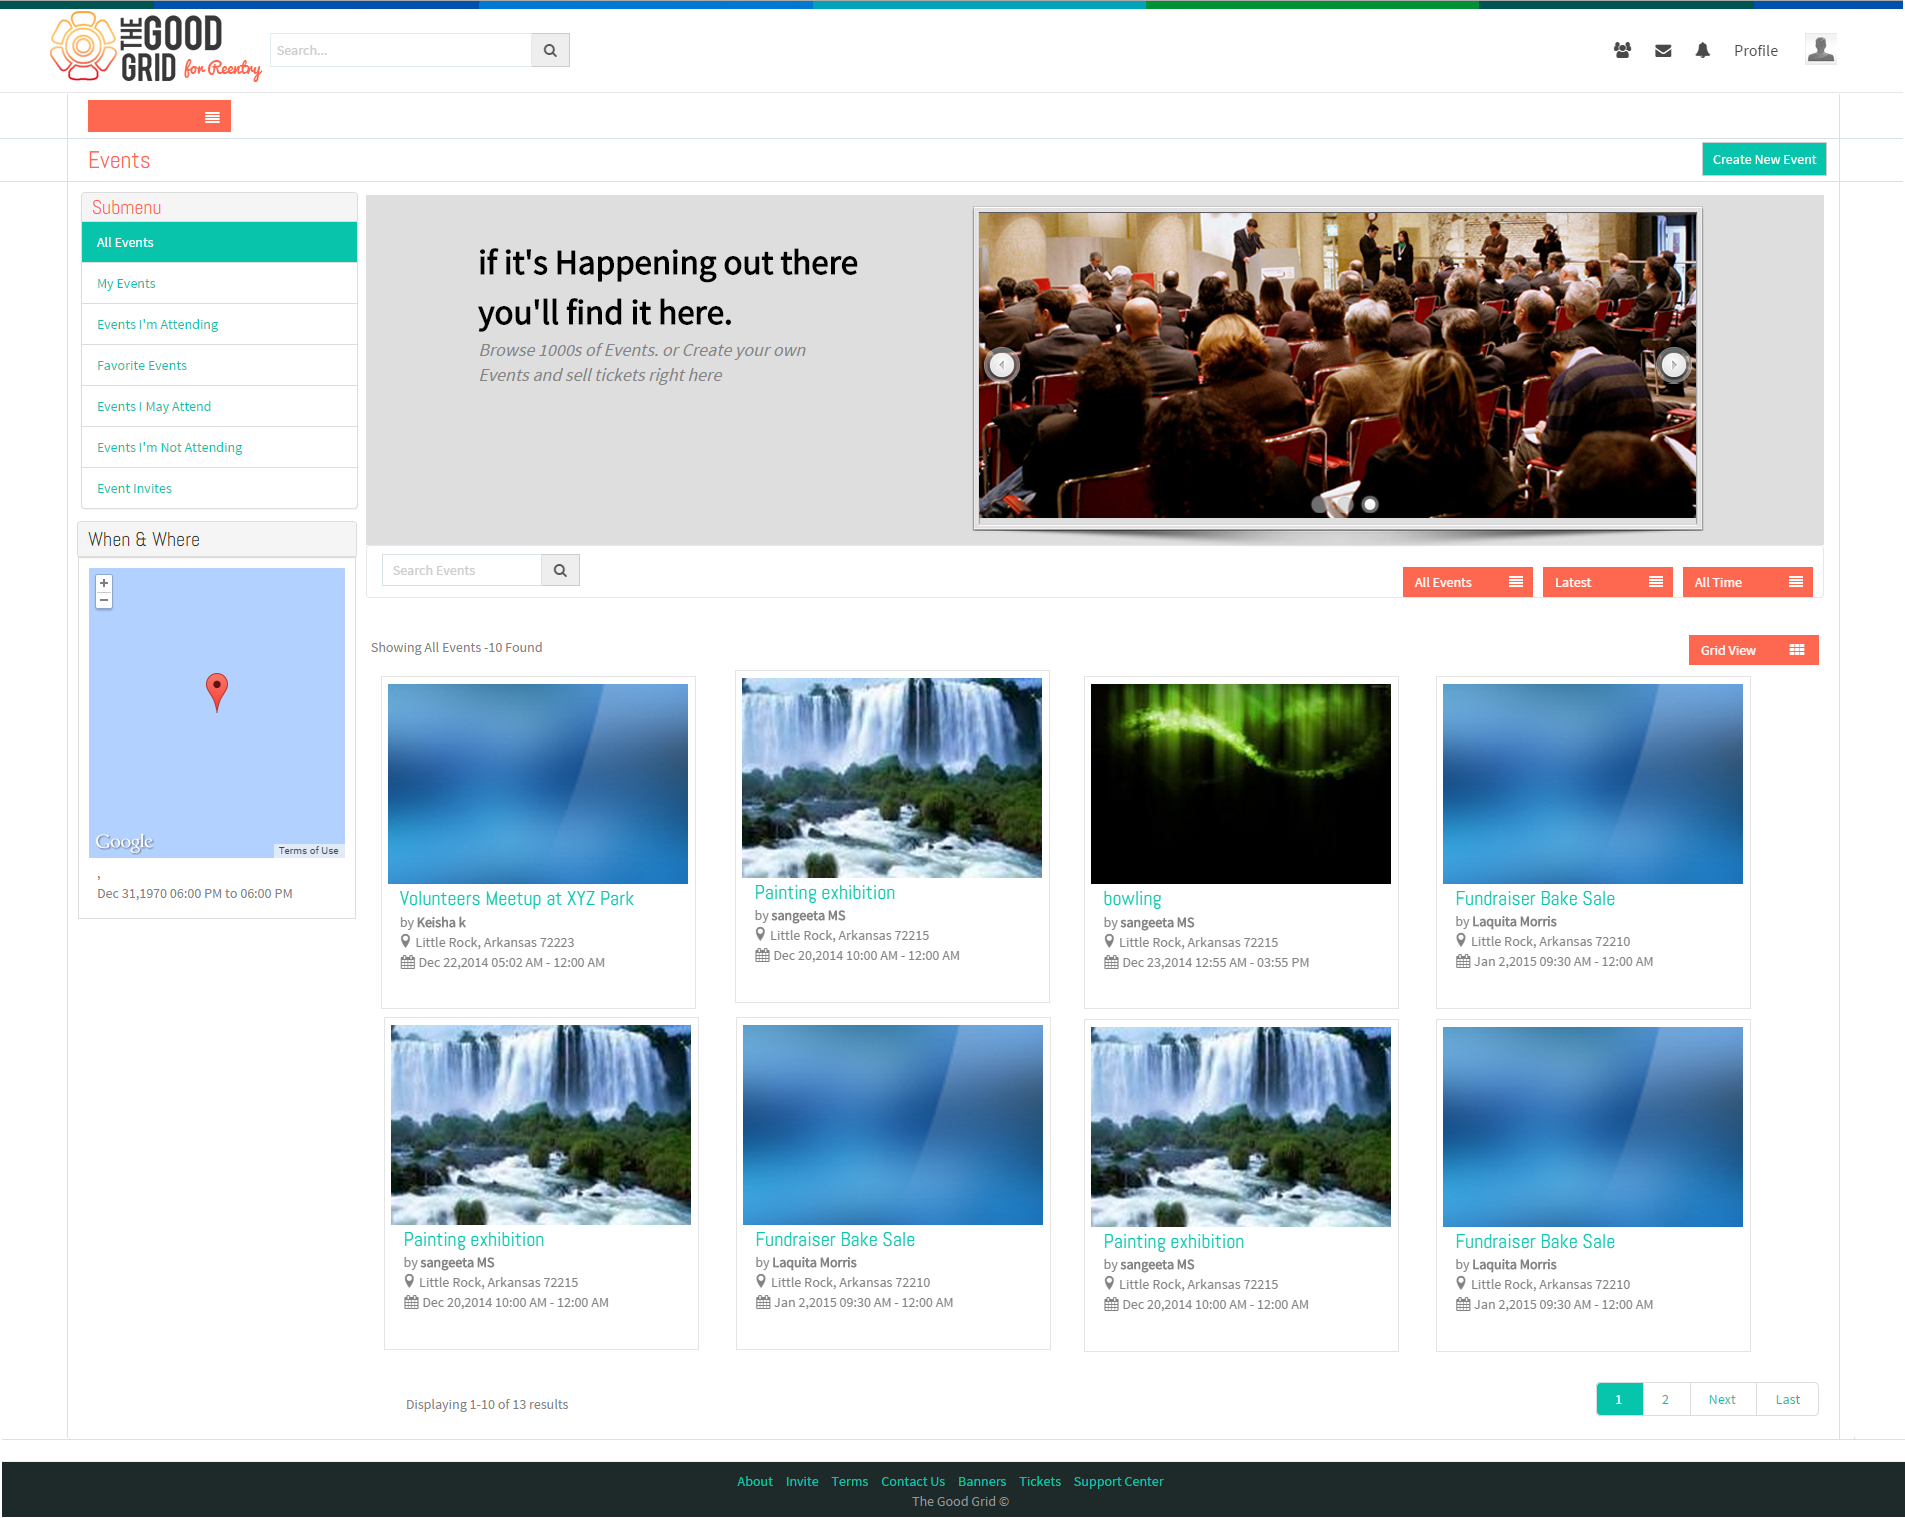
| − | * | + | * Jim wants to search an Organization “Hope Homeless Shelter”. For that he needs to enter desired Organization name in the Search bar and press Enter or click on Search Magnifier icon. |
| − | [[File: | + | [[File:V-24.png]] |
---- | ---- | ||
| − | * | + | * After clicking on Search icon he finds an Organization. |
| − | * | + | [[File:V-25.png]] |
| + | ---- | ||
| + | |||
| + | |||
| + | * On clicking the Organization Jim is redirected to that particular Organization’s Profile. | ||
| − | [[File: | + | [[File:V-26.png]] |
---- | ---- | ||
| − | * | + | * Now Jim wants to search an Event. For that he again needs to click on Main Menu. |
| − | + | ||
| − | [[File: | + | [[File:V-27.png]] |
---- | ---- | ||
| − | * | + | * From the Main Menu list he needs to select “Events” option. |
| − | [[File: | + | [[File:V-28.png]] |
---- | ---- | ||
| − | * | + | * On selecting Events from the main menu, he is redirected to the Events screen. |
| − | [[File: | + | [[File:V-29.png]] |
---- | ---- | ||
| − | |||
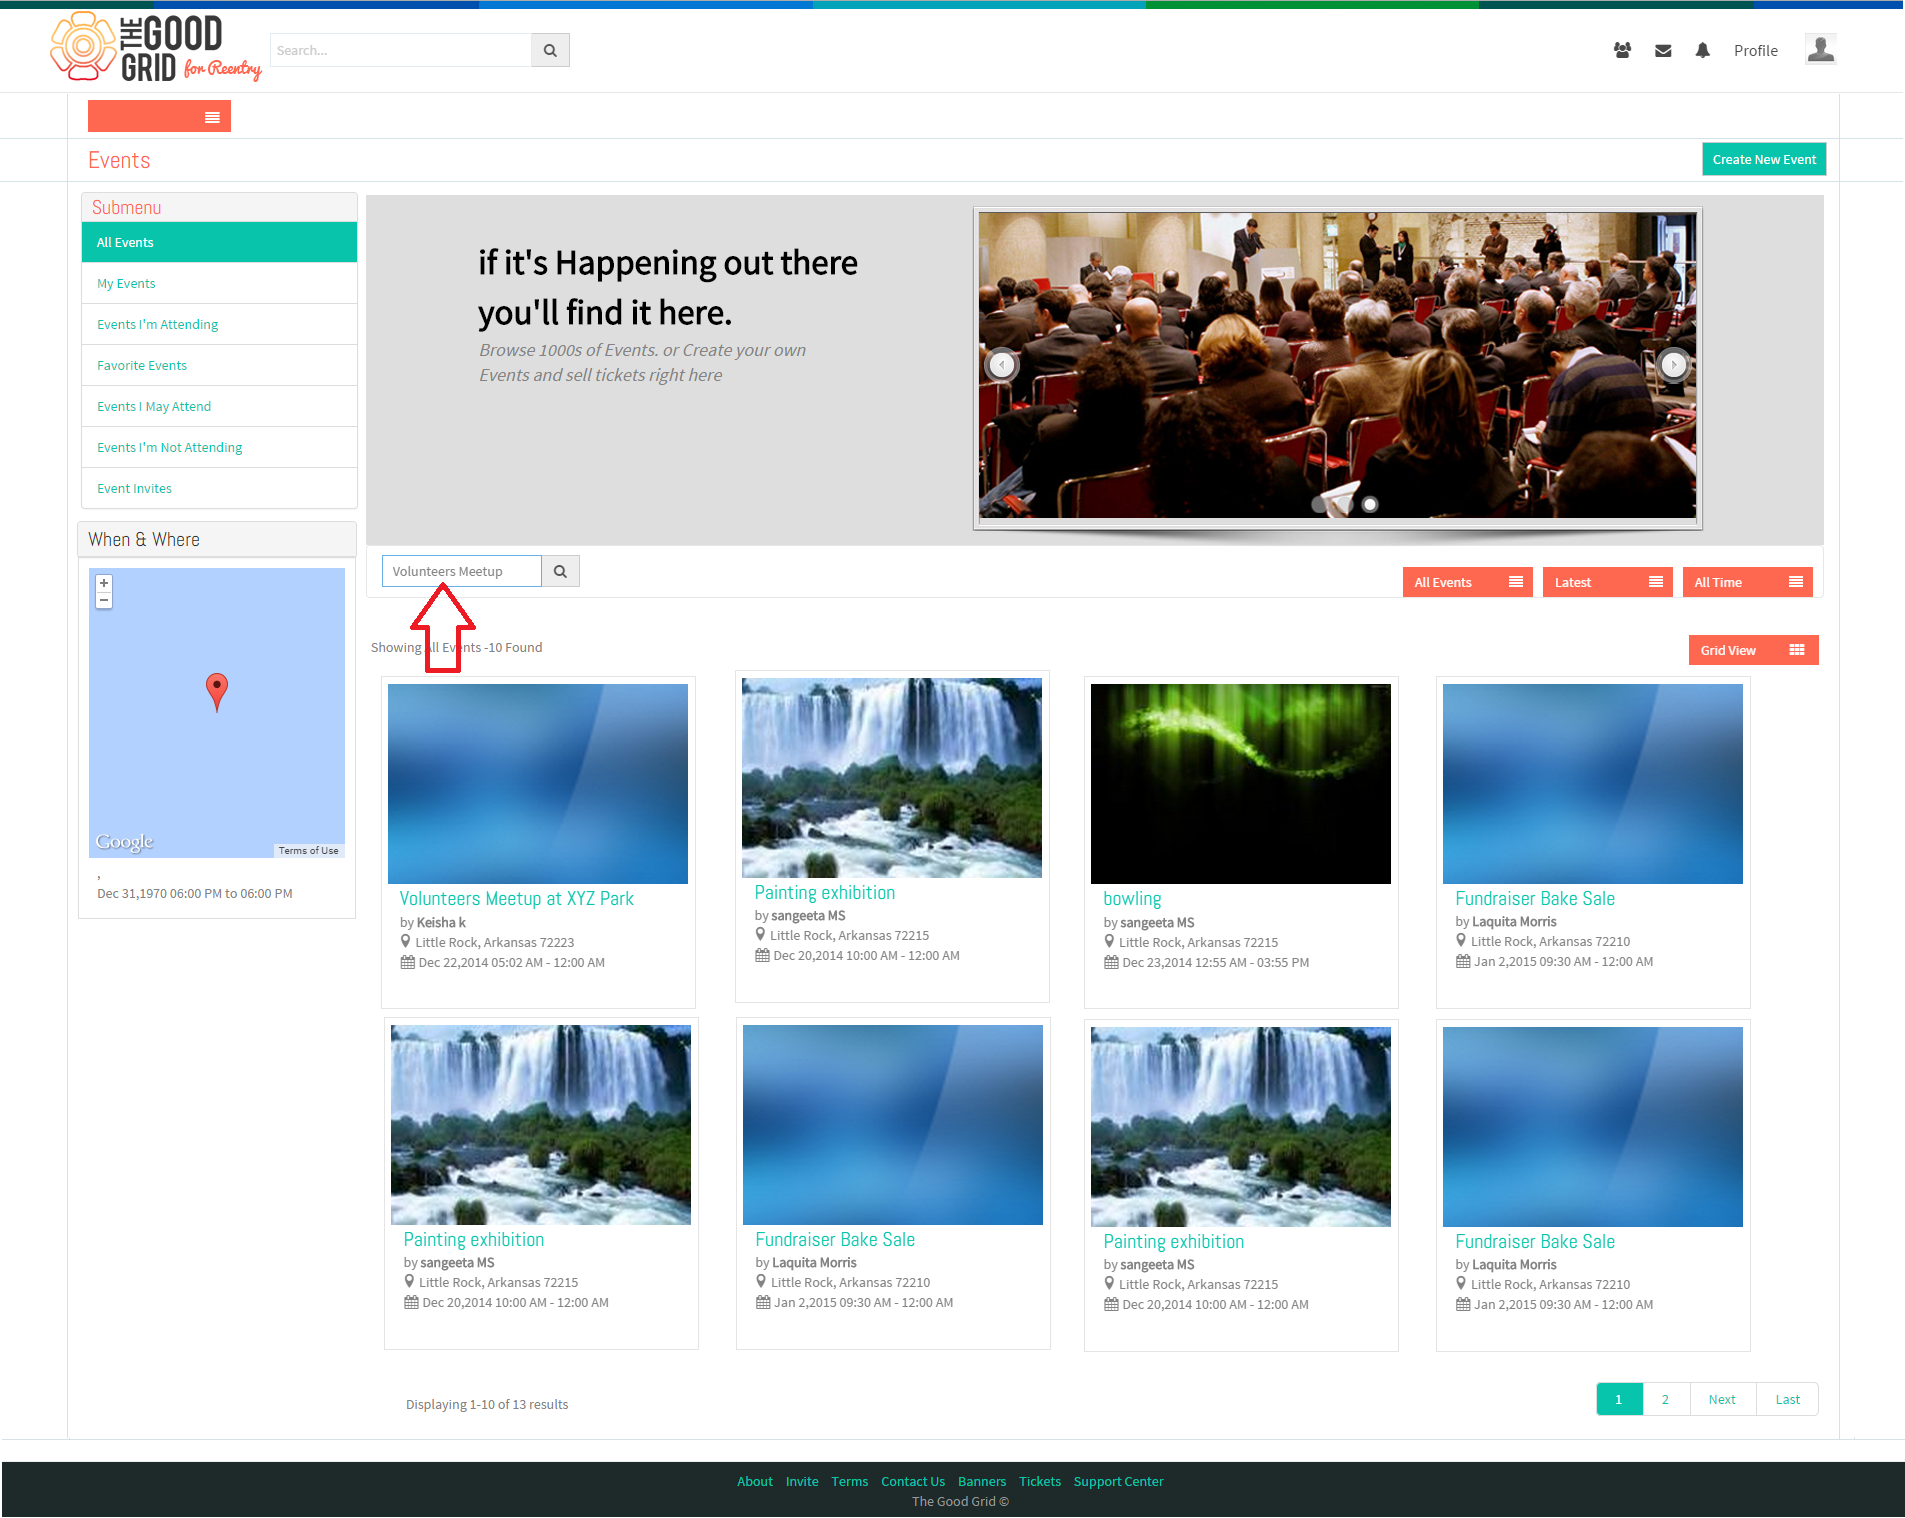
| − | [[File: | + | * Jim wants to search an Event “Volunteers Meetup at XYZ Park”. For that he needs to enter desired Event name in the Search bar and press Enter or click on Search Magnifier icon. |
| + | |||
| + | |||
| + | [[File:V-30.png]] | ||
---- | ---- | ||
| − | + | ||
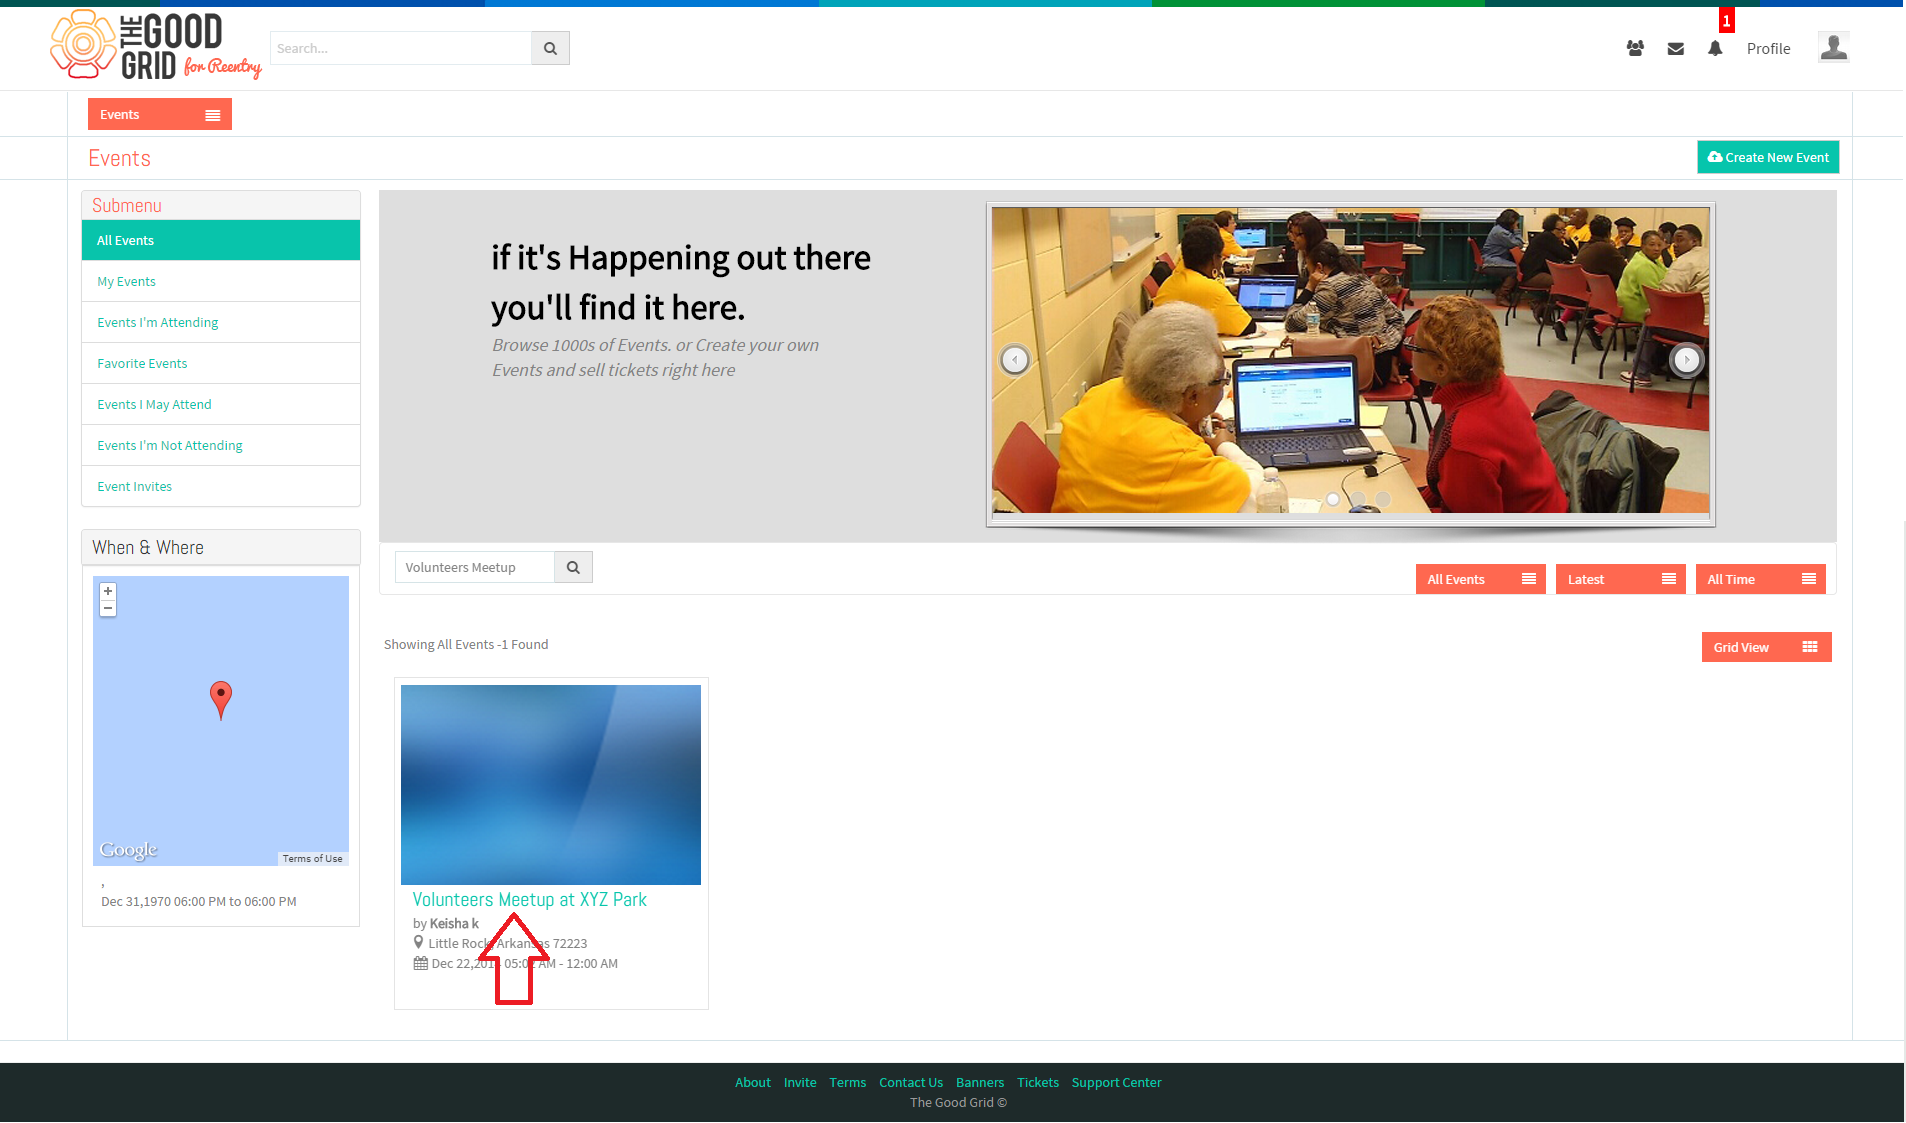
| − | * After | + | * After clicking on Search icon he finds an Event. |
| + | * Now on clicking the Event, Jim is redirect to that particular Event’s view page. | ||
| − | [[File: | + | [[File:V-31.png]] |
---- | ---- | ||
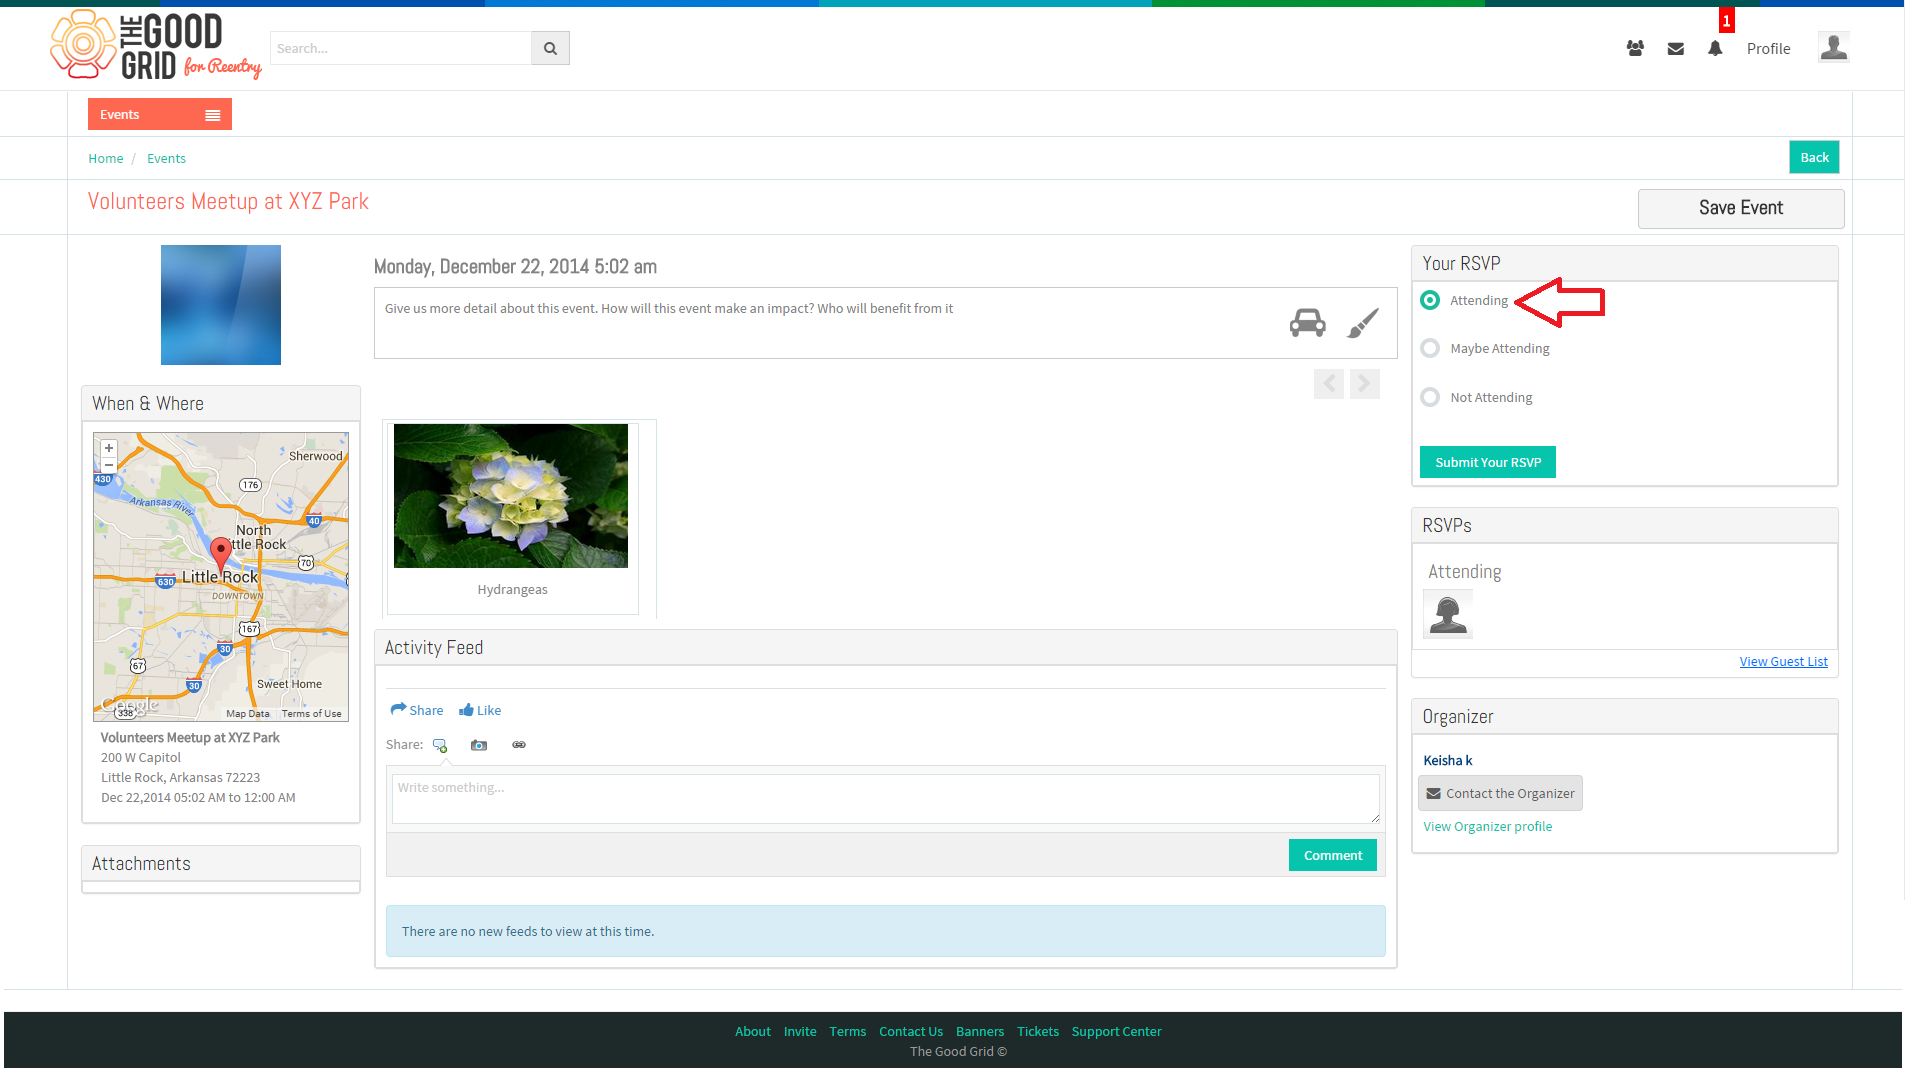
| − | * | + | * Jim views the Event and on clicking the Radio button he updates the RSVP for that event. |
| − | [[File: | + | [[File:V-32.png]] |
---- | ---- | ||
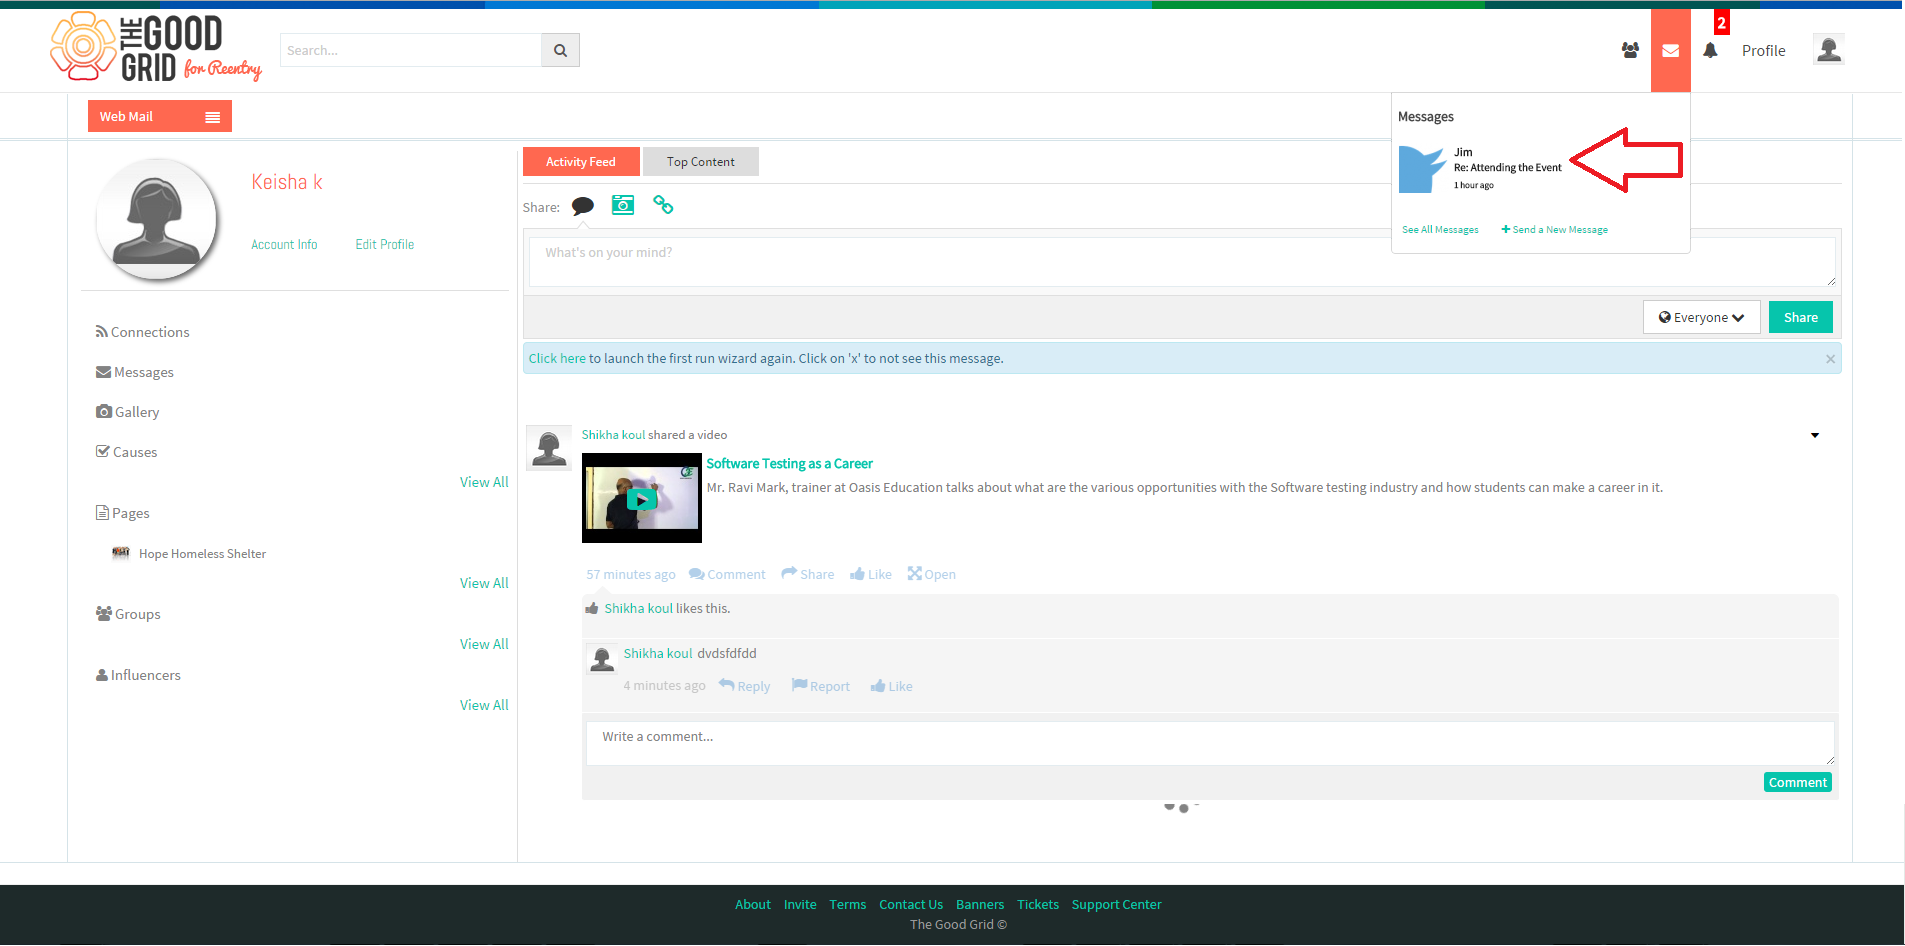
| − | * | + | * This generates a web mail to Keisha from Jim. |
| + | * Keisha logins to her account and there she will get message from the Jim. | ||
| − | [[File: | + | [[File:V-33.png]] |
---- | ---- | ||
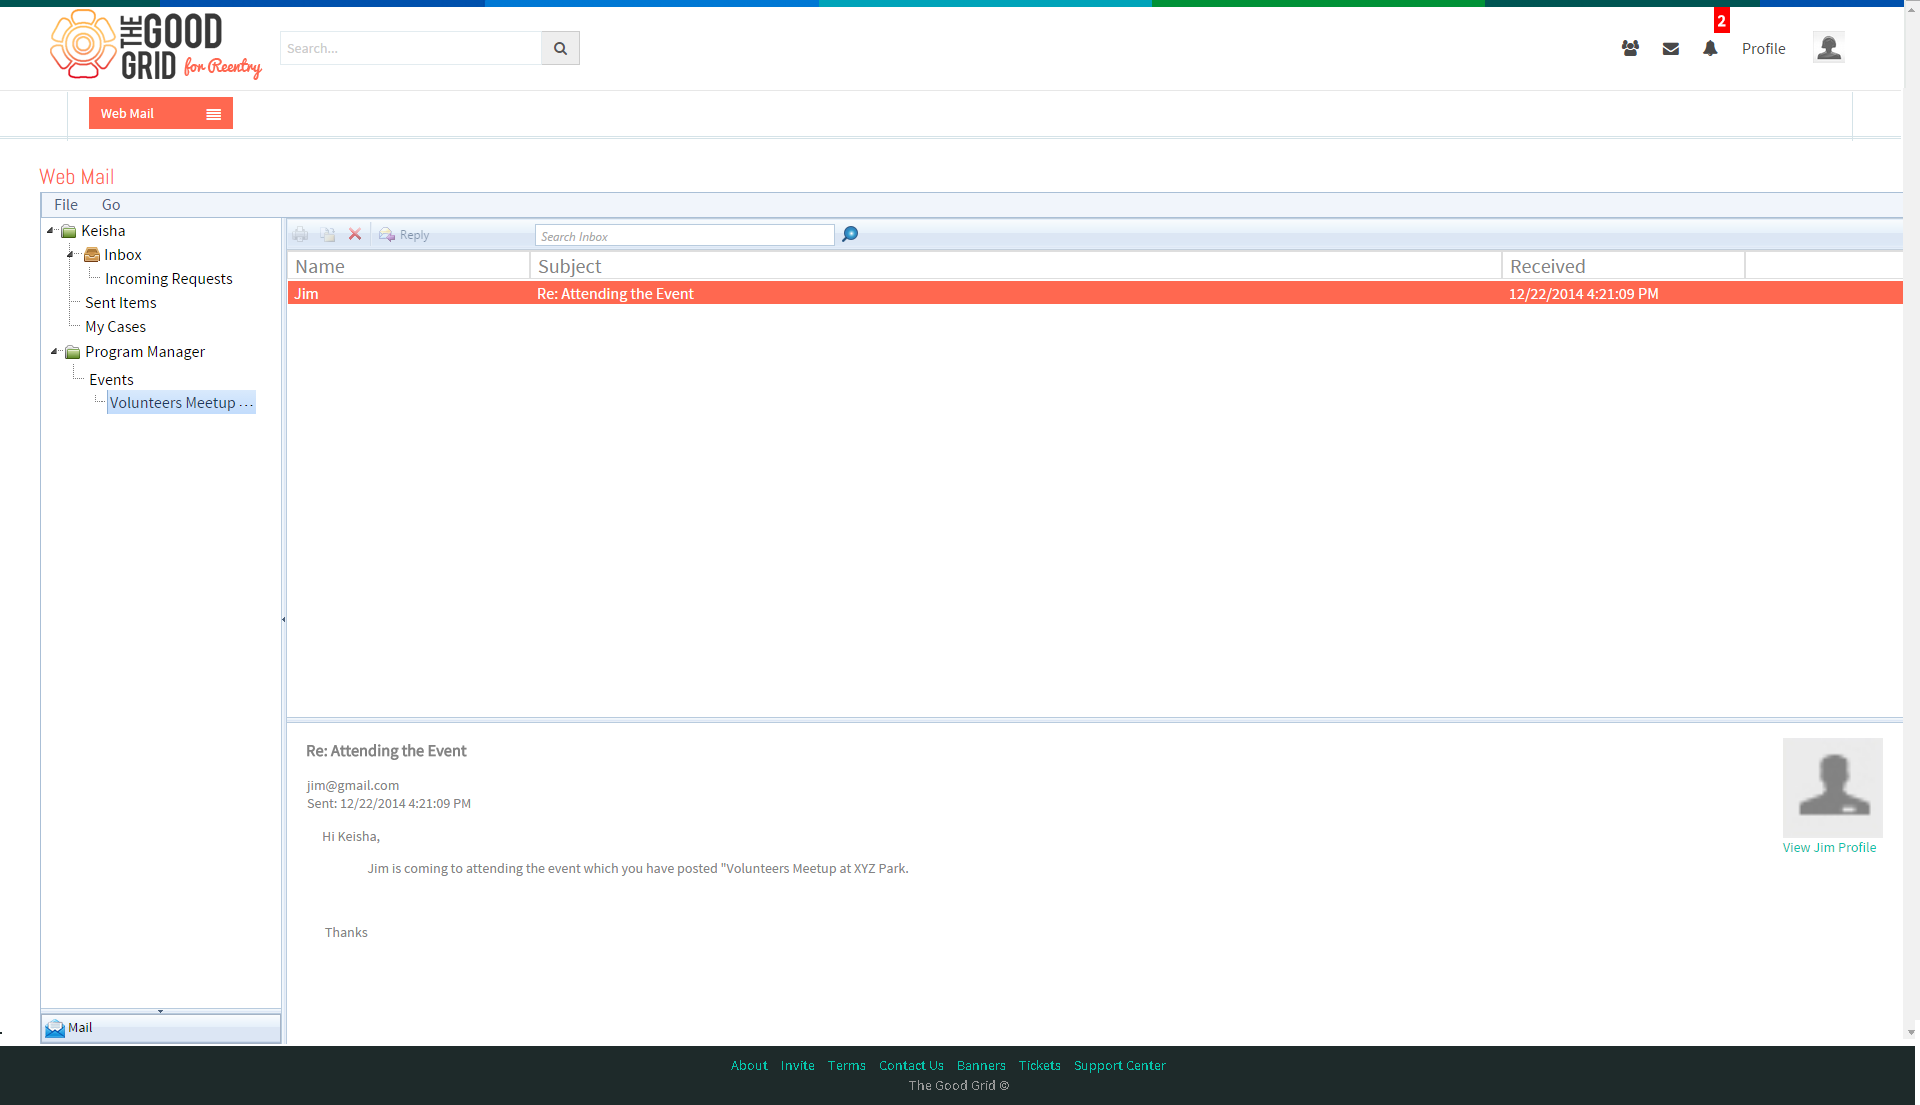
| − | * | + | * On clicking that it takes Keisha to her web mail.. |
| − | [[File: | + | [[File:V-34.png]] |
---- | ---- | ||
| − | * | + | * Now Jim wants to search Volunteering Opportunities. For that he again needs to click on Main Menu. |
| − | [[File: | + | |
| + | [[File:V-35.png]] | ||
---- | ---- | ||
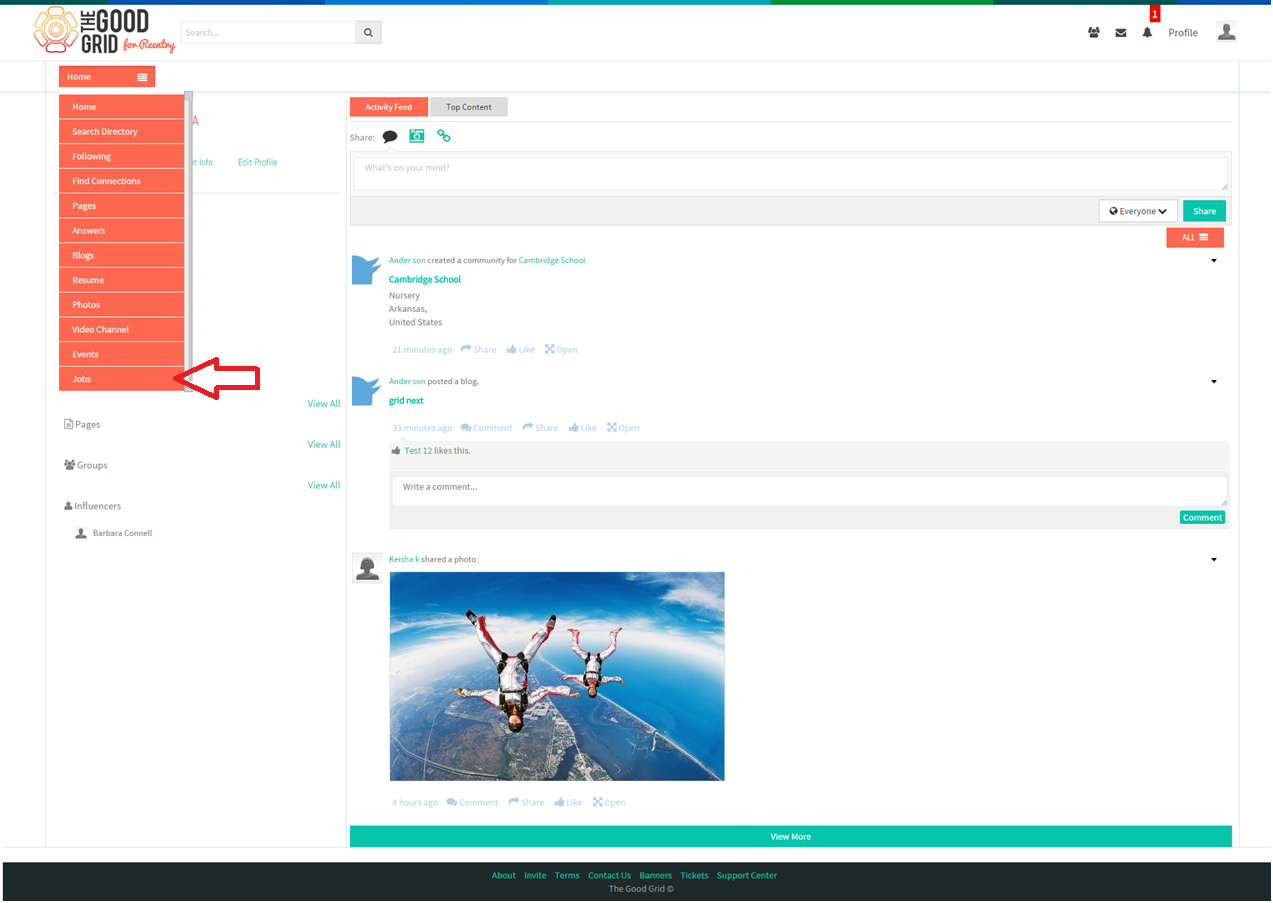
| − | * | + | * From the Main Menu list he needs to select “Jobs” option. |
| − | |||
| + | [[File:V-36.png]] | ||
| + | ---- | ||
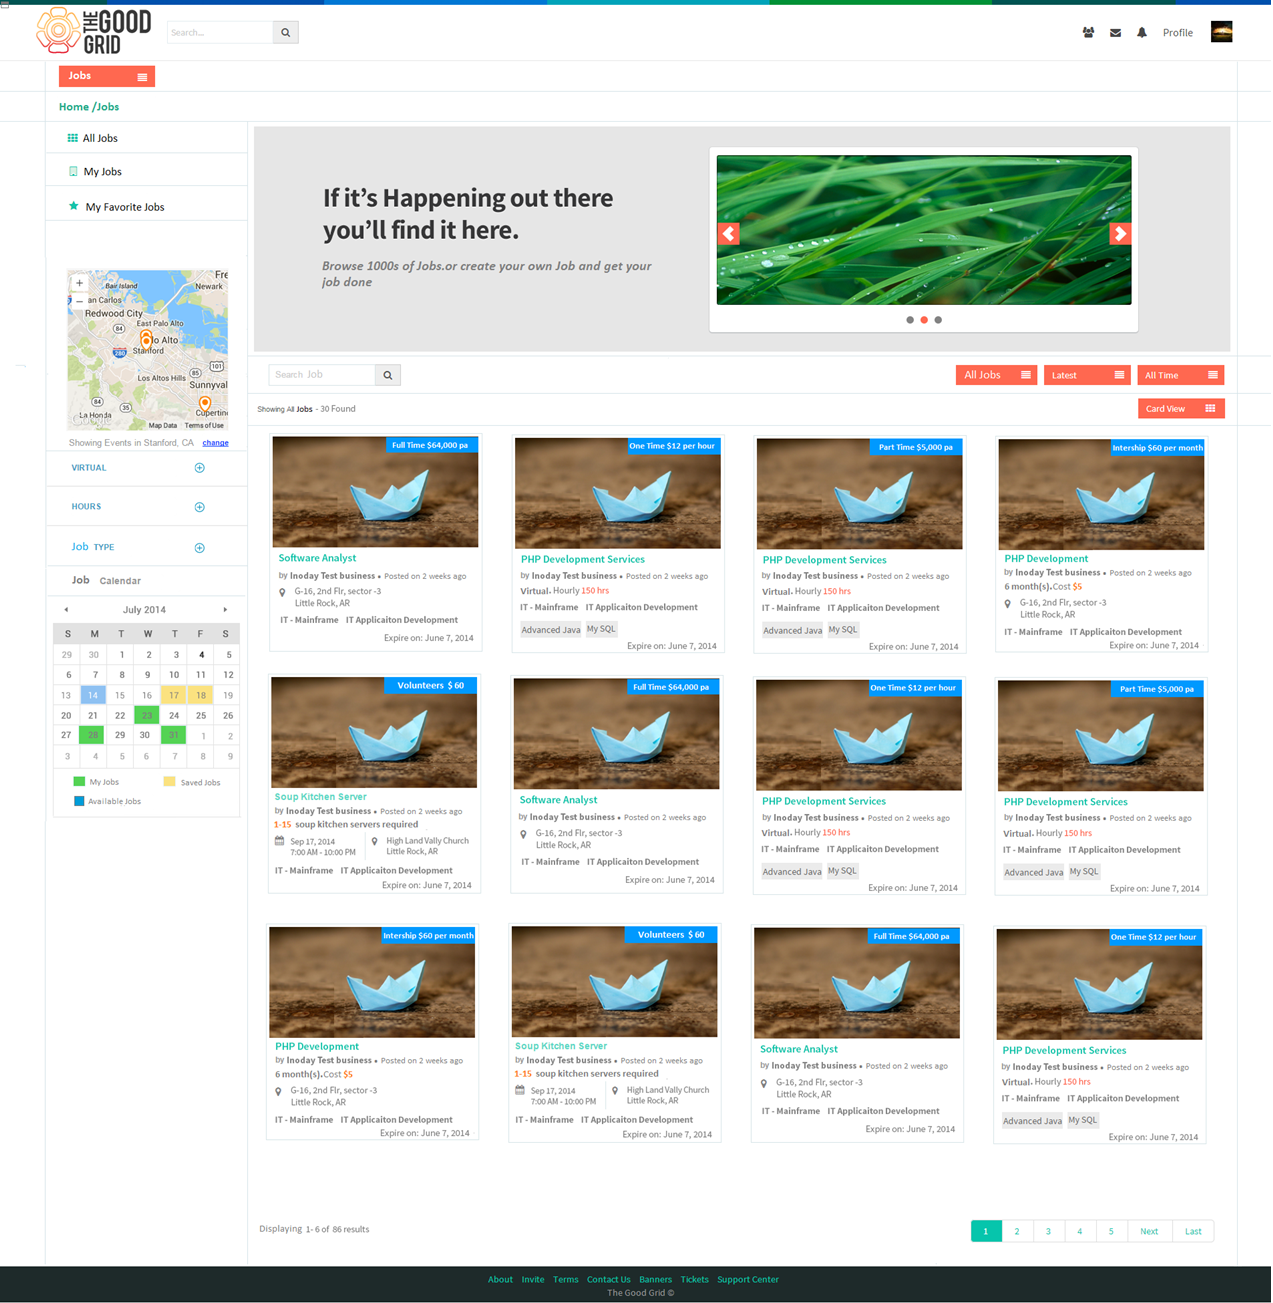
| − | [[File: | + | * On selecting Jobs from the main menu, Jim is redirected to the Jobs screen. |
| + | |||
| + | |||
| + | [[File:V-37.png]] | ||
---- | ---- | ||
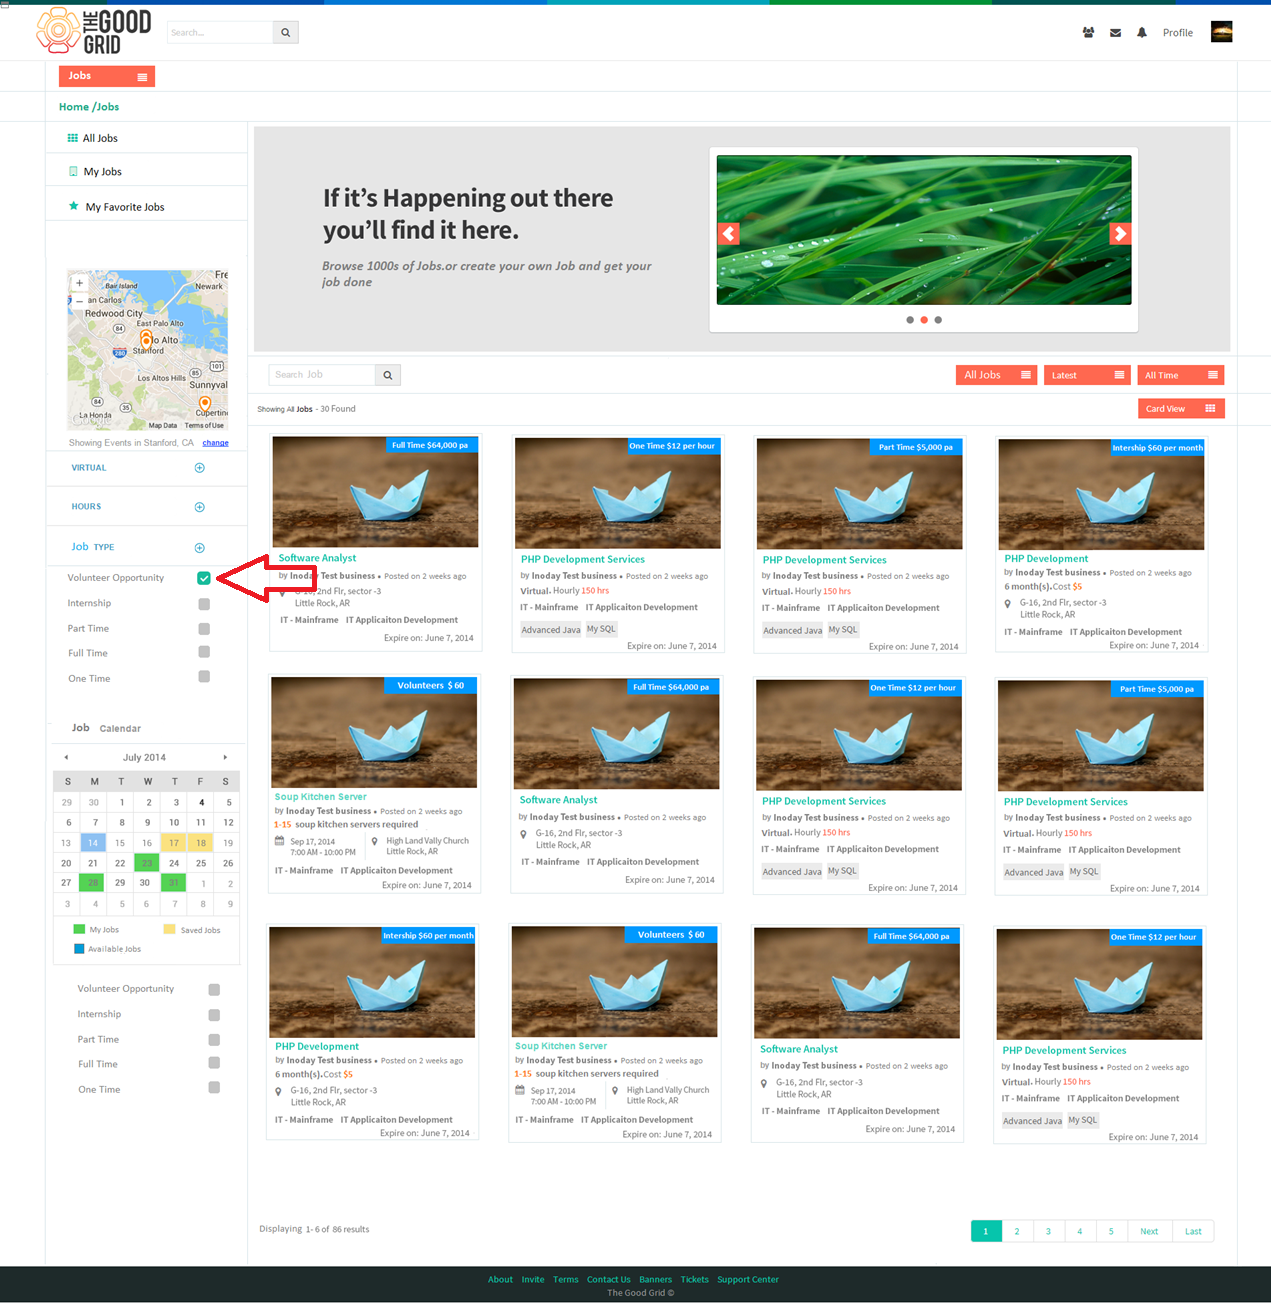
| − | * | + | * Now Jim needs to select Volunteer Opportunity from the left pane of the screen. |
| + | |||
| + | |||
| + | [[File:V-38.png]] | ||
| + | ---- | ||
| + | |||
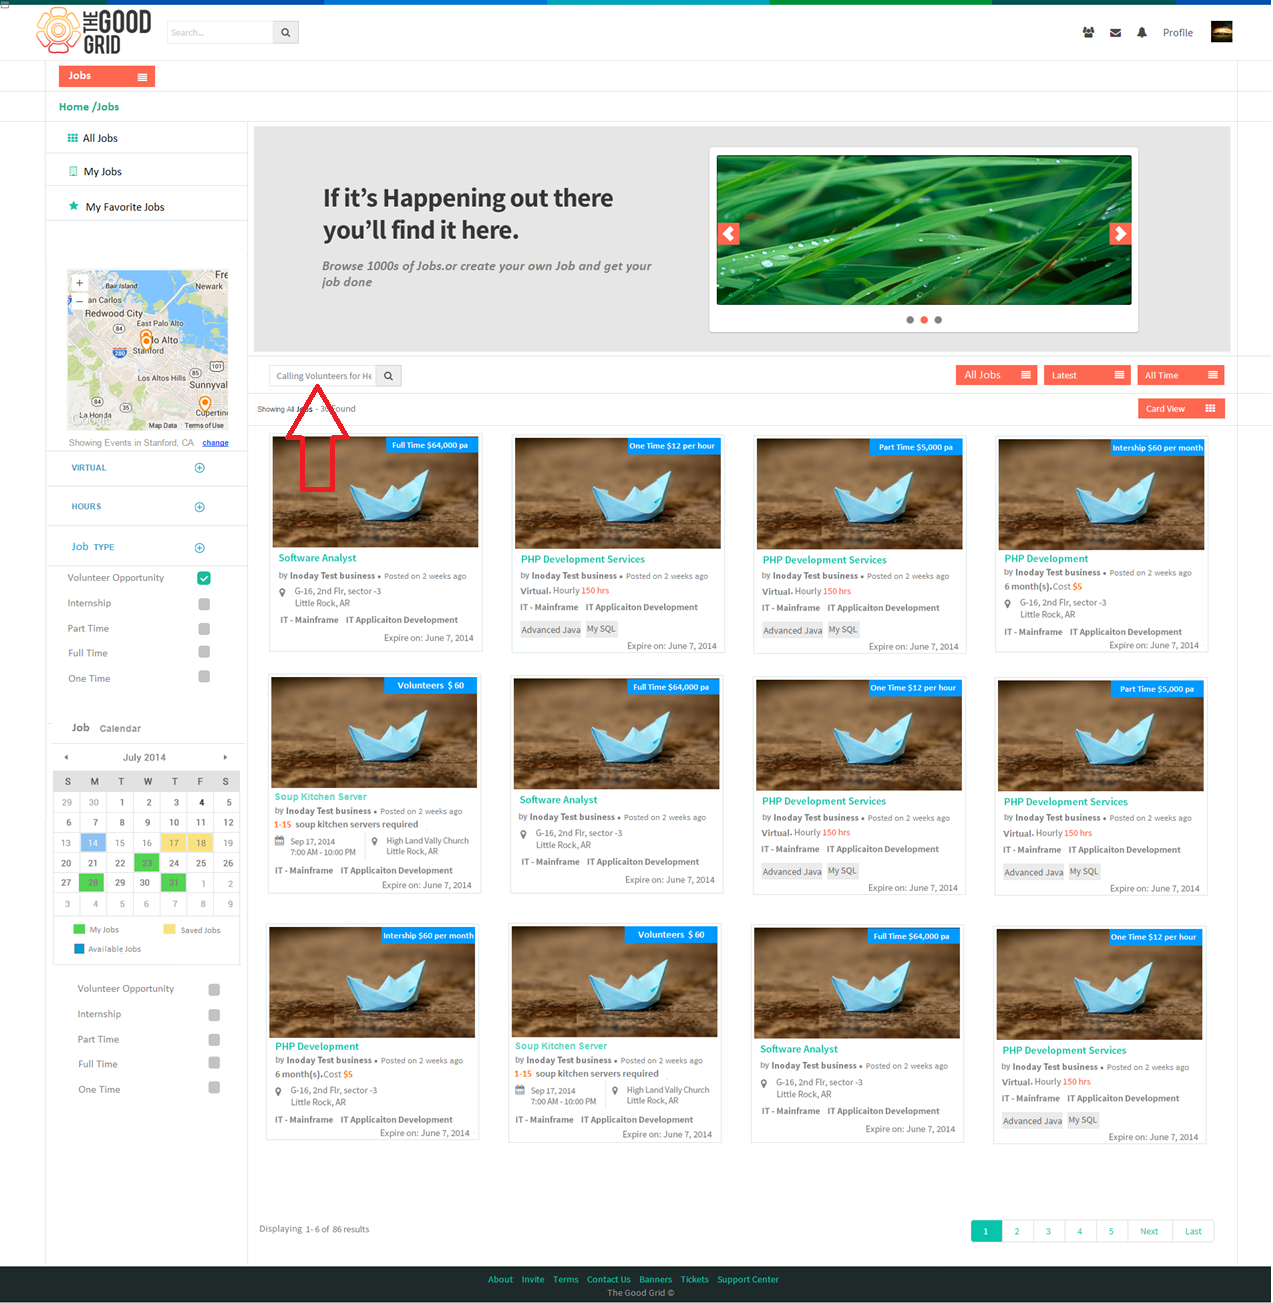
| + | * Jim wants to search Volunteer opportunity “Calling Volunteers for Health Camp”. For that he needs to enter desired Opportunity name in the Search bar and press Enter or click on Search Magnifier icon. | ||
| − | [[File: | + | [[File:V-39.png]] |
---- | ---- | ||
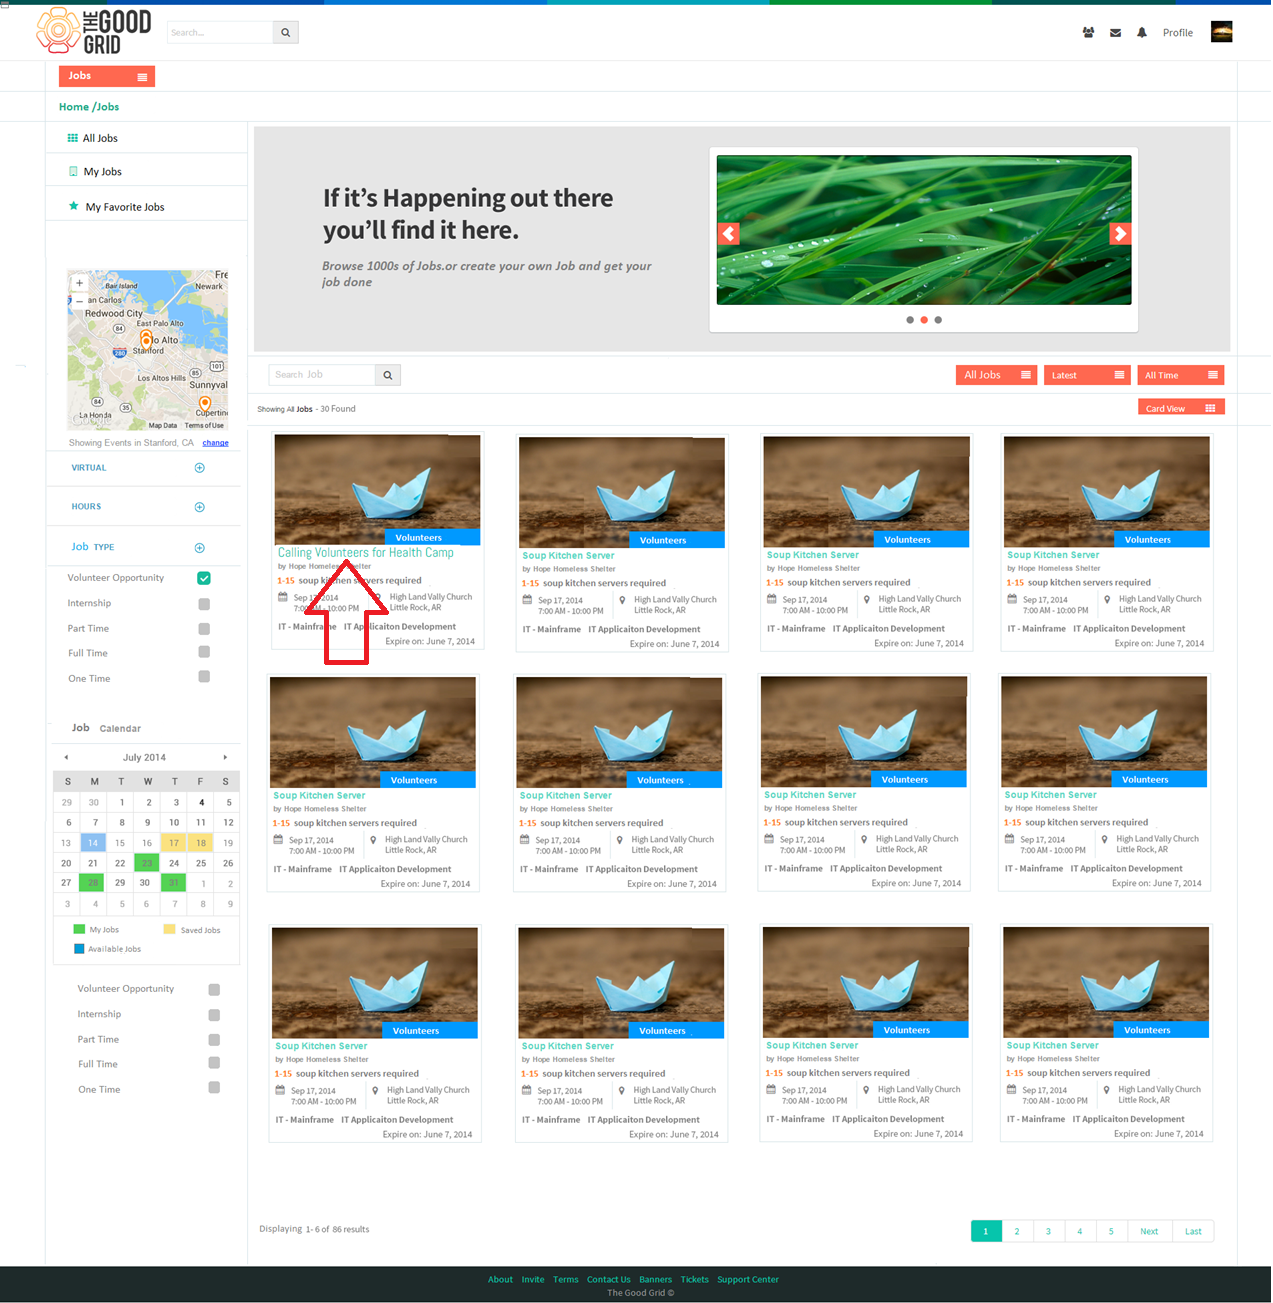
| − | * | + | * After clicking on Search icon he finds an Opportunity. |
| + | * Now on clicking the opportunity, it will redirect to that particular Opportunity’s view page. | ||
| − | [[File: | + | [[File:V-40.png]] |
---- | ---- | ||
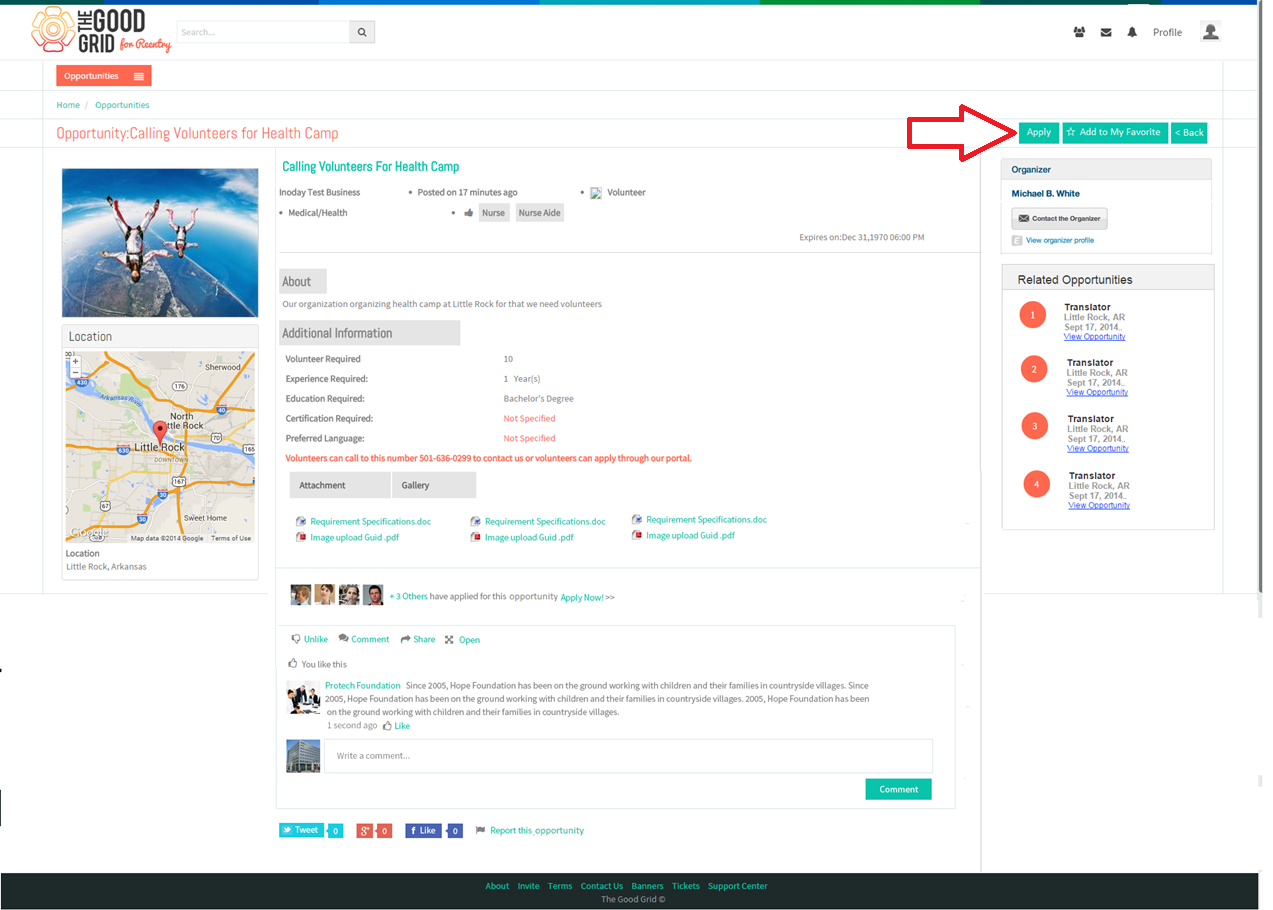
| − | * | + | * Jim views the Volunteer opportunity and to apply that he needs to click on Apply button. |
| − | [[File: | + | [[File:V-41.png]] |
---- | ---- | ||
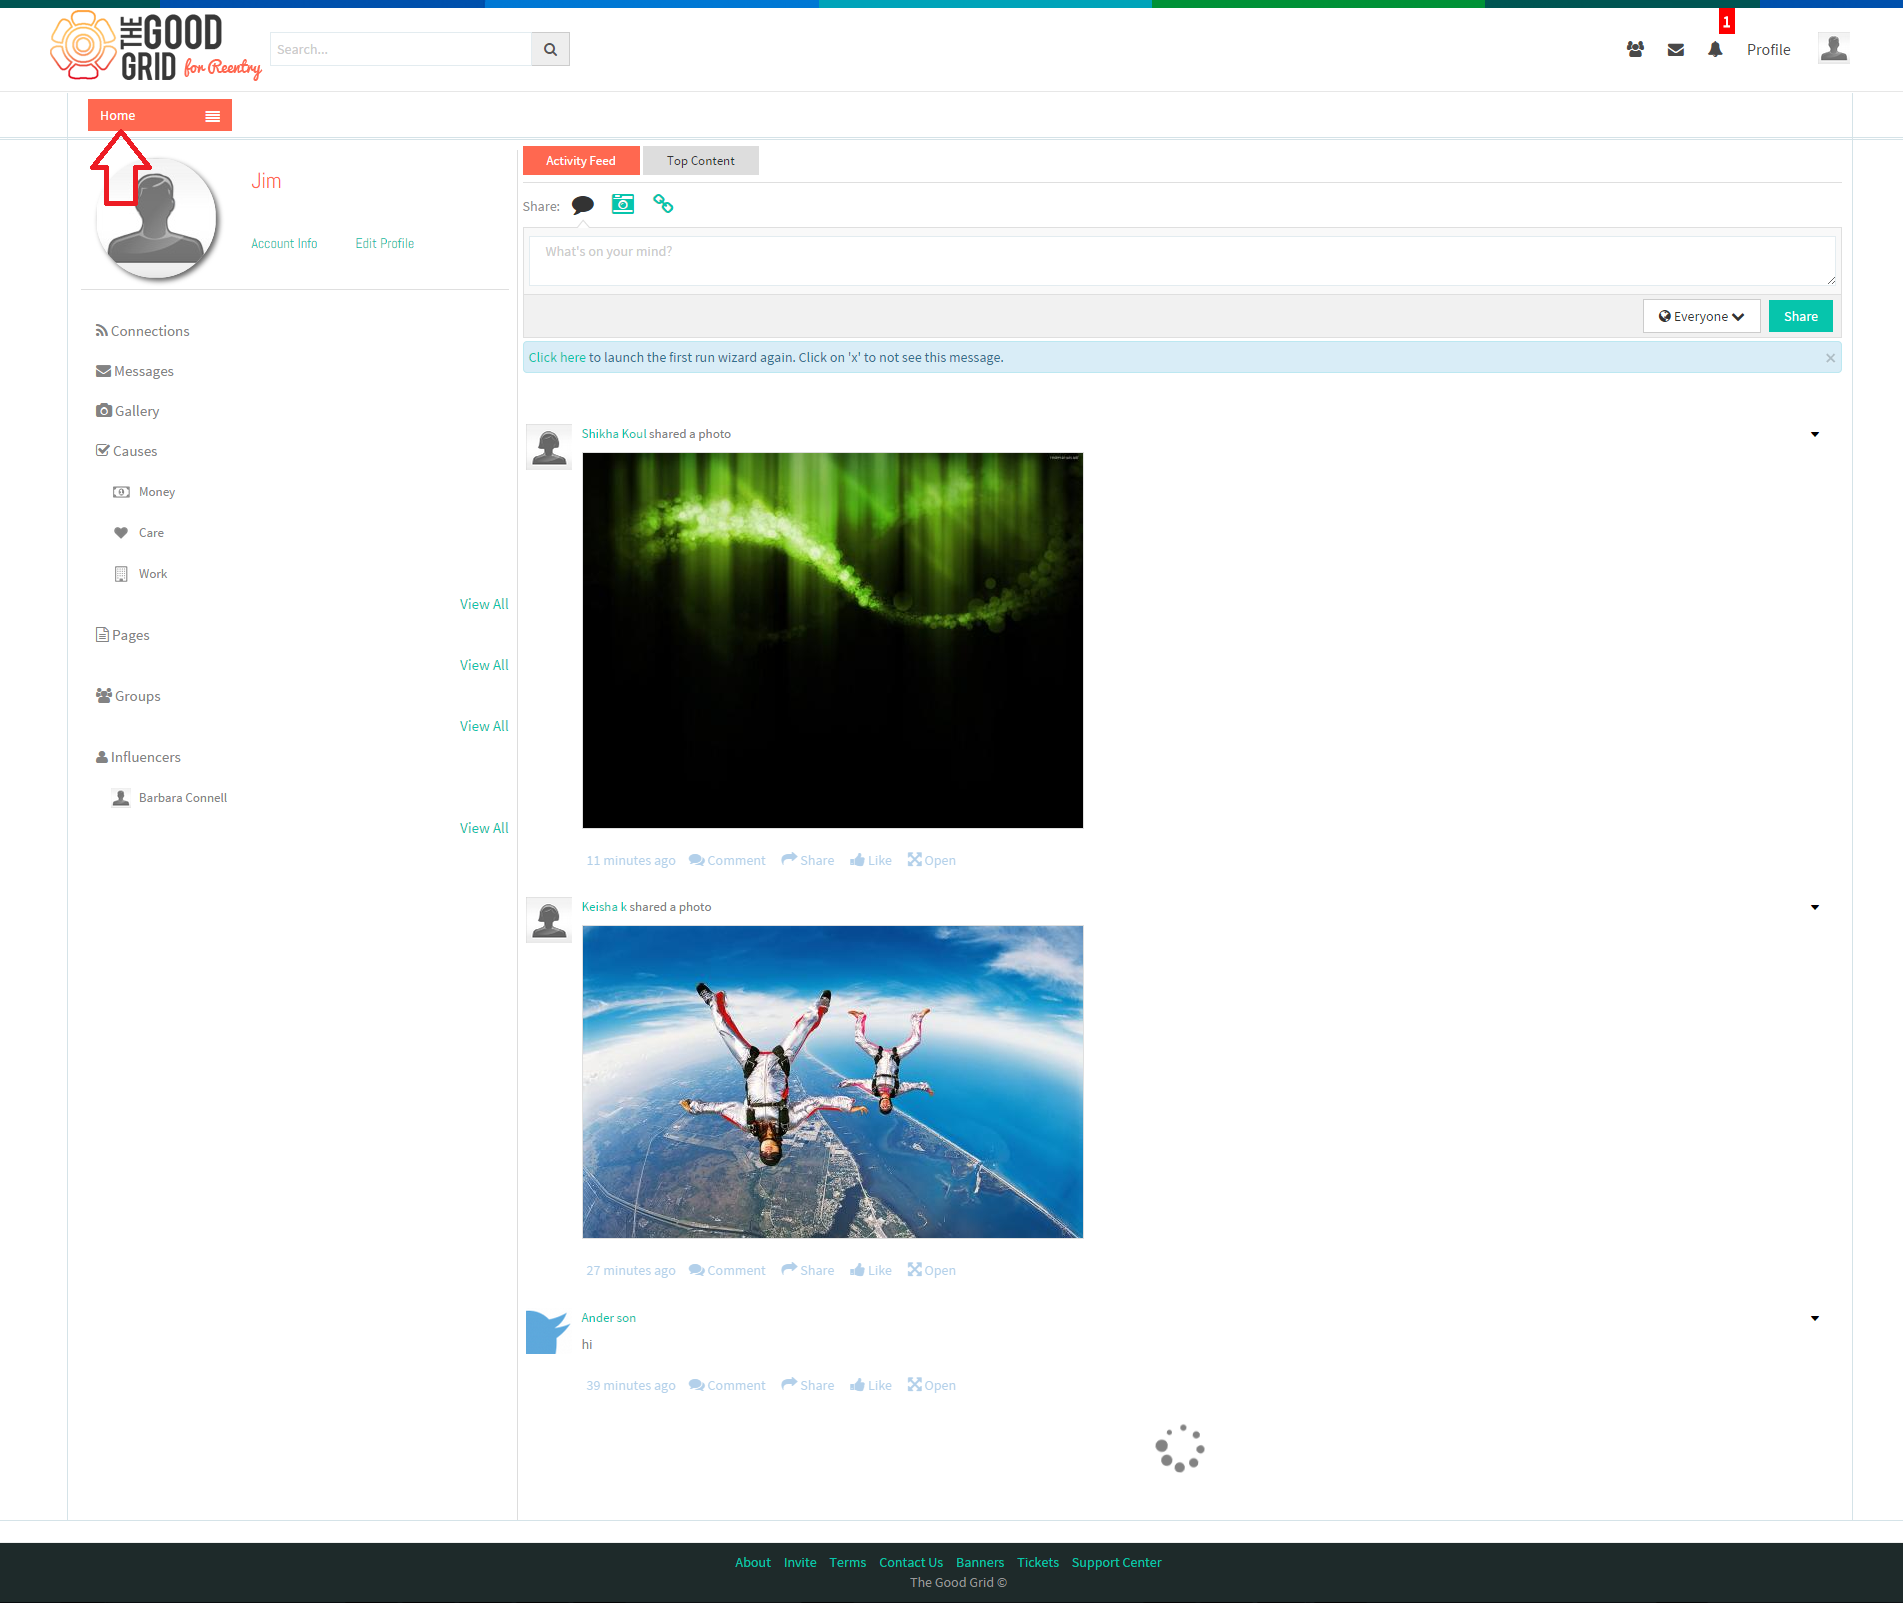
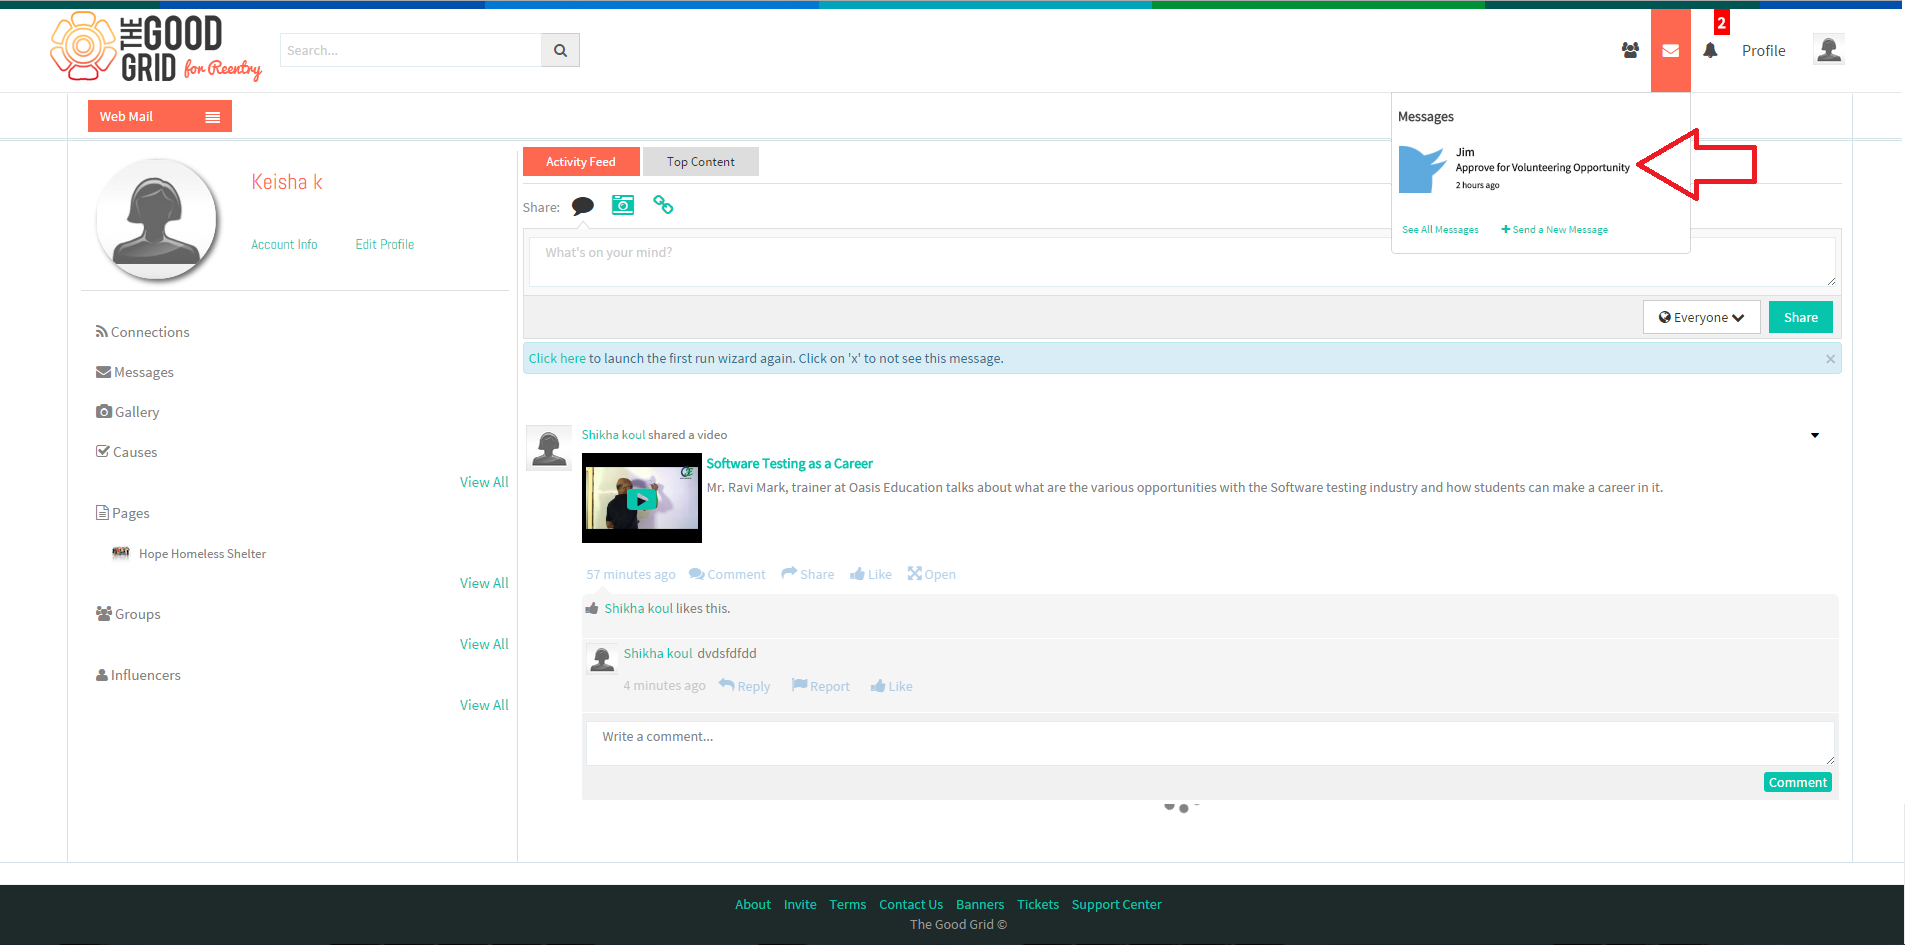
| − | * | + | * This generates a web mail to Keisha from Jim. |
| − | [[File: | + | [[File:V-42.png]] |
---- | ---- | ||
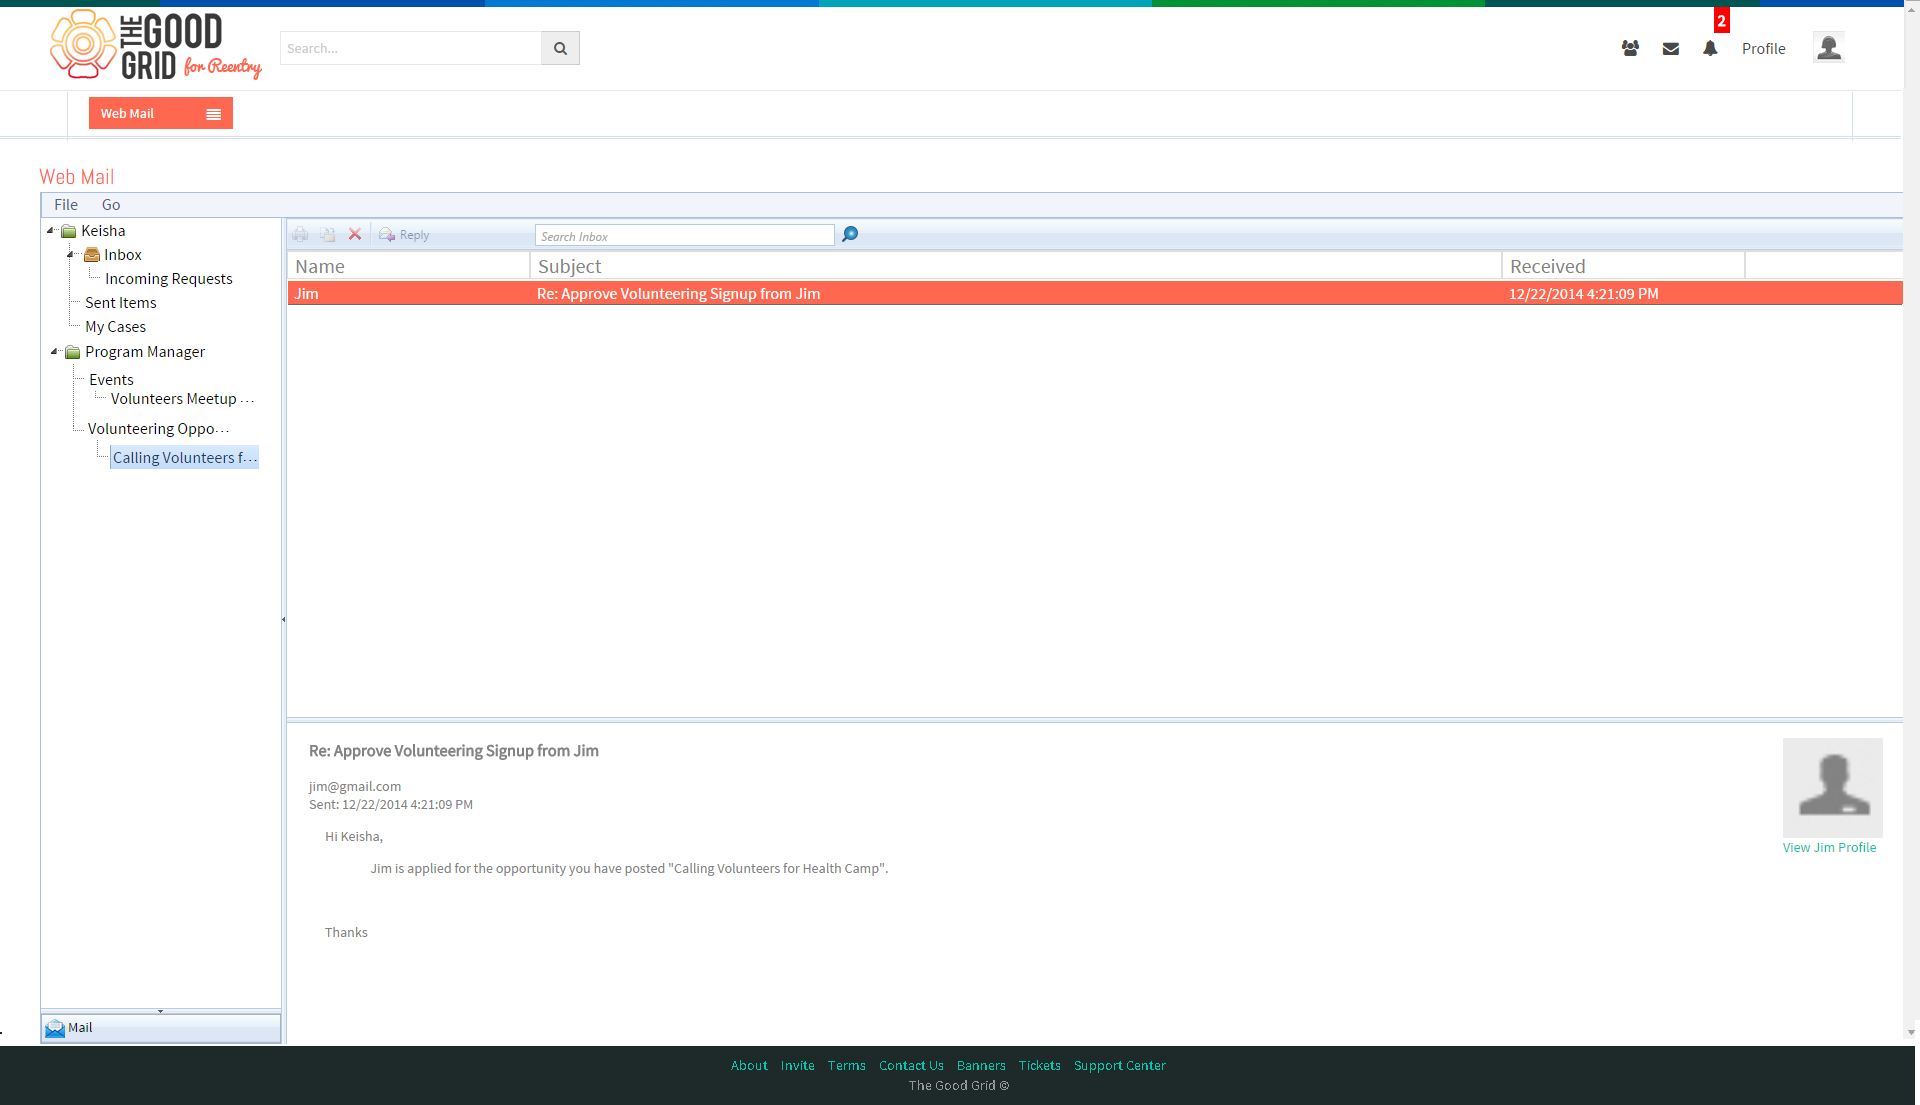
| − | * | + | * On clicking the received message it takes Keisha to her web mail. |
| − | [[File: | + | [[File:V-43.png]] |
---- | ---- | ||
Latest revision as of 00:15, 31 December 2014
Back to main menu
Applications Screen Flow
- Jim needs to enter the URL in the chrome browser and it takes him to the Landing Screen. For creating an account he needs to click Sign-up button.
- On clicking sign-up button, Jim is redirected to the sign-up screen.
- In sign-up screen he enters all mandatory information and clicks on sign-up button.
- After clicking on sign-up button, screen displays the message for successful sign-up process & the registration process will be kept as pending for Administrator approval.
- After that the Jim will receive a confirmation mail for sign-up in Good Grid in the registered email.
- Once the Administrator approves the user, Jim will receive the Account Activation mail in the registered mail address.
- Jim needs to click on the received link in activation mail & application will take him to the “Create New Password” screen where he can set the password for his account.
- Here Jim enters the Password and Confirm Password & clicks on “Update” button.
- After clicking on “Update” button, landing screen will be displayed.
- Here Jim needs to provide valid Email and Password & click on Login button.
- After that application will take him to the First Run wizard.
- To follow any cause, Jim needs to click on “Follow” link.
- Once he will click the Follow link, the “Follow” will change to “Un-follow”.
- Jim can also skip the first run wizard and he can directly go to his home page by clicking the link in the top banner.
- After following the Causes, to move to next section Jim needs to click on Next button as shown in the screen.
- On clicking Next button he is redirected to the “Add connections” section.
- After adding the connections again he needs to click on Next button to move to the next section.
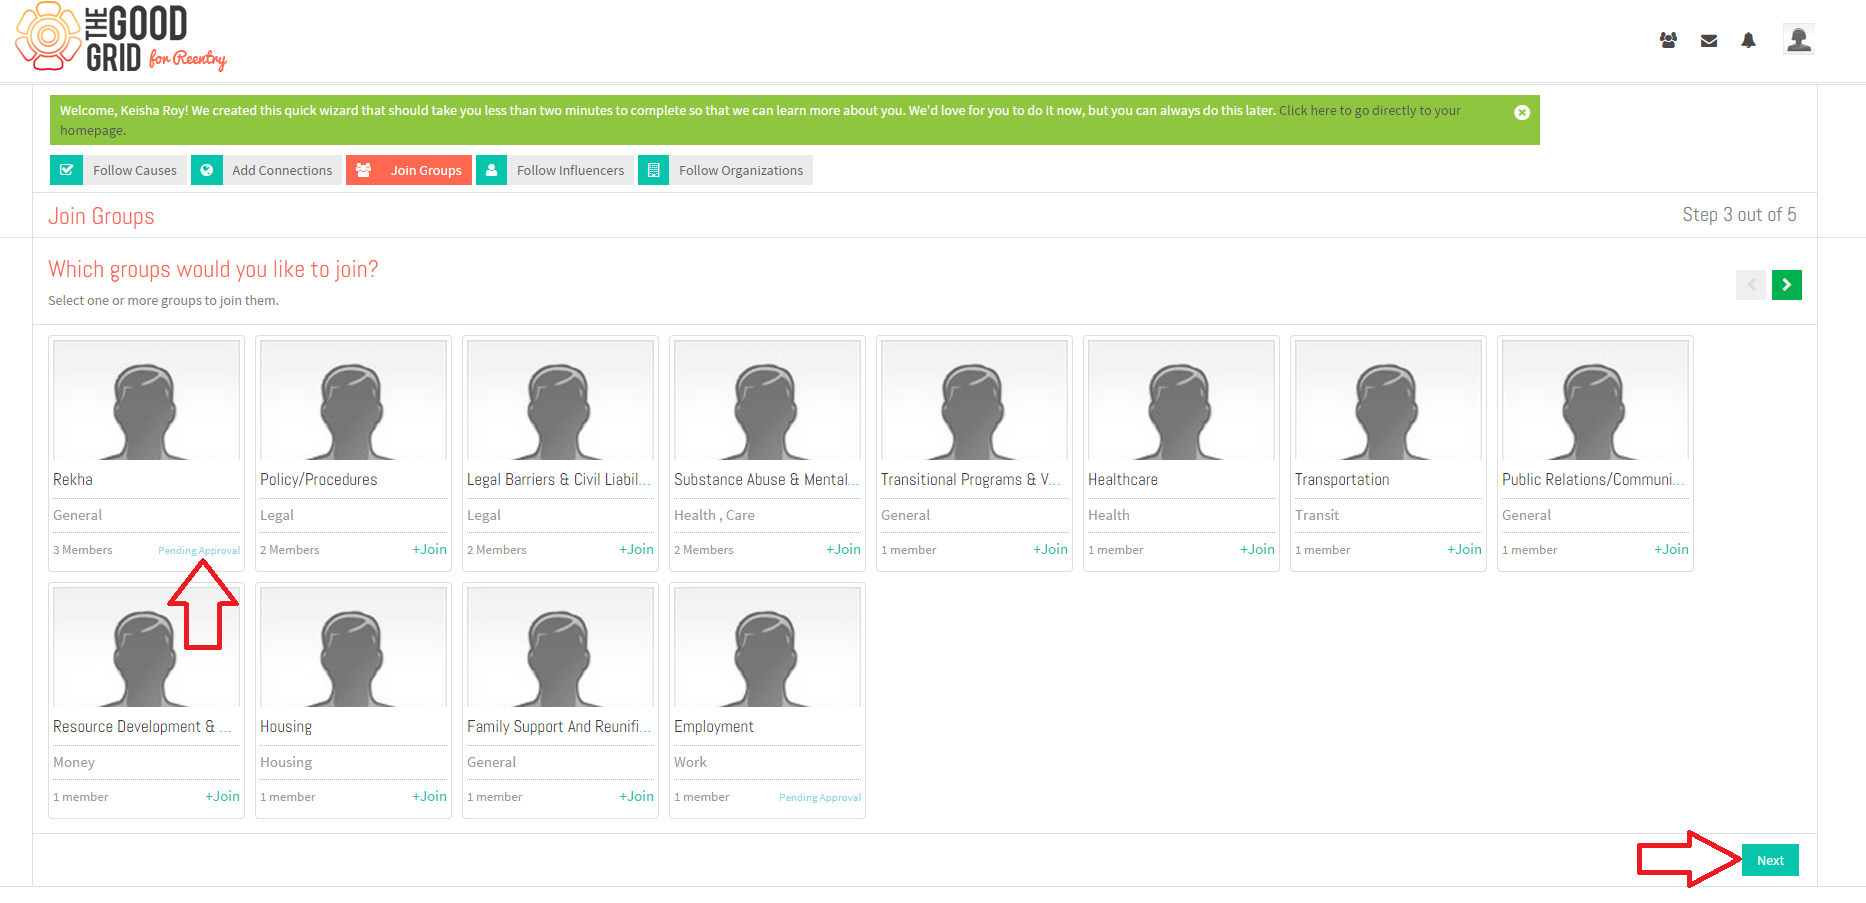
- On clicking Next button he is redirected to the “Join Groups” section.
- To join any Group, Jim needs to click on “Join” link.
- Once he will click the Join link, the “Join” will get change to “Pending Approval”or sometimes he can directly join the Group as per the settings of an Organization.
- After that he needs to click on Next button to move to the next section.
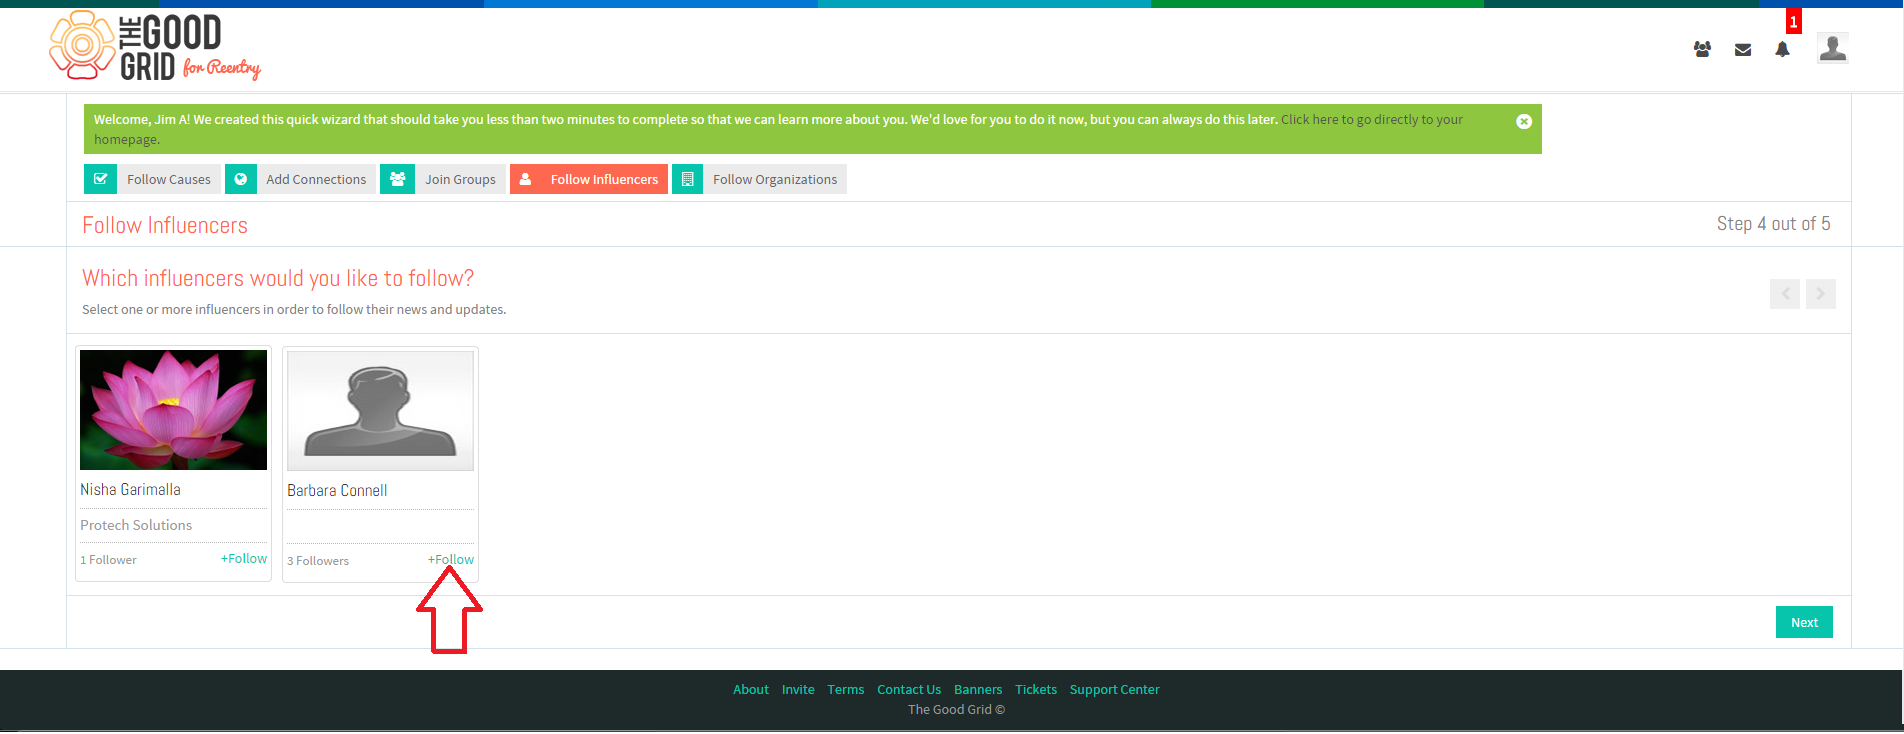
- On clicking Next button he should be redirected to the “Follow Influencers” section.
- To follow any Influencer, Jim needs to click on “Follow” link.
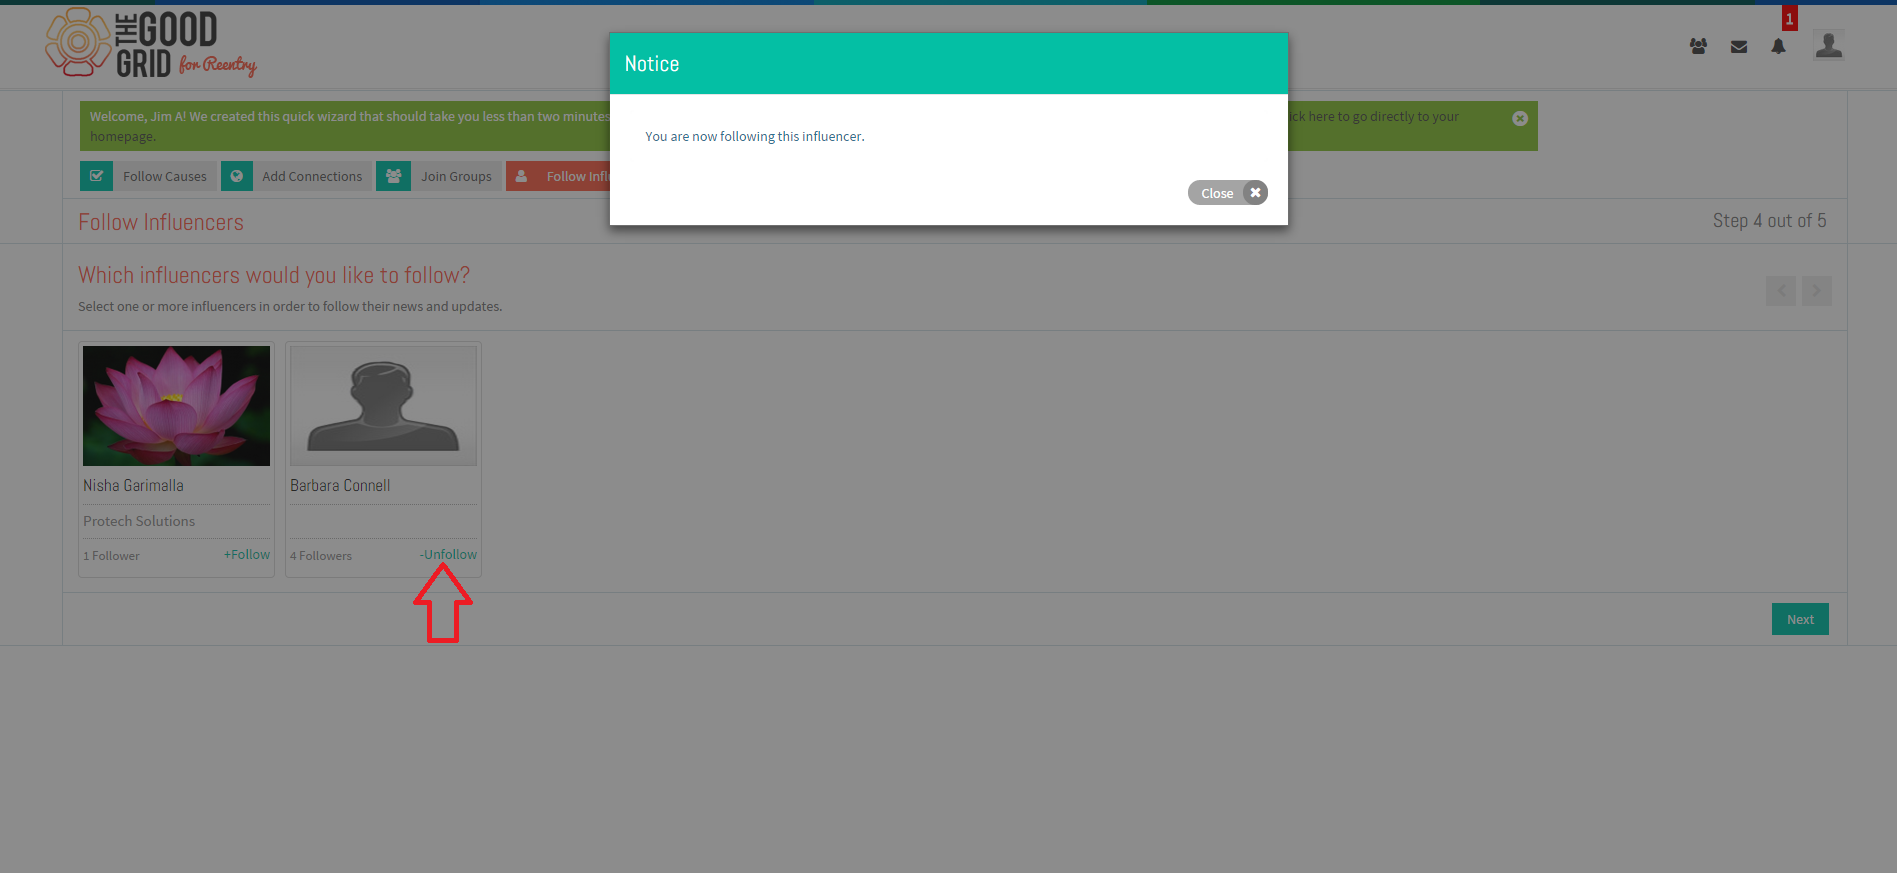
- Once he will click the Follow link, the “Follow” will get change to “Un-follow” & simultaneously the screen will display a notice as “You are now following this Influencer”.
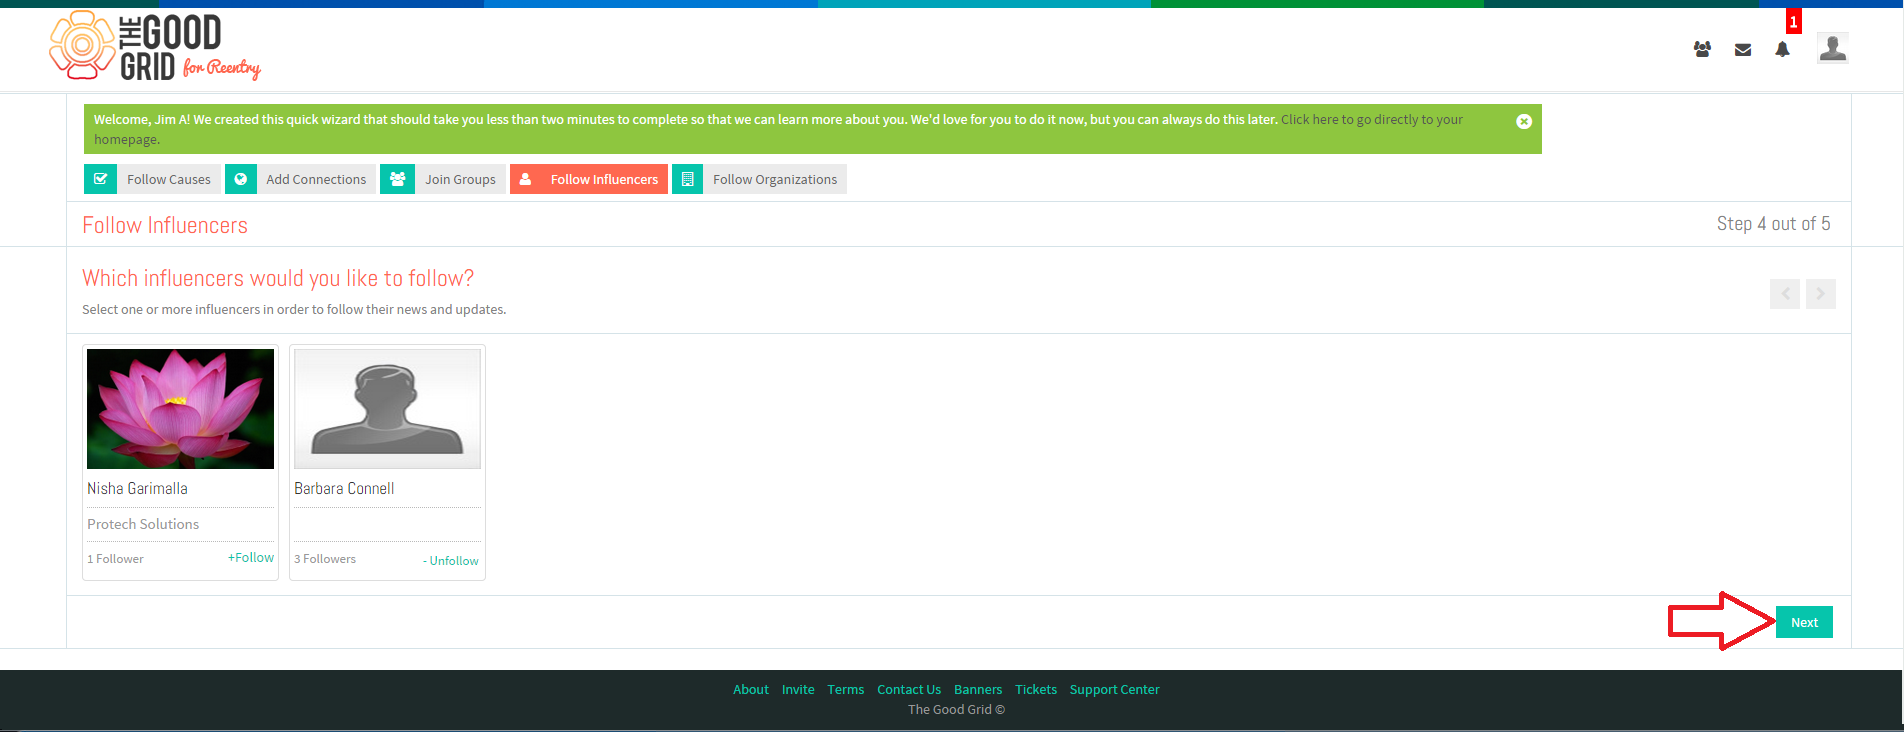
- After that he needs to click on Next button to move to the next section.
- On clicking Next button he is redirected to the “Follow Organizations” section.
- To follow any Organization, Jim needs to click on “Follow” link.
- Once he will click the Follow link, the “Follow” will get change to “Un-follow” & simultaneously the screen will display a notice as “You are following this Organization”.
- After that he needs to click on Next button to move to the Home Page.
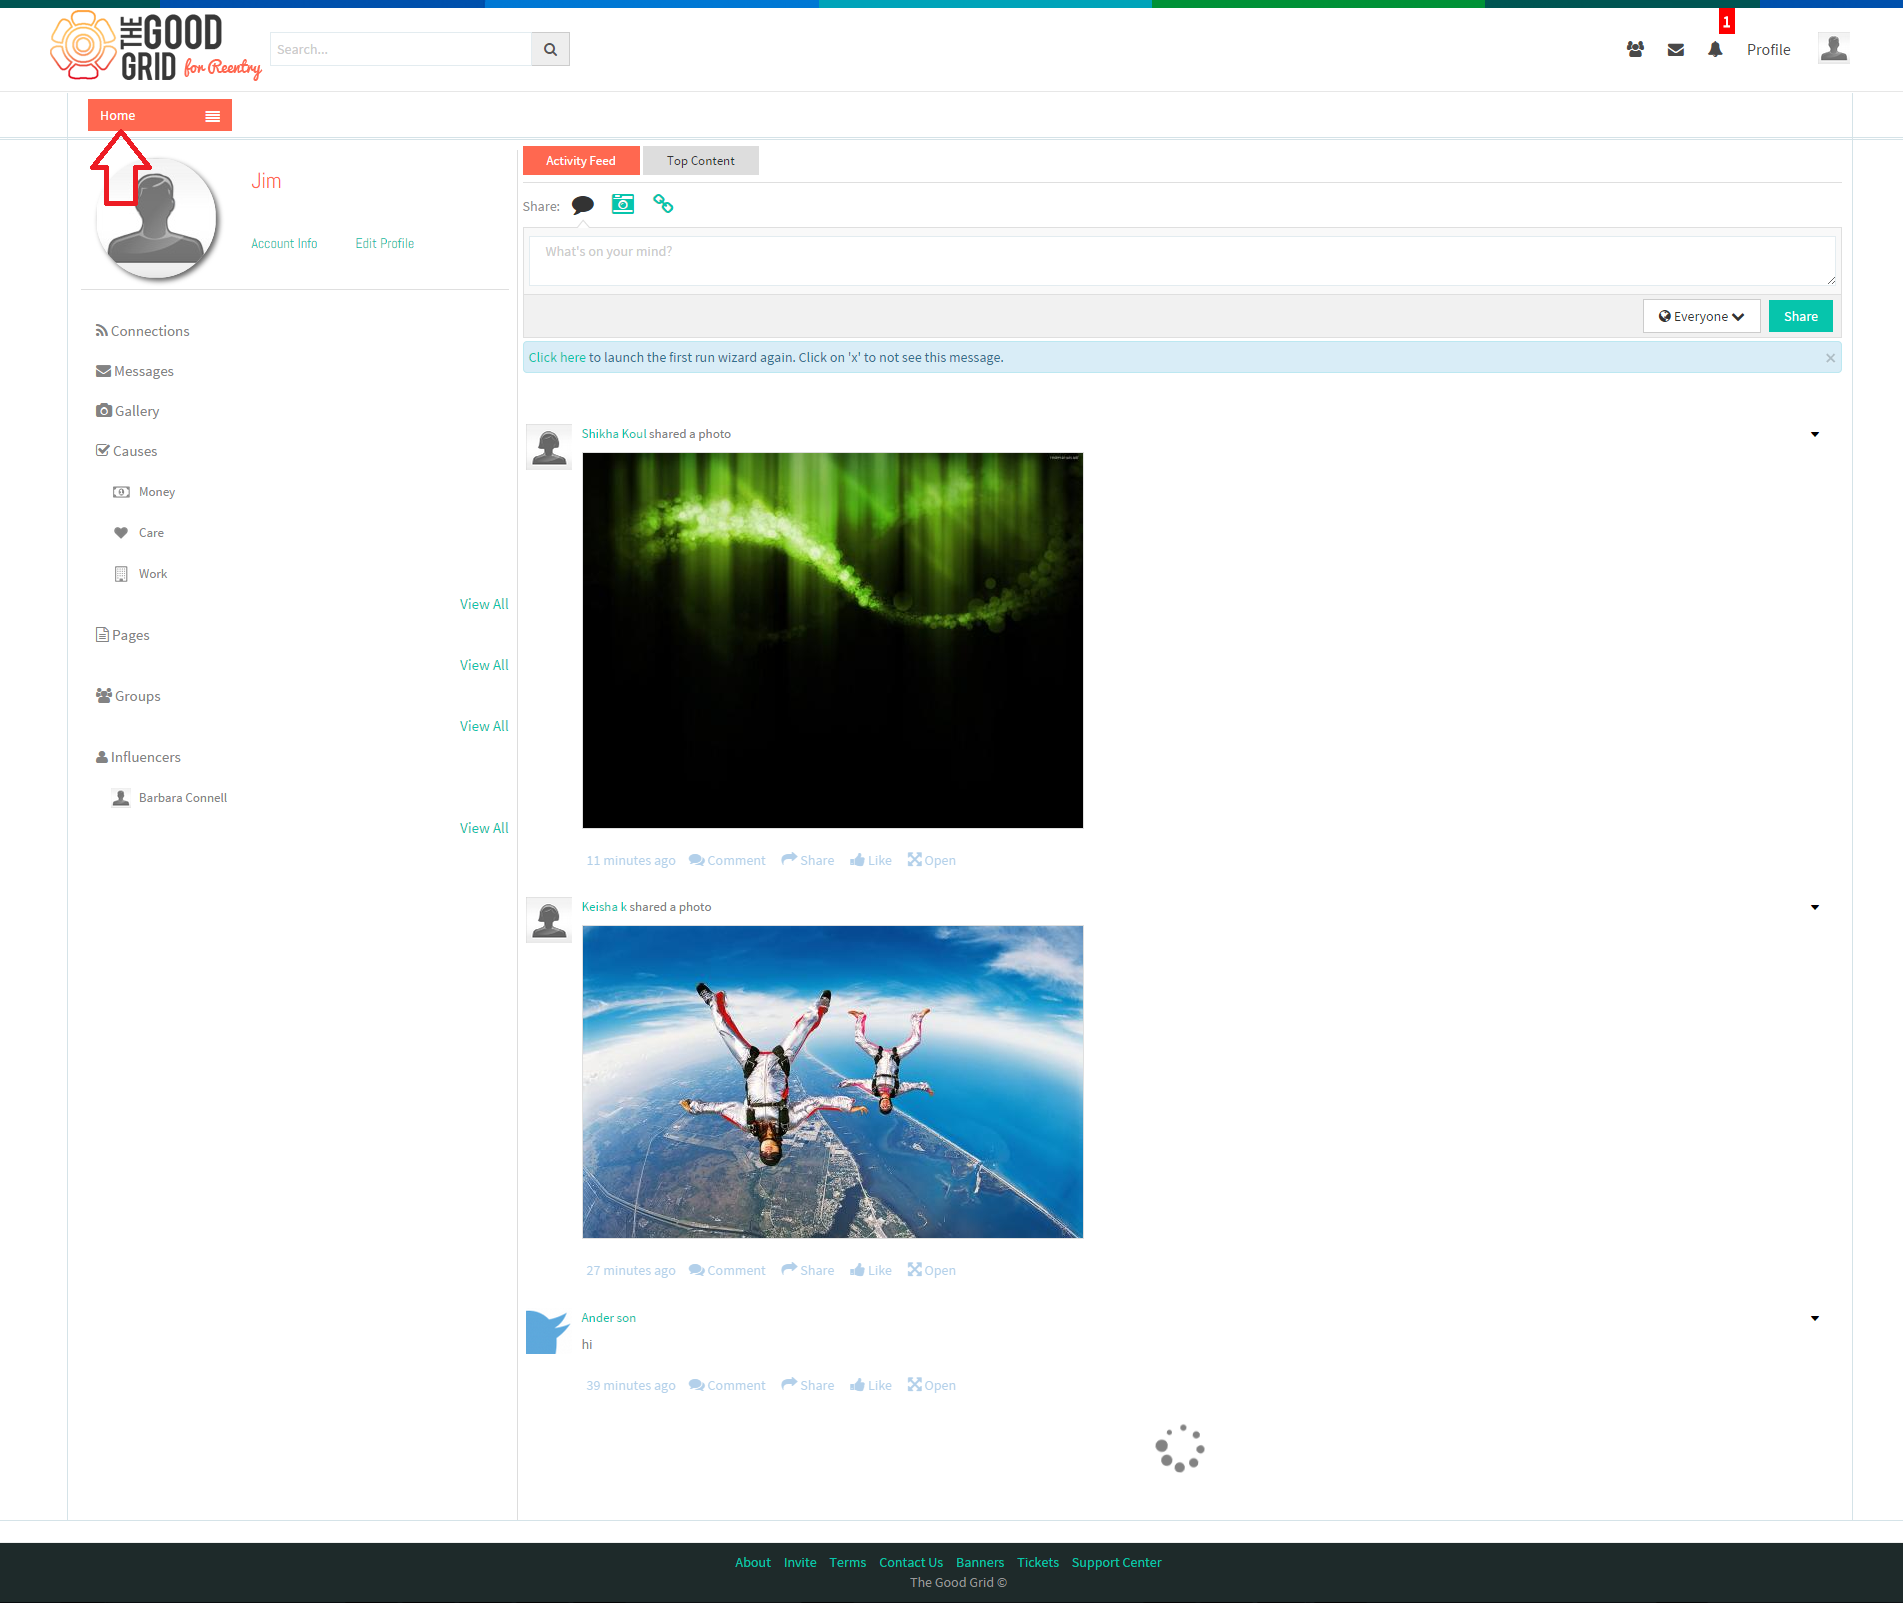
- Now the Jim will be redirected to his Home Page, highlighting the Activity Feed tab.
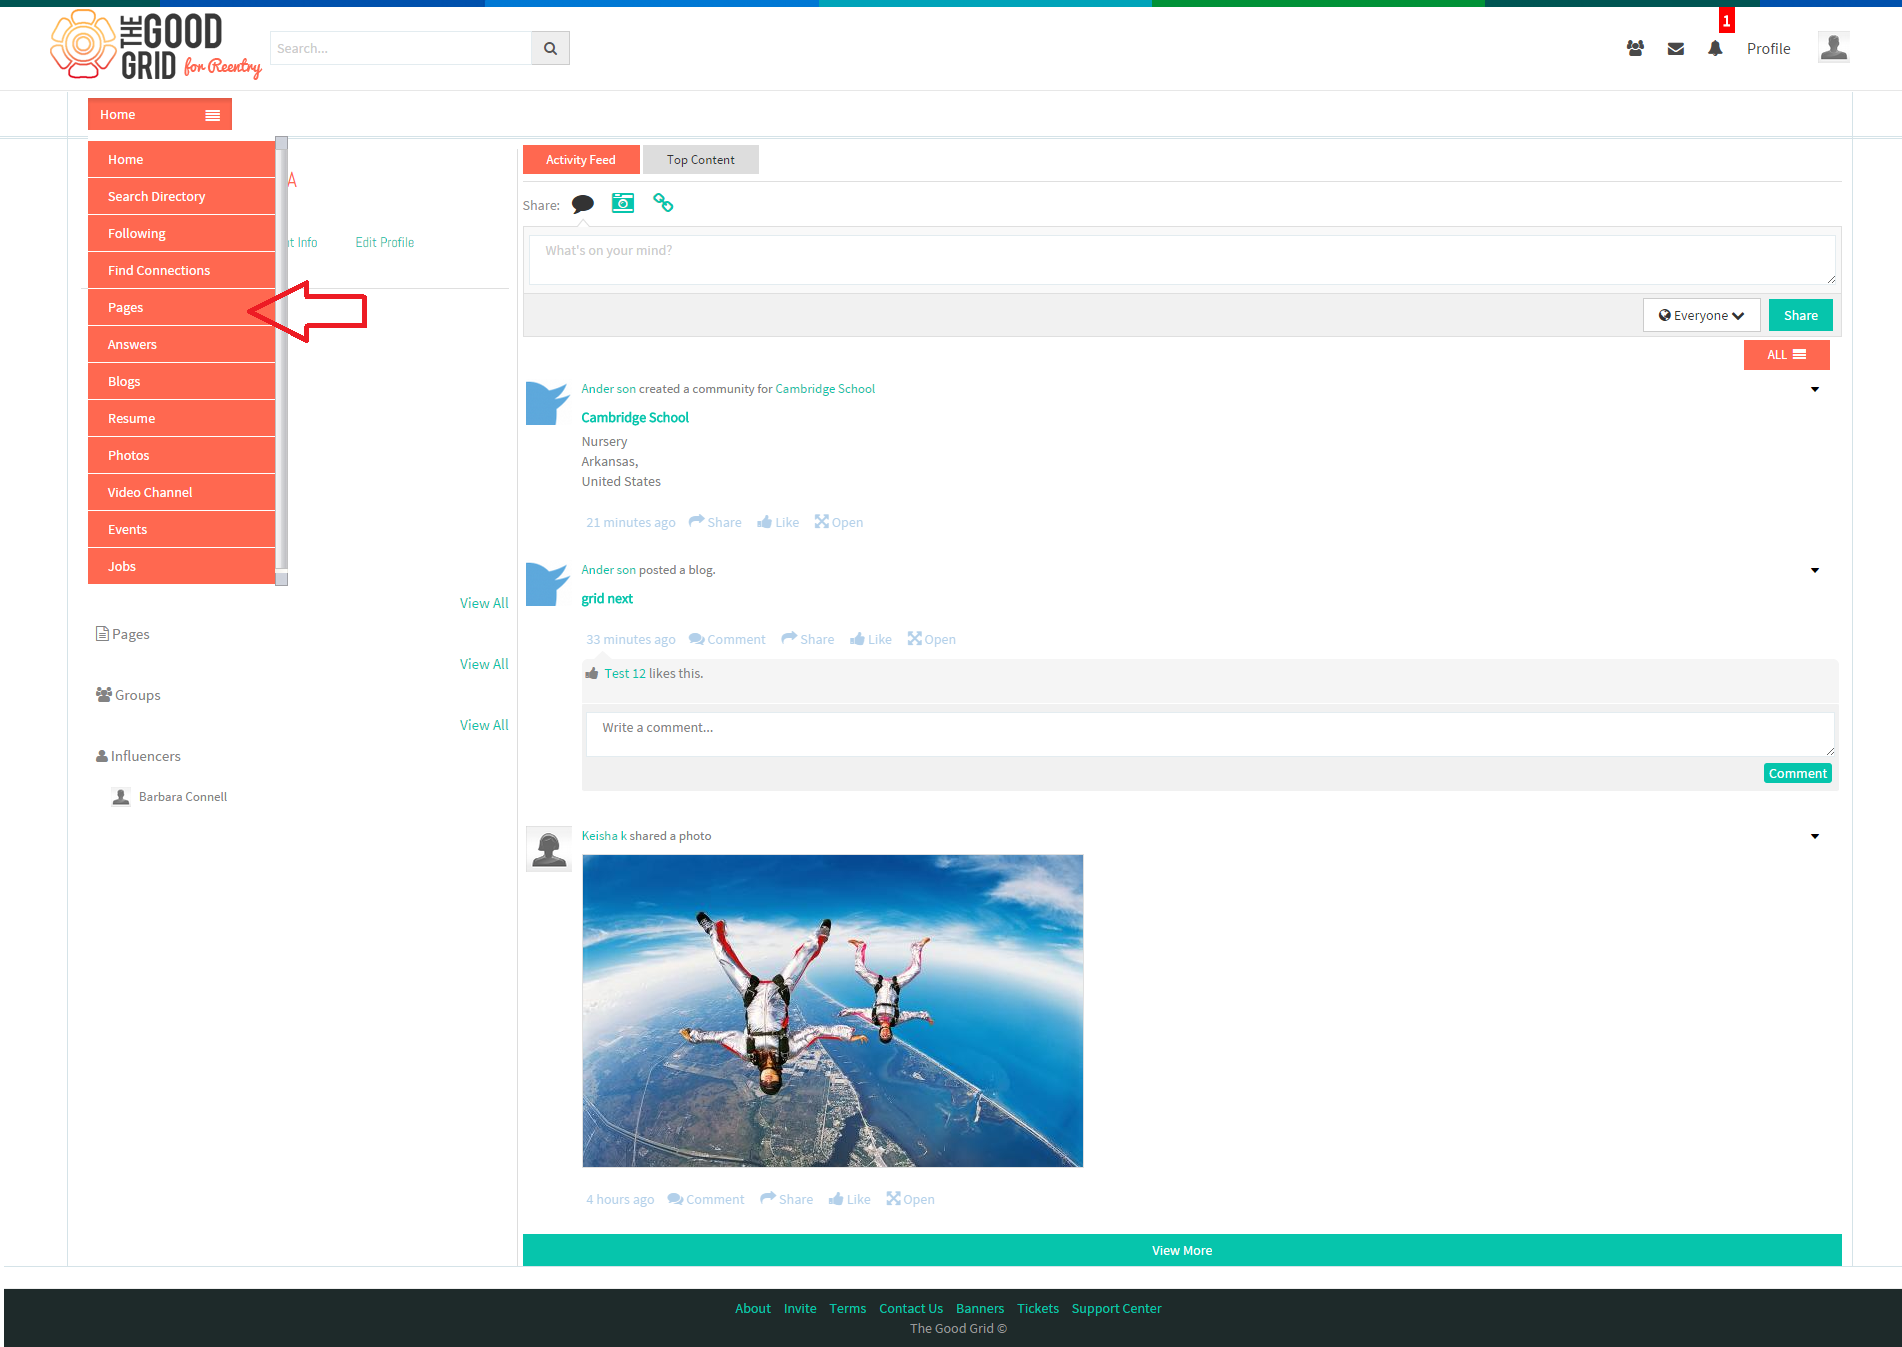
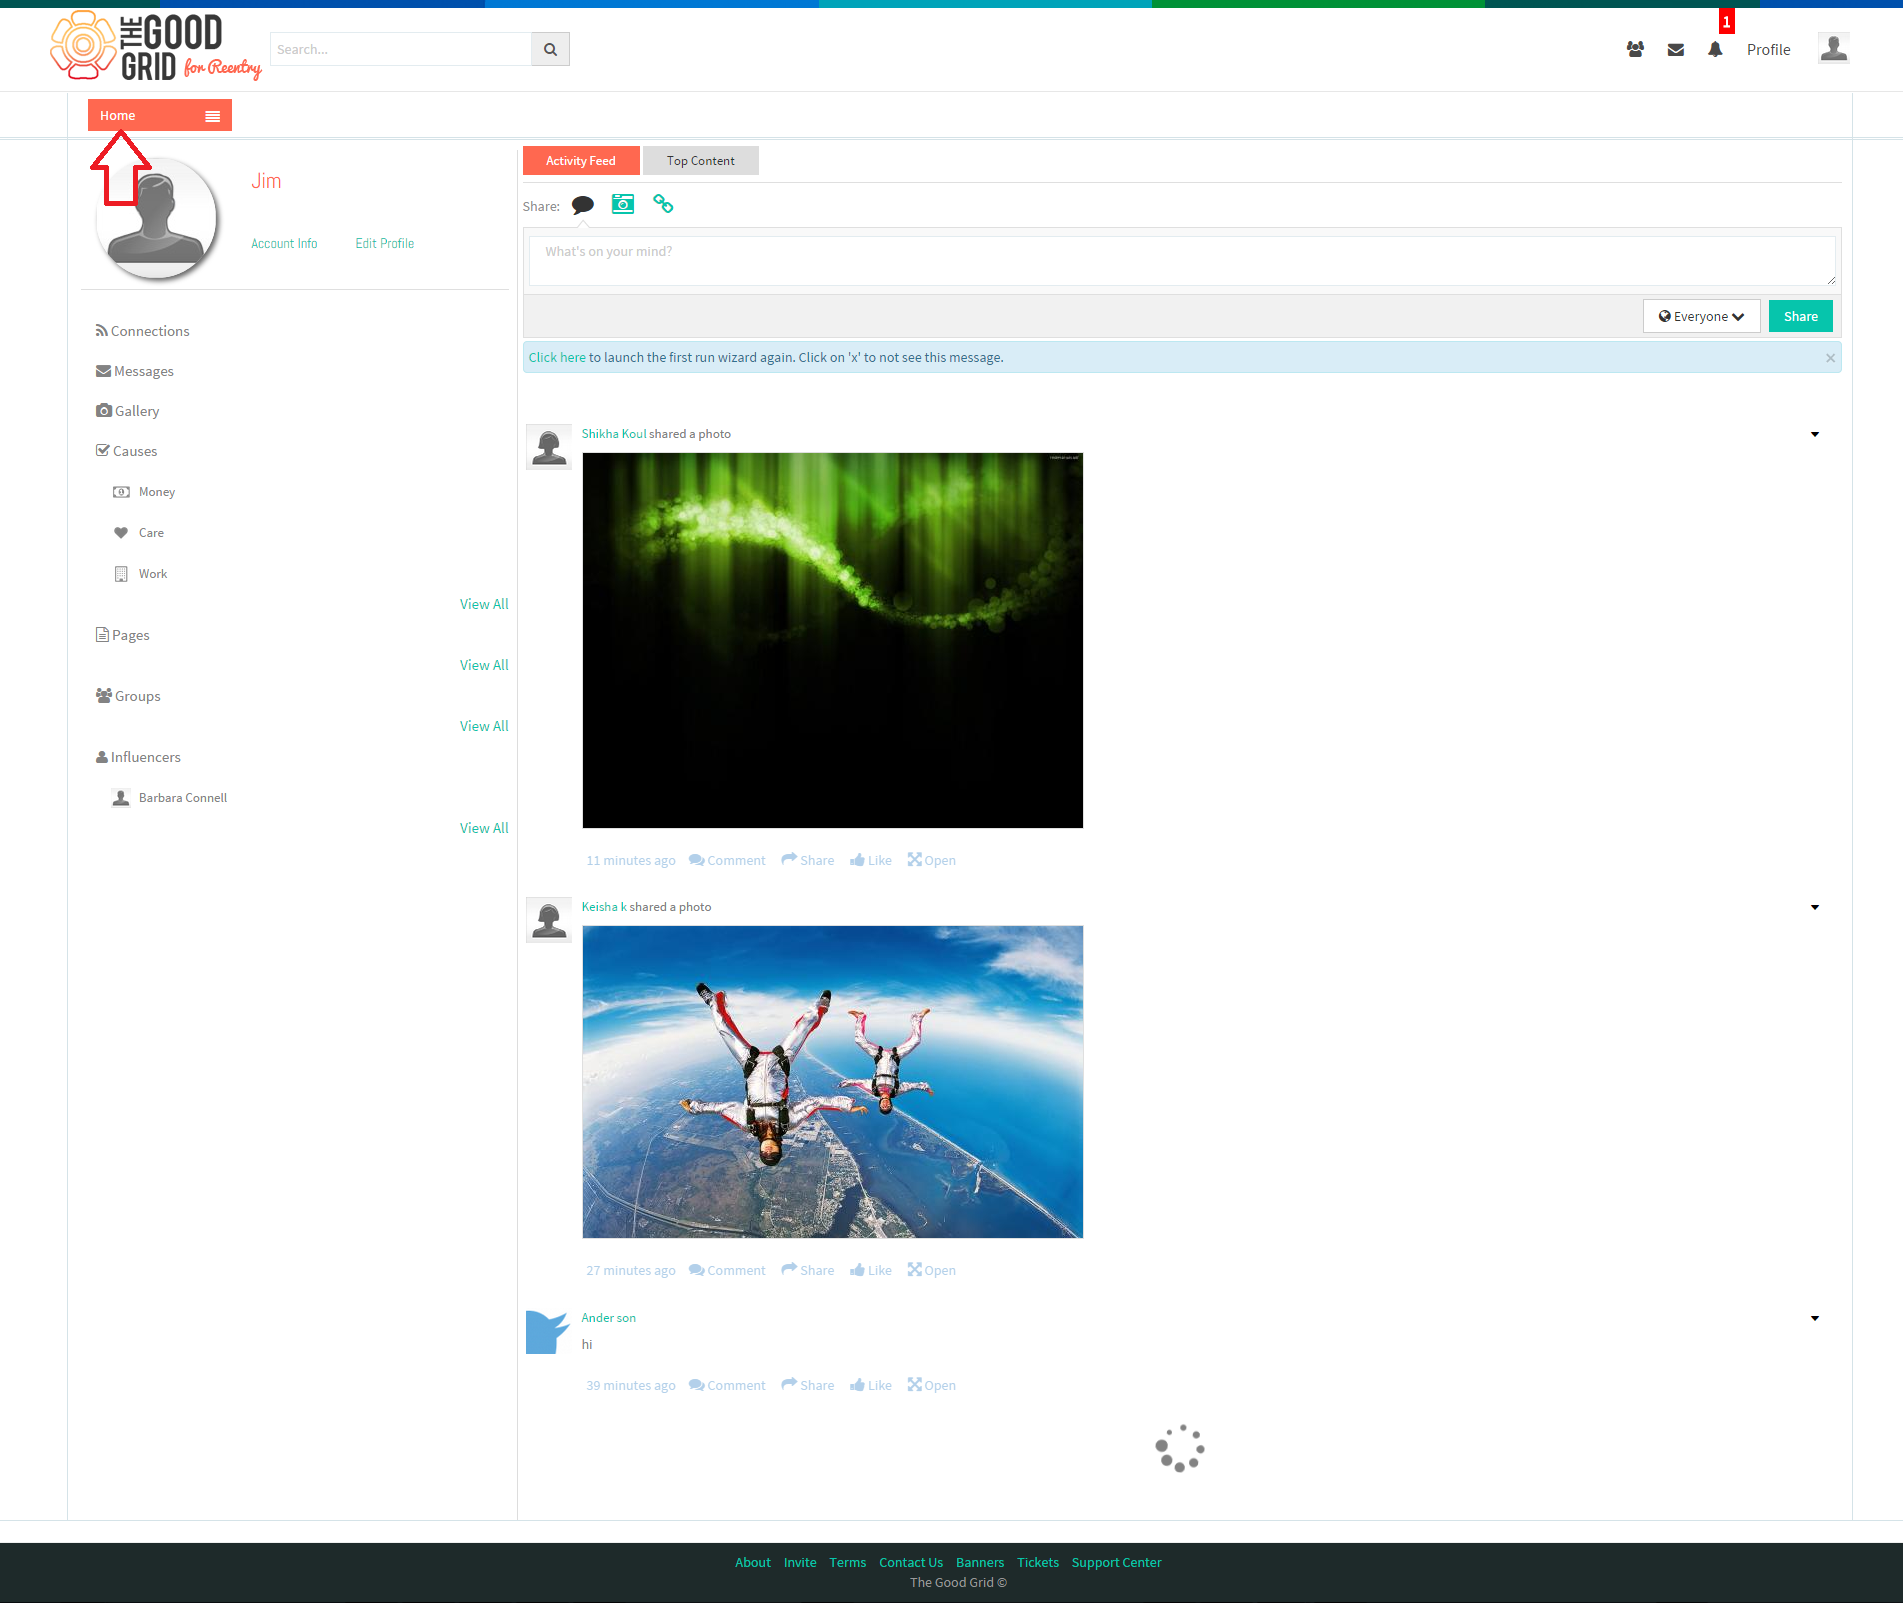
- To search an Organization Jim needs to click on Main Menu.
- On clicking Main Menu, list of options will be displayed from where Jim needs to select “Pages” option.
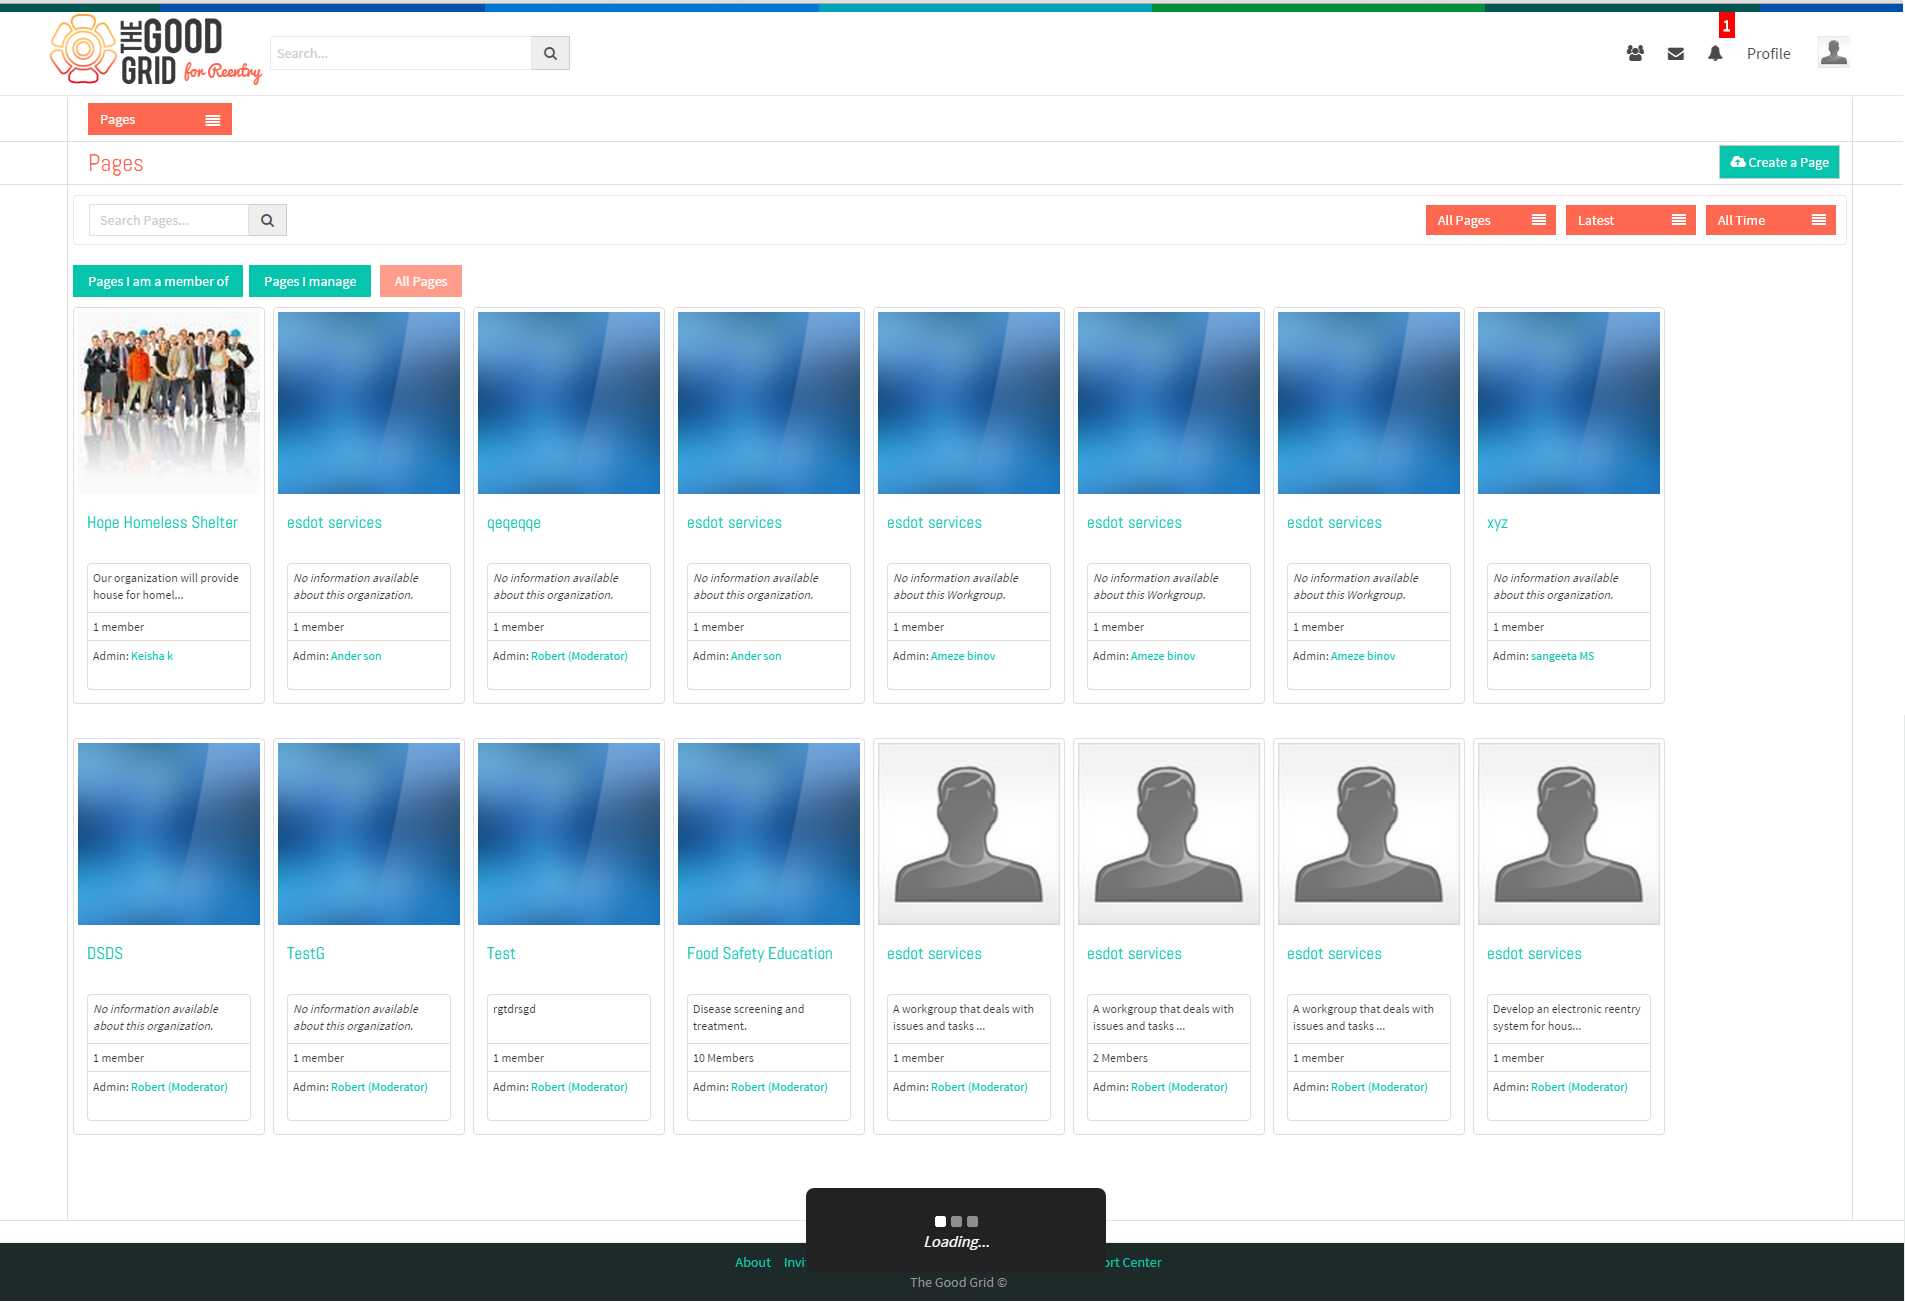
- On selecting Pages from the main menu, he is redirected to the Pages screen.
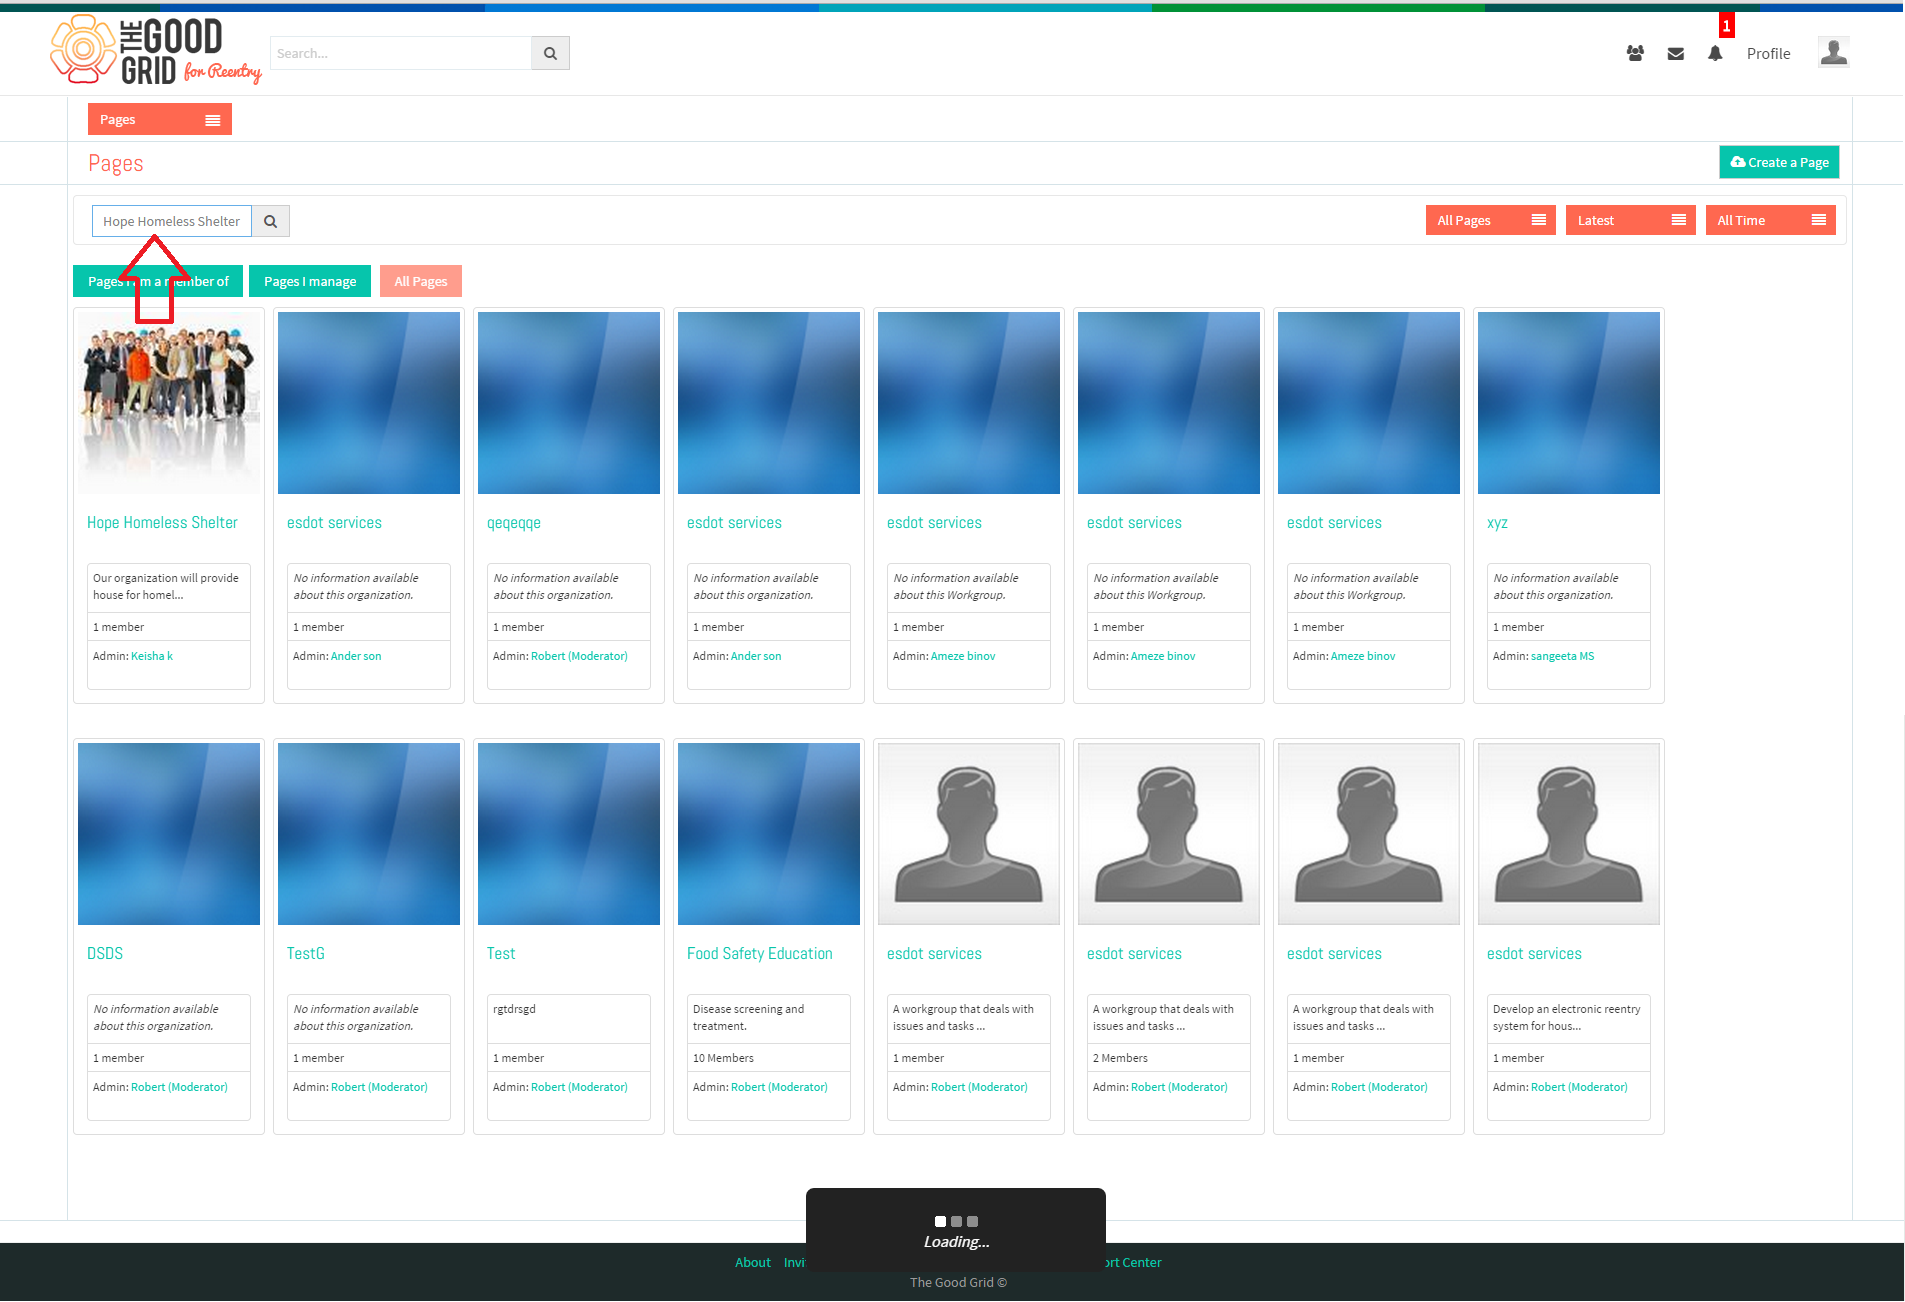
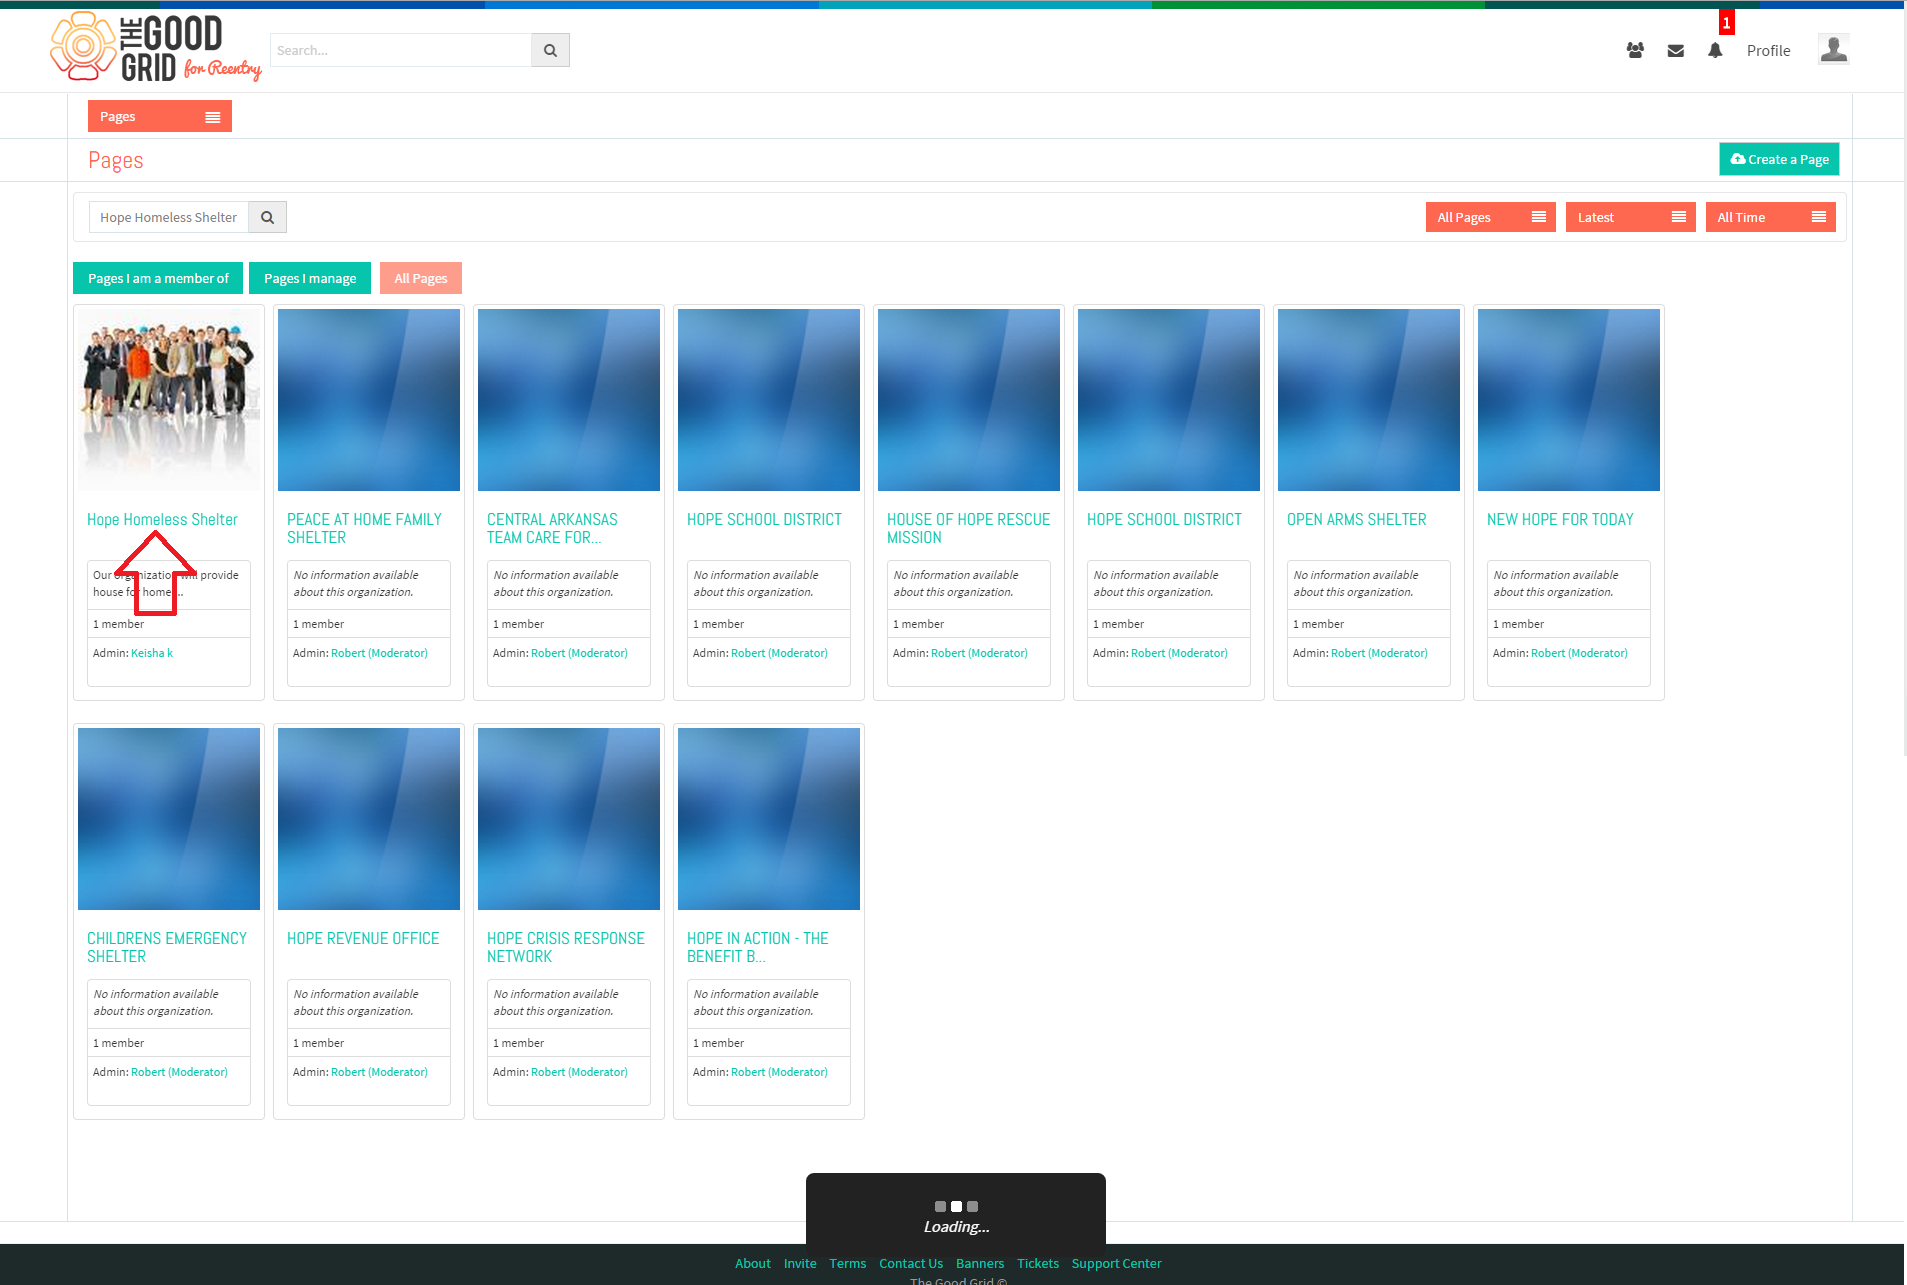
- Jim wants to search an Organization “Hope Homeless Shelter”. For that he needs to enter desired Organization name in the Search bar and press Enter or click on Search Magnifier icon.
- After clicking on Search icon he finds an Organization.
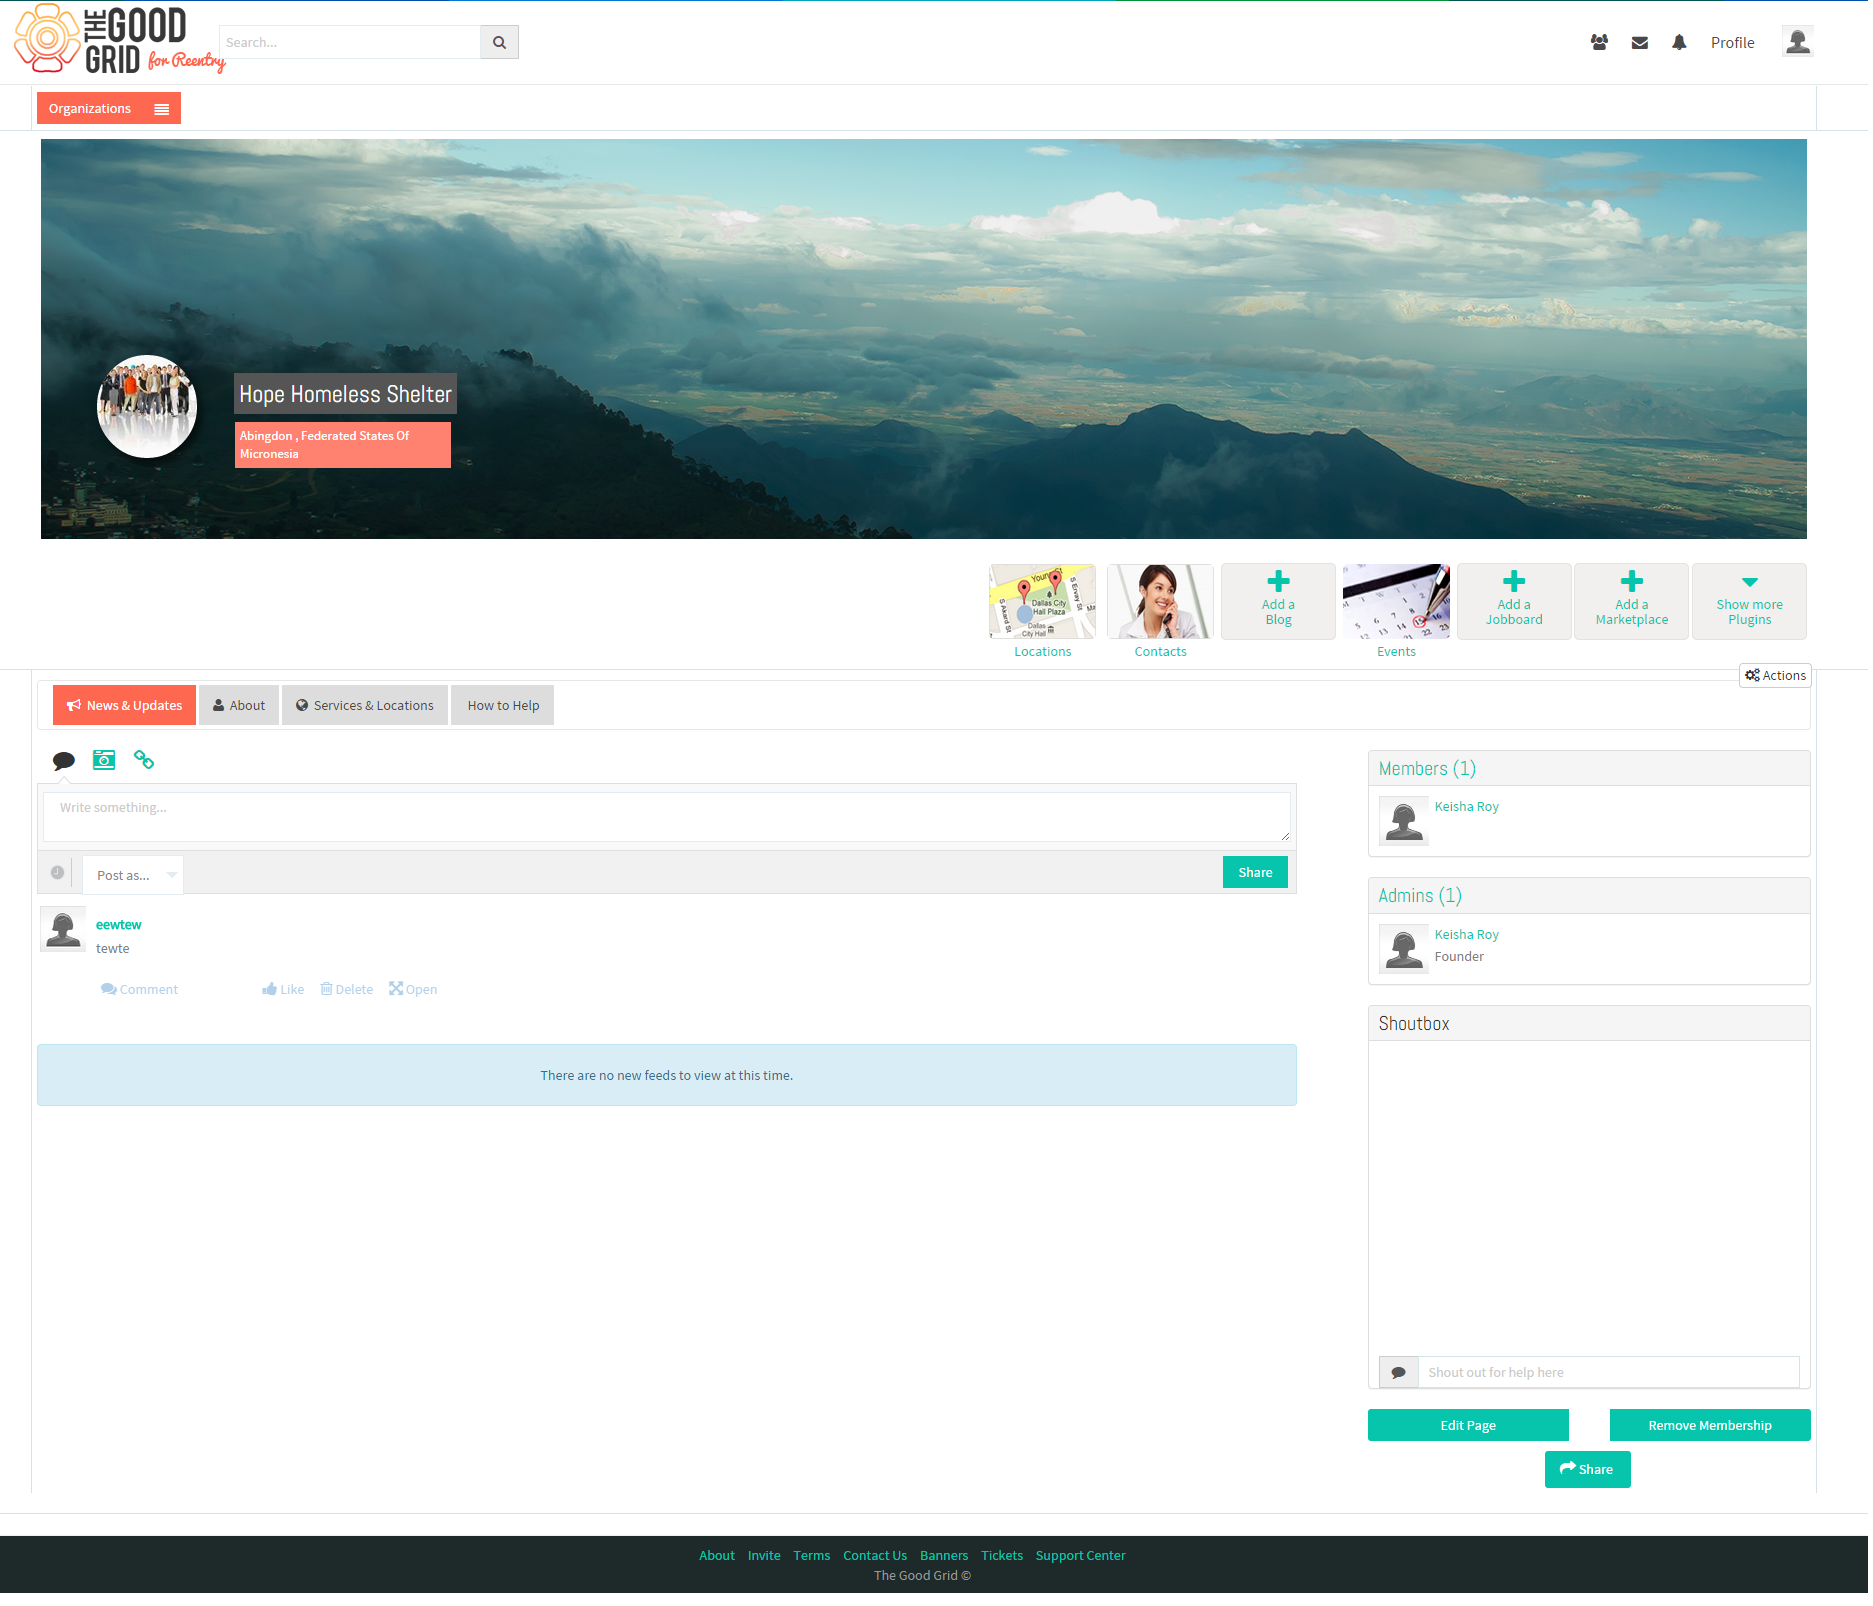
- On clicking the Organization Jim is redirected to that particular Organization’s Profile.
- Now Jim wants to search an Event. For that he again needs to click on Main Menu.
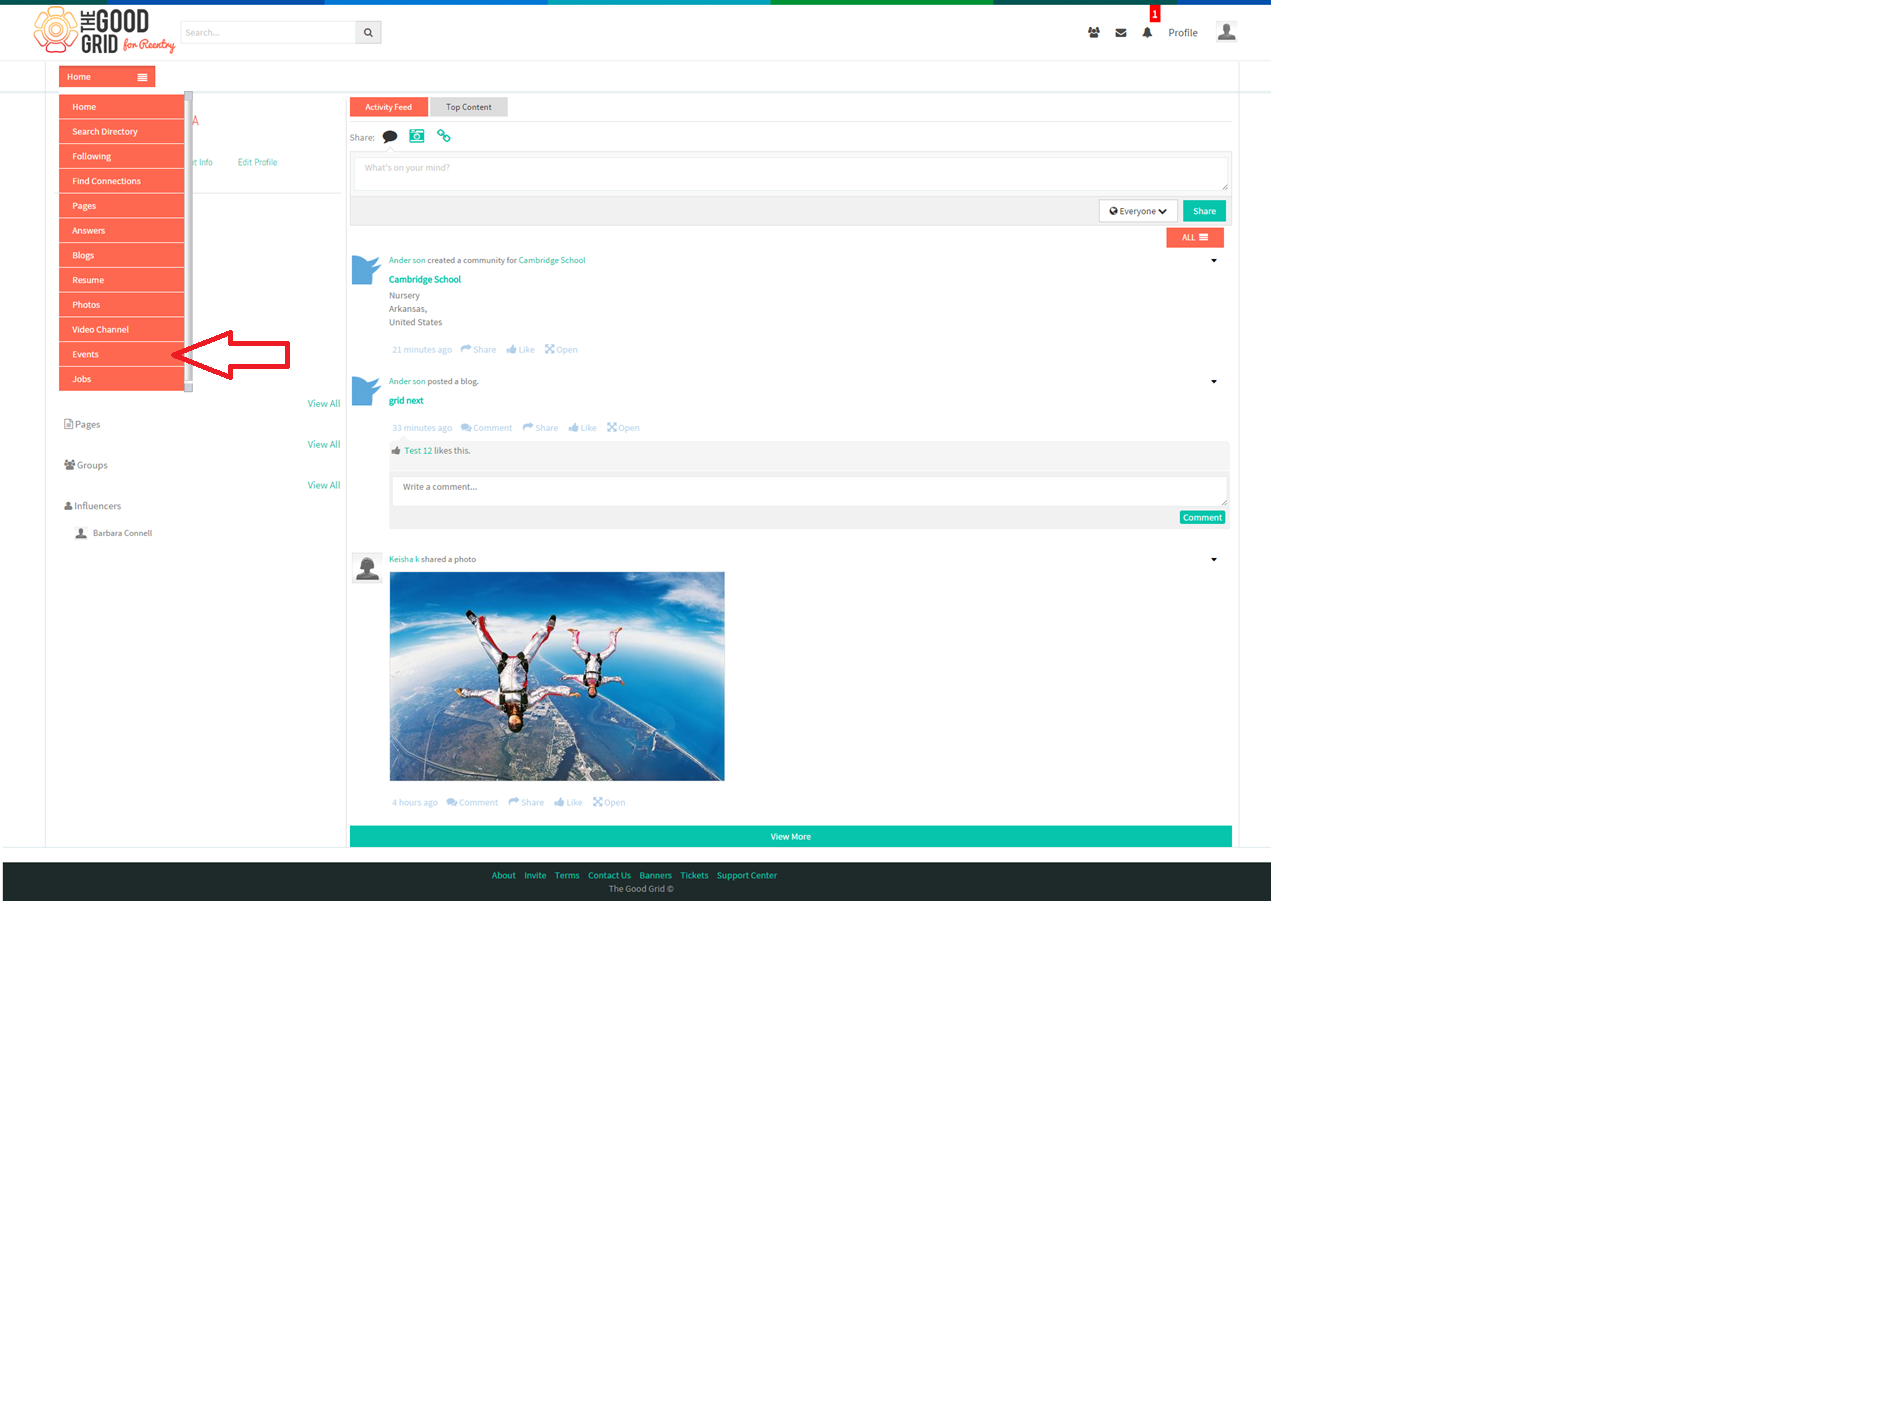
- From the Main Menu list he needs to select “Events” option.
- On selecting Events from the main menu, he is redirected to the Events screen.
- Jim wants to search an Event “Volunteers Meetup at XYZ Park”. For that he needs to enter desired Event name in the Search bar and press Enter or click on Search Magnifier icon.
- After clicking on Search icon he finds an Event.
- Now on clicking the Event, Jim is redirect to that particular Event’s view page.
- Jim views the Event and on clicking the Radio button he updates the RSVP for that event.
- This generates a web mail to Keisha from Jim.
- Keisha logins to her account and there she will get message from the Jim.
- On clicking that it takes Keisha to her web mail..
- Now Jim wants to search Volunteering Opportunities. For that he again needs to click on Main Menu.
- From the Main Menu list he needs to select “Jobs” option.
- On selecting Jobs from the main menu, Jim is redirected to the Jobs screen.
- Now Jim needs to select Volunteer Opportunity from the left pane of the screen.
- Jim wants to search Volunteer opportunity “Calling Volunteers for Health Camp”. For that he needs to enter desired Opportunity name in the Search bar and press Enter or click on Search Magnifier icon.
- After clicking on Search icon he finds an Opportunity.
- Now on clicking the opportunity, it will redirect to that particular Opportunity’s view page.
- Jim views the Volunteer opportunity and to apply that he needs to click on Apply button.
- This generates a web mail to Keisha from Jim.
- On clicking the received message it takes Keisha to her web mail.

