Difference between revisions of "How to add a Service"
(→Applications Screen Flow) |
(→User Actions Presentation) |
||
| (7 intermediate revisions by the same user not shown) | |||
| Line 64: | Line 64: | ||
| − | --- | + | ---- |
| Line 89: | Line 89: | ||
[[File:ServiceContact.png]] | [[File:ServiceContact.png]] | ||
| + | |||
| + | |||
| + | ---- | ||
| + | |||
| + | |||
| + | * <big> Select Category under which your Service falls and then click on Save and Continue button .</big> | ||
| + | |||
| + | |||
| + | [[File:ServiceCategory.png]] | ||
| + | |||
| + | |||
| + | ---- | ||
| + | |||
| + | |||
| + | * <big> Mention Additional details and then click on Submit button .</big> | ||
| + | |||
| + | |||
| + | [[File:AdditionalDetails.png]] | ||
| + | |||
| + | |||
| + | ---- | ||
| + | |||
| + | |||
| + | * <big> View Service Page .</big> | ||
| + | |||
| + | |||
| + | [[File:ServicePage.png]] | ||
| Line 101: | Line 128: | ||
| − | [[File: | + | [[File:AddService.gif]] |
Latest revision as of 06:41, 8 January 2015
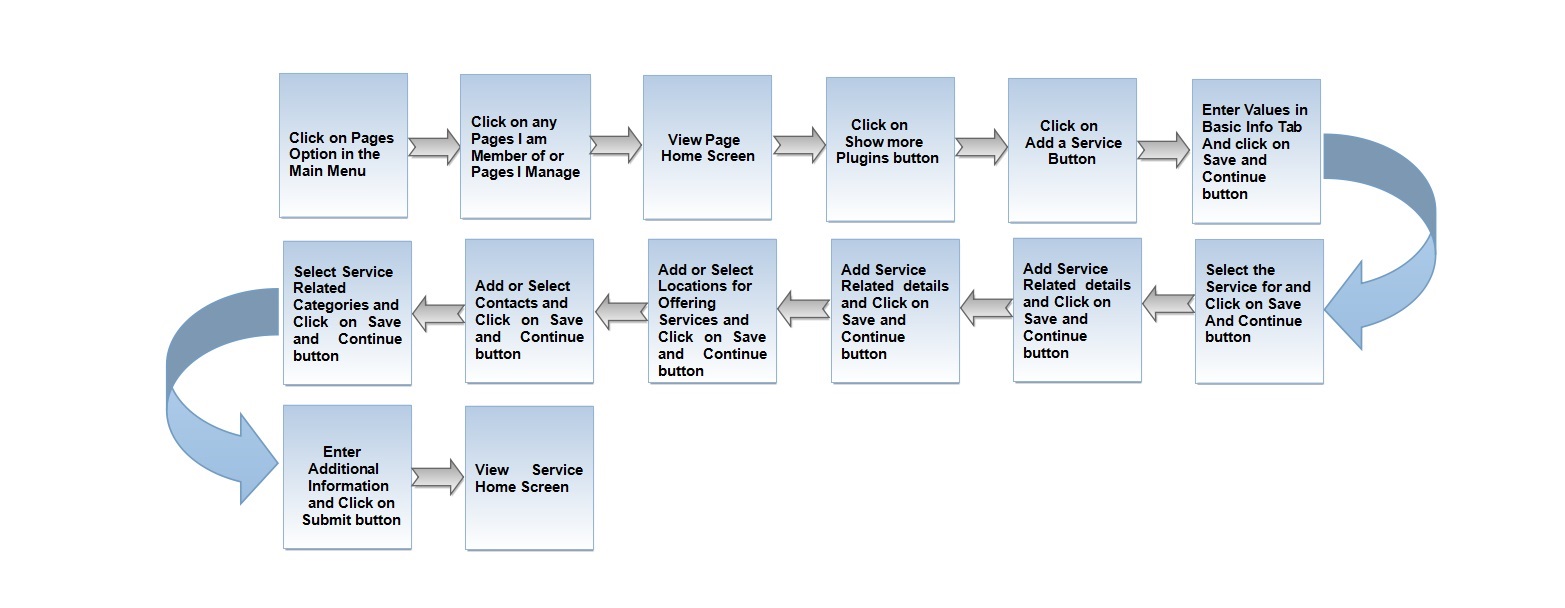
Actions Work Flow
Applications Screen Flow
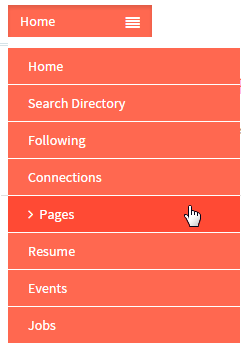
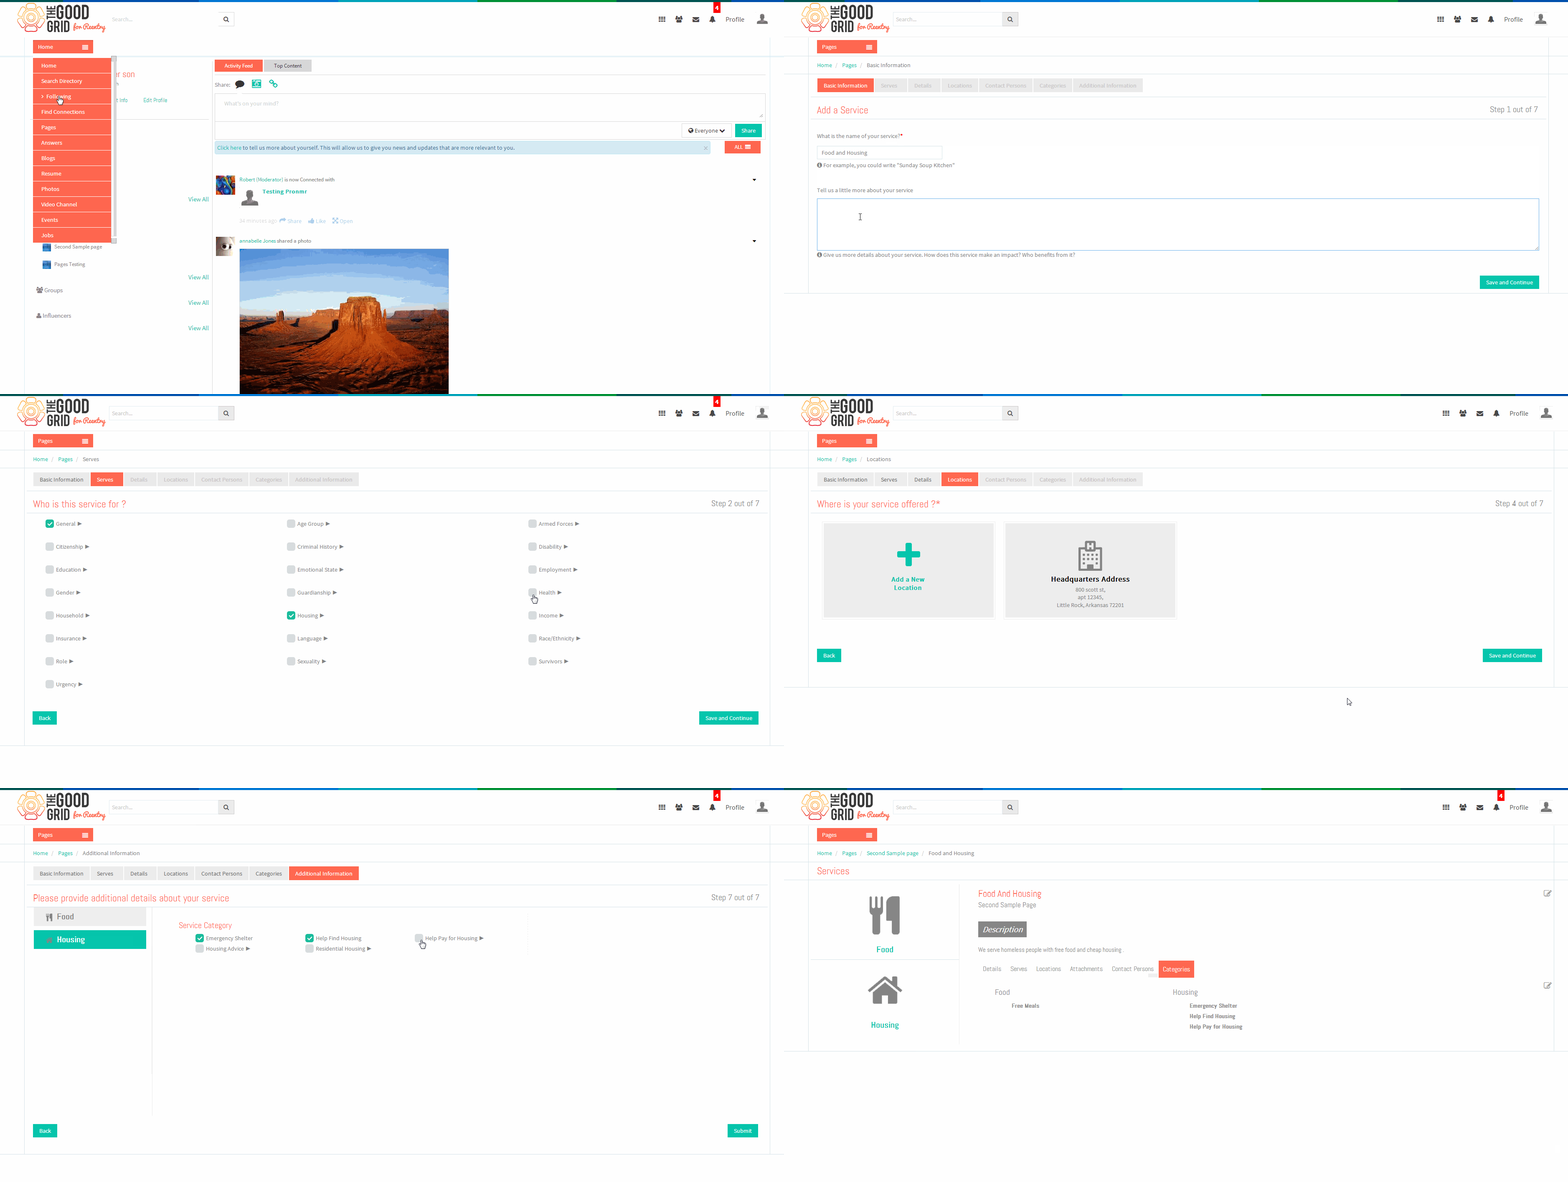
- Click on Pages option in the Drop down of Main Menu.
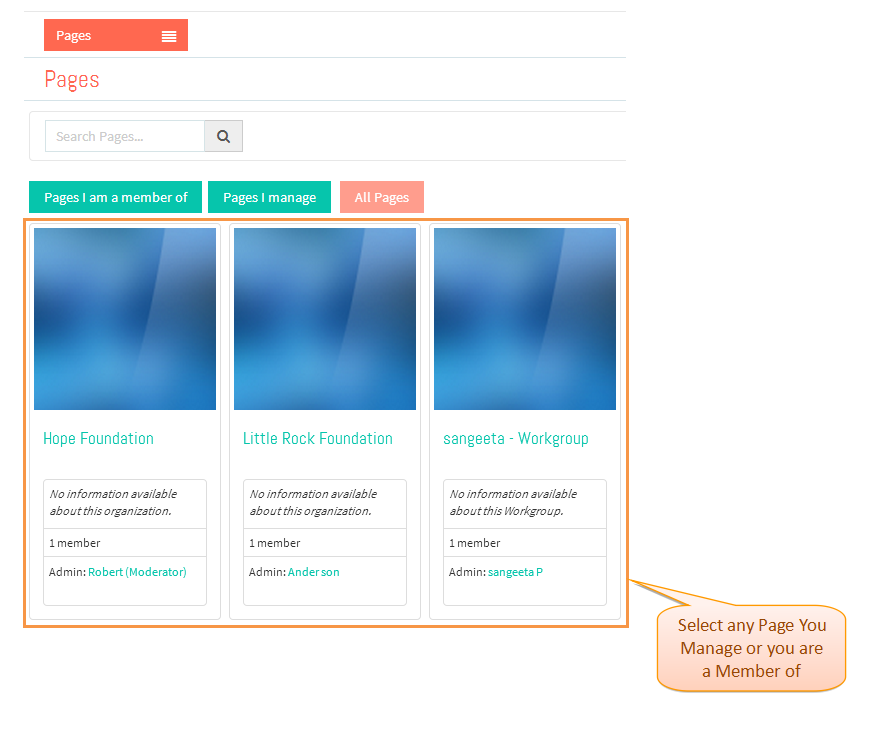
- Select the Page you are a Member or any Page you manage .
- Click on 'Show more Plugins' button .
- Click on 'Add a Service' button .
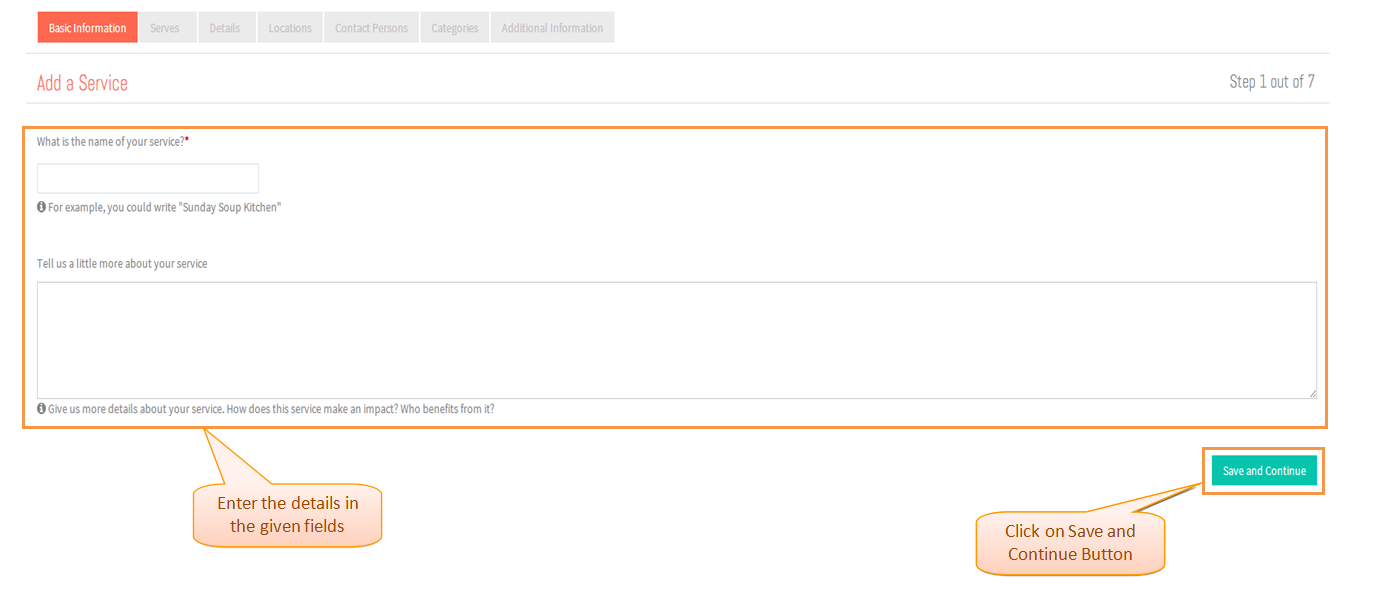
- Enter the Basic Information details and click on Save and Continue button .
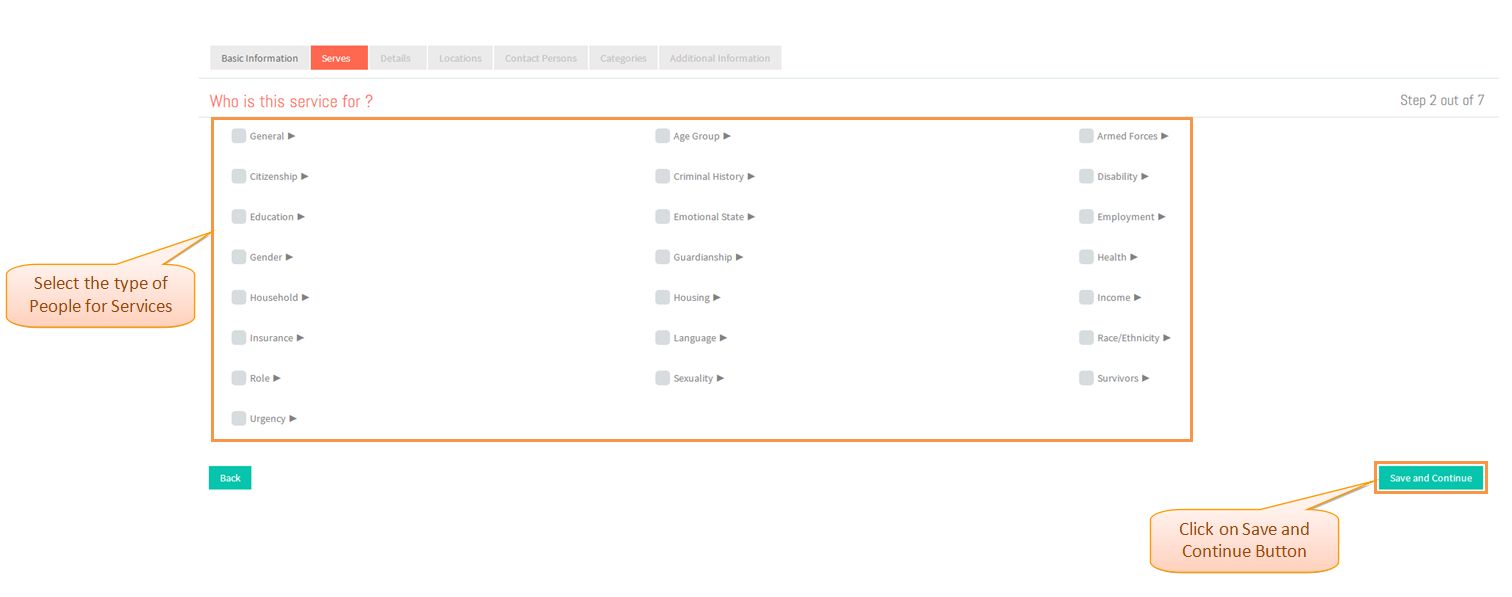
- Select the type of people you want your Service(s) to be availed by and then click on Save and Continue button .
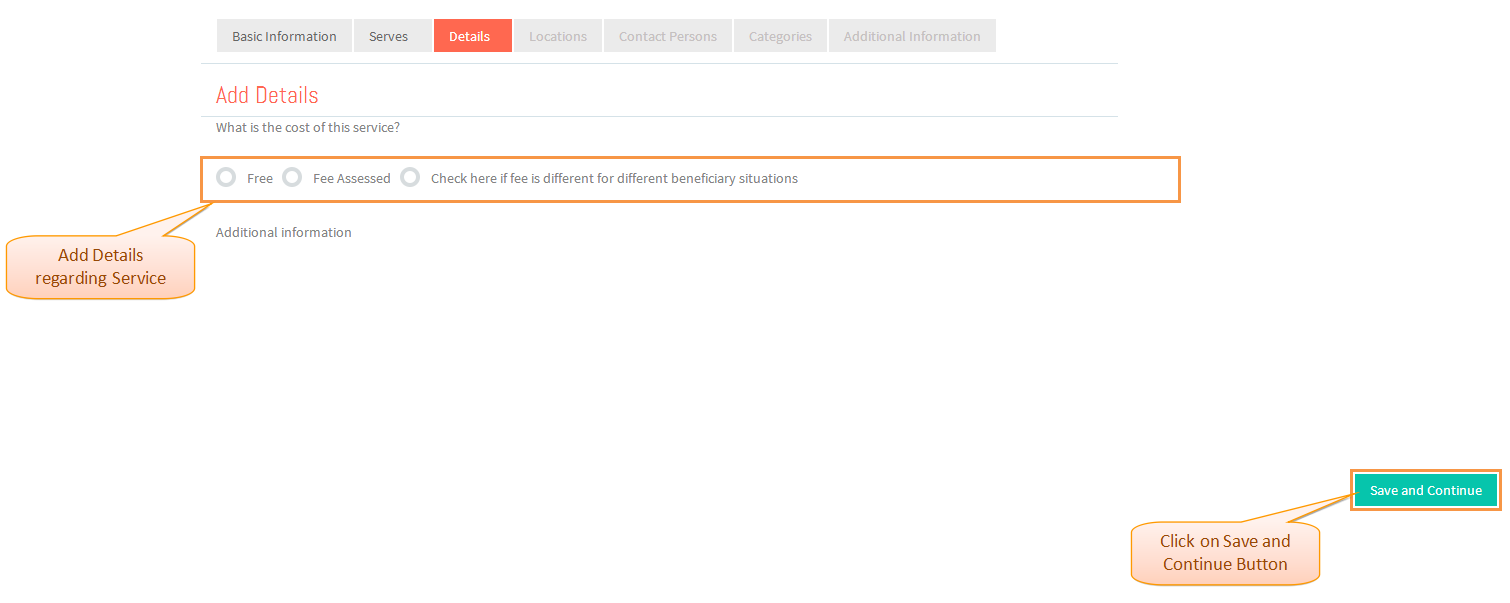
- Enter the Service details and click on Save and Continue button .
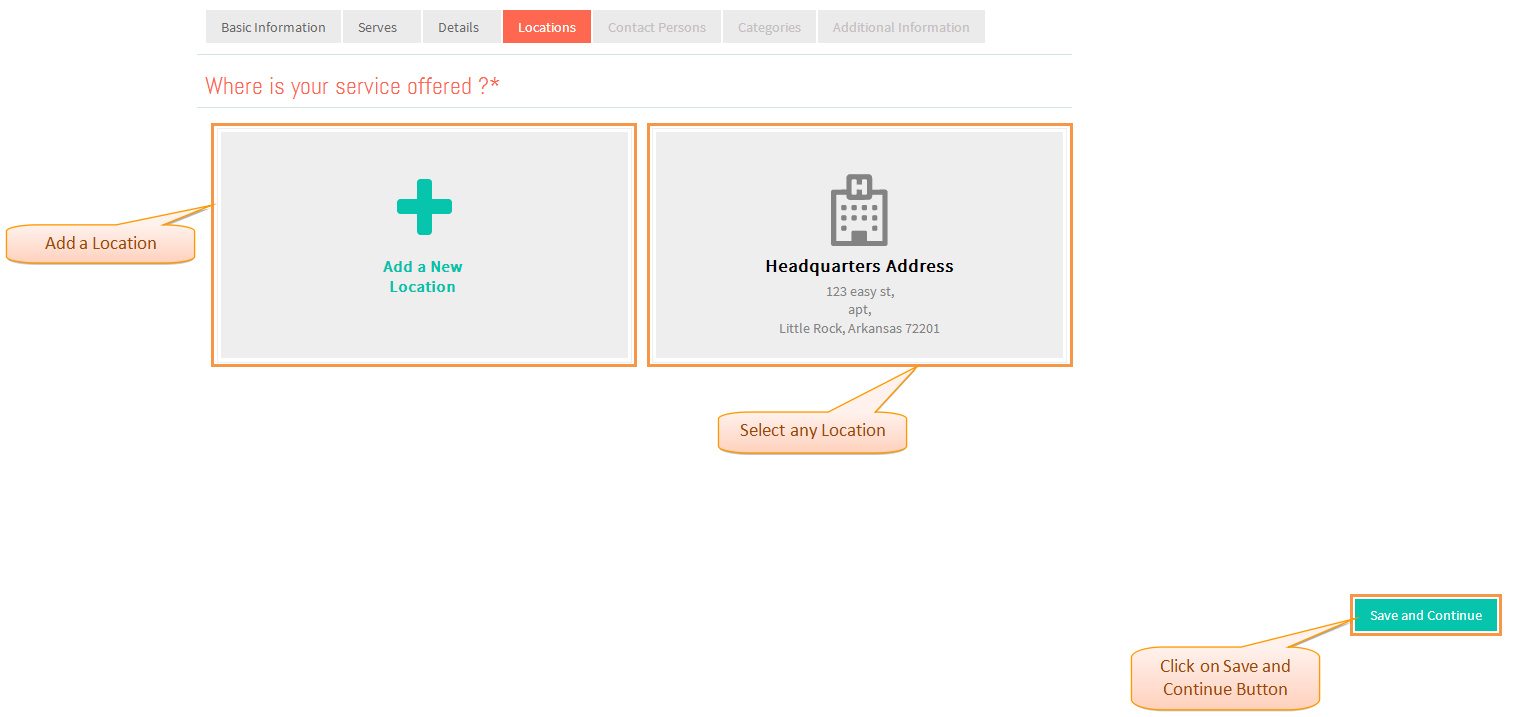
- Add or Select a Location and click on Save and Continue button .
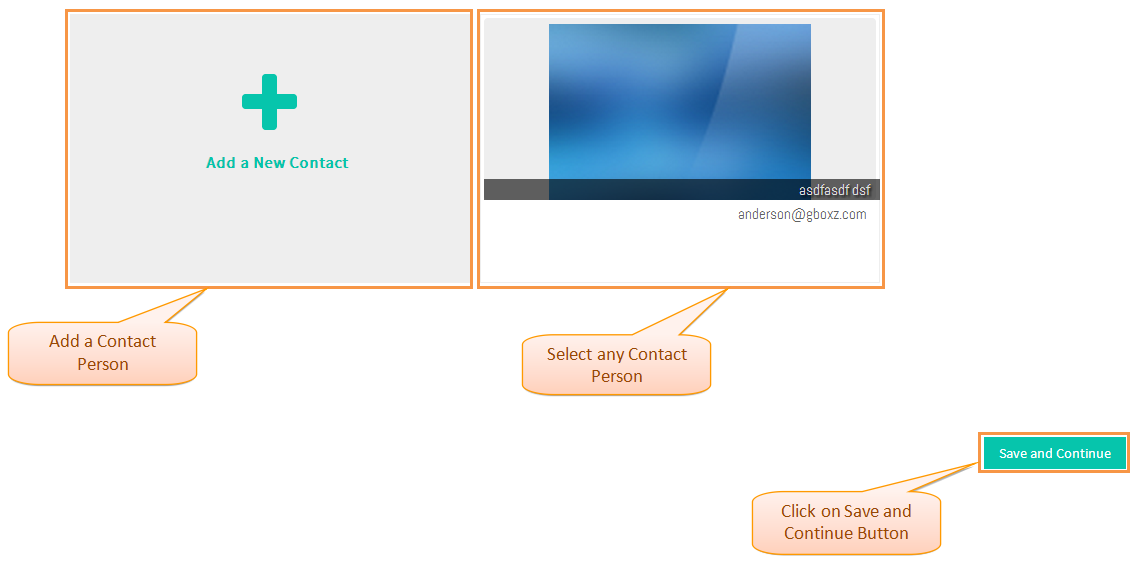
- Add or Select a Contact Person and click on Save and Continue button .
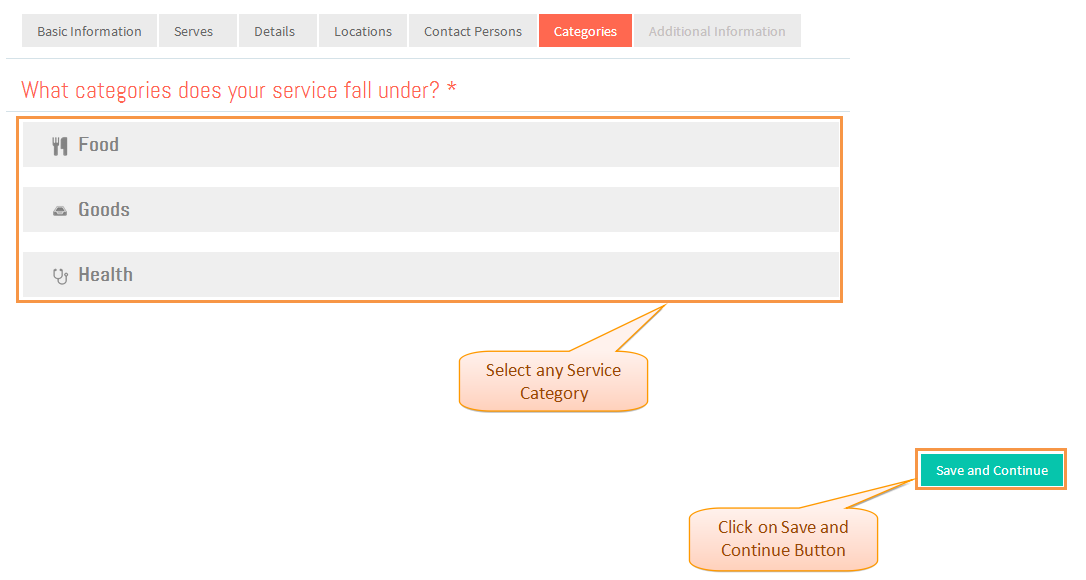
- Select Category under which your Service falls and then click on Save and Continue button .
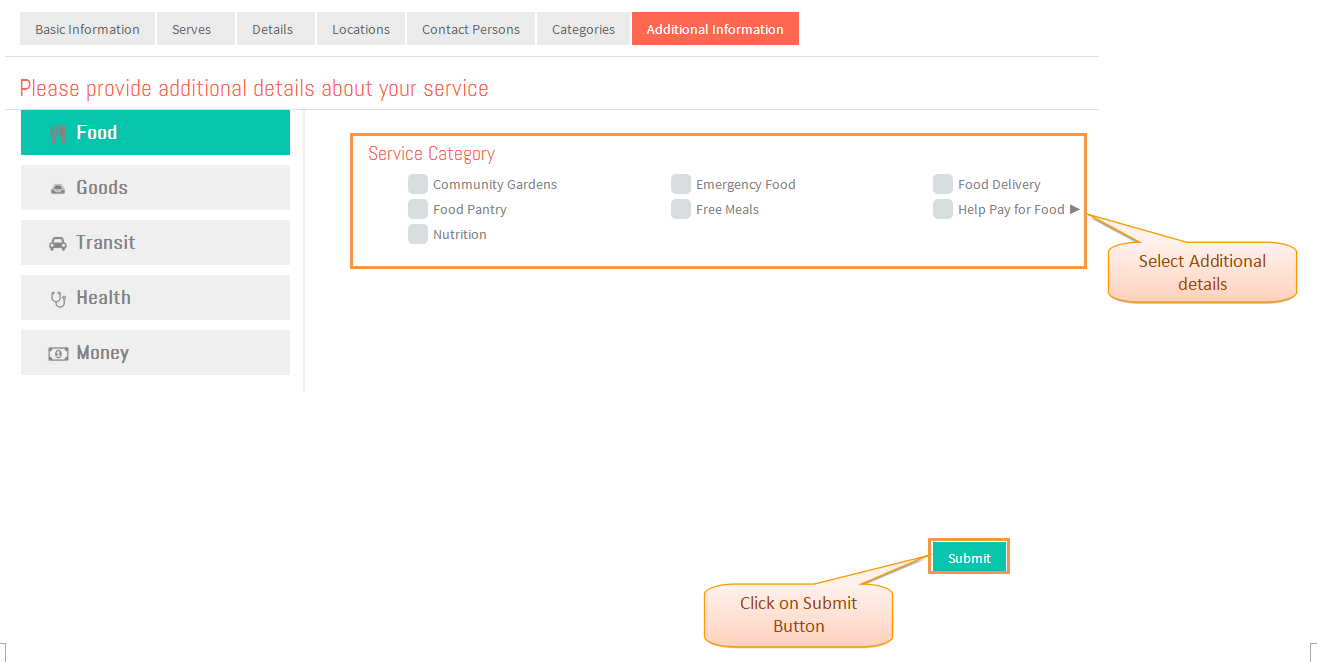
- Mention Additional details and then click on Submit button .
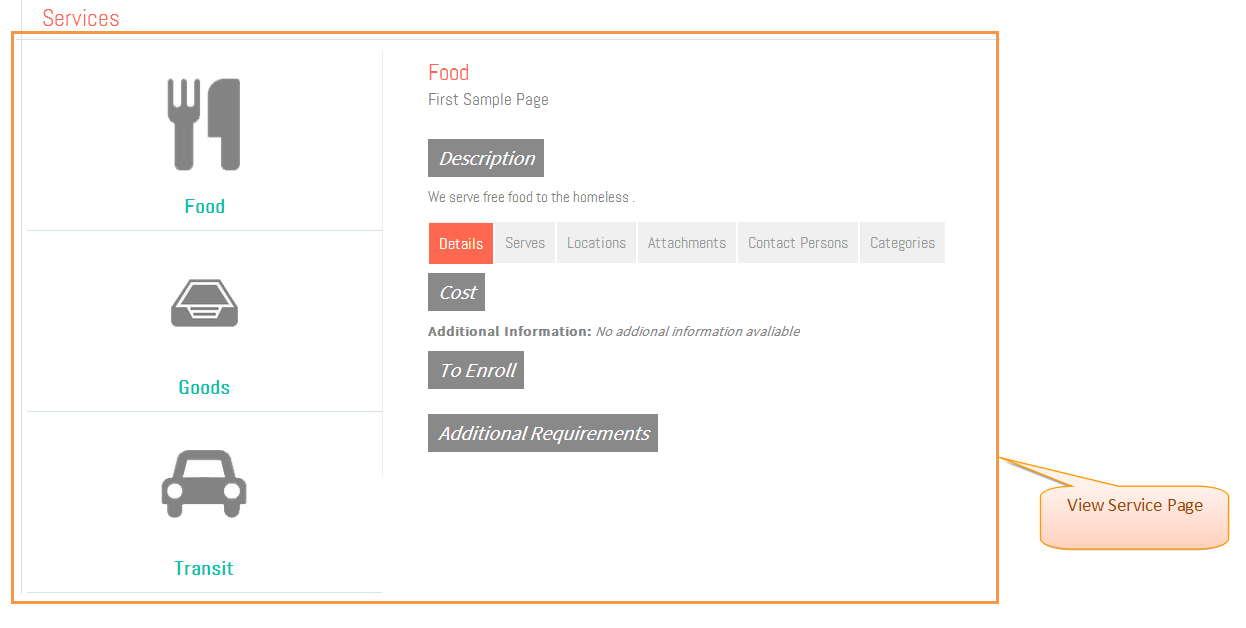
- View Service Page .
User Actions Presentation

