Difference between revisions of "Create internship - V1"
(Created page with " '''<code>Back ...") |
|||
| Line 1: | Line 1: | ||
| − | '''<code>[[How to create a Job - V1|Back]] | + | '''<code>[[How to create a Job - V1|Back]] [[Service Providers - Version 1|Back To Main Menu]]</code>''' |
== '''Actions Work Flow''' == | == '''Actions Work Flow''' == | ||
Latest revision as of 00:09, 7 May 2015
Back Back To Main Menu
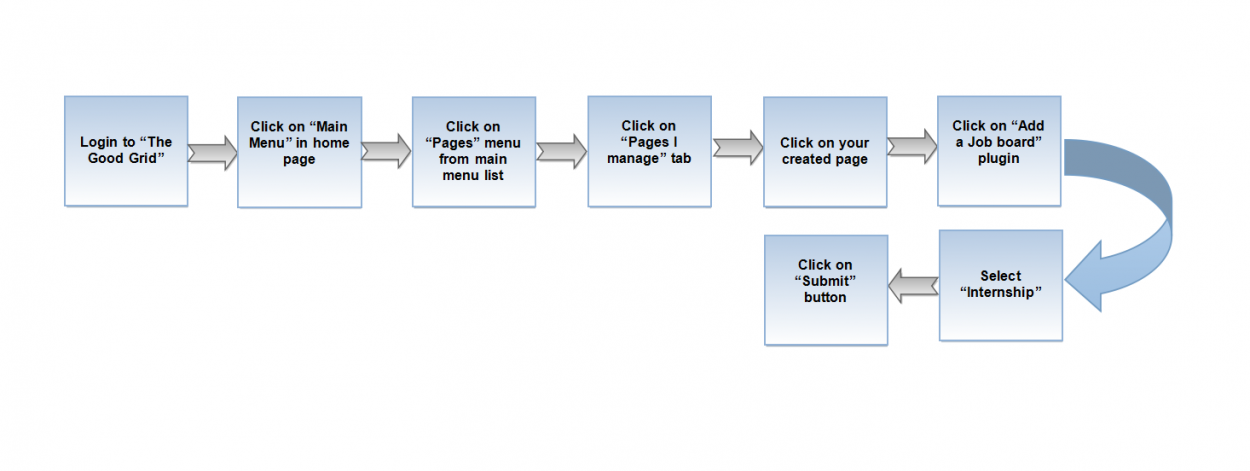
Actions Work Flow
Applications Screen Flow
- Enter the URL in Web Browser.In Login page, enter valid credentials and click on Login button.
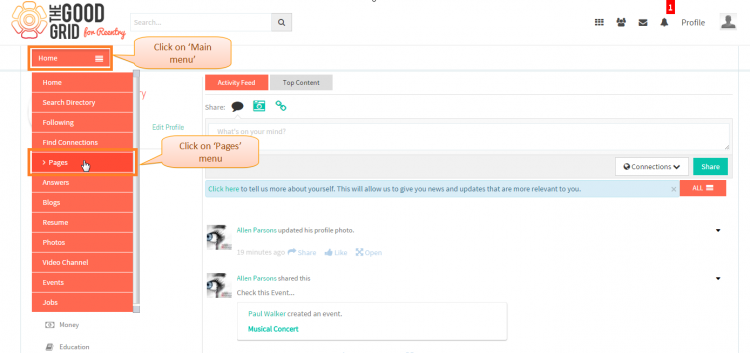
- On clicking Login button, it will navigate to Home Page.Now click on Main menu and click on Pages option in the drop down of Main menu.
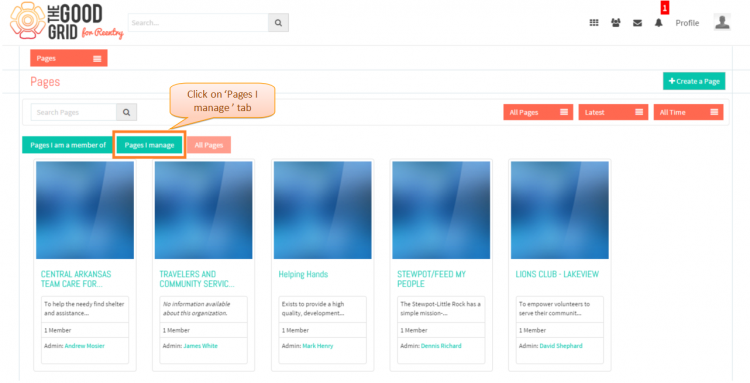
- Navigation to Pages landing page.Where you have to click on Pages I manage tab for viewing own creatd pages.
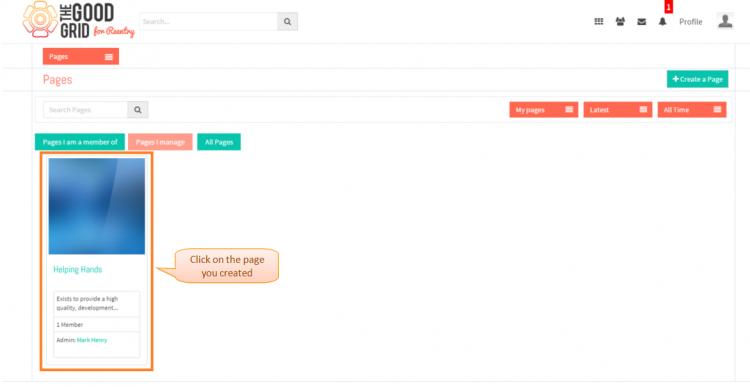
- Click on any page which you have created.
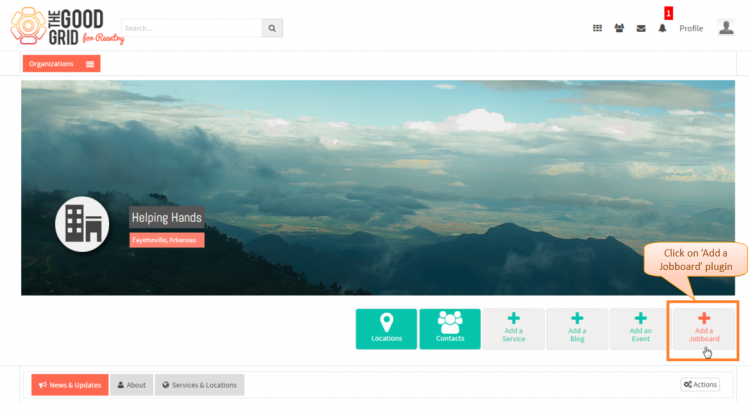
- Click on Add a Jobboard plugin in the Page profile page.
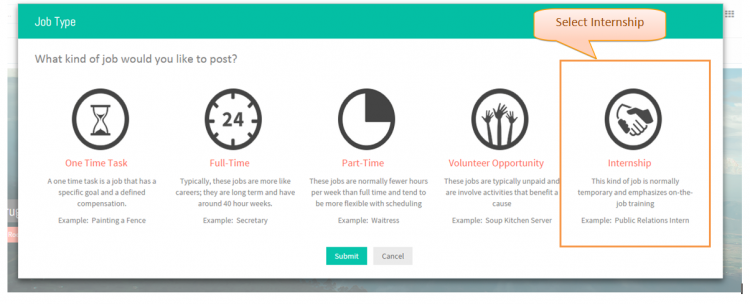
- Job Type pop-up will display where you have to select Internship.
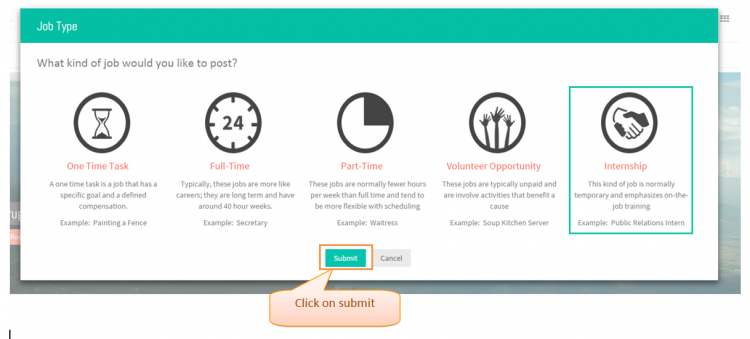
- After selecting the job type, you have to click on Submit button.
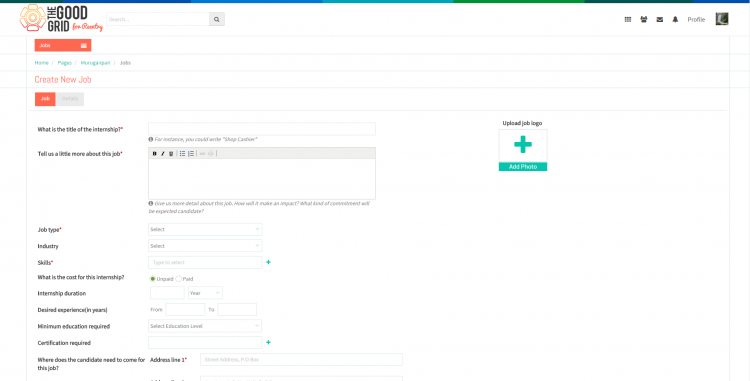
- Once you click on Submit button then it will navigate to Internship Job creation page
- If you want to know how to set the Job visibility then please Click here...
- If you want to know how to publish a job then please Click here...
User Actions Presentation

