Difference between revisions of "Create a task"
(→Assign a task) |
(→Assign a task) |
||
| Line 41: | Line 41: | ||
[[File:F15.PNG|1020px]] | [[File:F15.PNG|1020px]] | ||
| + | |||
| + | |||
| + | *Assigned user will get display | ||
| + | |||
| + | |||
| + | [[File:F16.PNG|1020px]] | ||
==''' Schedule a task''' == | ==''' Schedule a task''' == | ||
Revision as of 03:47, 12 December 2014
| >> Back To TMS Help Center Main page | >> Tasks |
Contents
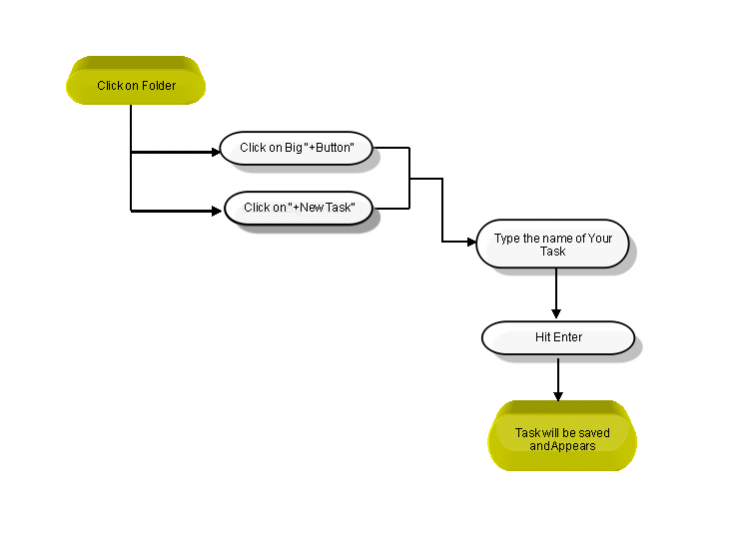
Follow the steps to Create a new task
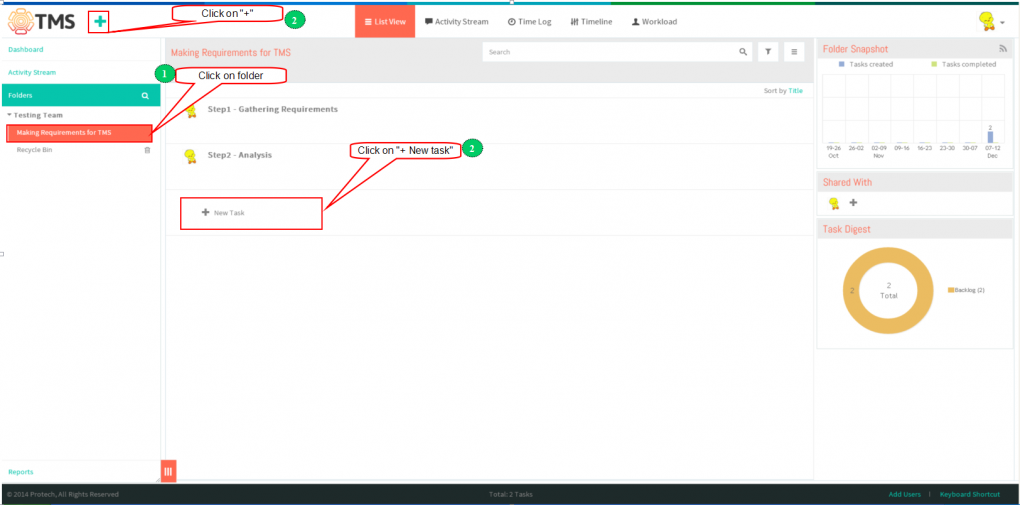
- In the left-hand pane, click on the folder in which you want to create a task
,Then simply click on the big “+” Button or “+ New Task” line in the task list pane
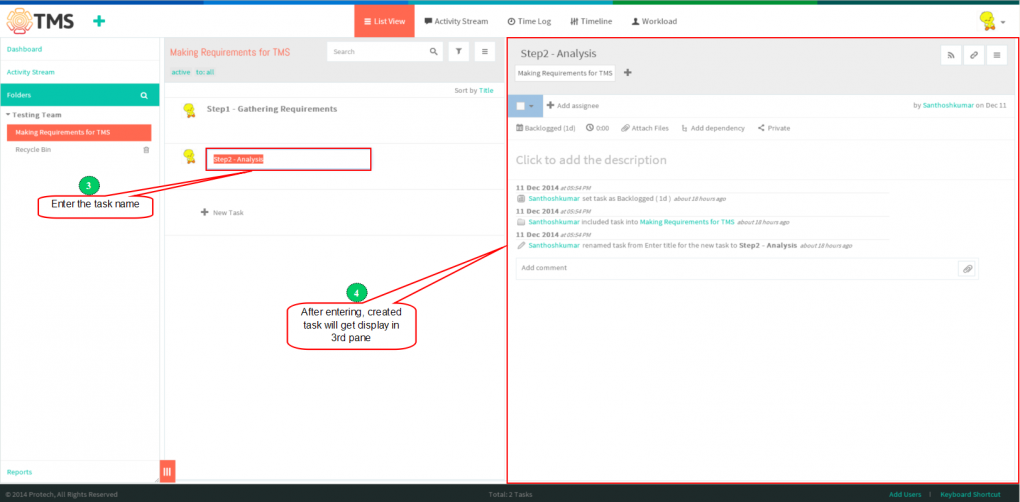
- Type in the name of your task,and hit “Enter”. task will get display in list view
. After this, the task will be saved and appear in the list in the middle pane of your workspace
.
Assign a task
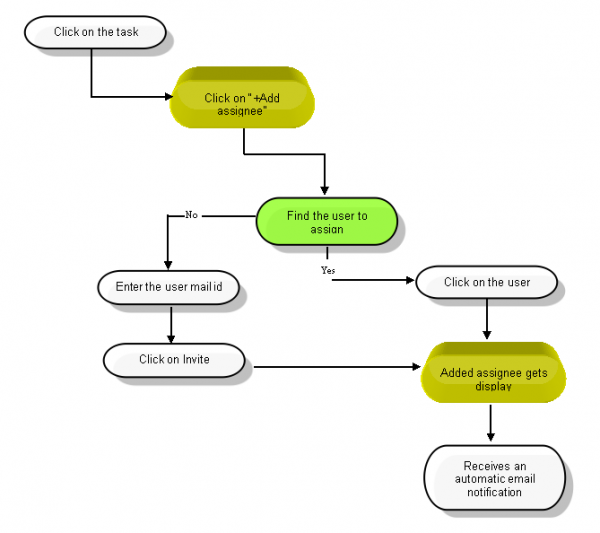
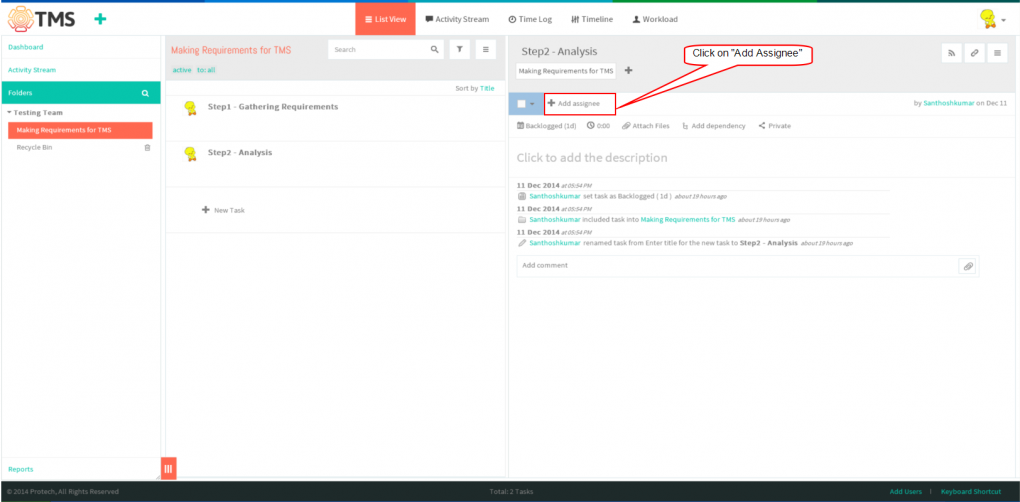
- Click on task in list view pane which is in left pane, then click on Add Assignee
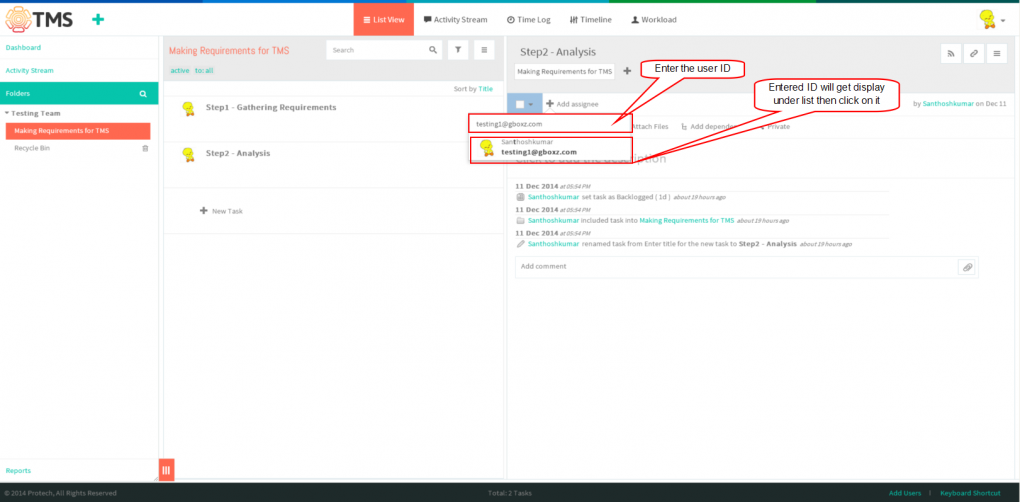
- You can type the first letters of the name, and TMS will suggest an appropriate list of people. You can assign the task to as many people as you need.
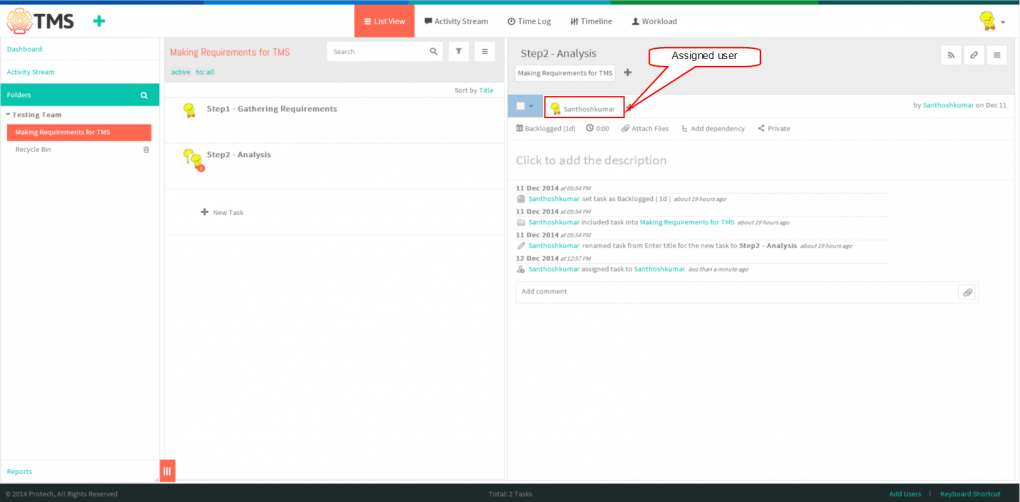
- Assigned user will get display
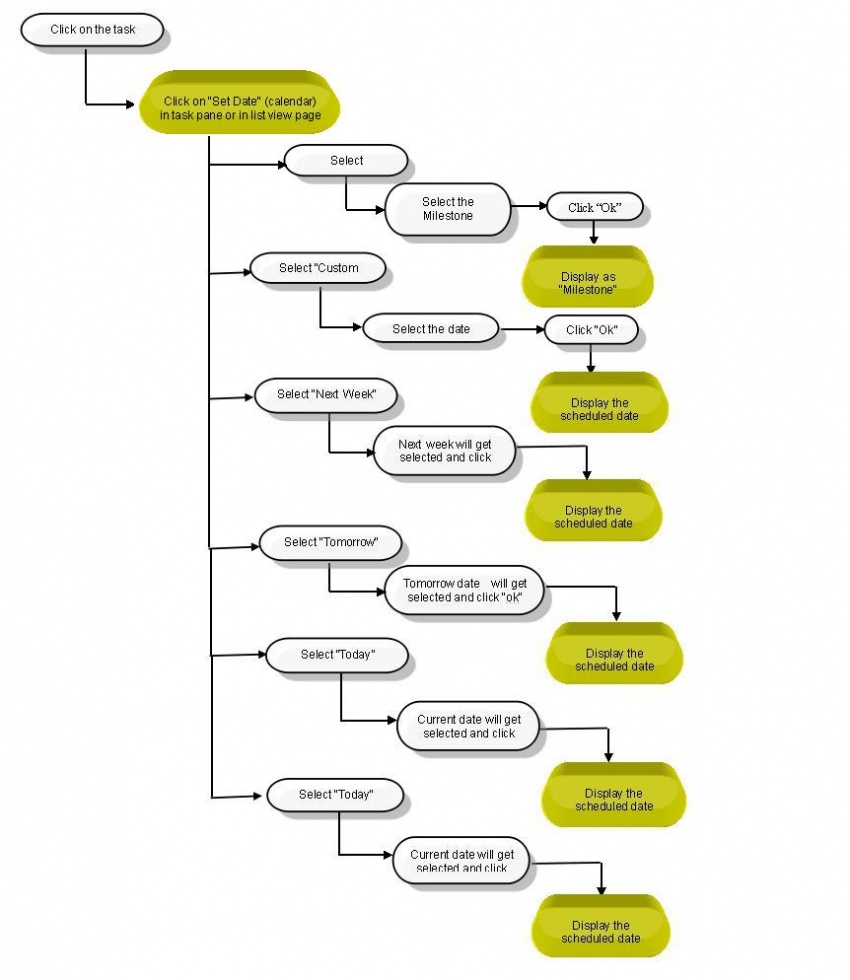
Schedule a task
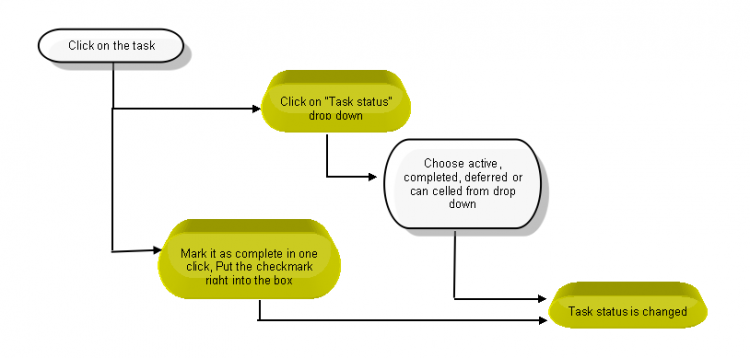
Set the task status
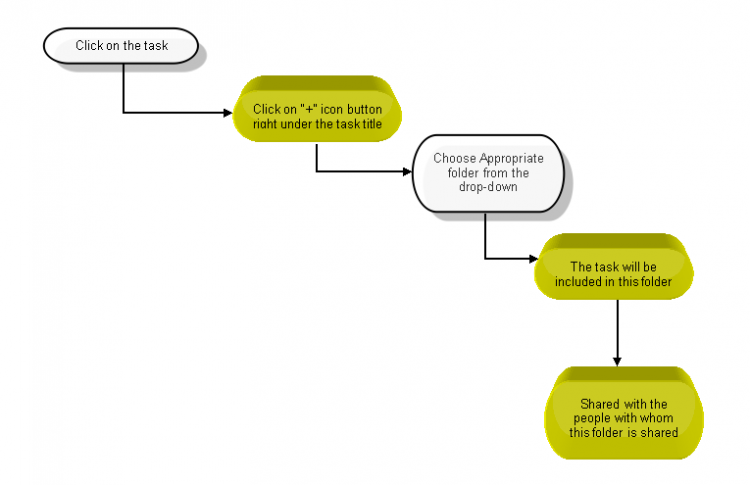
Tag a task (organize tasks into folders)
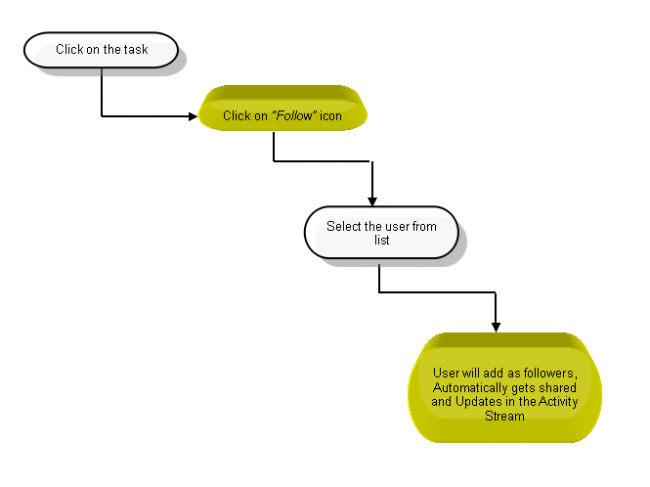
Follow a task
Cross-link tasks
Checklists
Note: This option is not available in TMS, flow as per wrike

