Service Provider
Applications Screen Flow
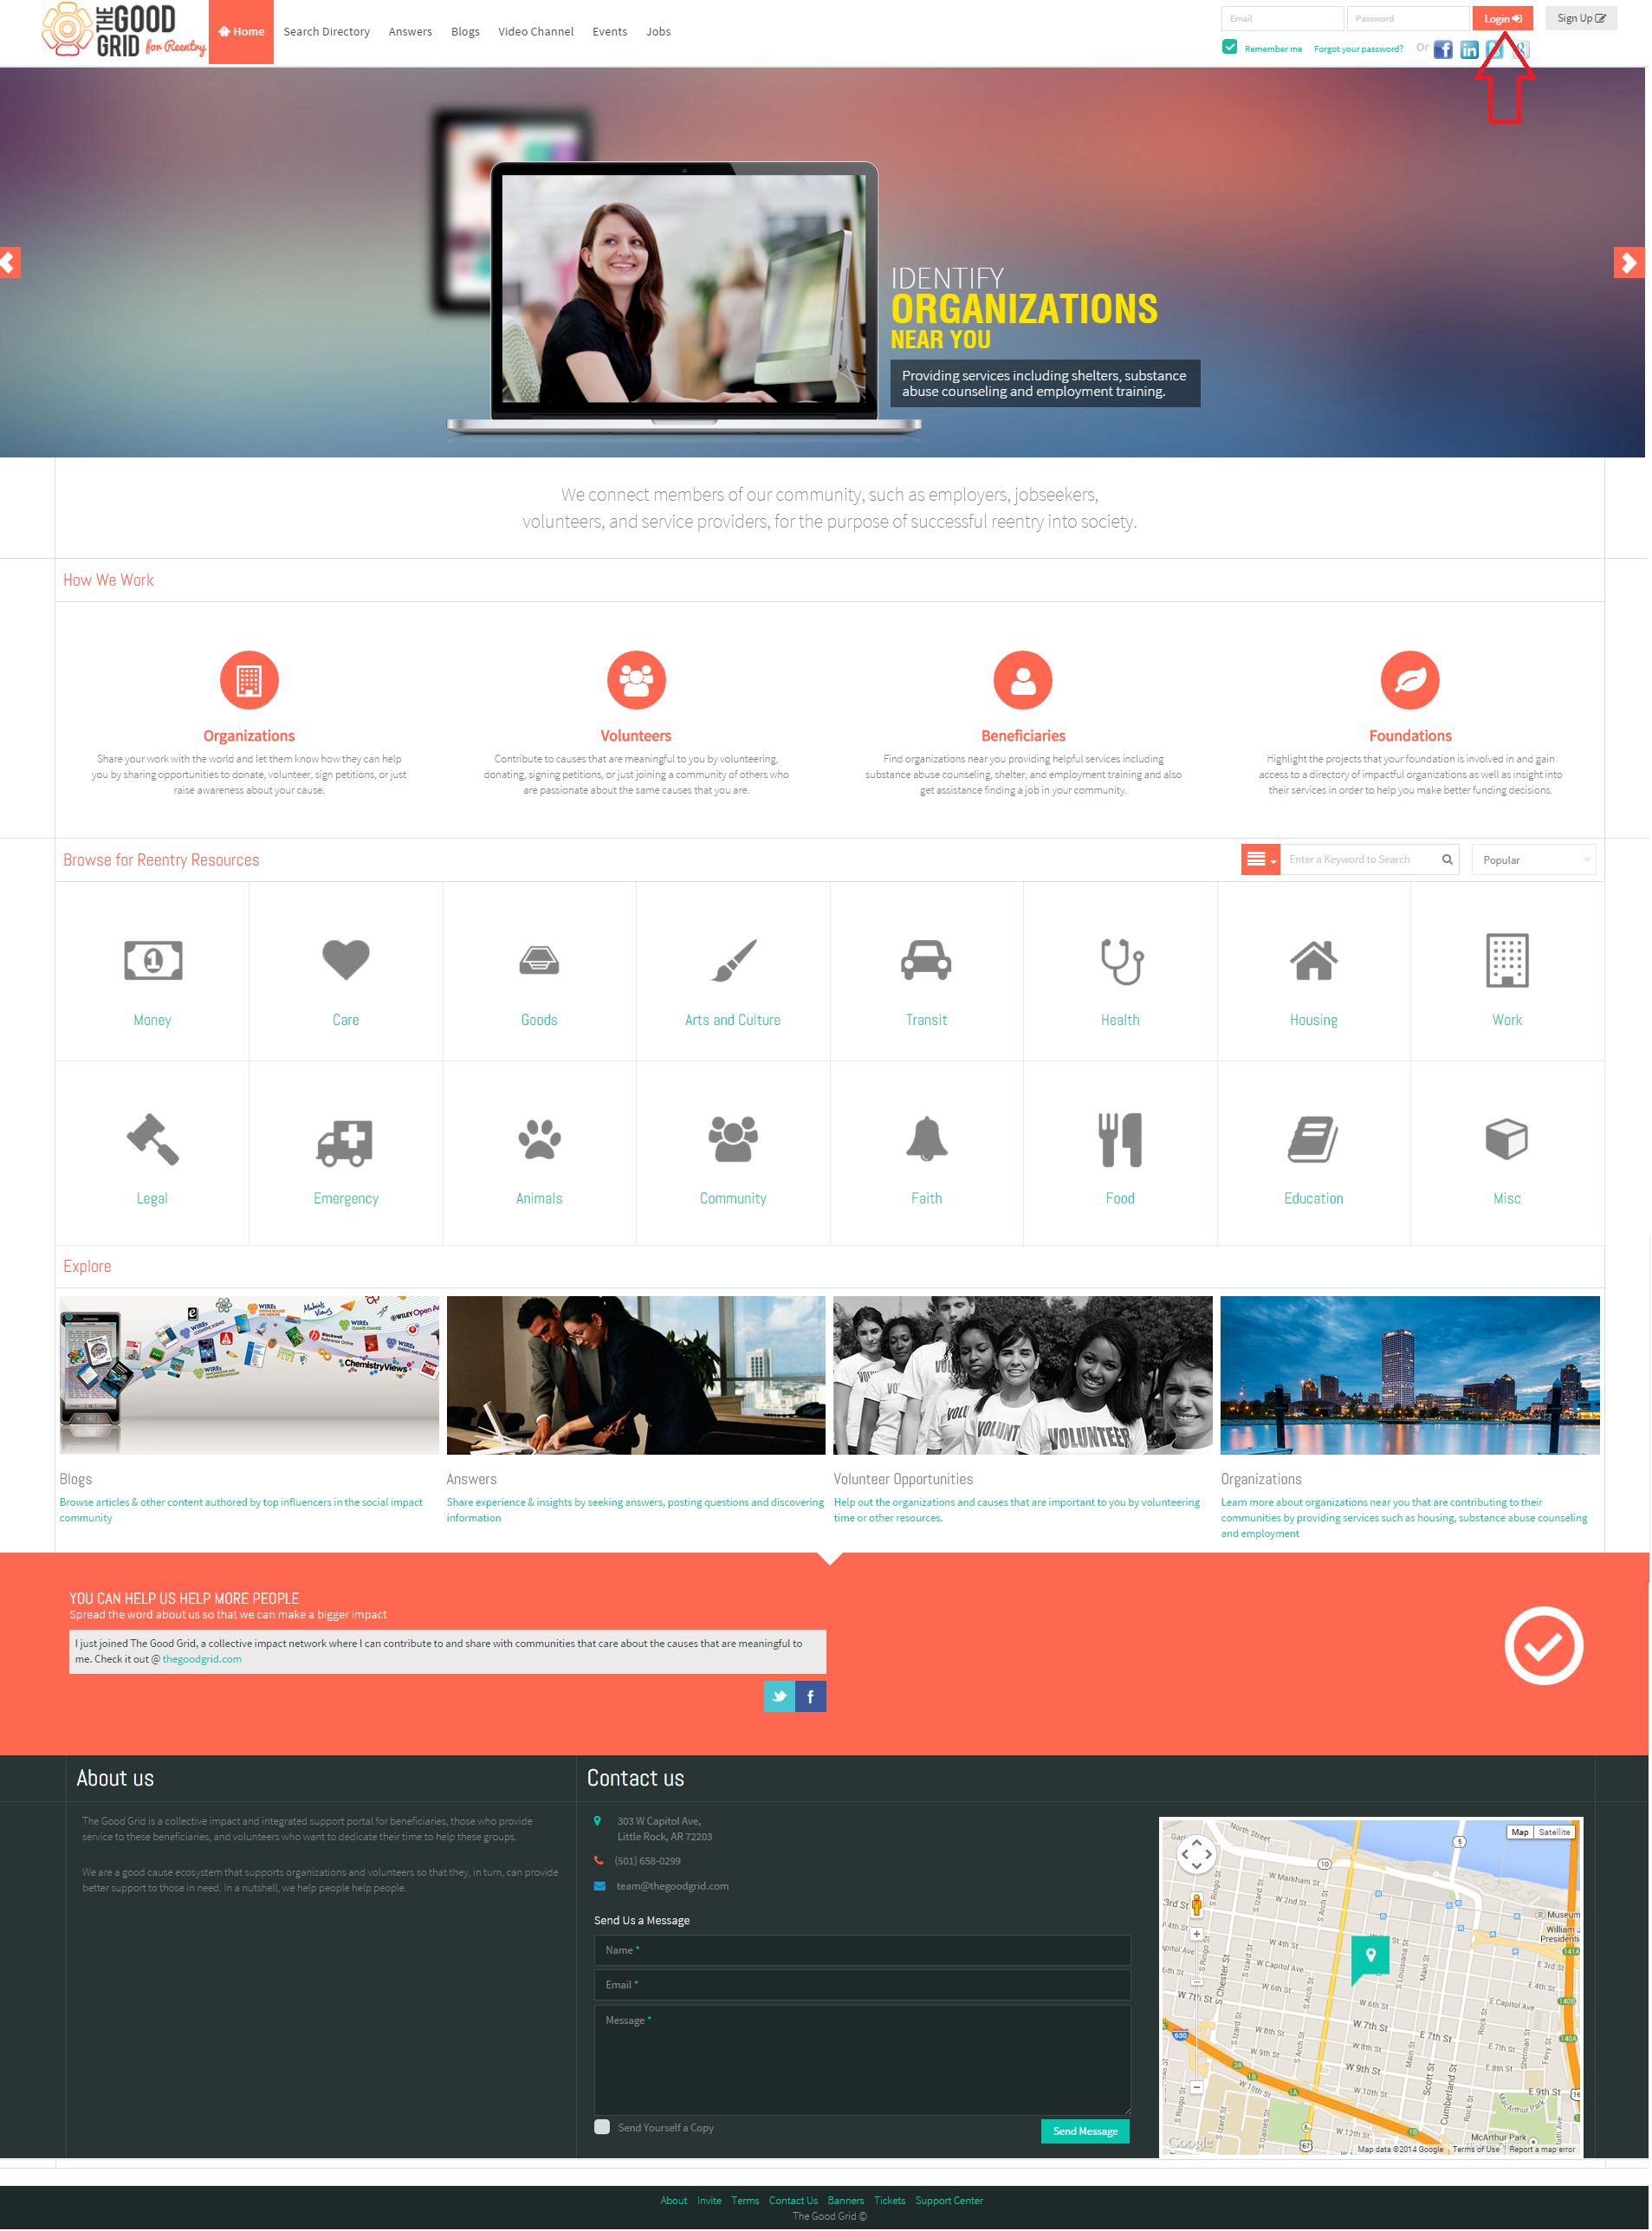
- Keisha enters email address and password and clicks on Login button.
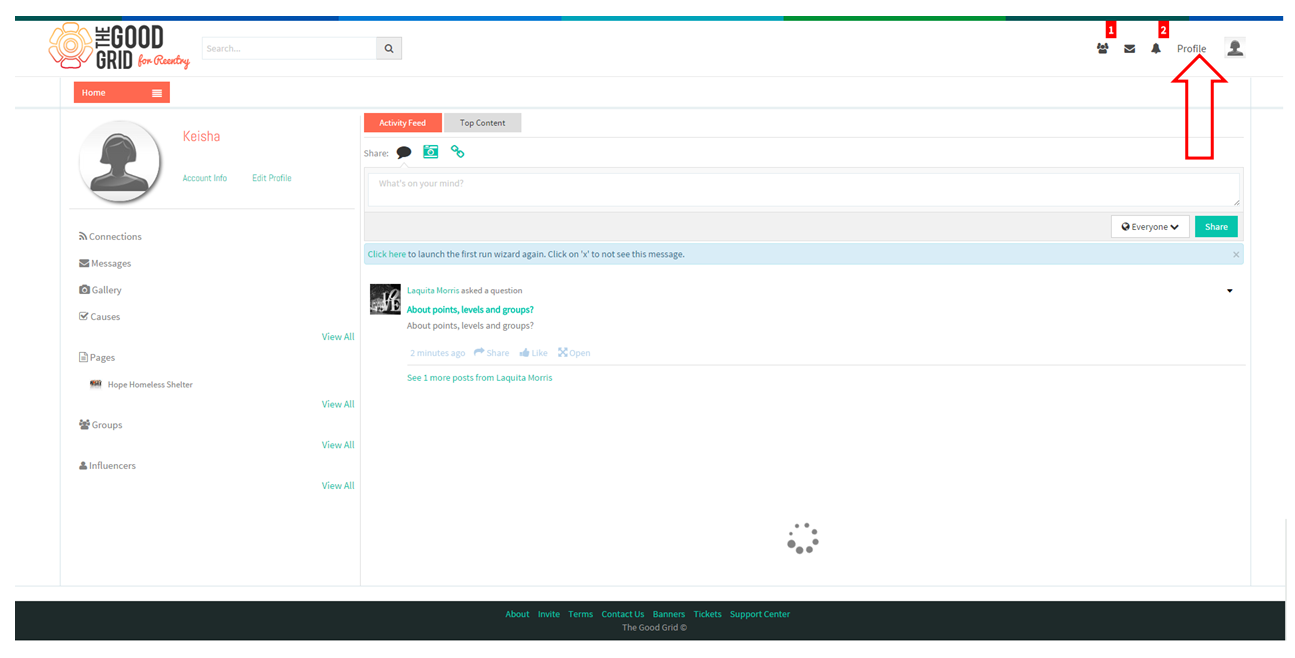
- To update her profile Keisha has to click on the Profile in the header.
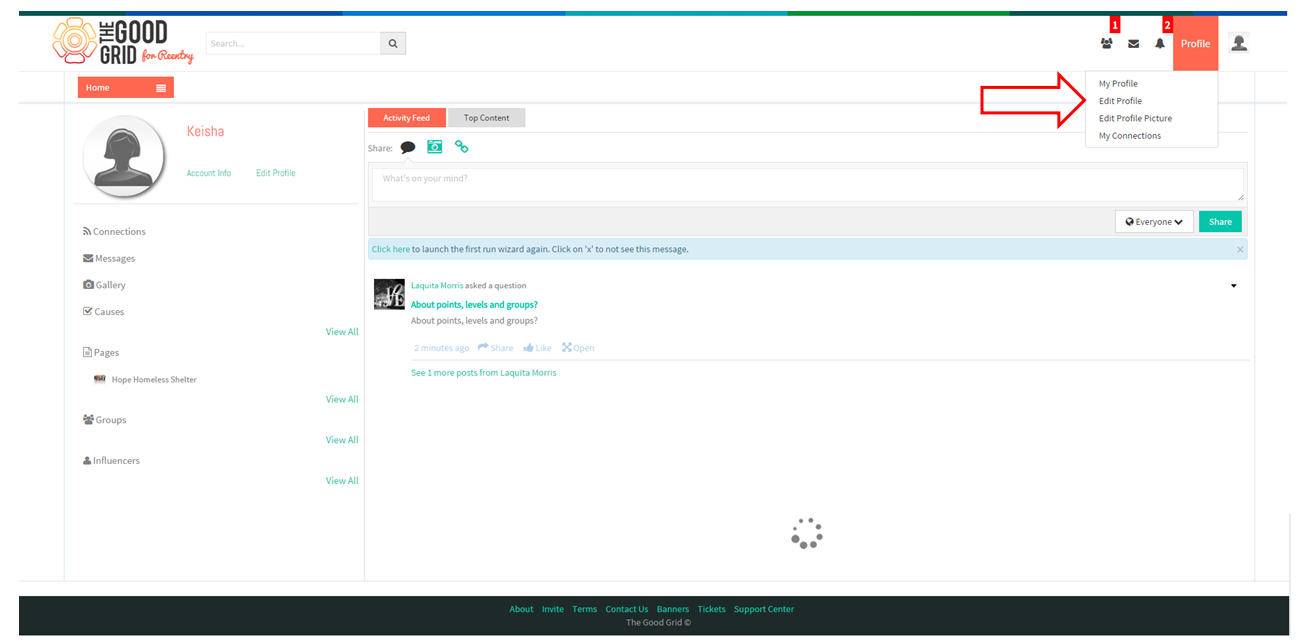
- On clicking the Profile application, screen displays the overlay.
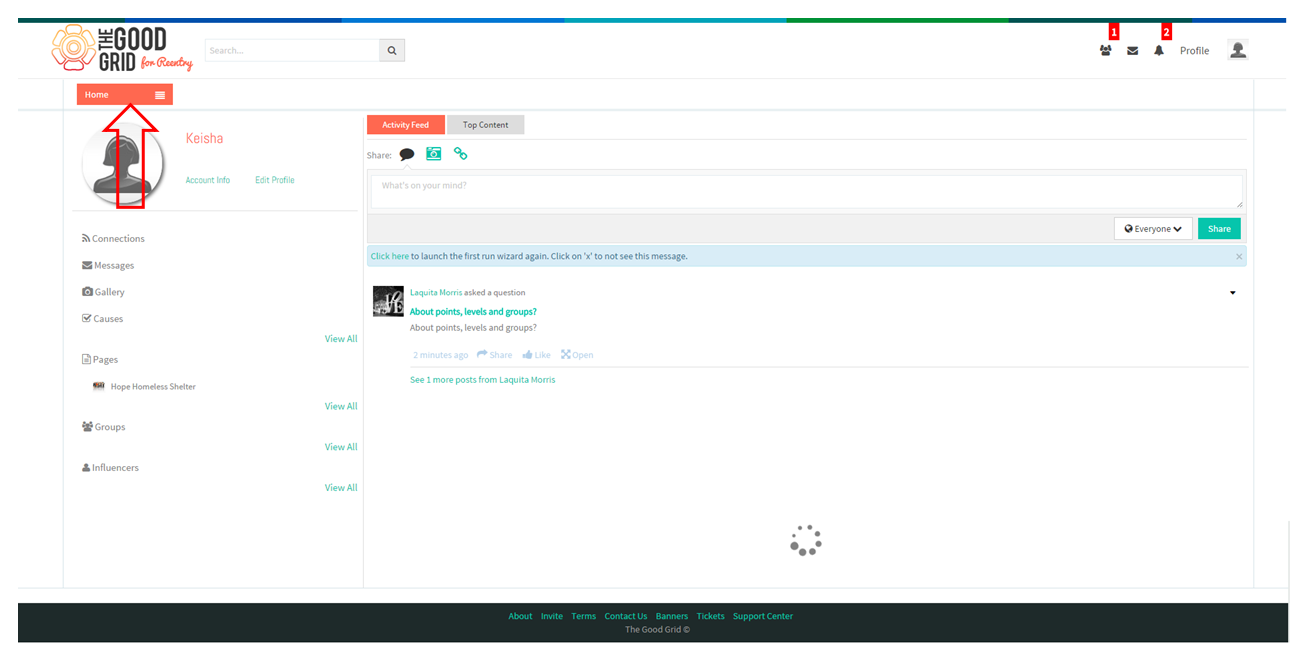
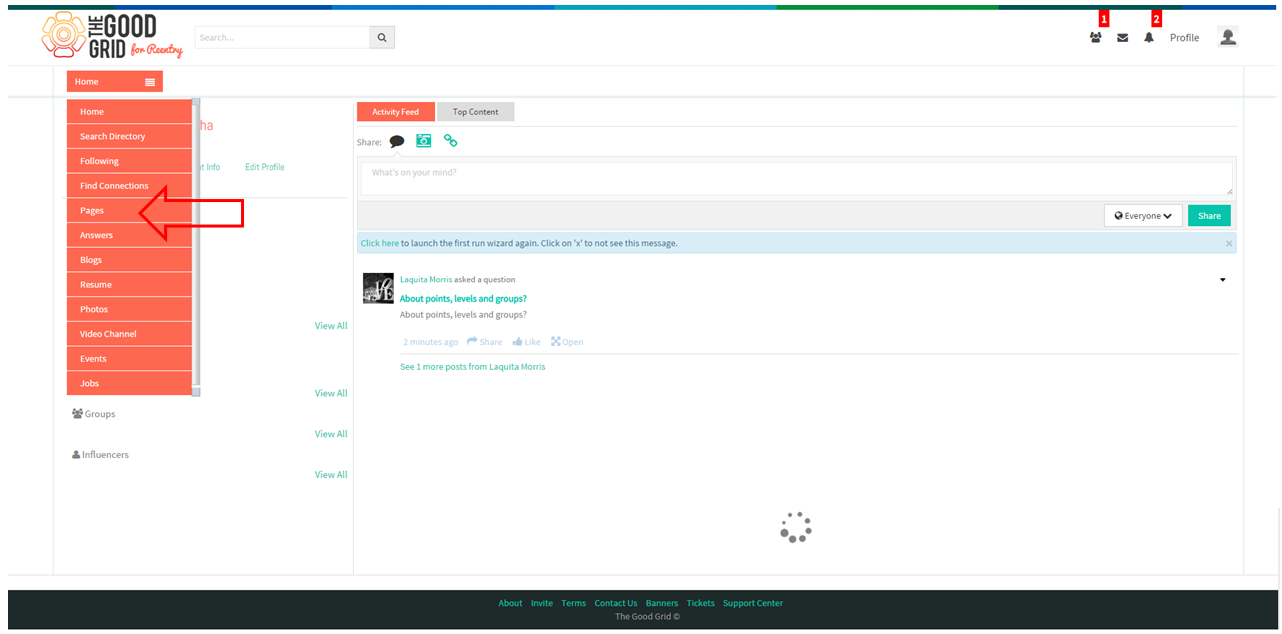
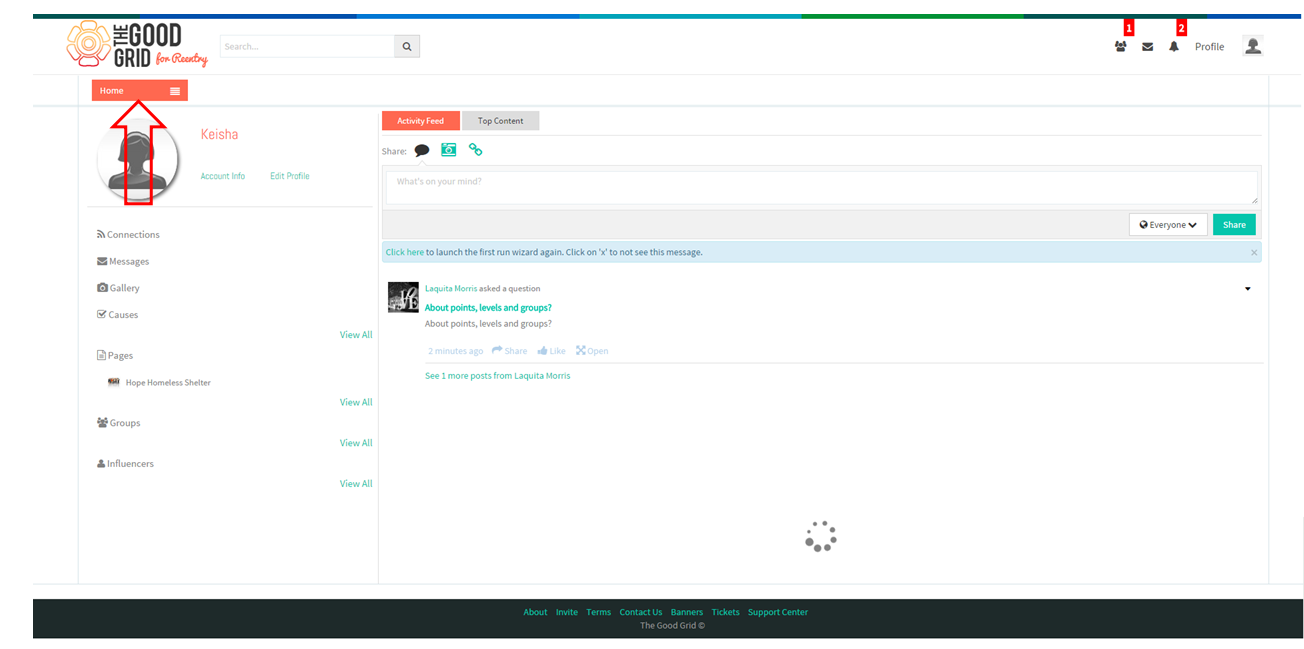
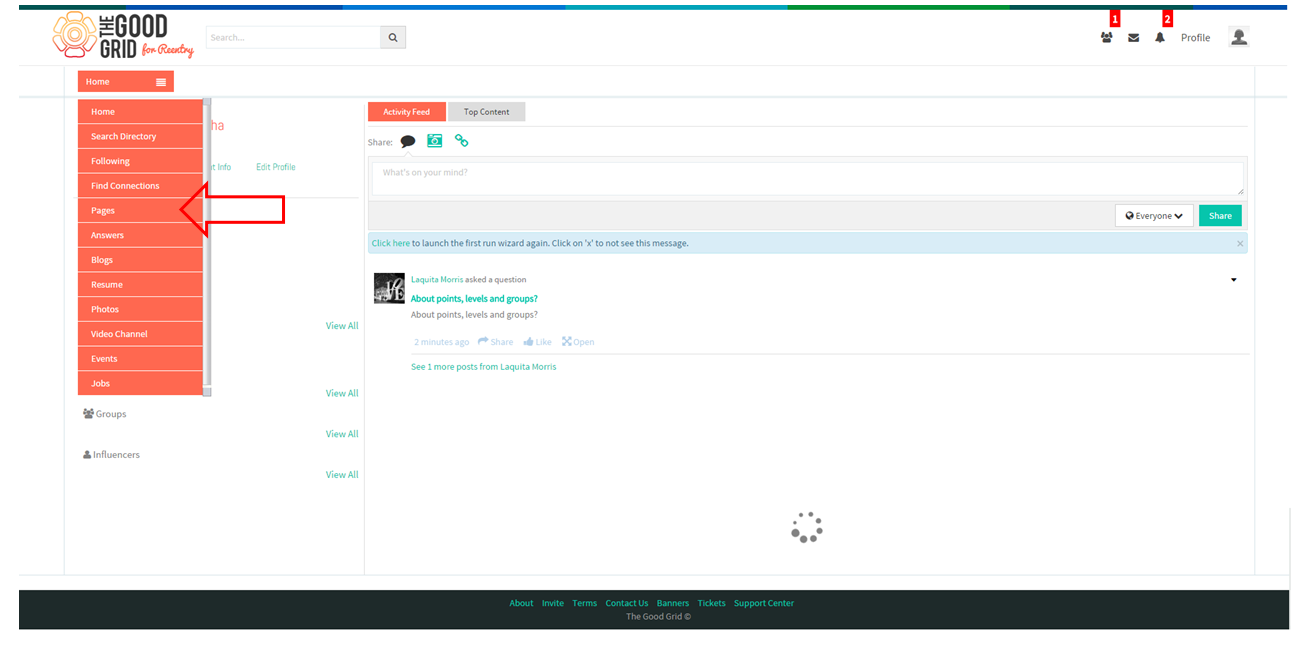
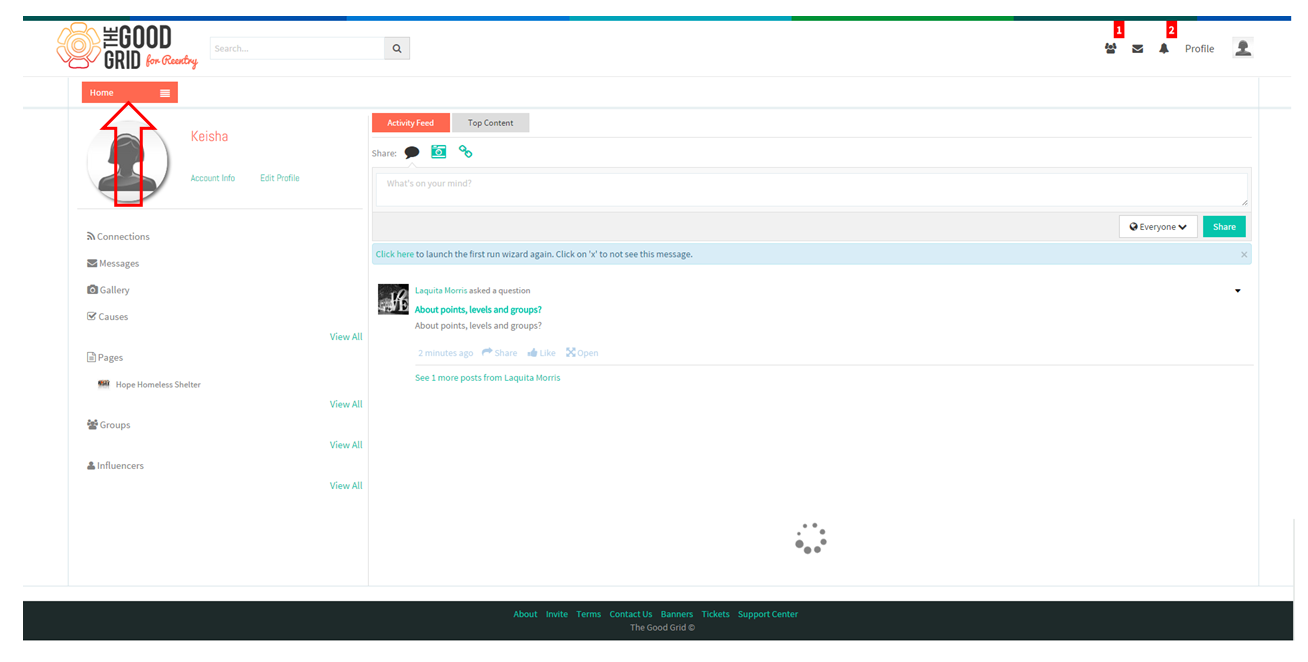
- To create a page Keisha has to click on Main menu.
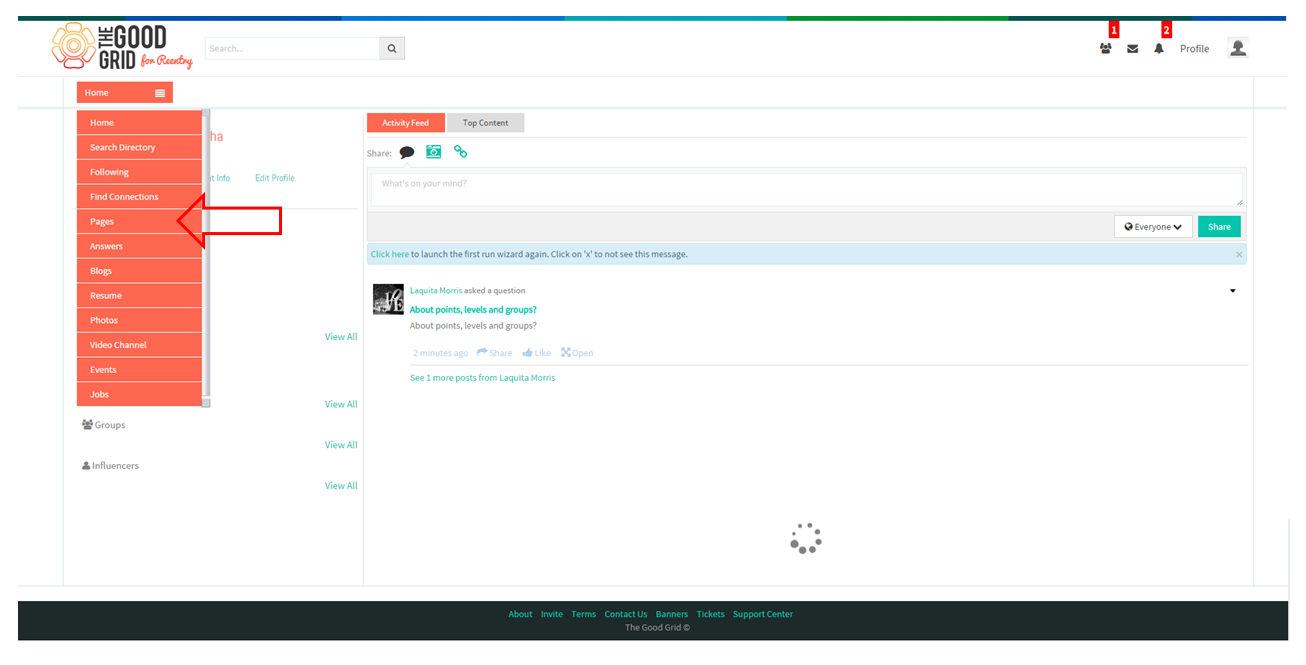
- From that she has to click on Pages option.
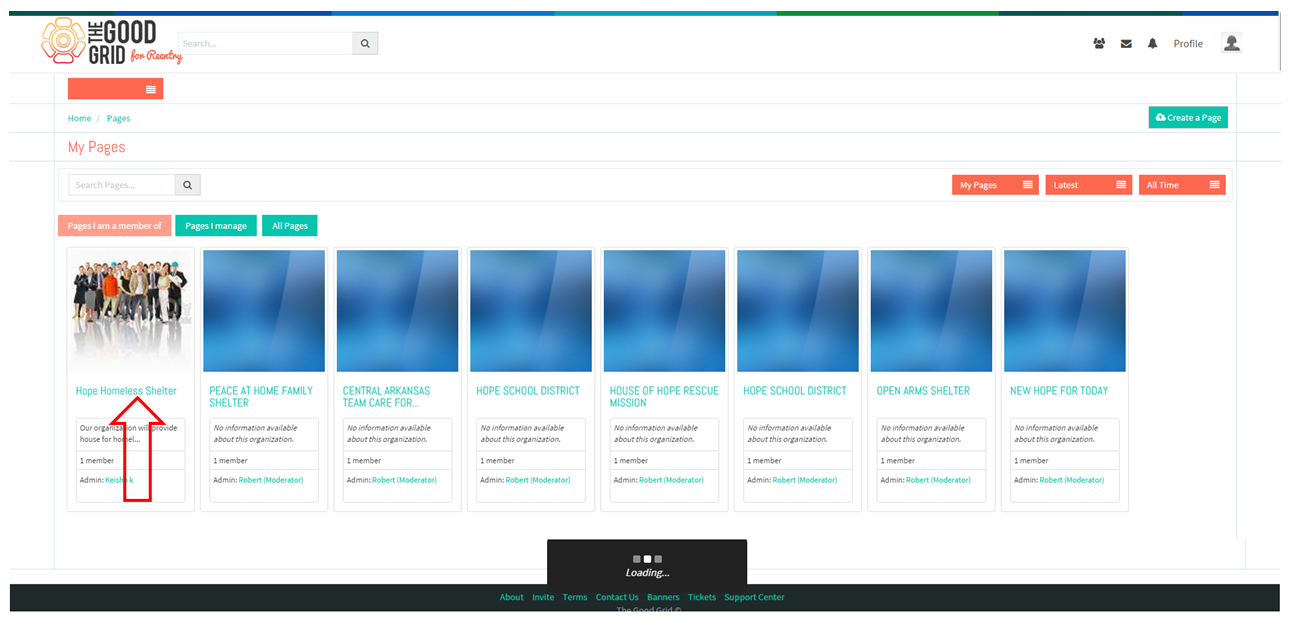
- On clicking Pages option, application navigates to the Pages screen.
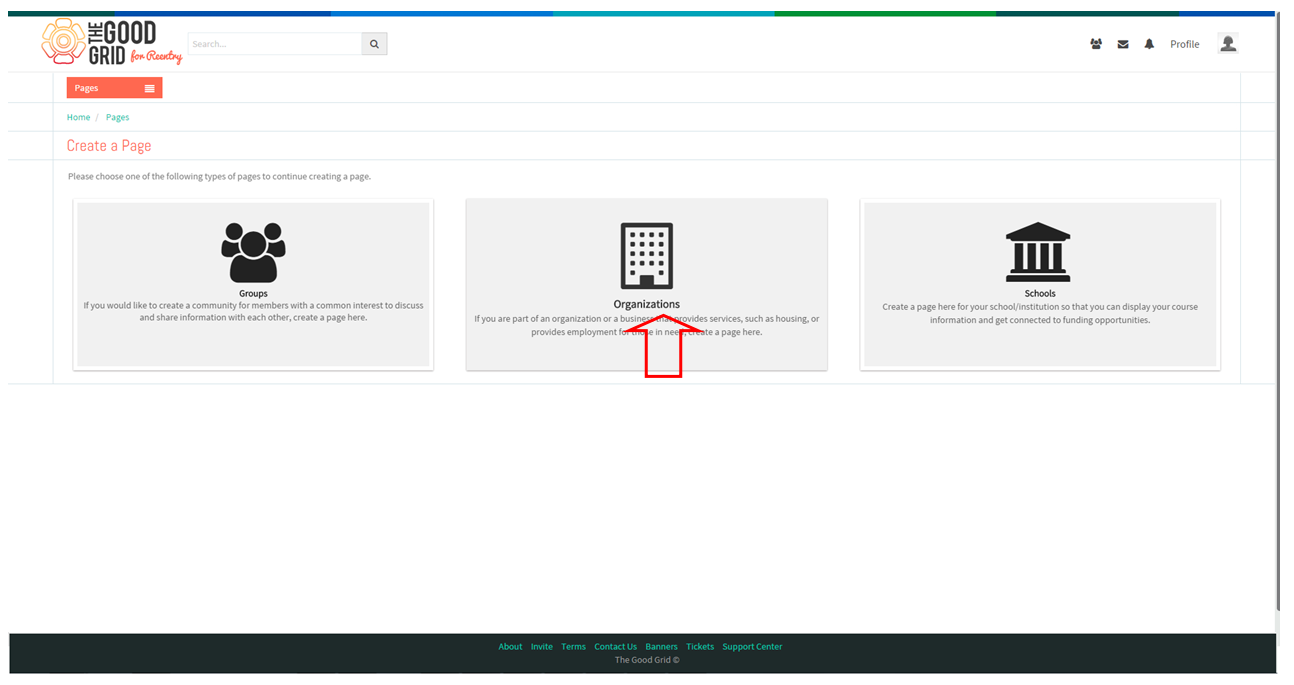
- To create a Page for Organization Keisha has to click on “Create a Page button. On clicking create a page button, application takes her to the create wizard.
- To create a page for organization Keisha has to click on the Organization badge. On clicking the organization badge it takes her to the organization create screen.
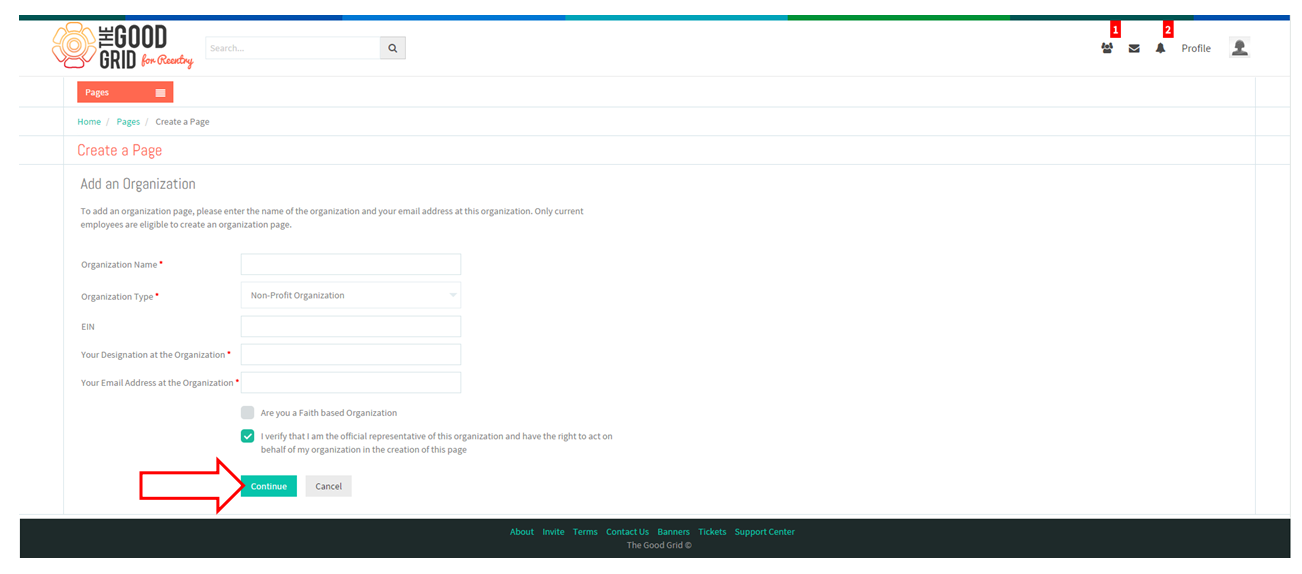
- After entering all mandatory information click on “Continue” button.
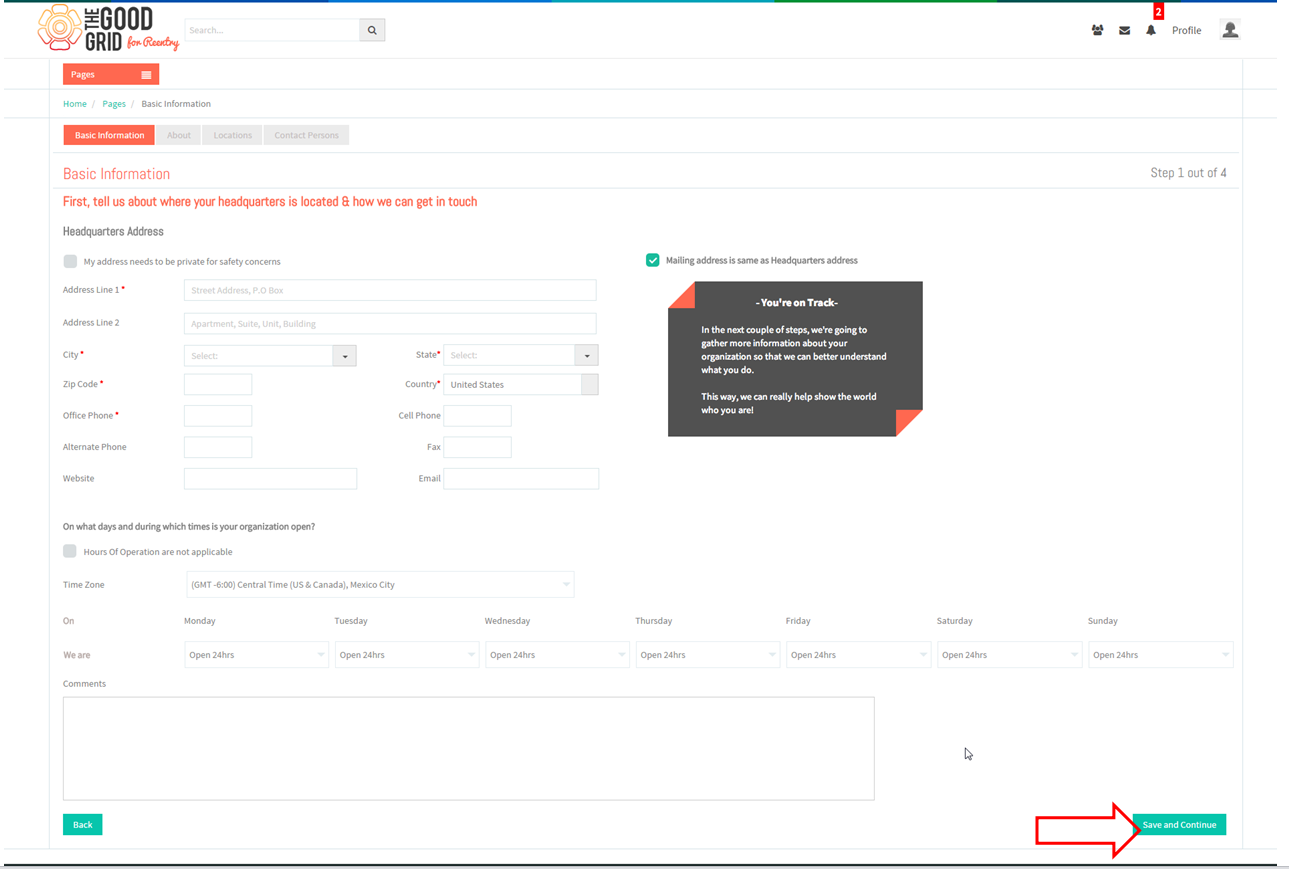
- On Clicking continue button, application takes her to Basic Information screen.
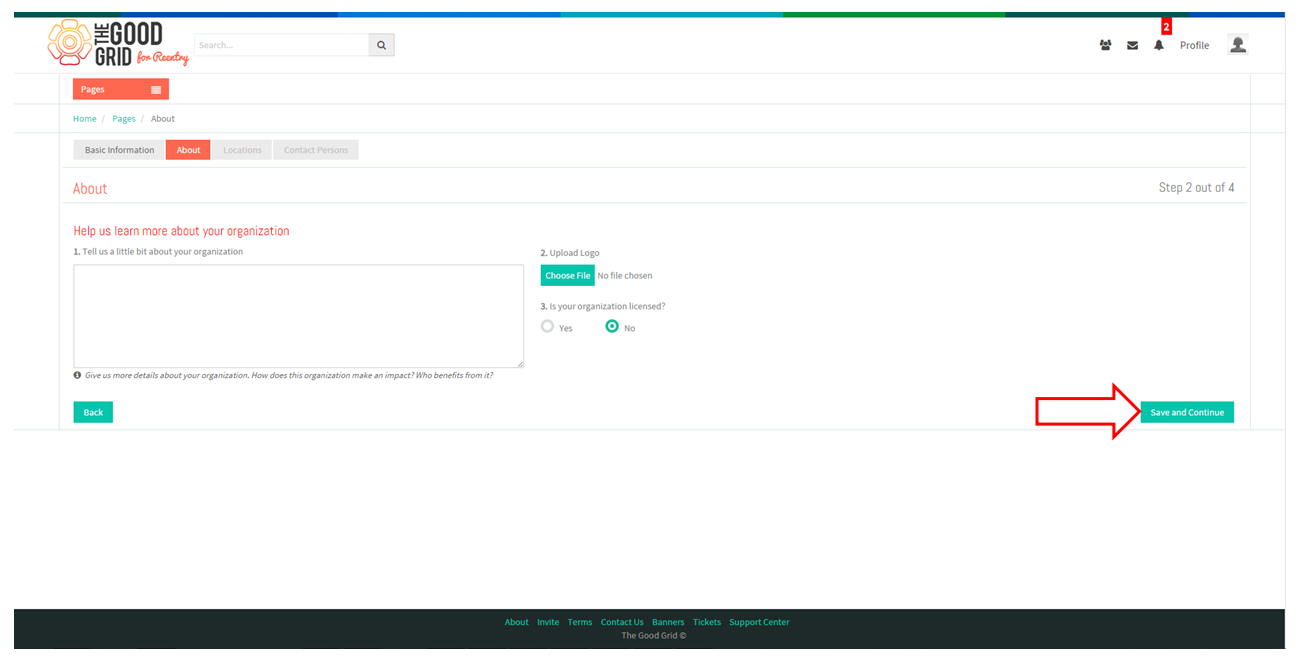
- After entering the above information click on “Save and Continue” button. Application takes her to “About” screen.
- Similarly for the other two steps.
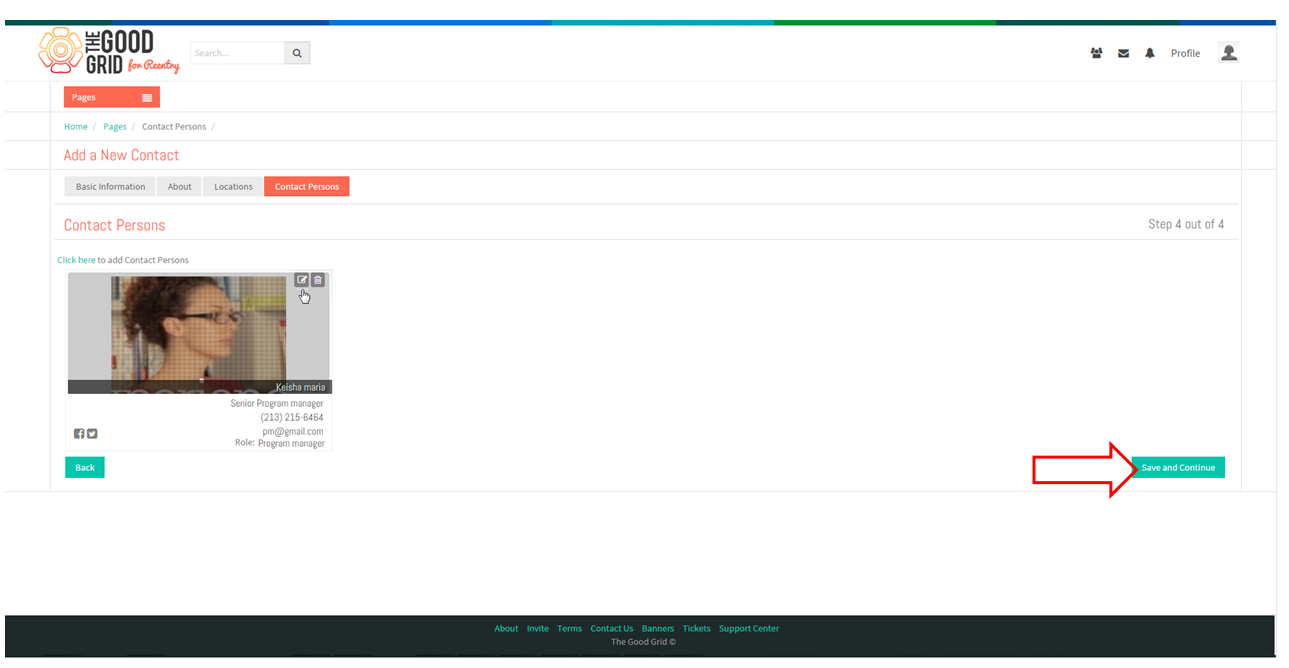
- In Contact person screen after adding the contacts, click “Save and Continue” button.
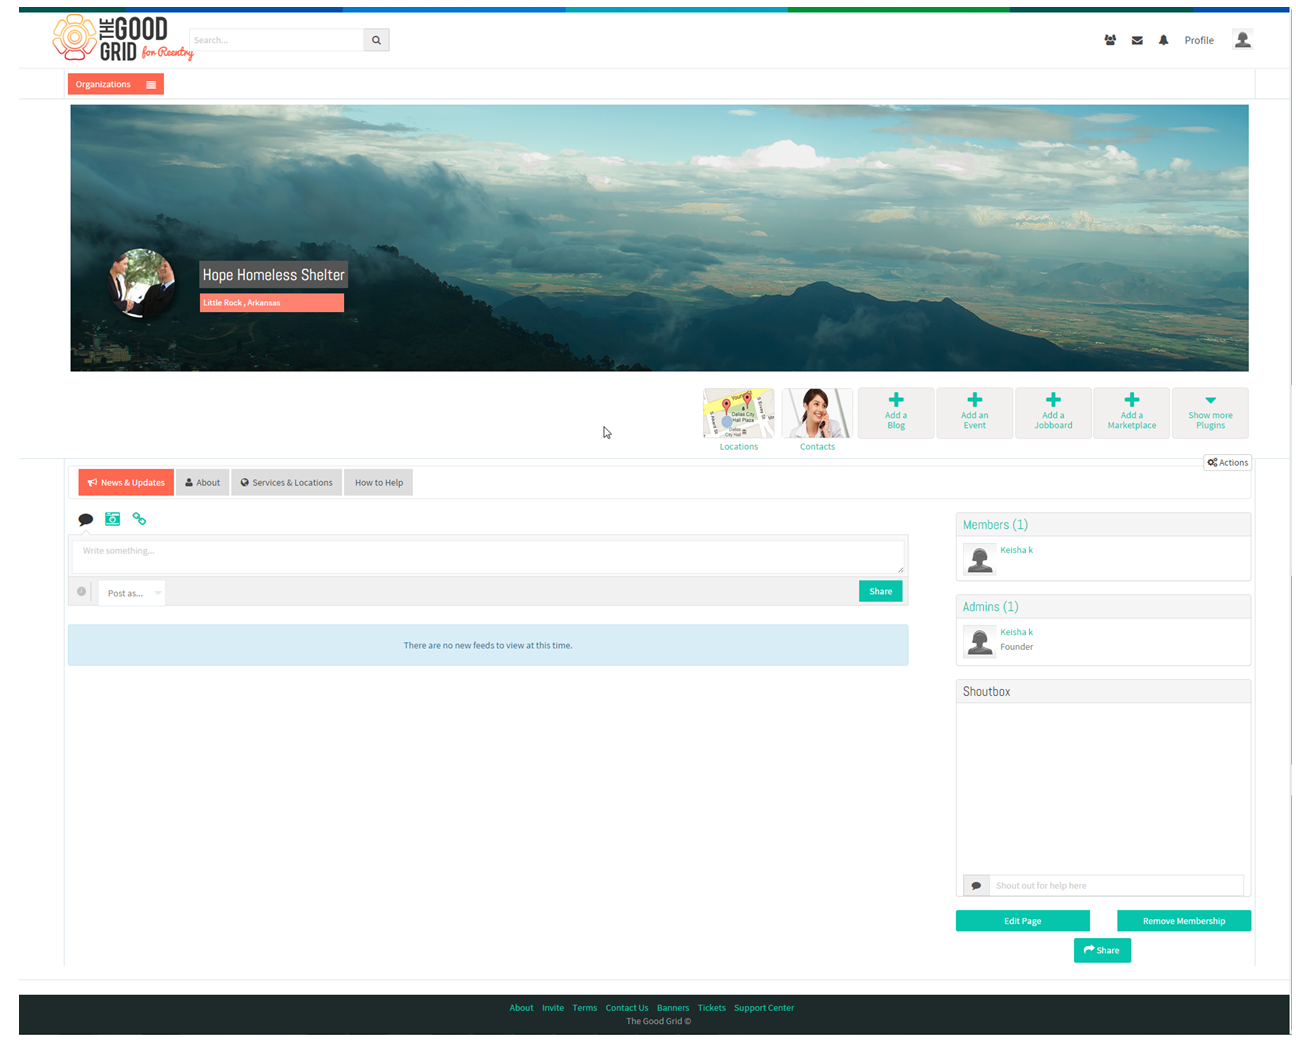
- Application takes her to the Organization Profile.
- To create Volunteer Opportunities Keisha has to click on Main Menu.
- From the main menu select the option called “Pages”.
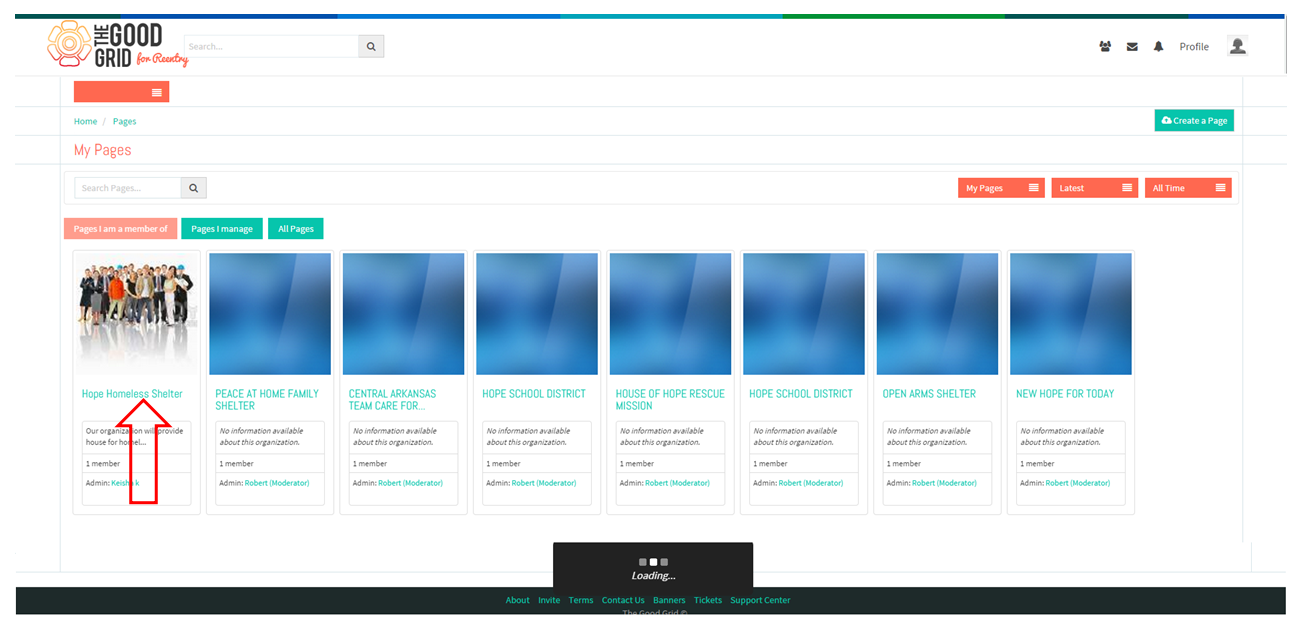
- In Pages screen she needs to click on the organization which she has created.
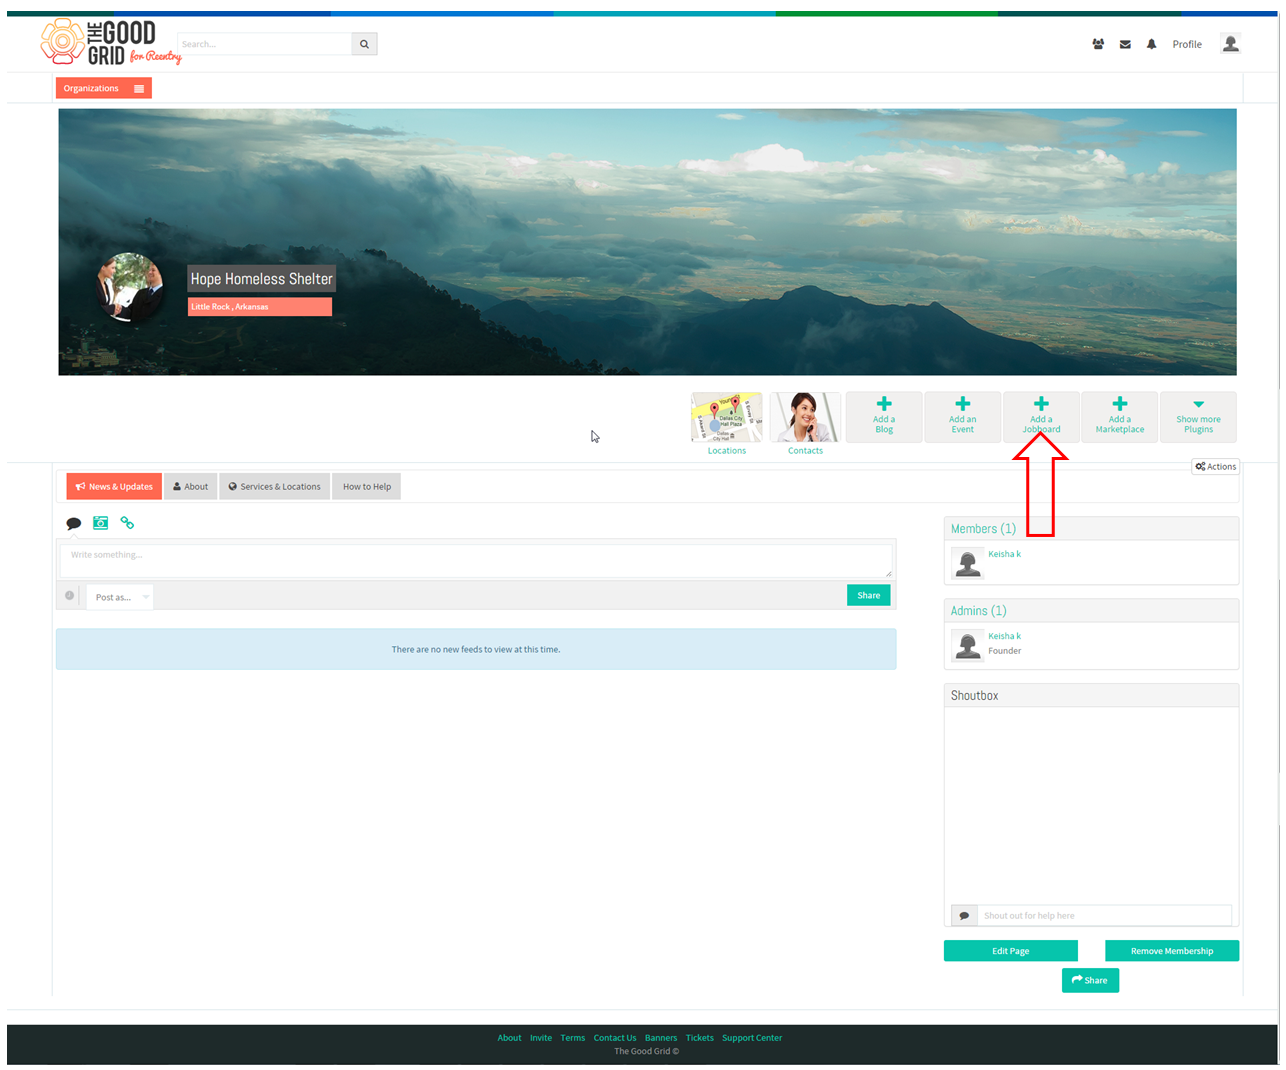
- Applications takes her to the organization profile page. From there she needs to click on the plug-in “Add a Job Board”.
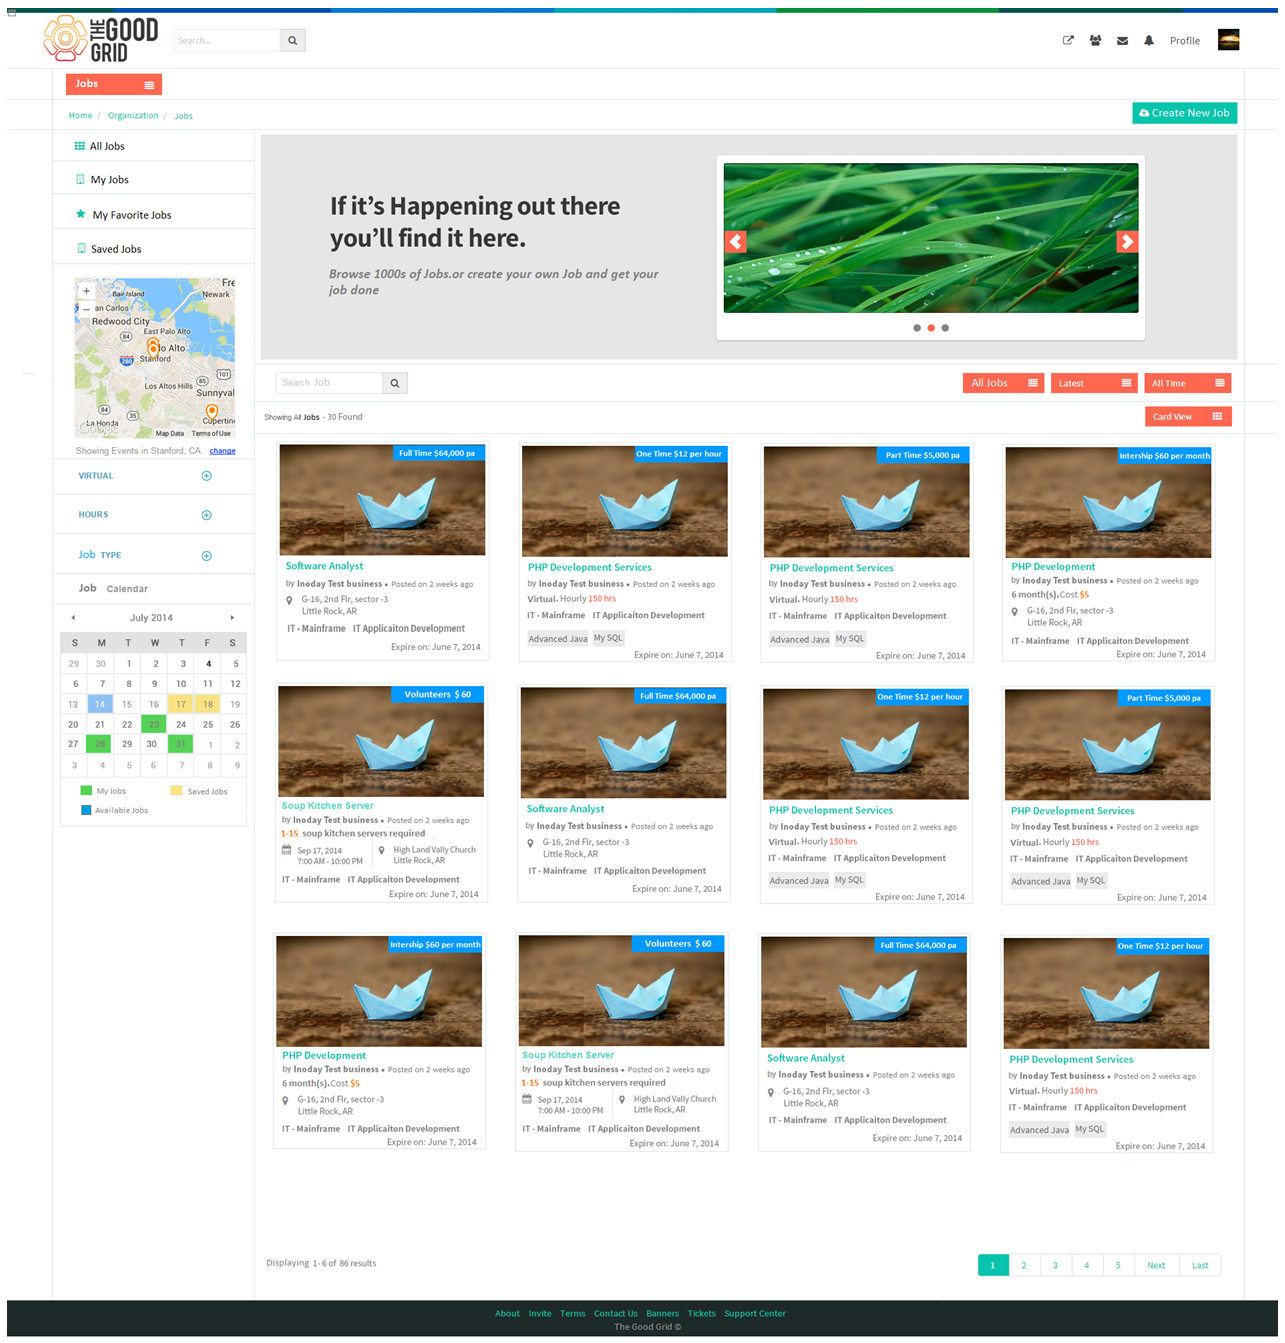
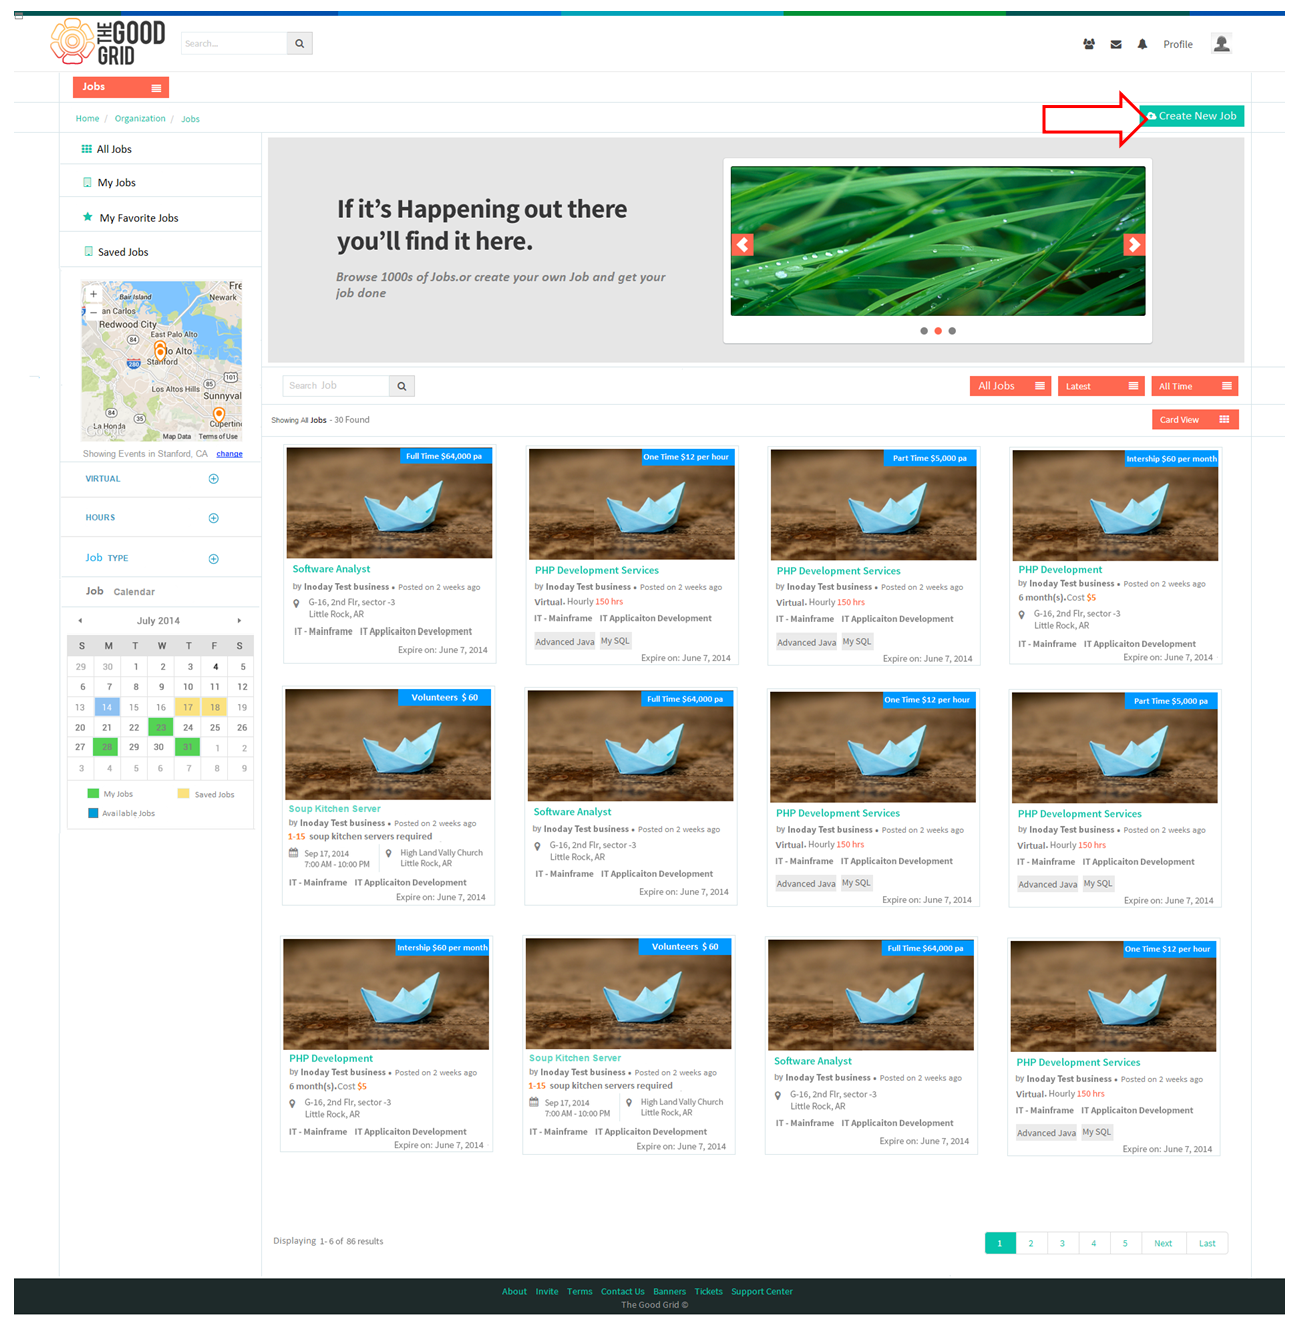
- On clicking “Add a Job Board” it takes her to Job Posting module.
- To create an opportunity Keisha has to click on the Create New Job.
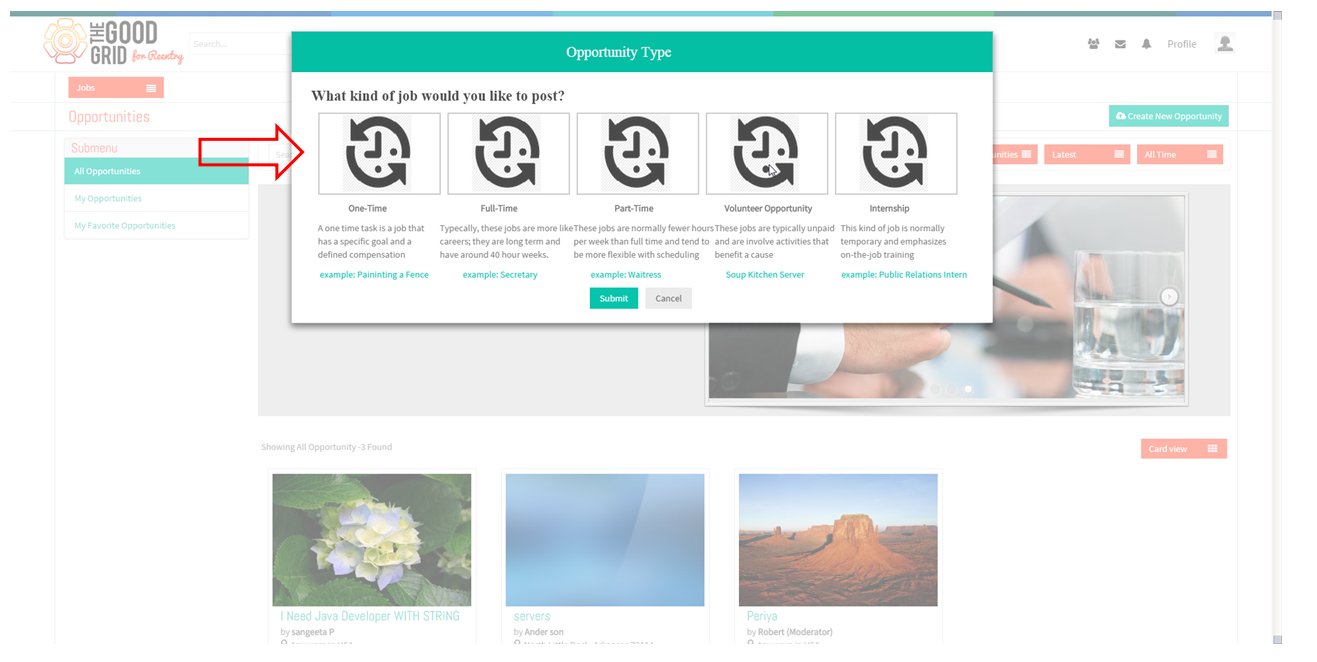
- On clicking “Create New Job” application displays a pop-up.
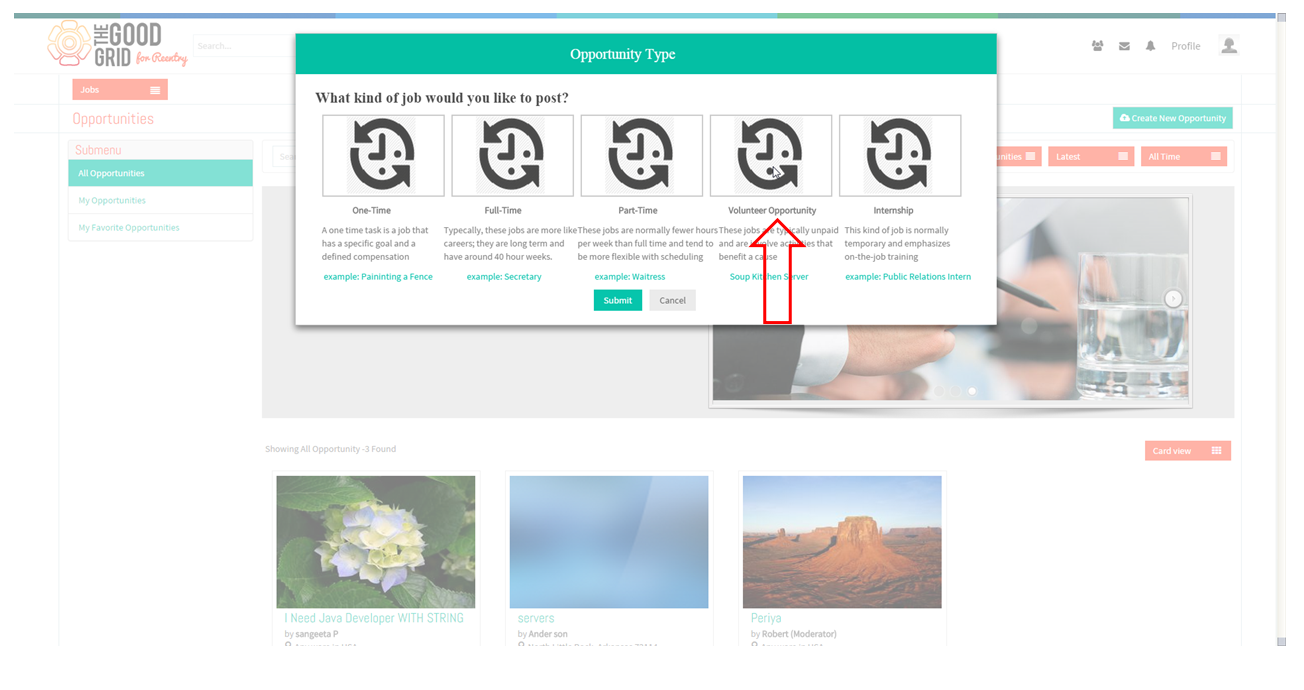
- To create Volunteering Opportunity Keisha has to click on the Volunteering Opportunity widget.
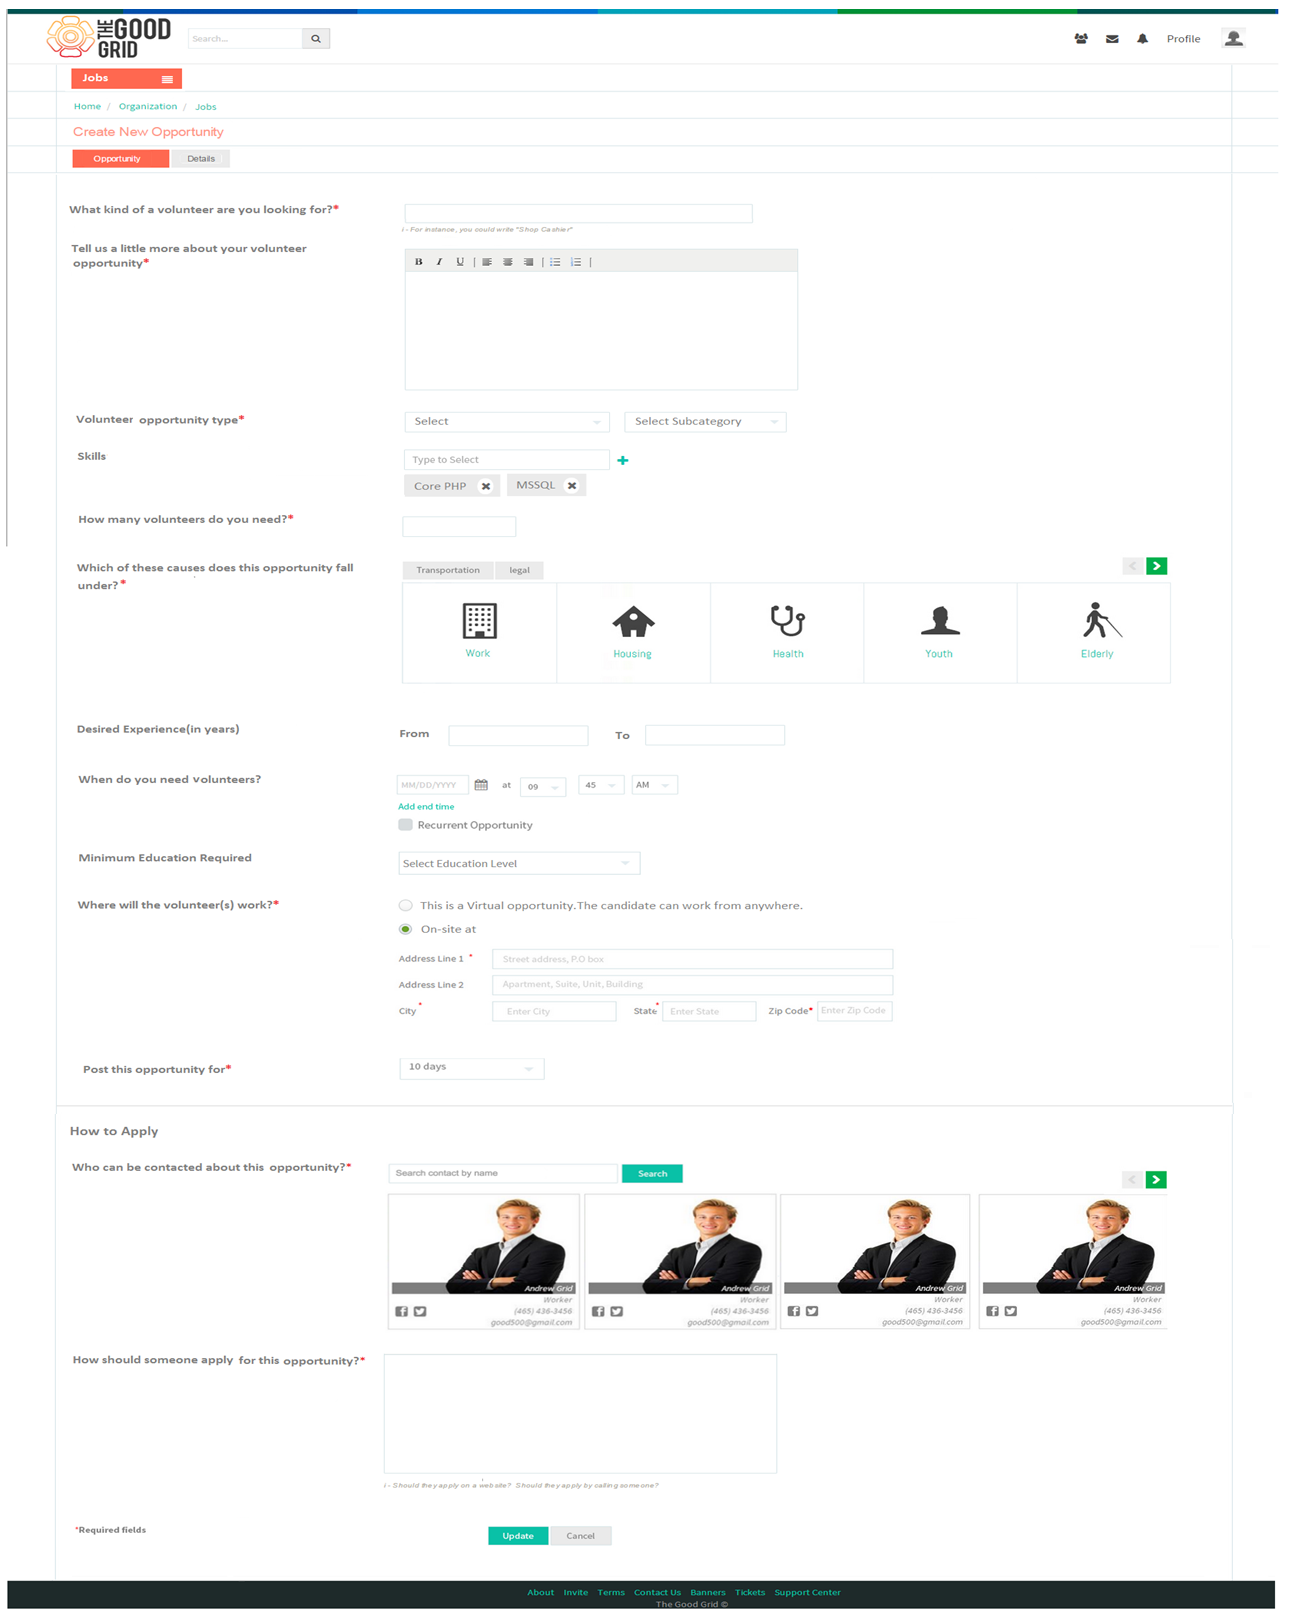
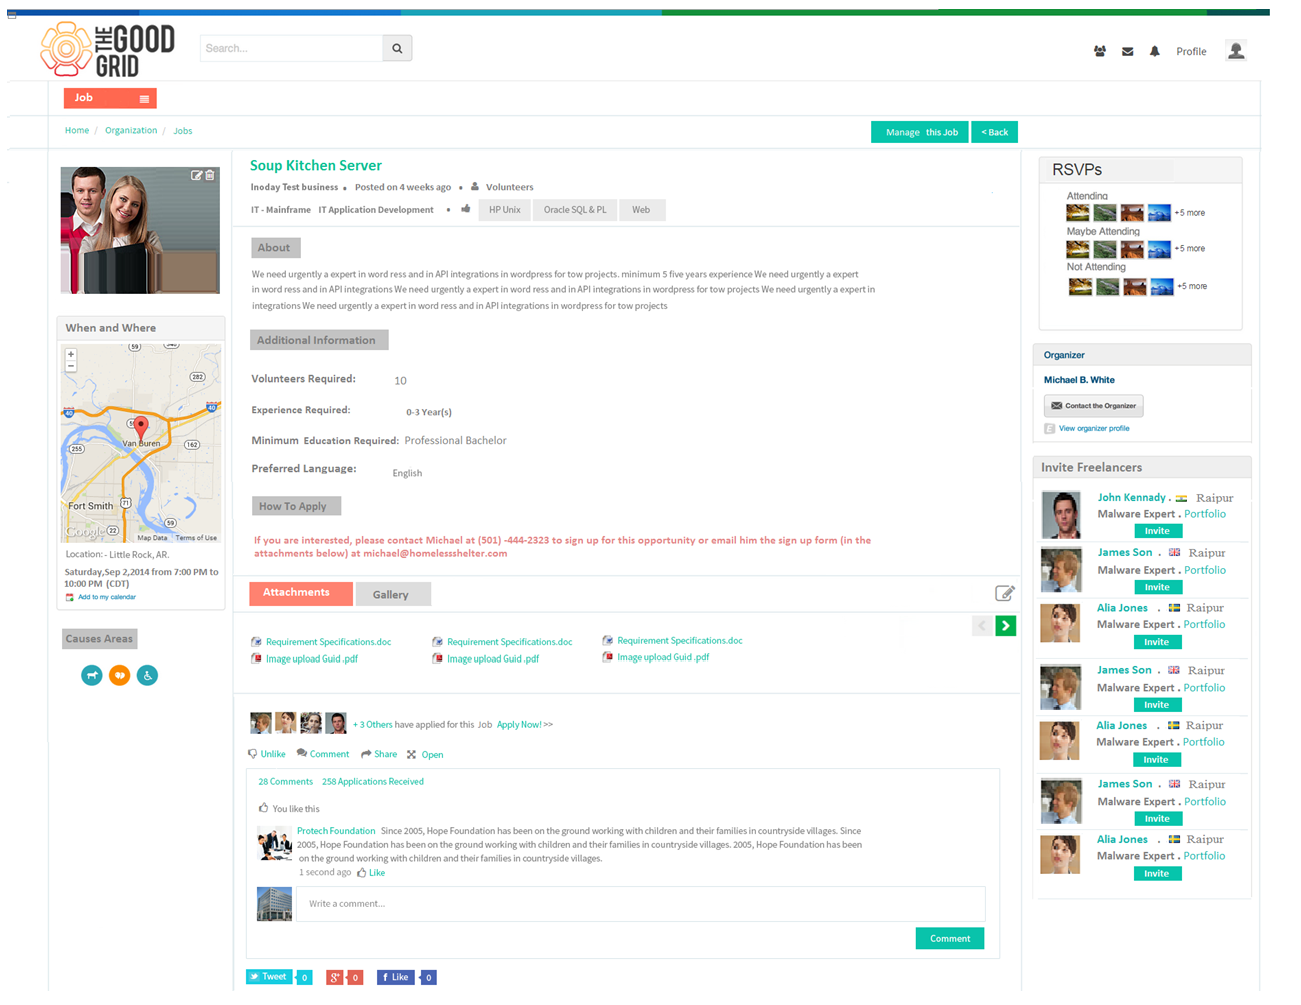
- On clicking the volunteering opportunity widget application takes her to the create screen.
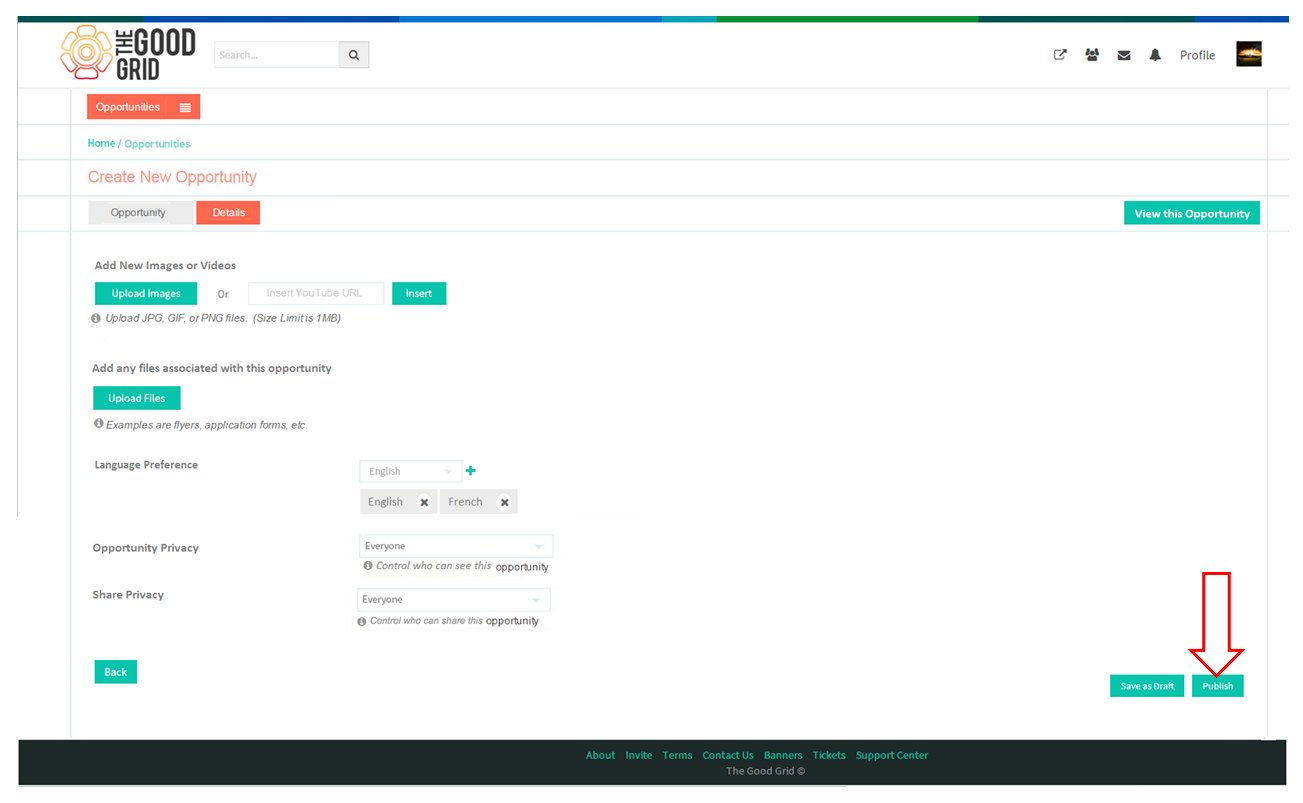
- After entering the necessary information and on clicking “Update” button application takes her to Details screen.
- After entering the information in the above fields and on clicking the “Publish” button the opportunity will get published.
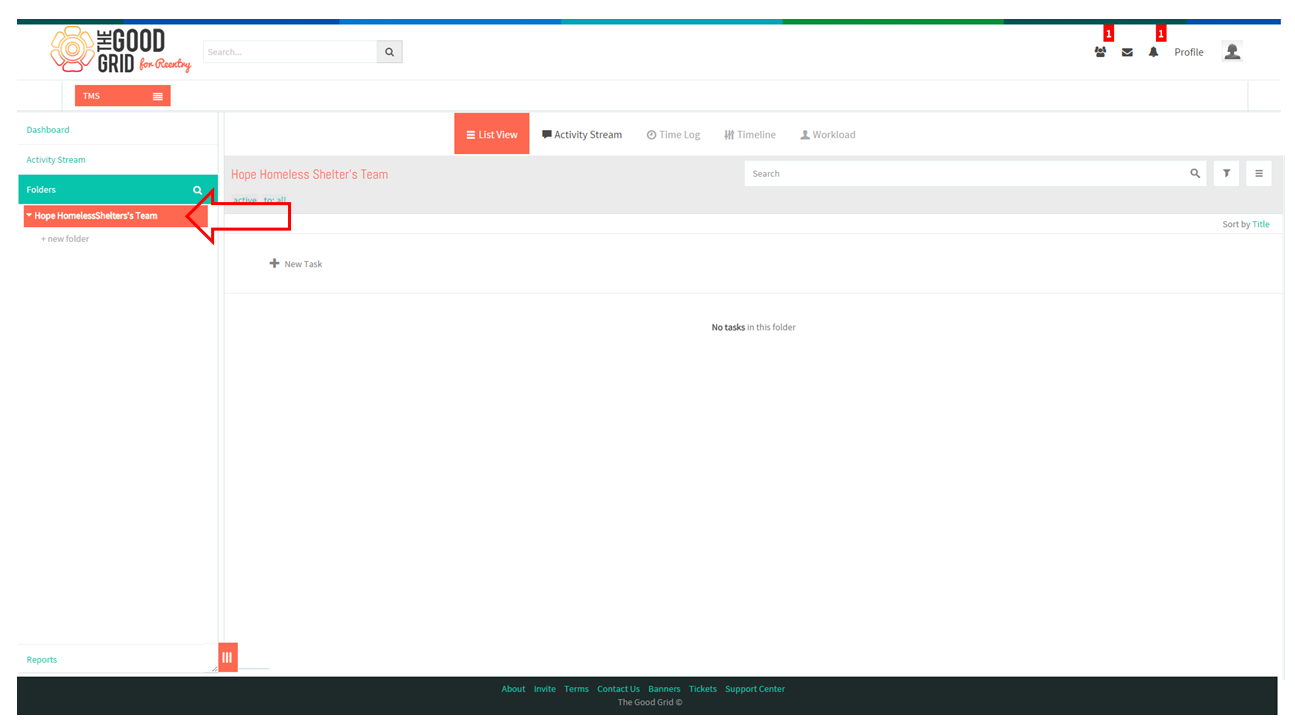
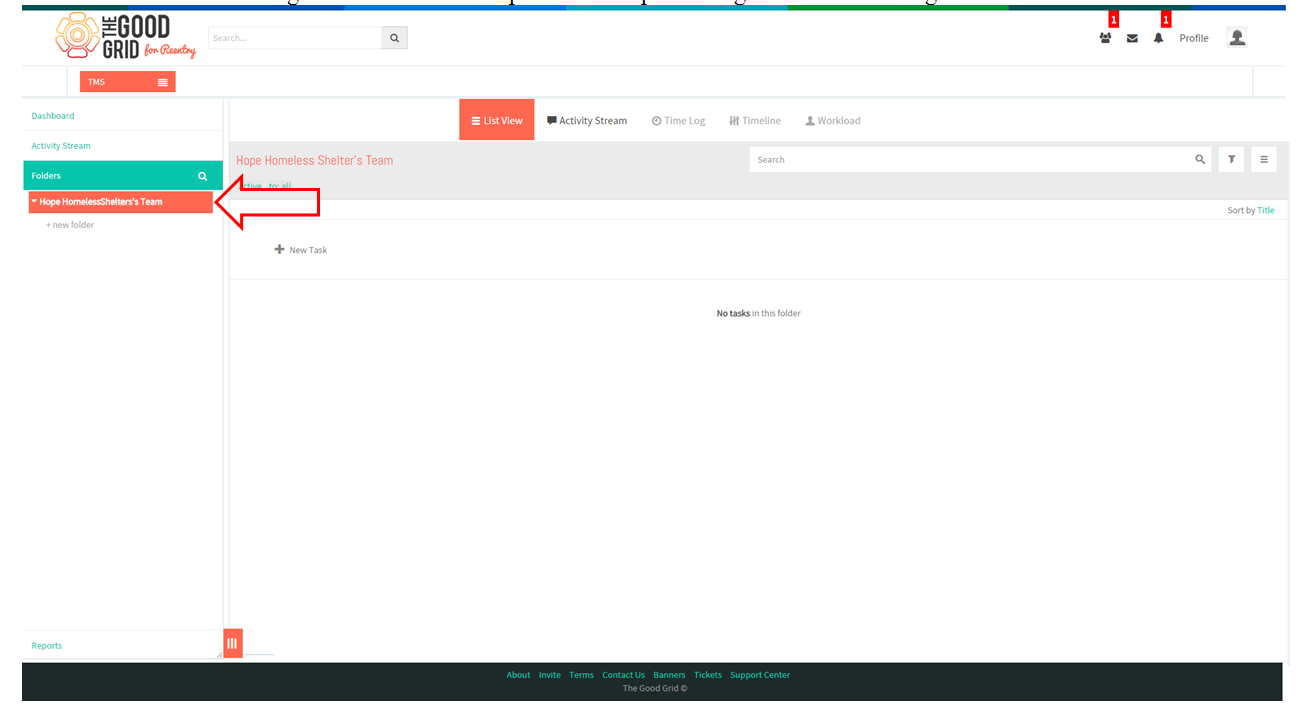
- Once Keisha created the Organization in her TMS profile Workspace will get created in the organization name.
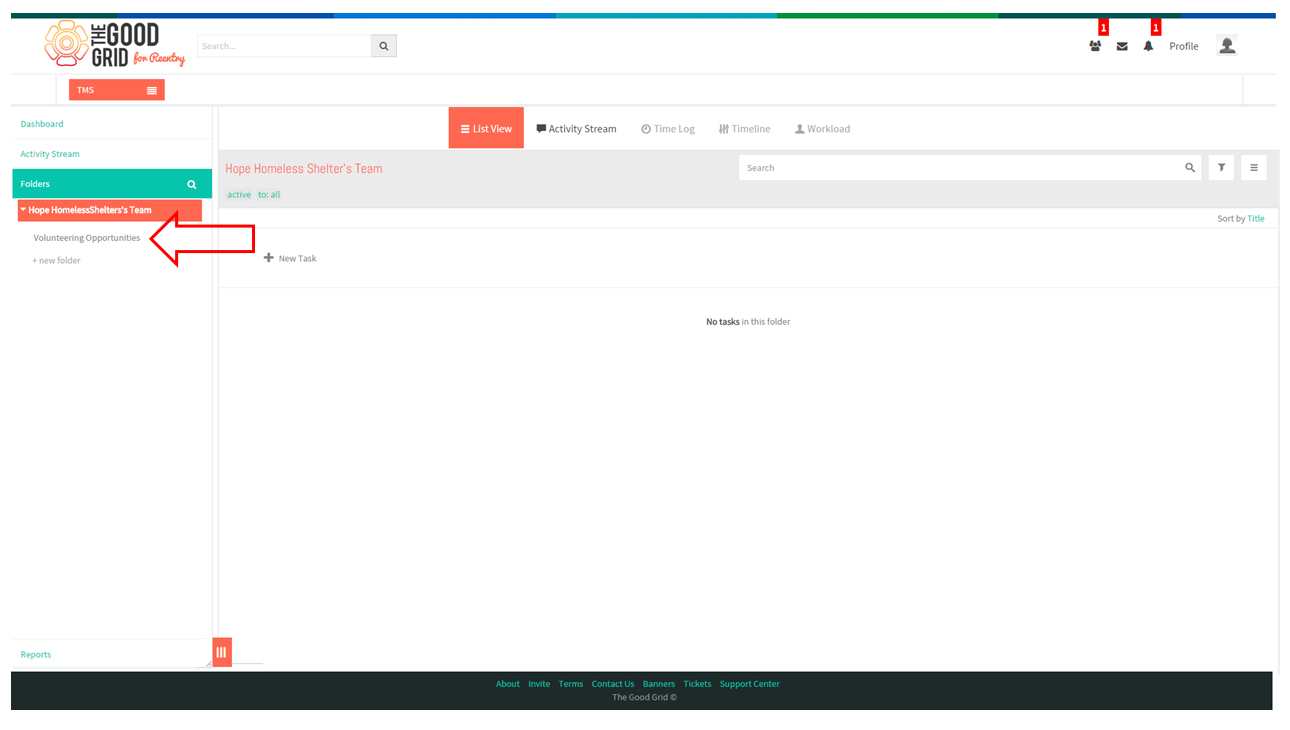
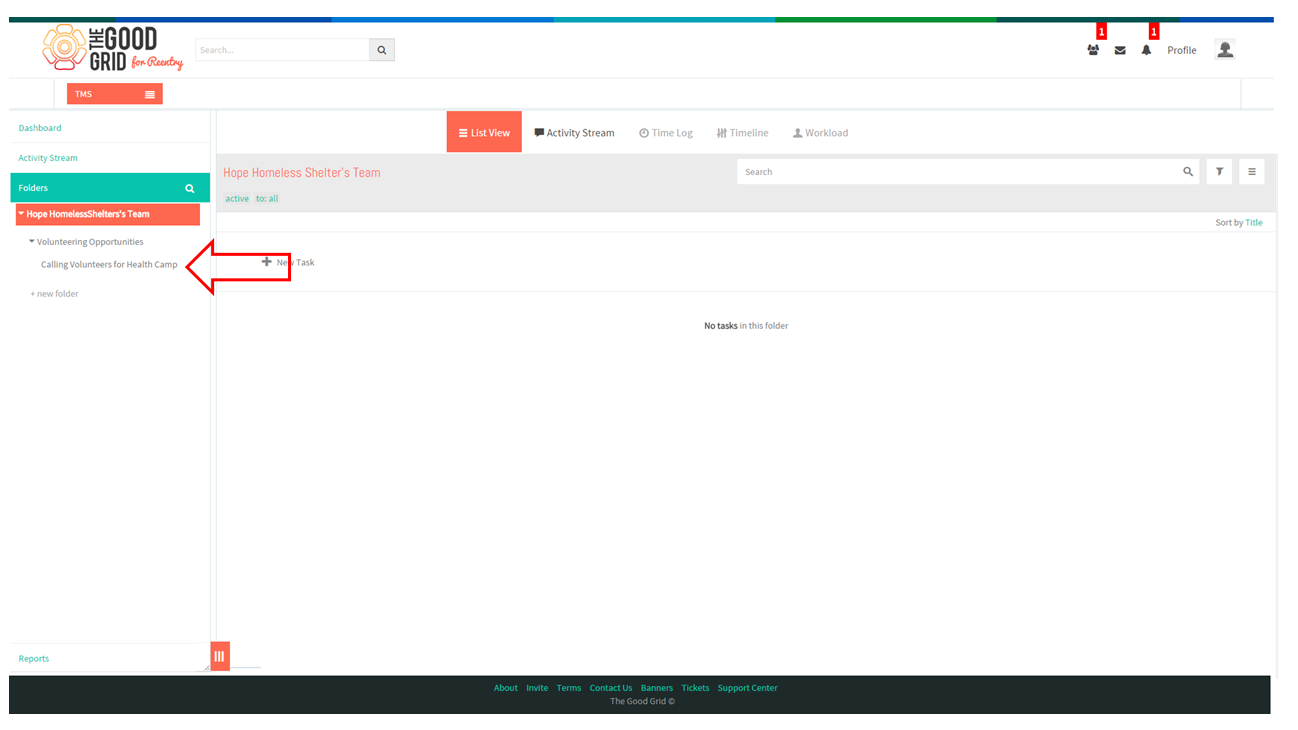
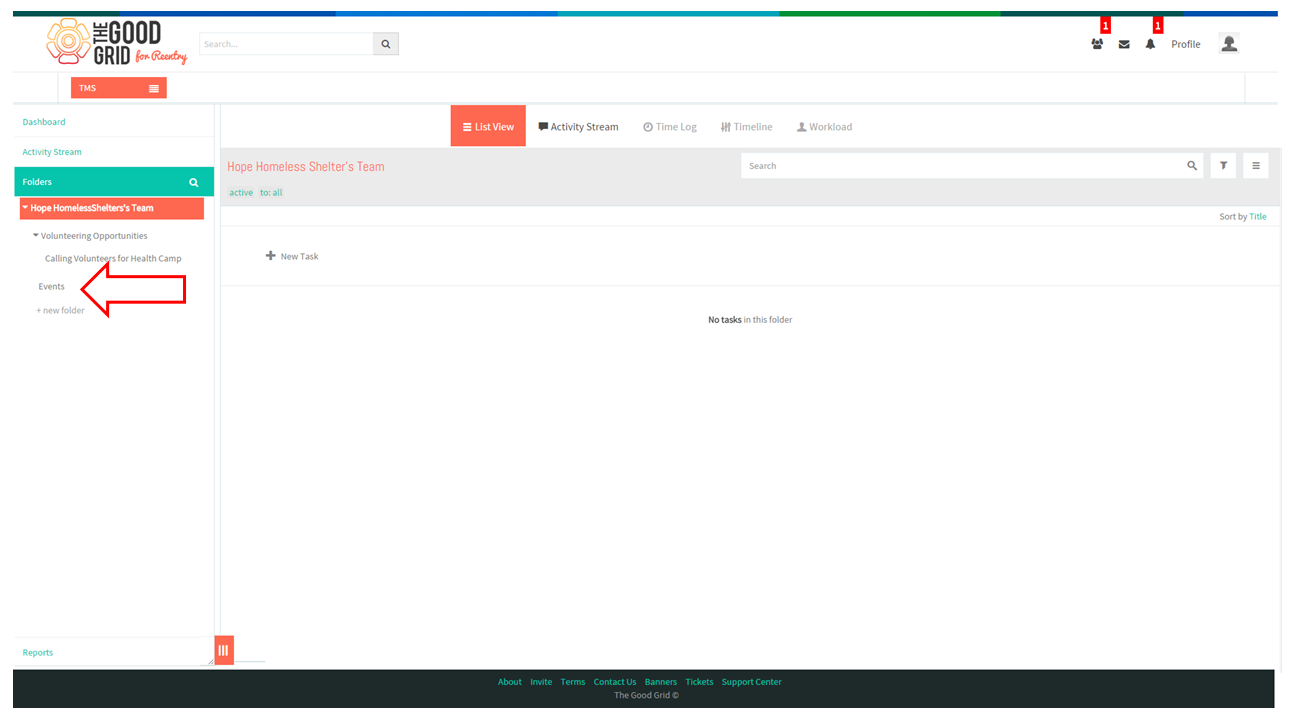
- After Creating the Opportunity in TMS, automatically a Folder will be created in the name of “Volunteering Opportunities”.
- After creating an Opportunity in TMS, application automatically will create a sub-folder under volunteering opportunities folder.
- To add events Keisha has to click on the Main Menu.
- From the main menu she needs to select the option "Pages".
- In Pages screen she needs to click on the organization which she has created.
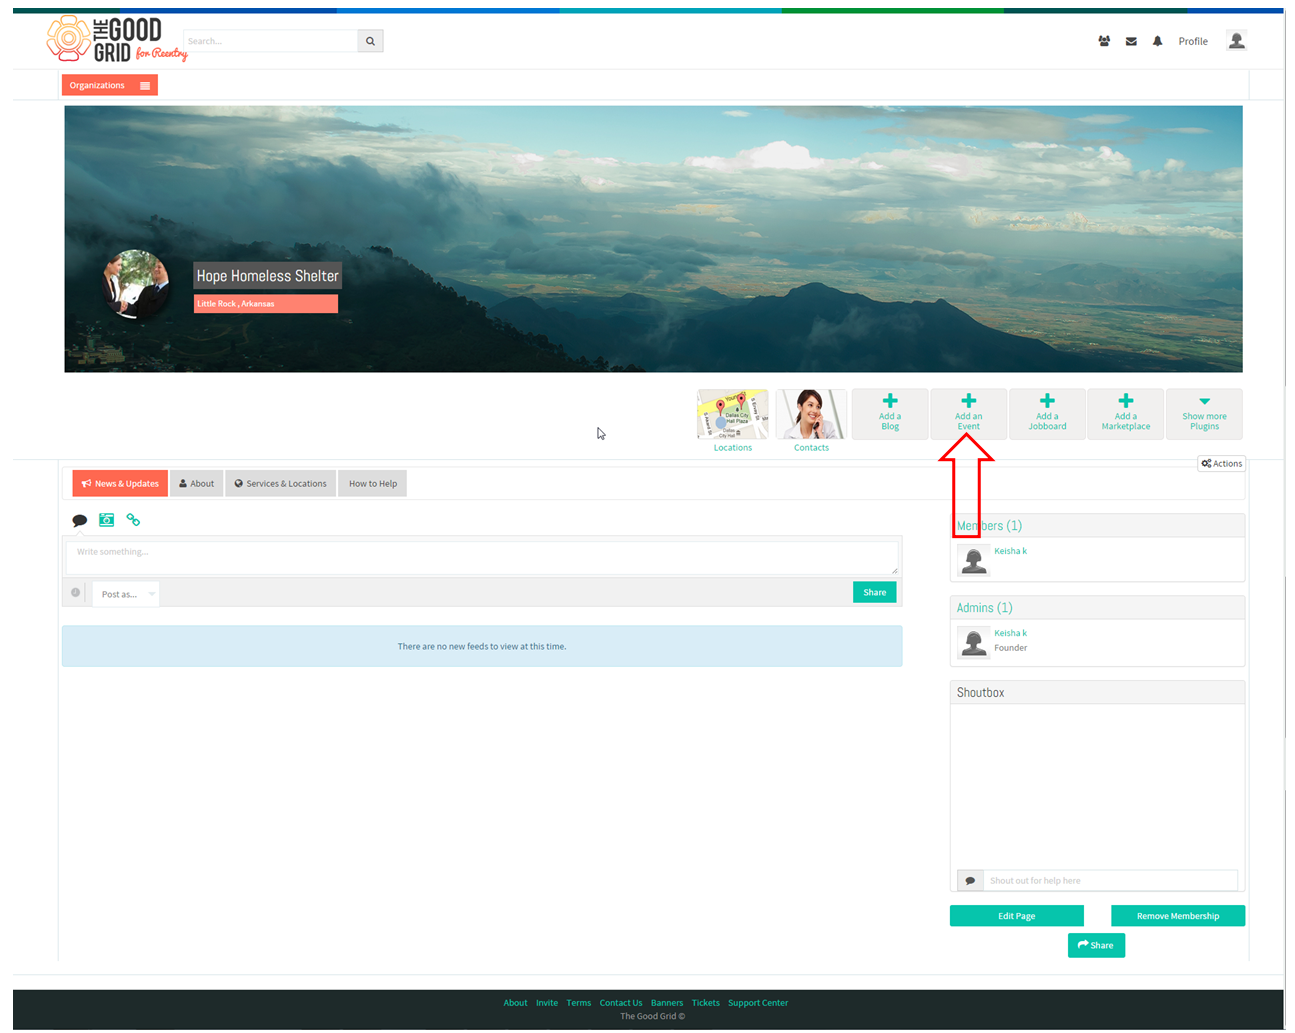
- Applications takes her to the organization profile page. From there she needs to click on the plug-in “Add Event”.
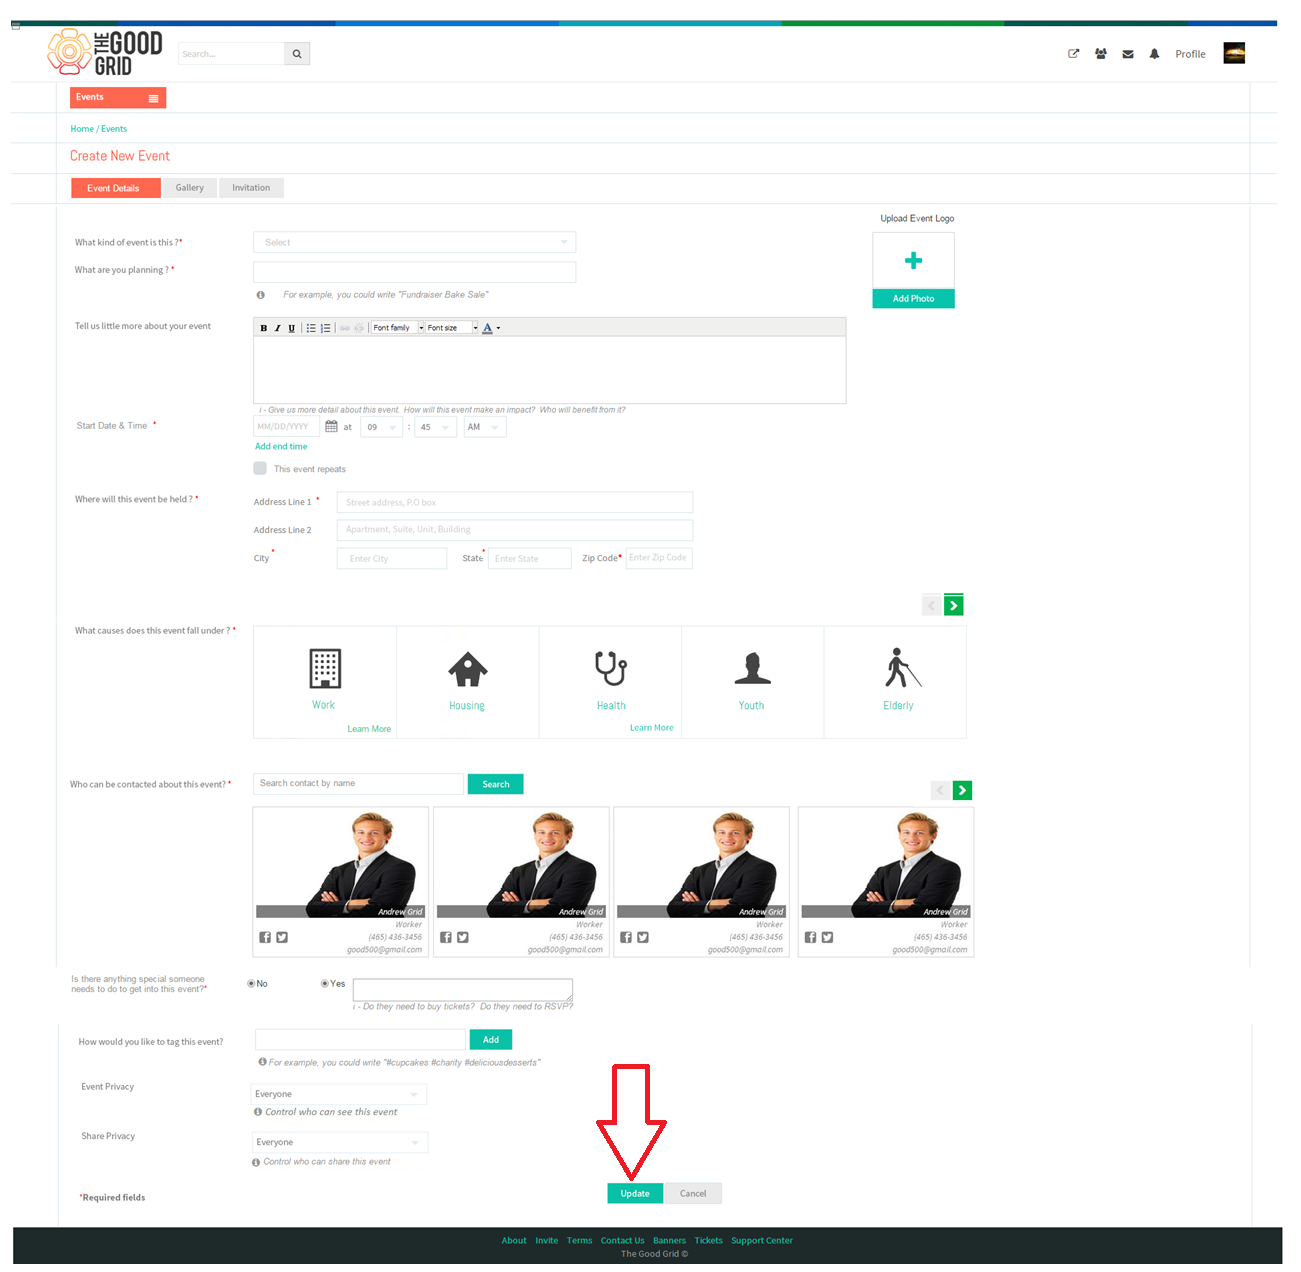
- On clicking “Add Event” it takes her to Events Create Wizard.
- To create events Keisha needs to enter all the required fields and needs to click on the “Update” button.
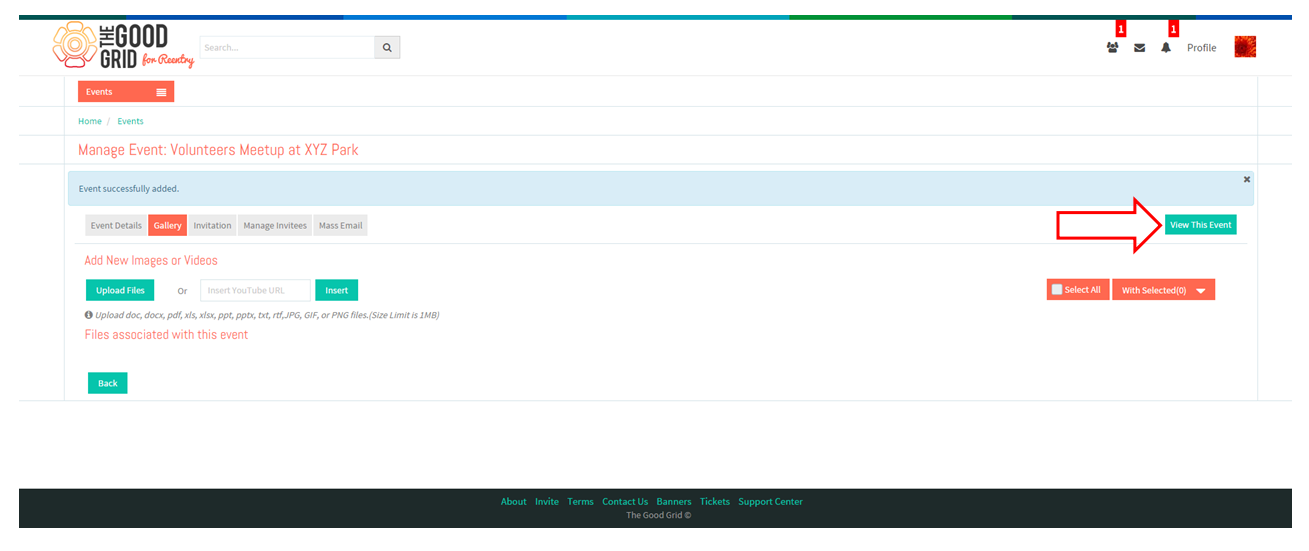
- On clicking “Update” button application takes her to the Gallery screen.
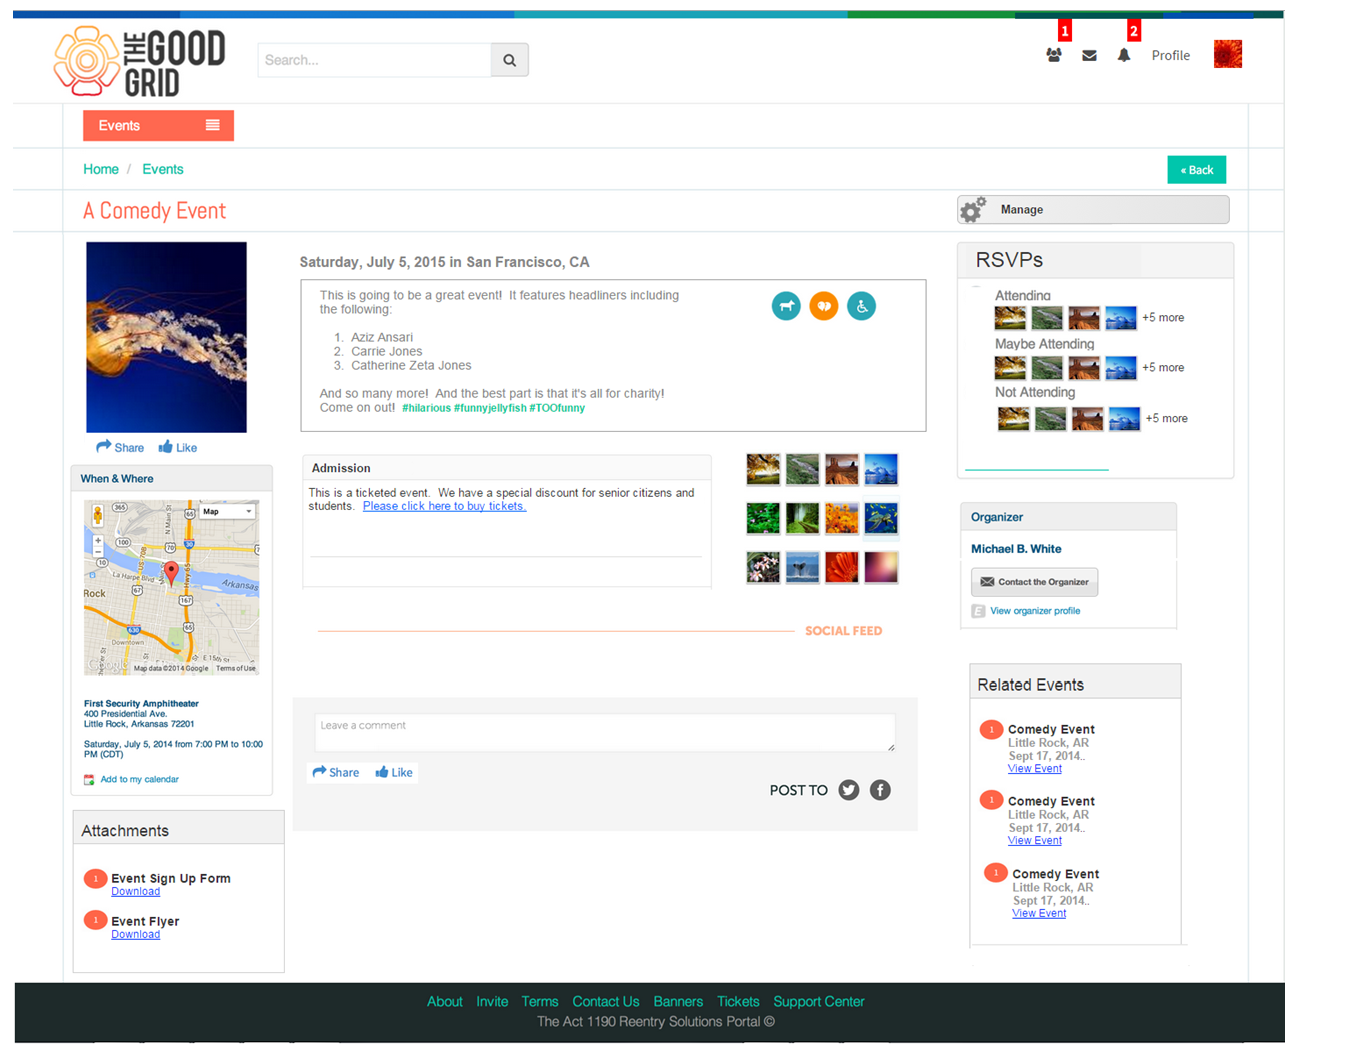
- Keisha can view the event created.
- Once Keisha created the Organization in her TMS profile Workspace will get created in the organization name.
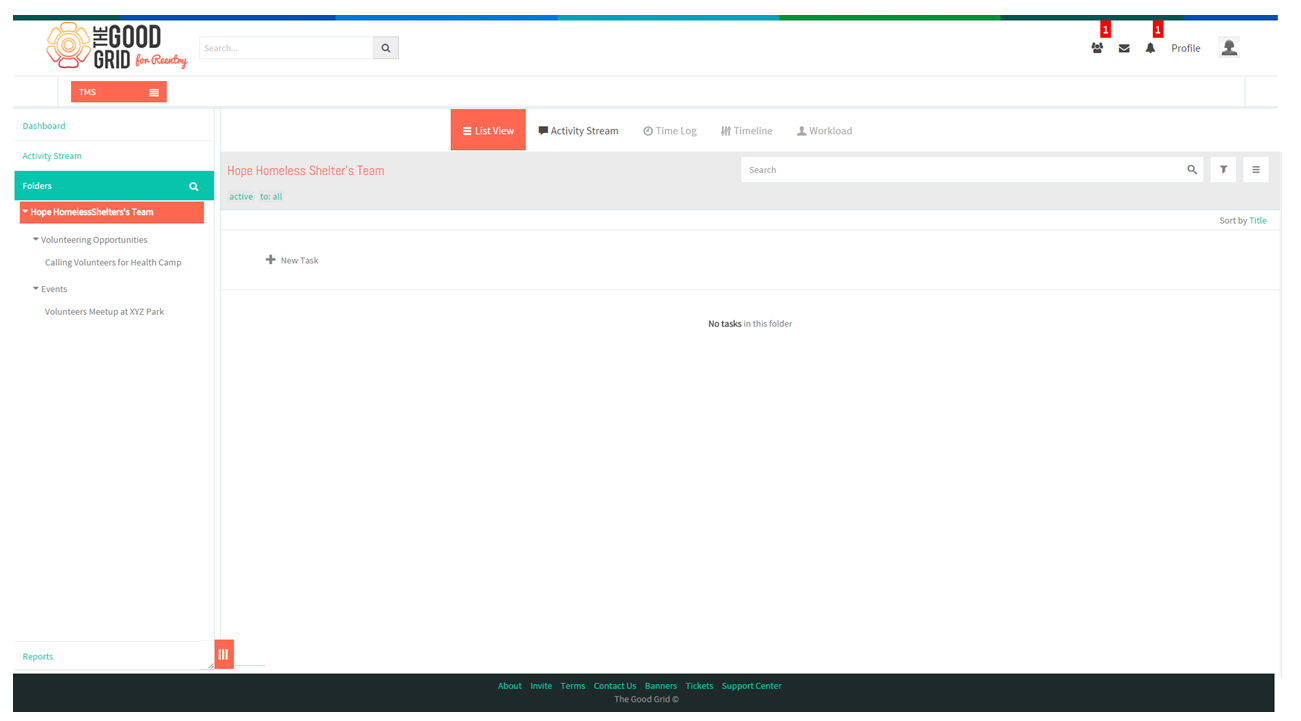
- After Creating the Events in TMS, automatically a Folder will be created in the name of “Events”.
- After creating an Event in TMS application, automatically a sub-folder will be created under volunteering opportunities folder.

